Follow these steps to install and configure the CA Connector on Windows.
Step 1 - Provision a Windows Host
Provision a Windows host that is capable of running the CA Connector.
Windows Server 2016-2022 is recommended.
Step 2 - Prepare Installation Files
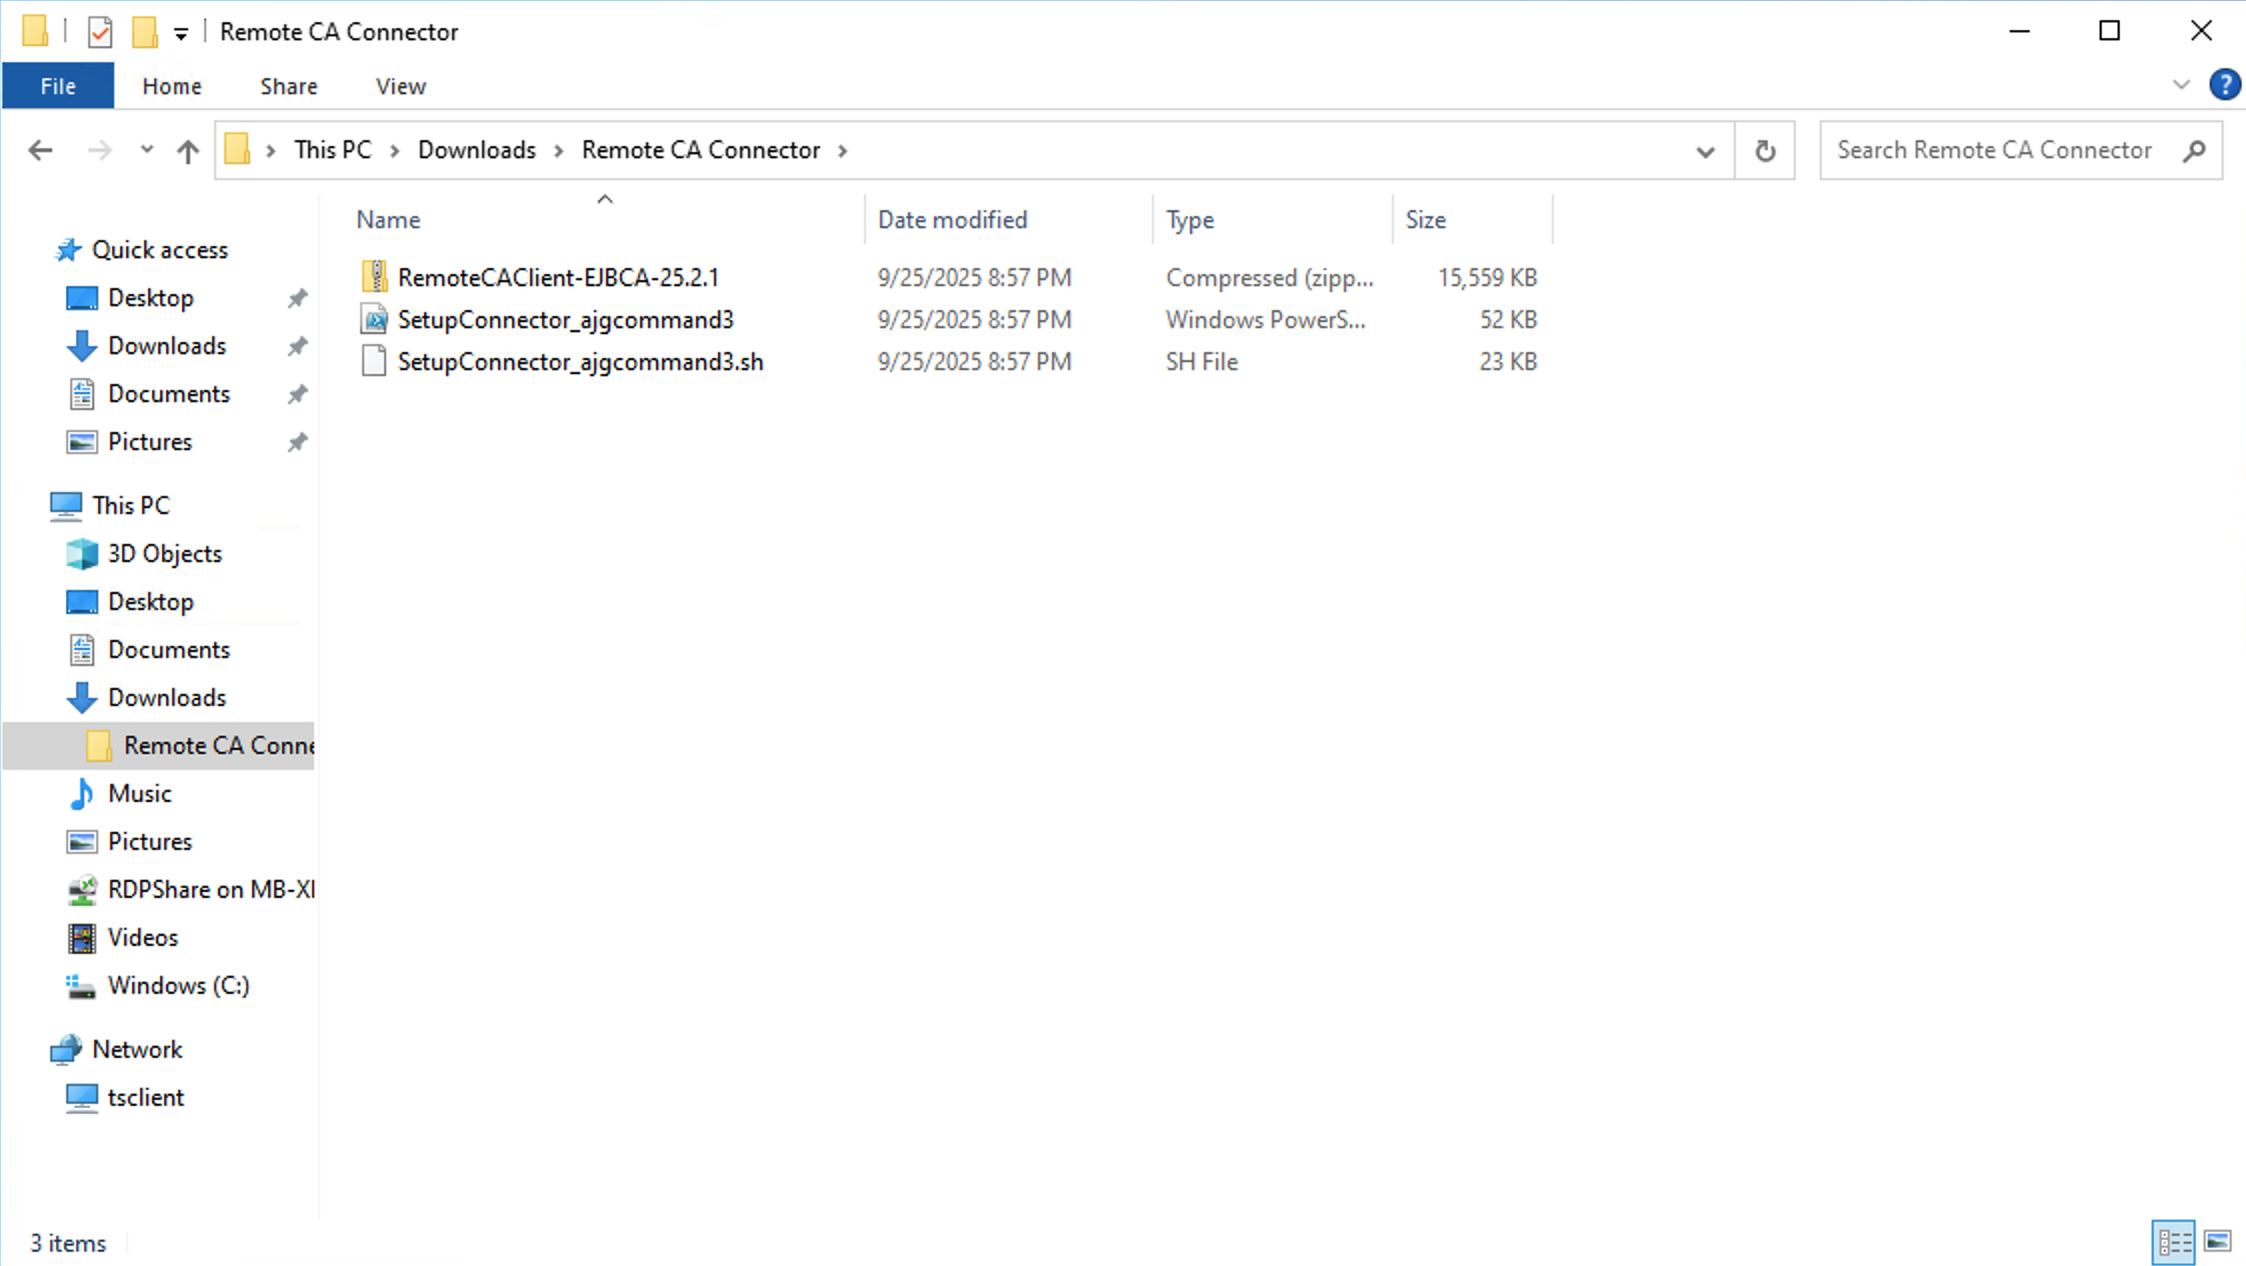
Place the SetupConnector_{deploymentName}.ps1 script in a directory with the RemoteCAClient-Type-Version.zip (for example RemoteCAClient-EJBCA-25.2.1.zip) file that you downloaded from the Command SaaS Portal.
It is required to run this script as an administrator. If you cannot elevate a PowerShell window to Administrator, please contact a System Administrator to provide these credentials.
In the following example, the script and .zip file were placed in the Downloads called “~\Downloads\Remote CA Connector\”.
Step 3 - Run the Installation Script
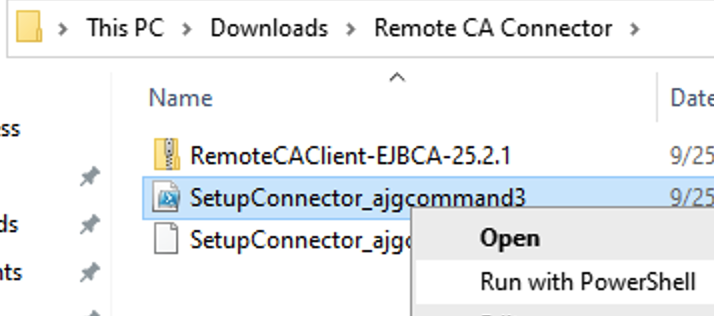
Run the script by right-clicking the script file, and then selecting Run with PowerShell or by opening a PowerShell window and executing the script. Once prompted click Open.
The script needs to run with privileged access and will prompt for access depending on your execution policy. Press “A” for All and then Enter, if prompted:

There are three options you can use when running the installation script.
-
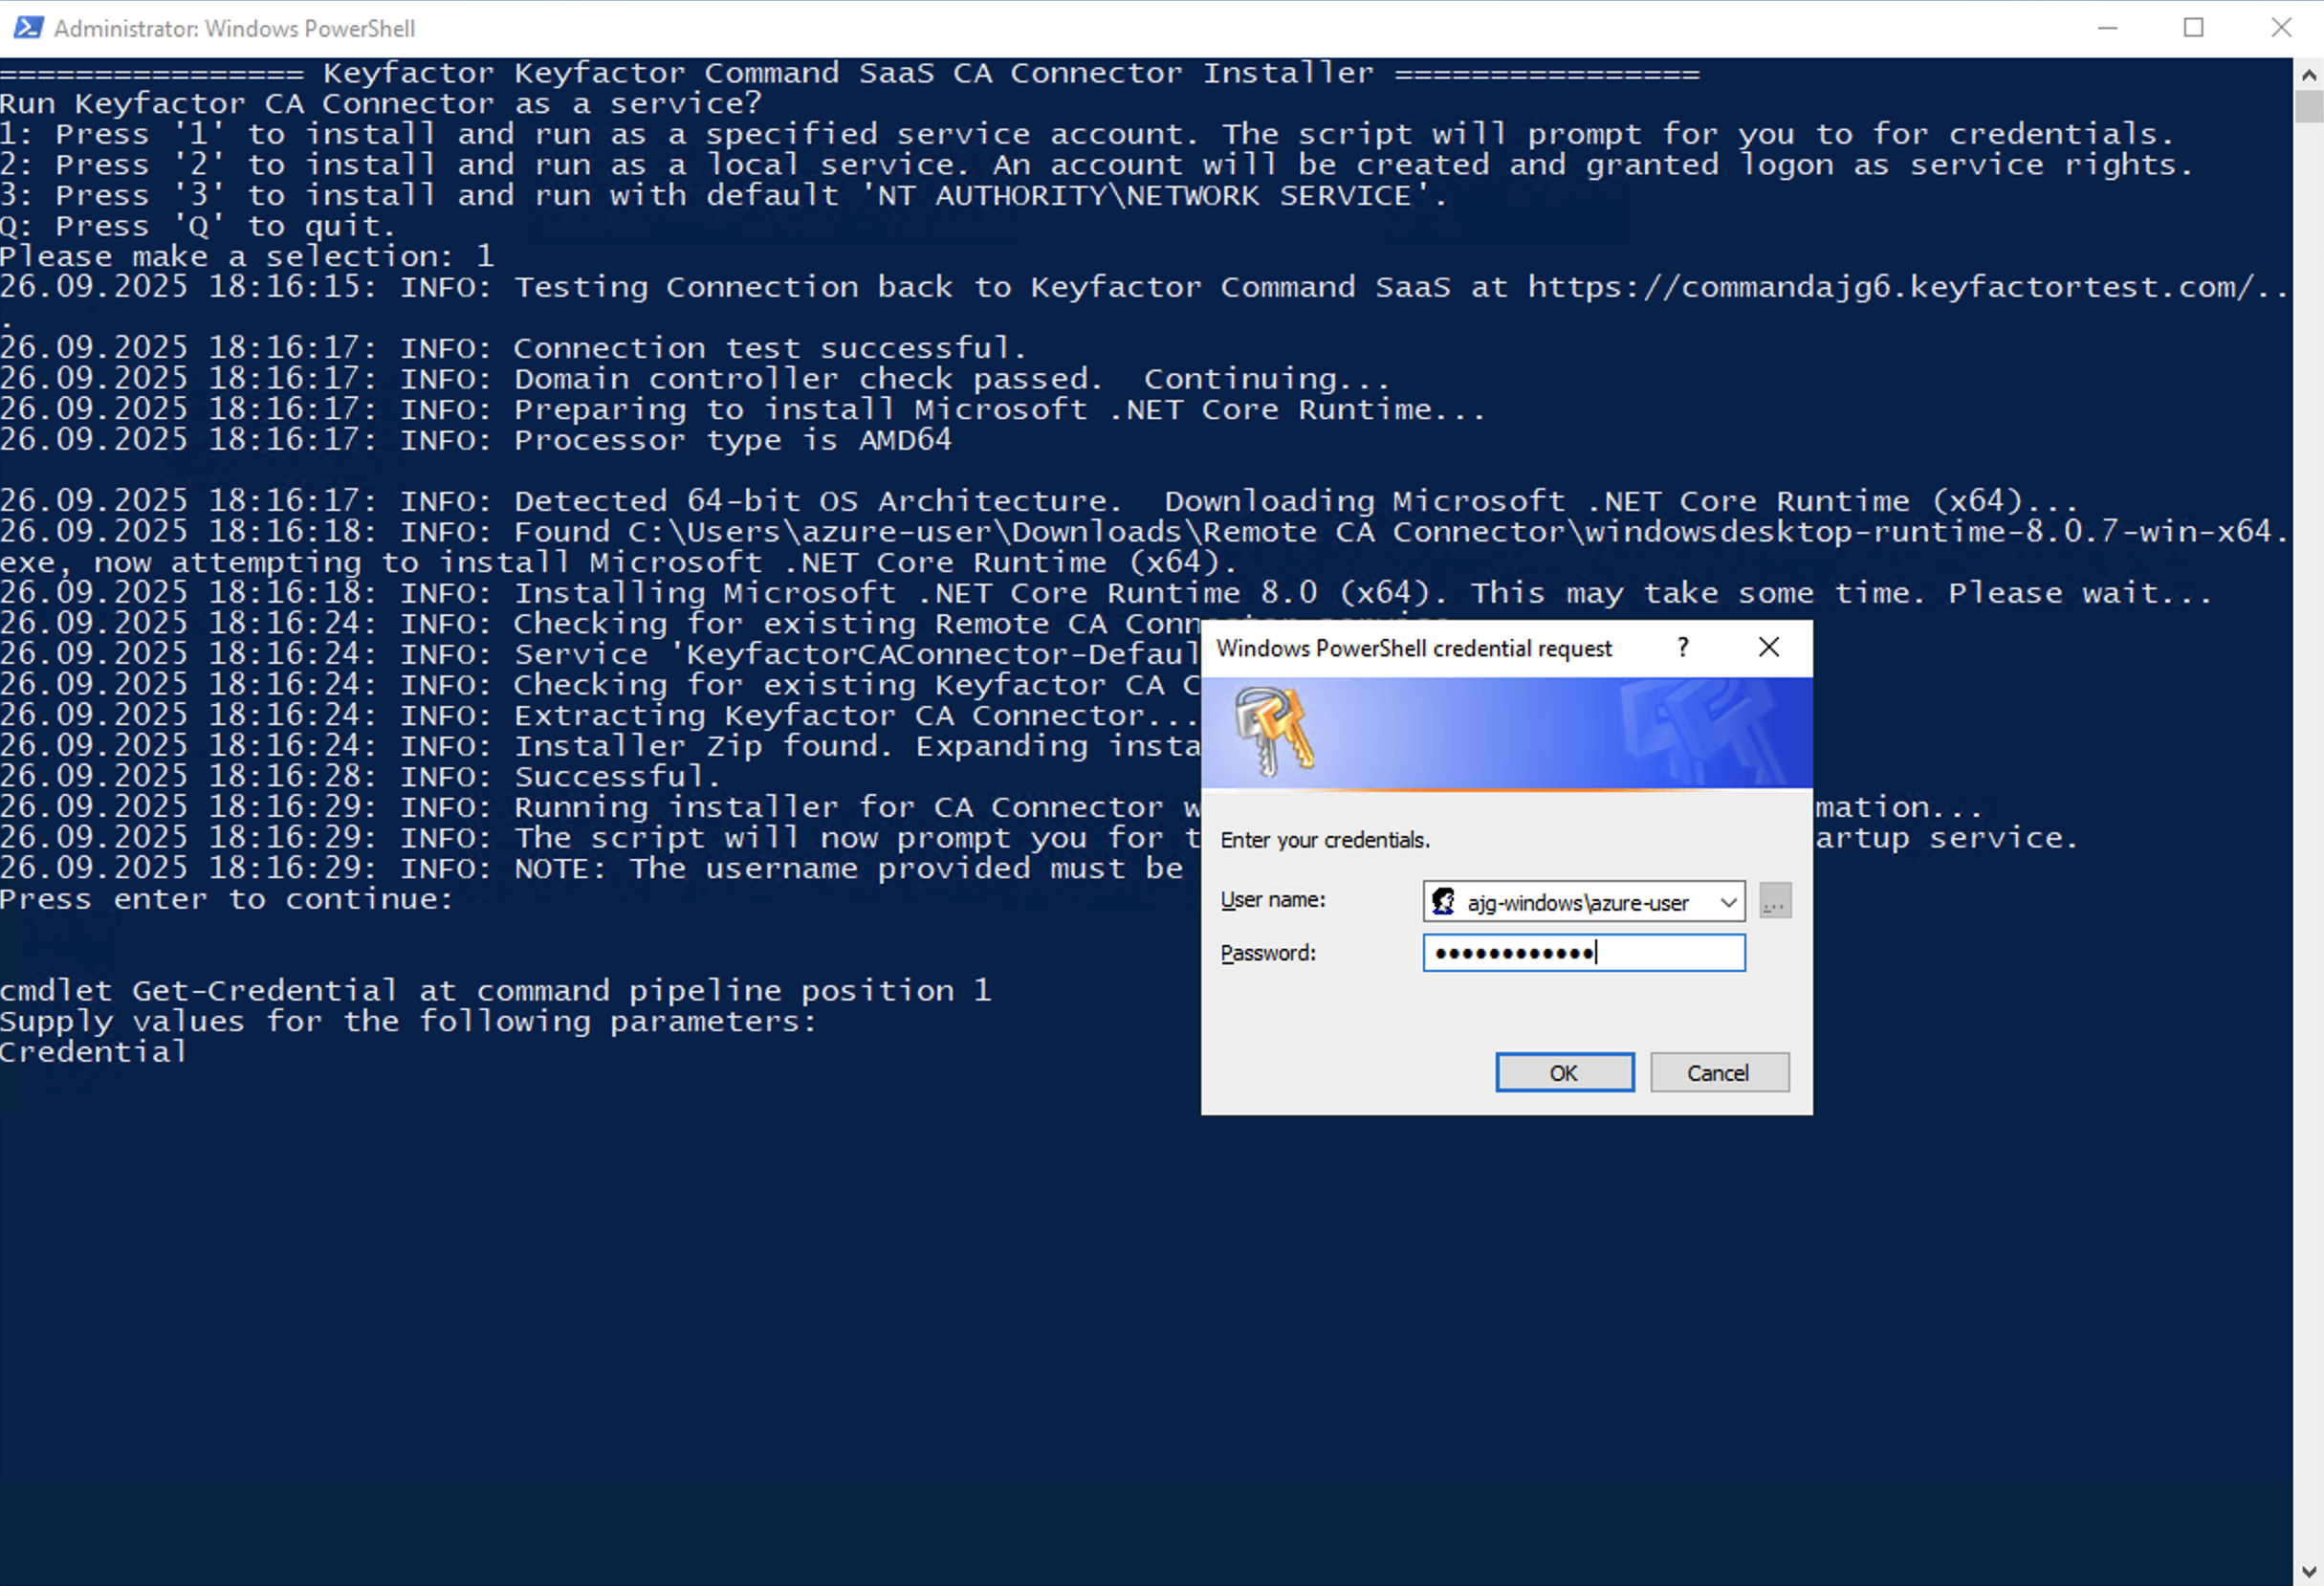
Option 1 will install the CA Connector as a service, but will prompt you for a domain username and password that has rights to the network and server. This is the recommended method and required if using the RA Connector to connect to an MSCA.
-
Option 2 will install the Remote CA Connector as a service, but generate a local user that it can run as. This may create connectivity issues to other MS devices, but should work well as a proof of concept.
-
Option 3 will install the Remote CA Connector with the 'NT Authority\Network Service' and should work for most use cases including connecting to an EJBCA instance.

Step 4 - Connect to Command SaaS
The first thing the installation script will do is try to connect to the Command SaaS deployment.

If the connection fails, this is likely because it is required to allow any addresses into the Command SaaS deployment via the Self-Service Source IP feature of Command SaaS.
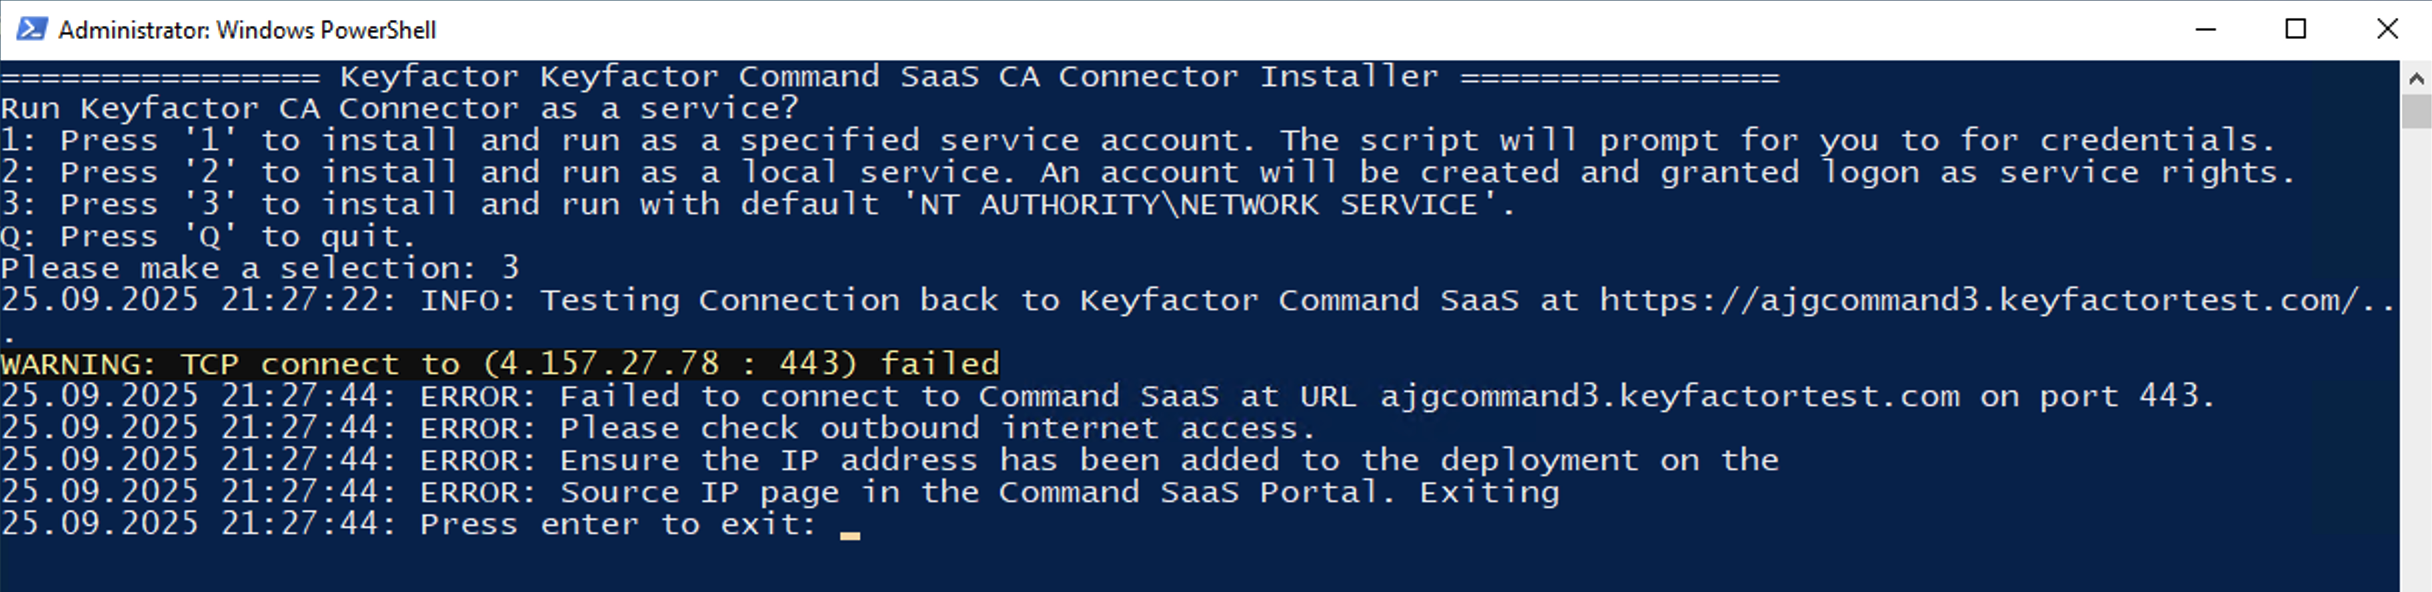
If the process fails, add the outbound internet IP of the host you are using to your Command SaaS deployment.
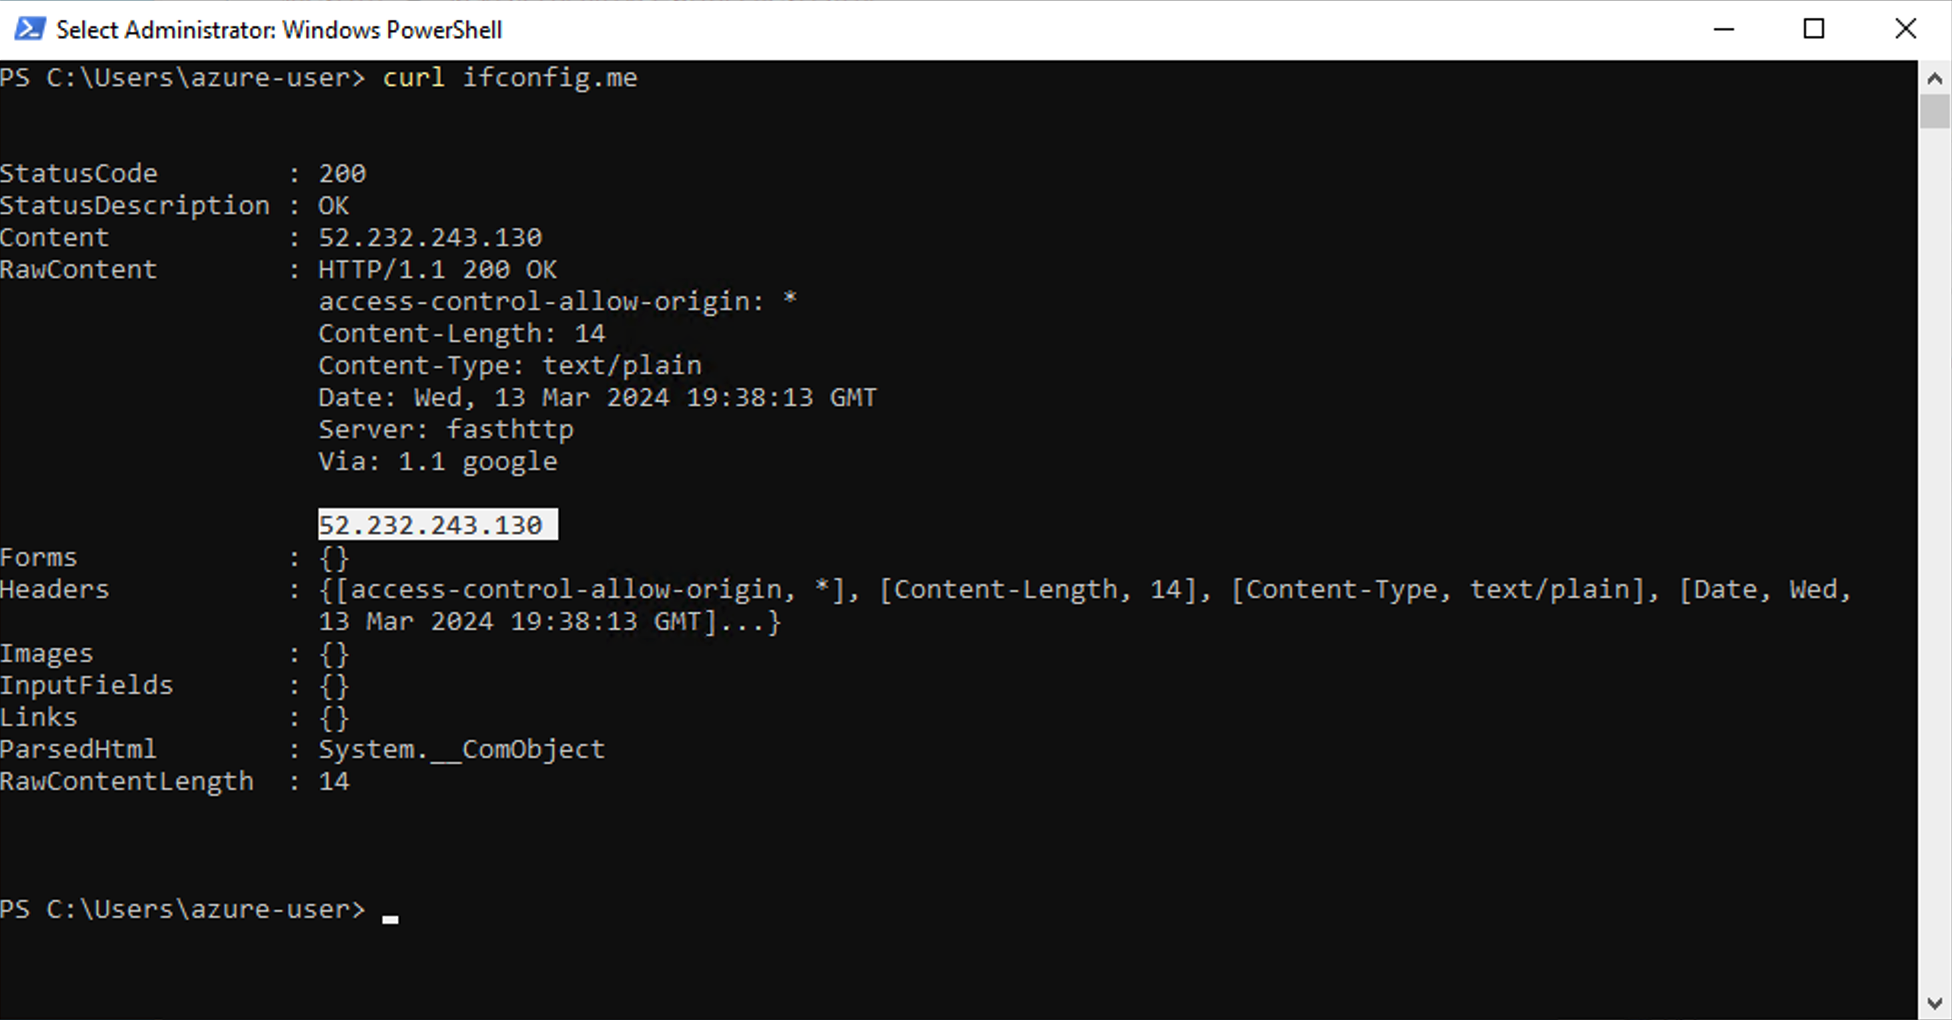
One option to determine the outbound IP address of the host you are using is to type the following command in the PowerShell window.
Note: This method uses the third-party service http://ifconfig.me .
curl ifconfig.me
The response will show the IP address that your host will use to access the Command SaaS Deployment.
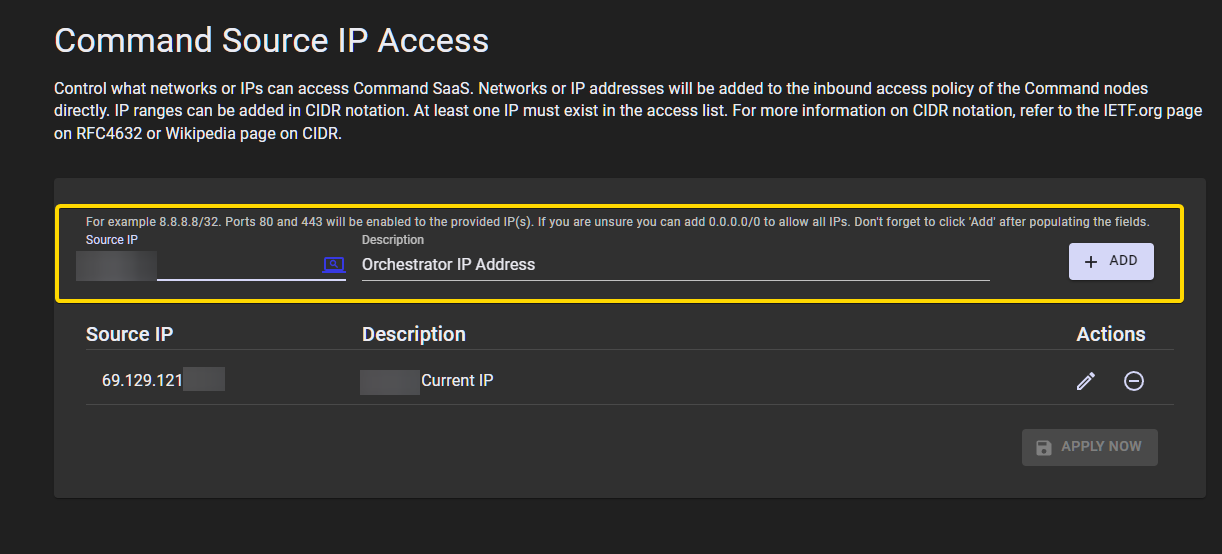
Add this IP address to the Source IPs screen in the Command SaaS Portal for this deployment. Click Add, and then click Apply Now.
Step 5 - Complete the Installation
Once the change has processed, run the script again. The script will install .NET, if needed. If .NET already exists, the script will skip this step.
The remainder of the step is determined based on the installation option you selected.
If you selected Option 1
Selecting Option 1 will prompt you for the credentials you would like to use to run the service as. If dotnet core 8 is not installed, it will download and install it for you. The script will then prompt you for credentials to run the service as:
Once that is done, the script will prompt you for the Client Secret for your Command SaaS deployment. The Client Secret can be found on the CA Connectors screen in the Keyfactor Command SaaS Portal for the deployment being configured. Click Show to show the client secret and use the copy button to add it to your clipboard.

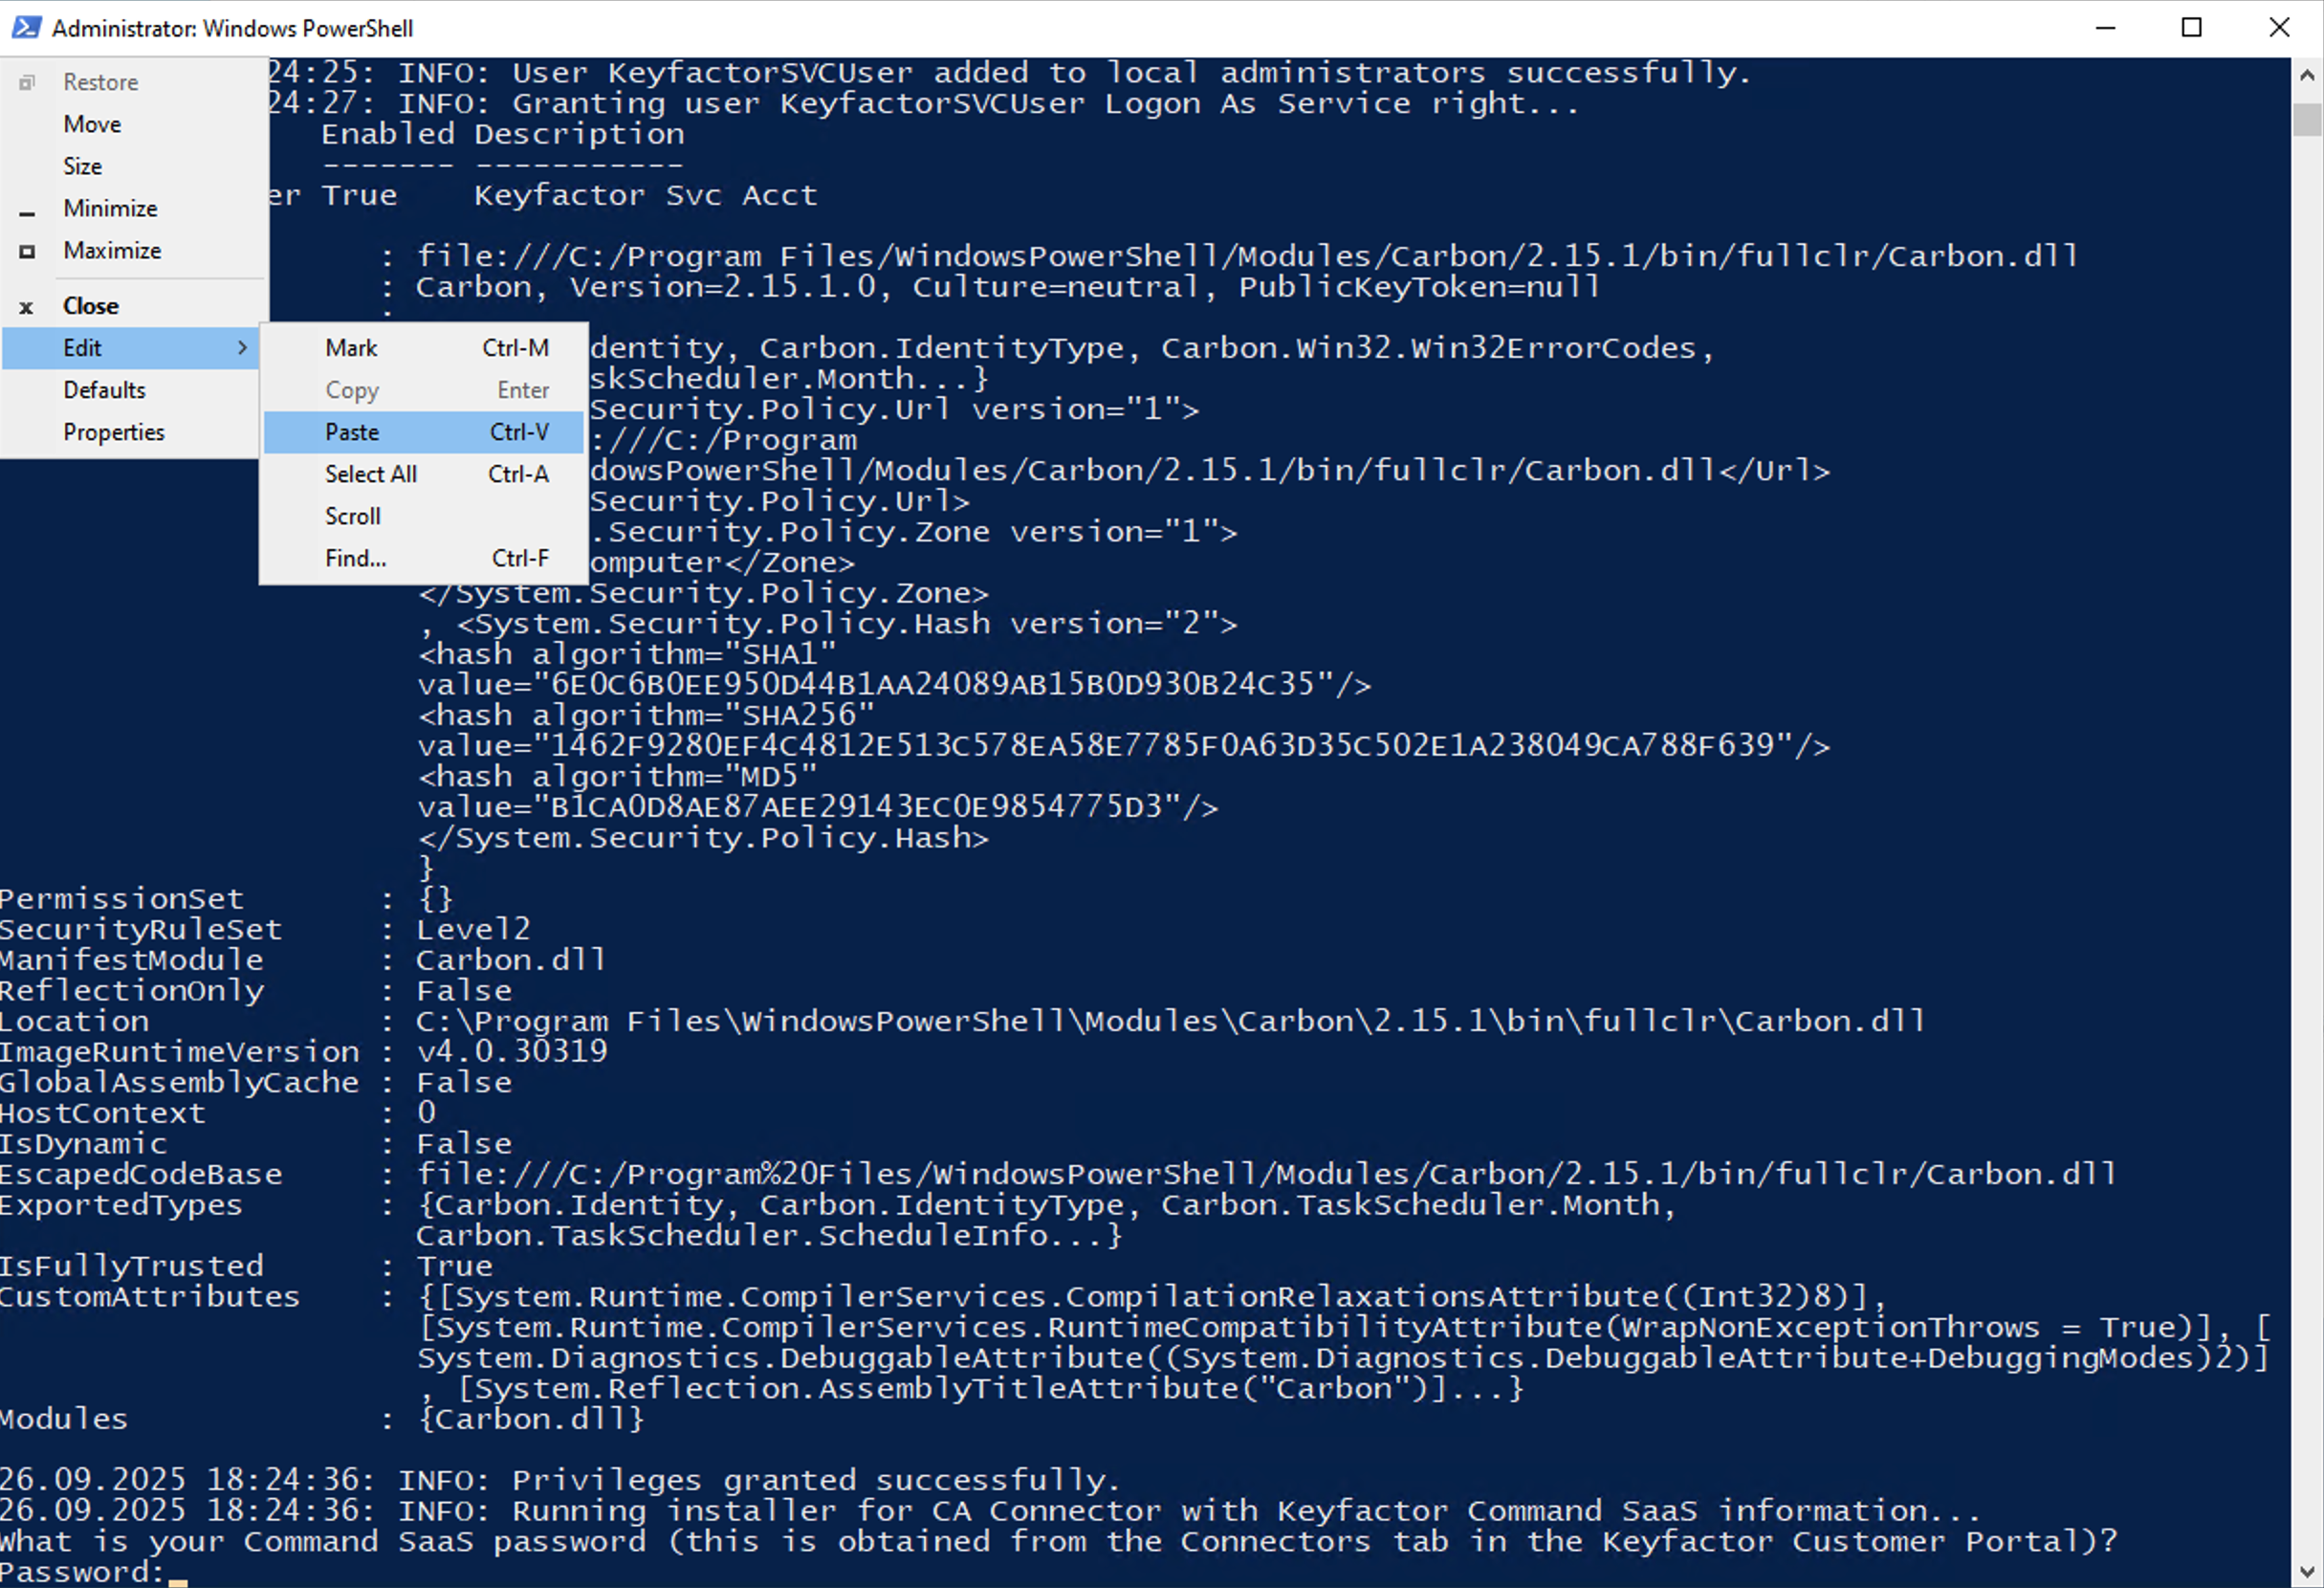
Paste the Client Secret value into the script using the PowerShell Edit > Paste method in the terminal window.
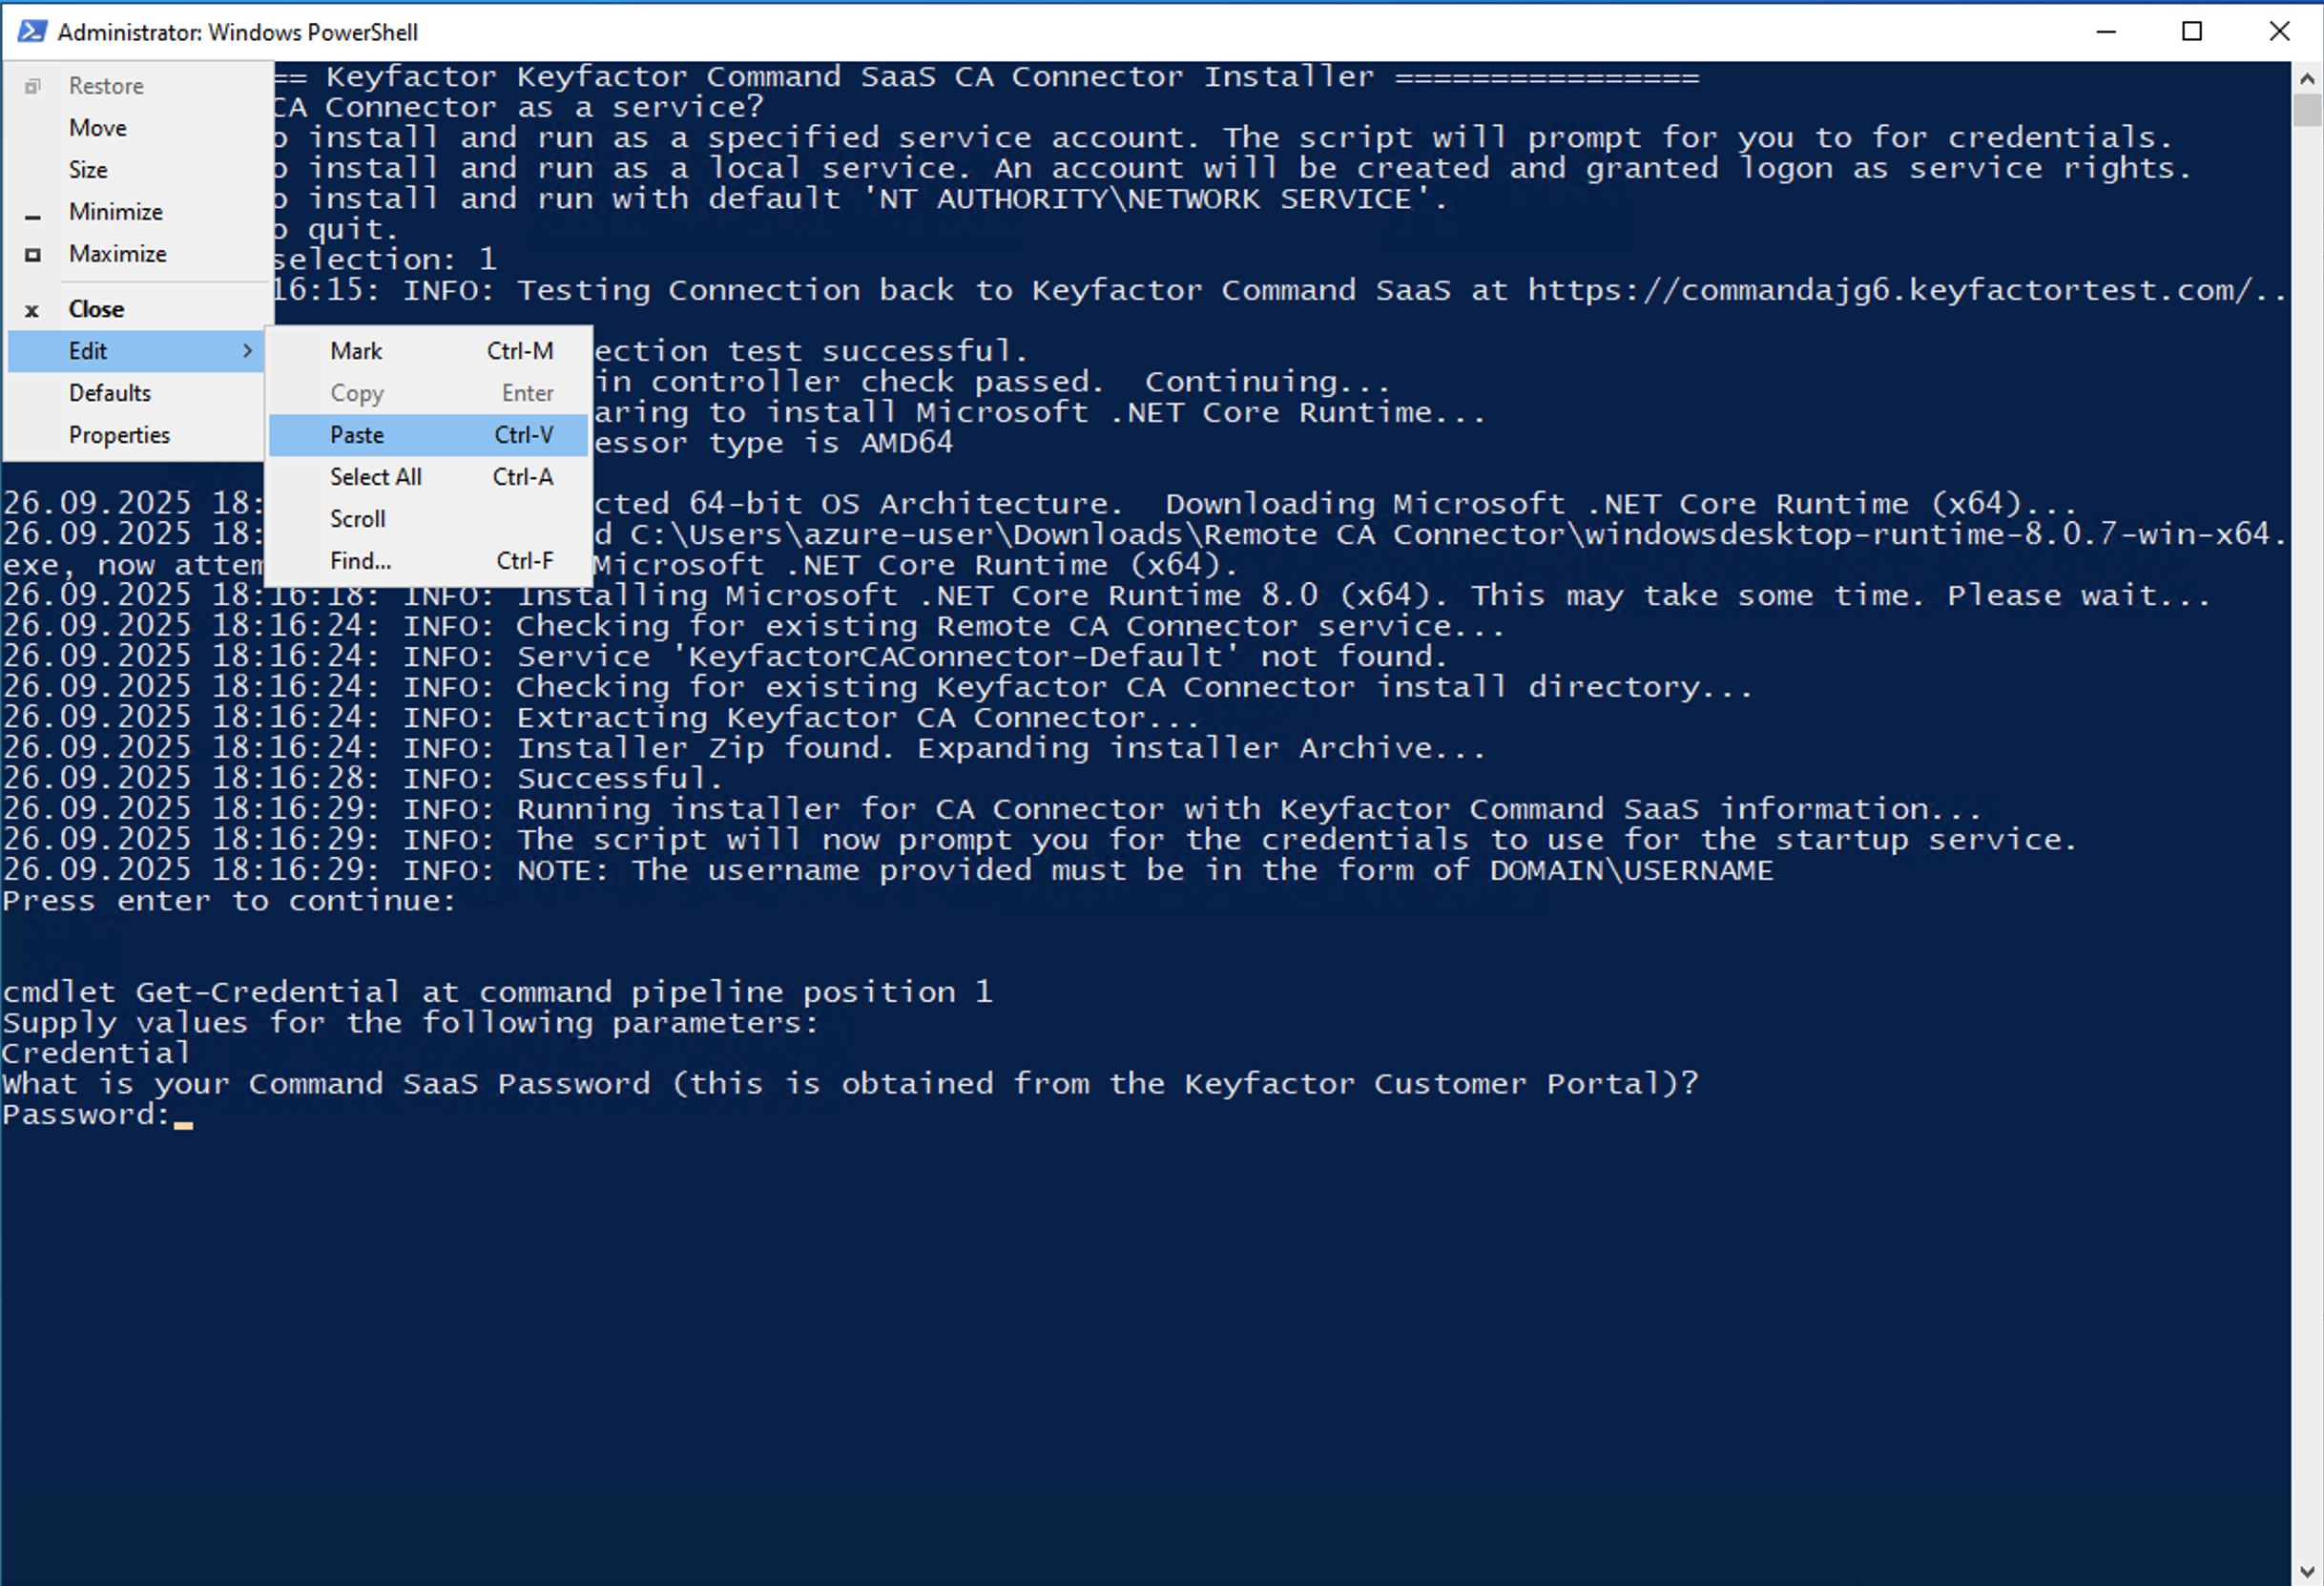
Ensure that the password is the full-length secret pasted into the window. The password will have an obfuscated character for each pasted character.

The script will then copy the files in place and give you additional information at the end.
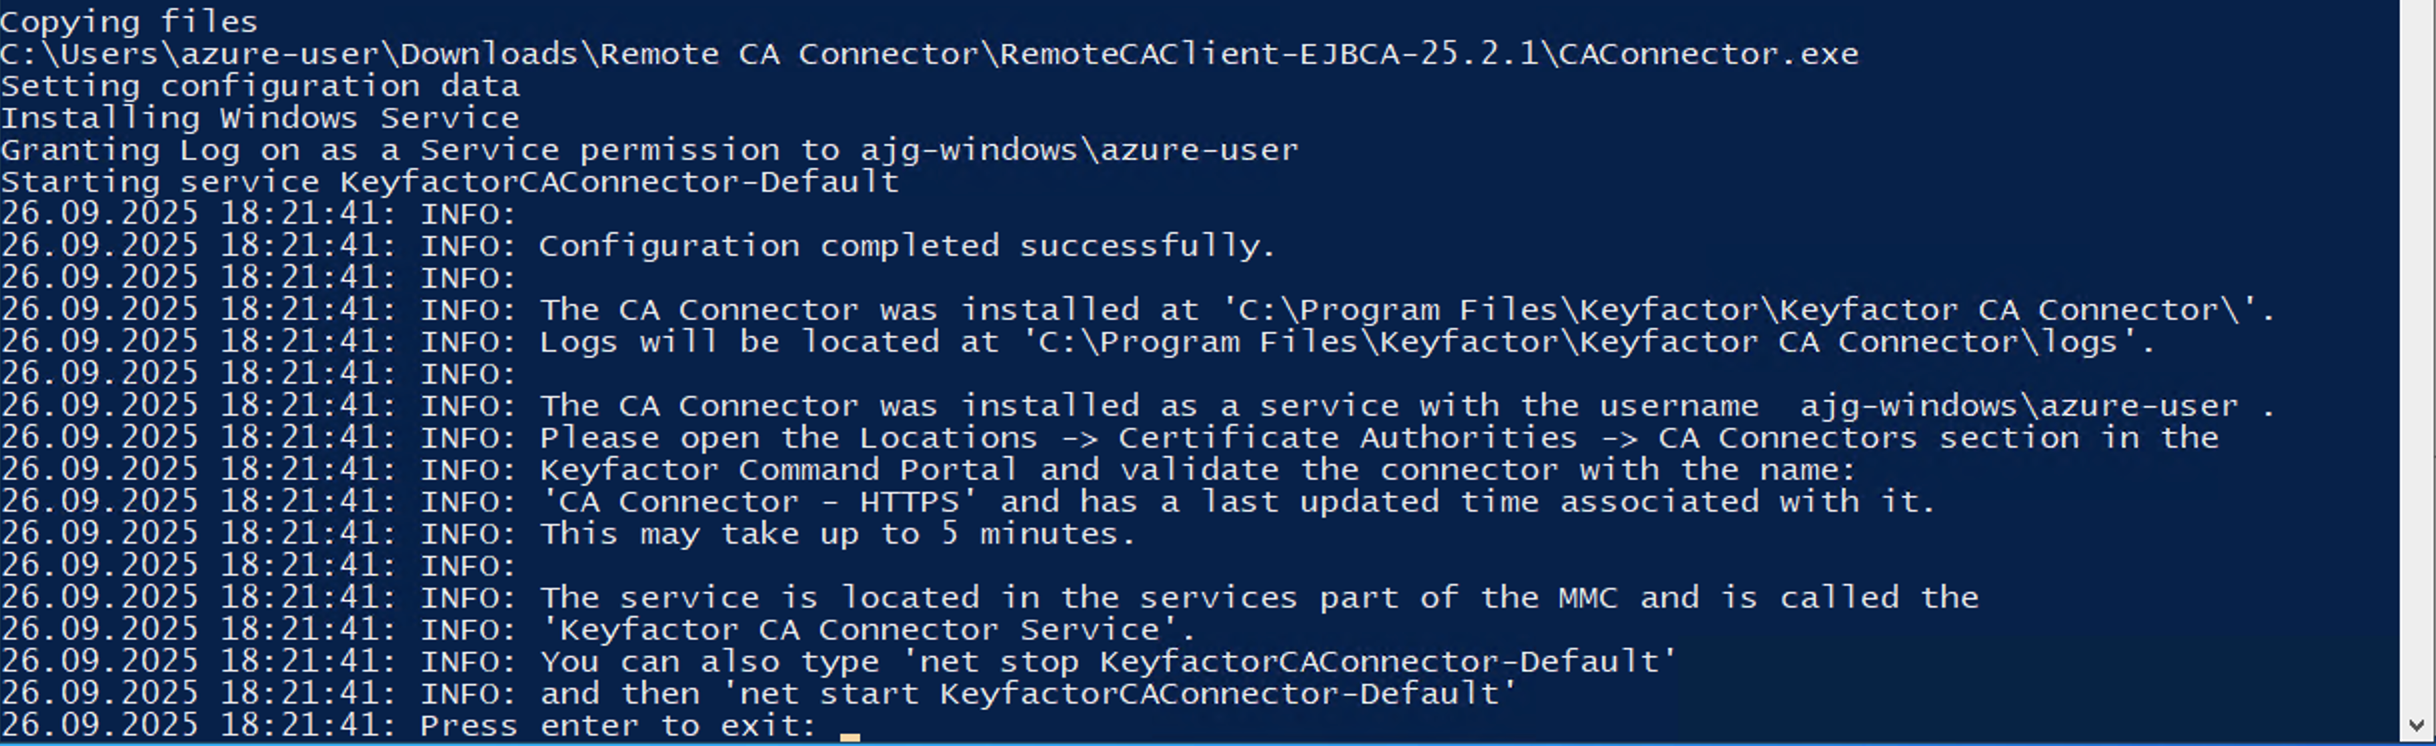
If you selected Option 2
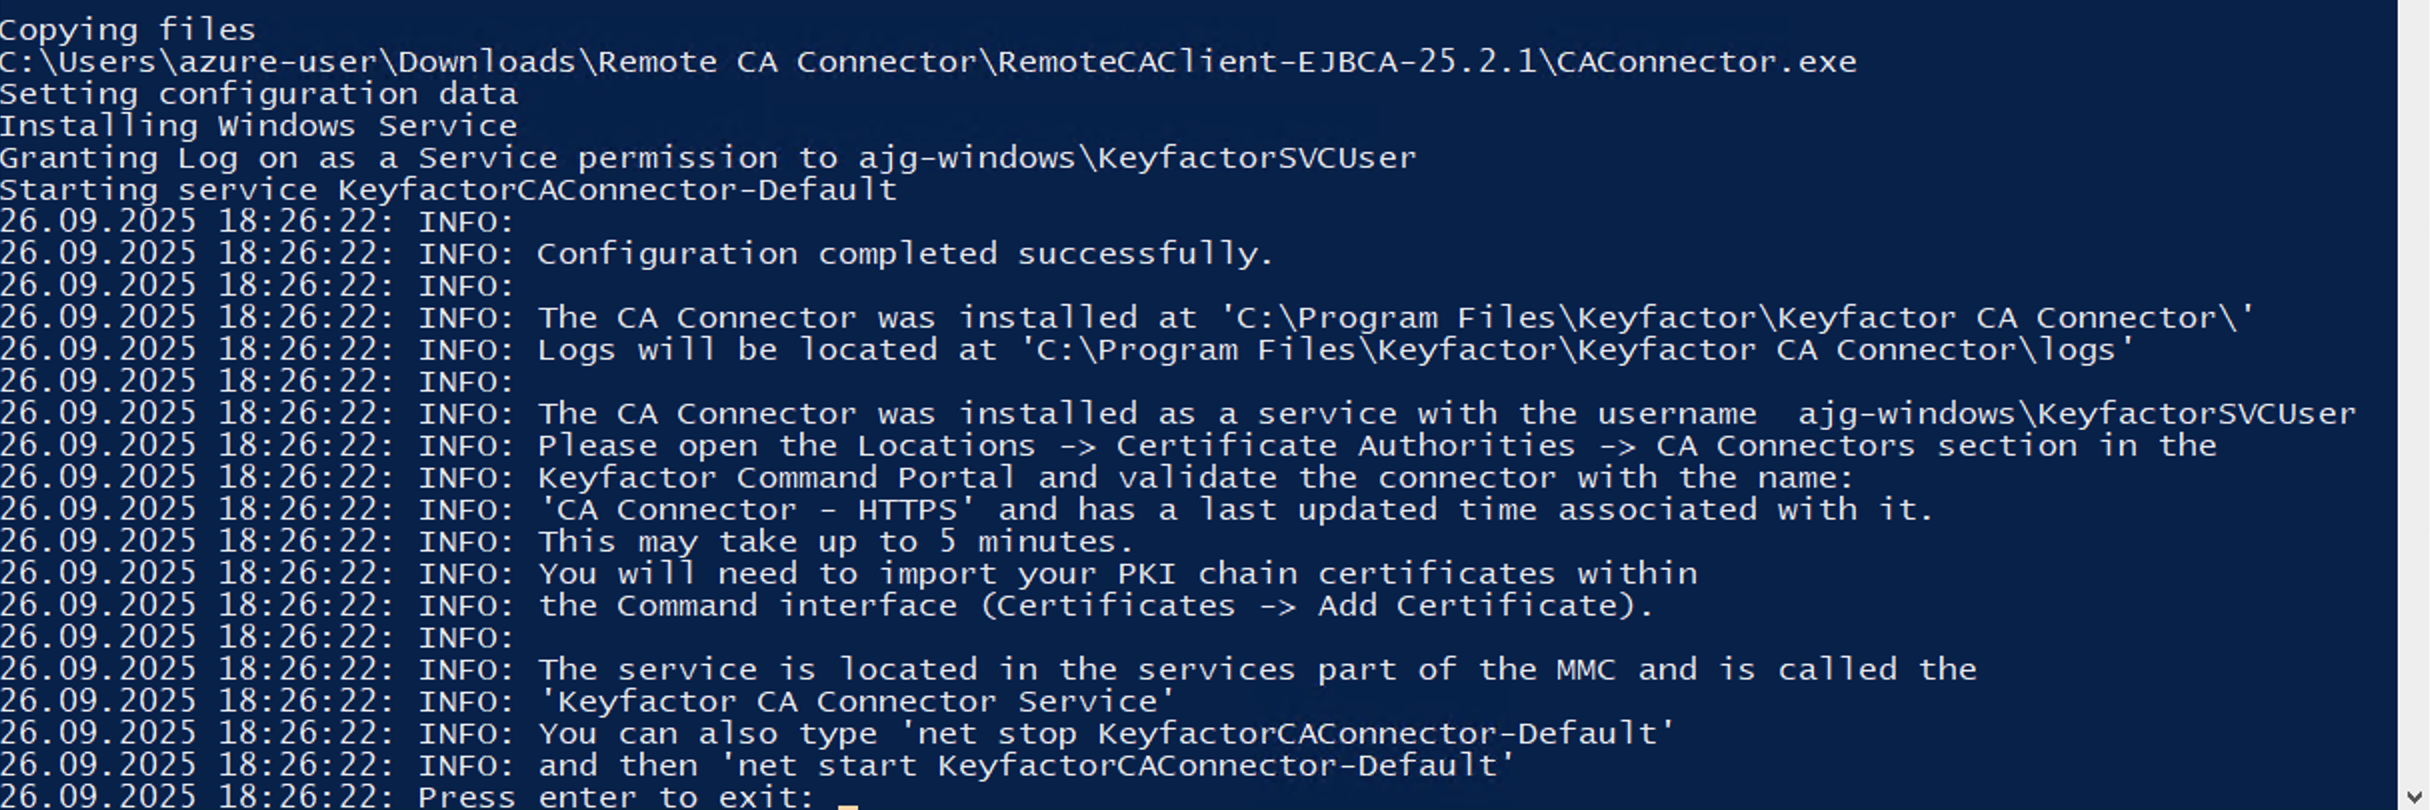
If you selected Option 2, the script will generate a local service account automatically called “KeyfactorSVCUser”. The script will install the carbon utilities to perform this task since it needs these tools to create the user and grant it logon as a service rights. It will not prompt for any credentials other than the Command SaaS password you need to obtain from the Command SaaS Portal. Paste your Client Secret using the PowerShell Edit > Paste method in the terminal window.
It will then complete and give you information about the installation.
If you selected Option 3
Option 3 is the same process but the CA Connector will run as ‘NT AUTHORITY\NETWORK SERVICE’.

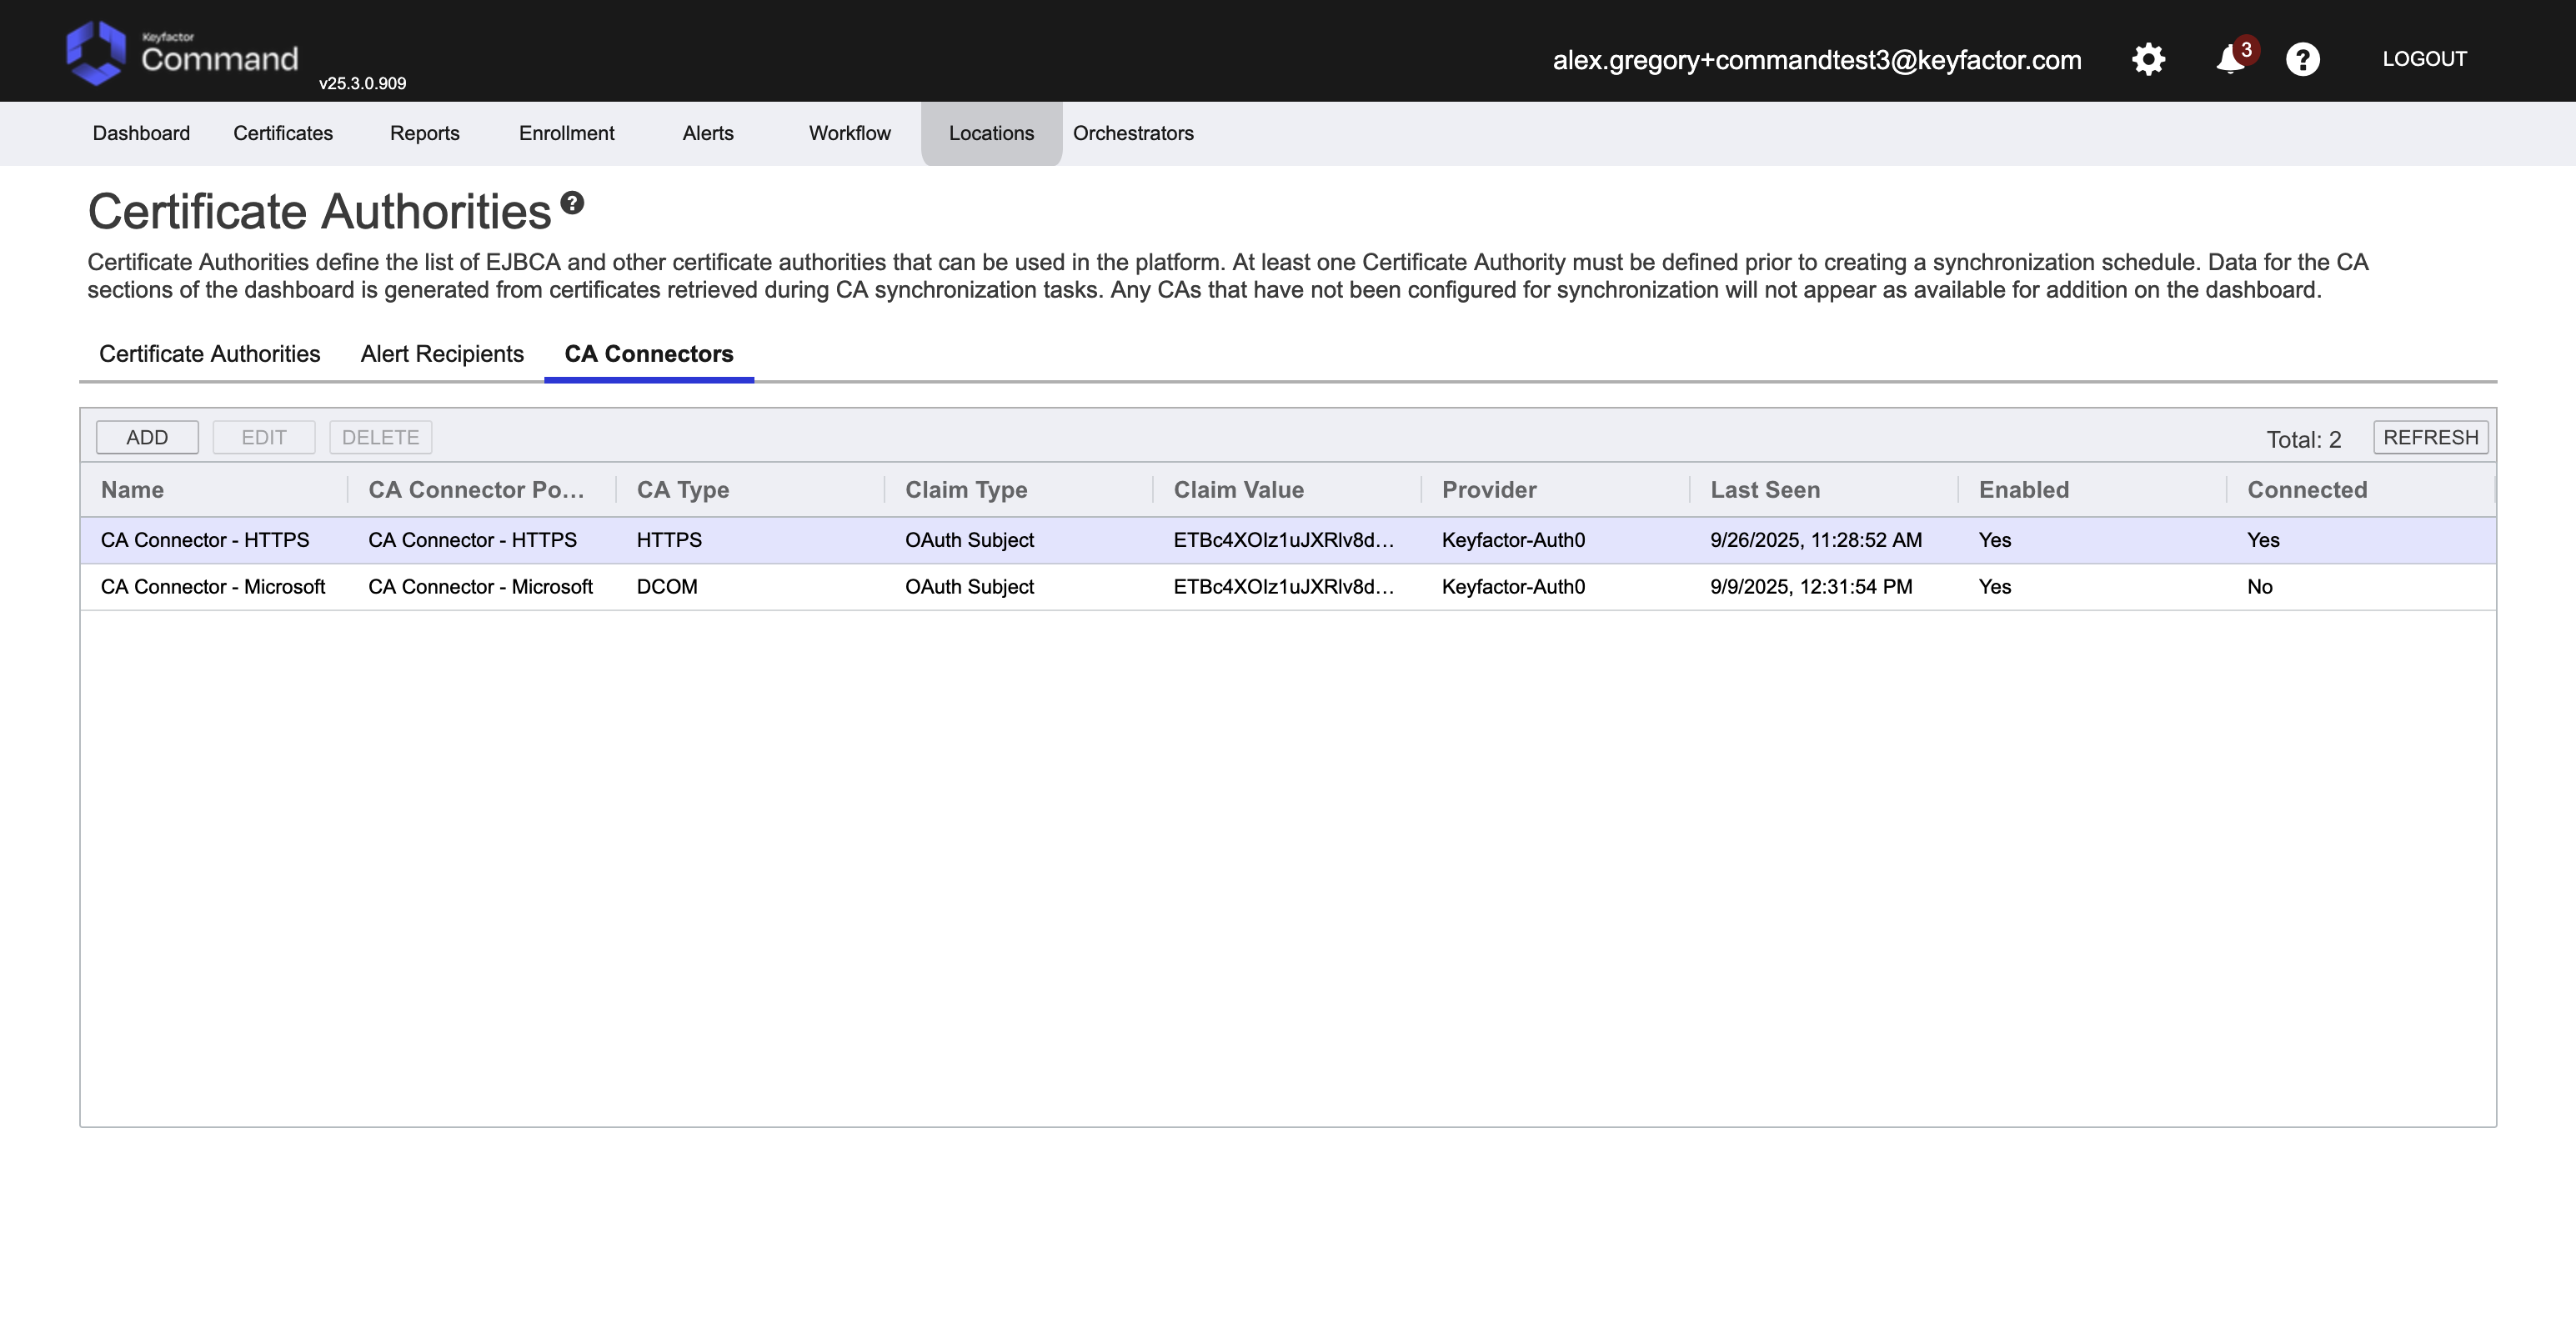
Checking Command SaaS
Once complete, access the Command SaaS interface and check the CA Connector has been seen by the server. Go to Locations → Certificate Authorities.
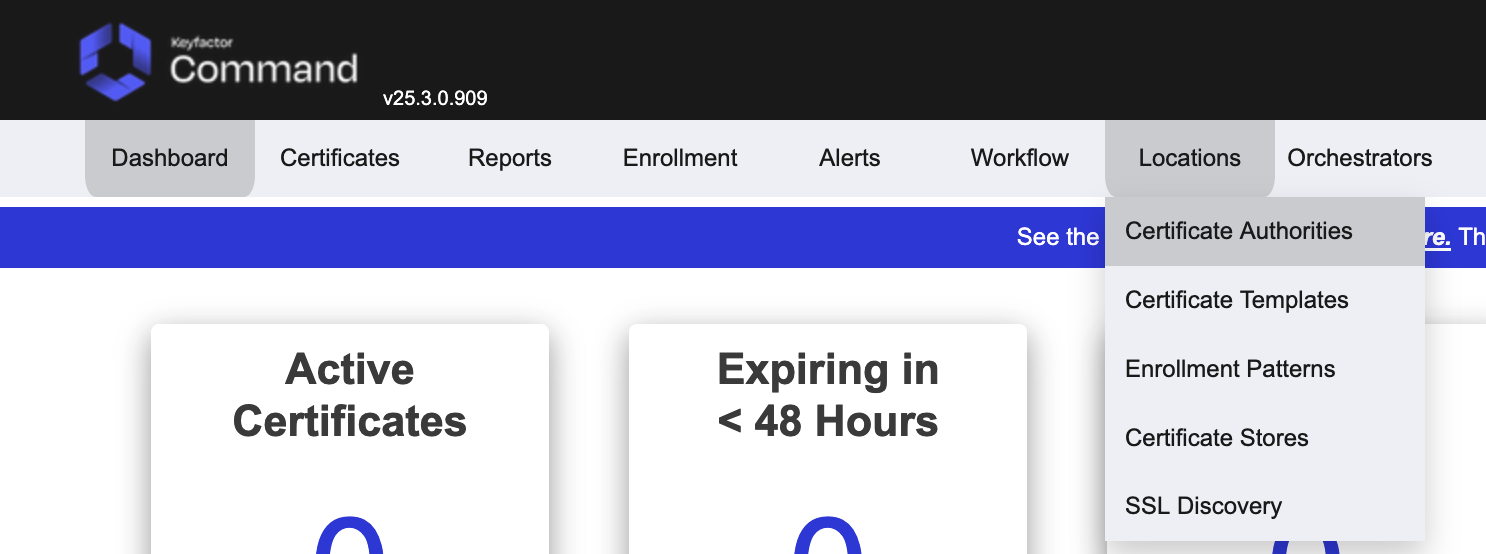
Access the CA Connectors tab, there should be a connector with a recently updated Last Seen time.