Create S3 Bucket
The following includes instruction for creating the bucket and enabling versioning for an existing bucket.
Create Bucket
To create the bucket, do the following:
- Login to the AWS Console that contains your EJBCA Cloud Instance.
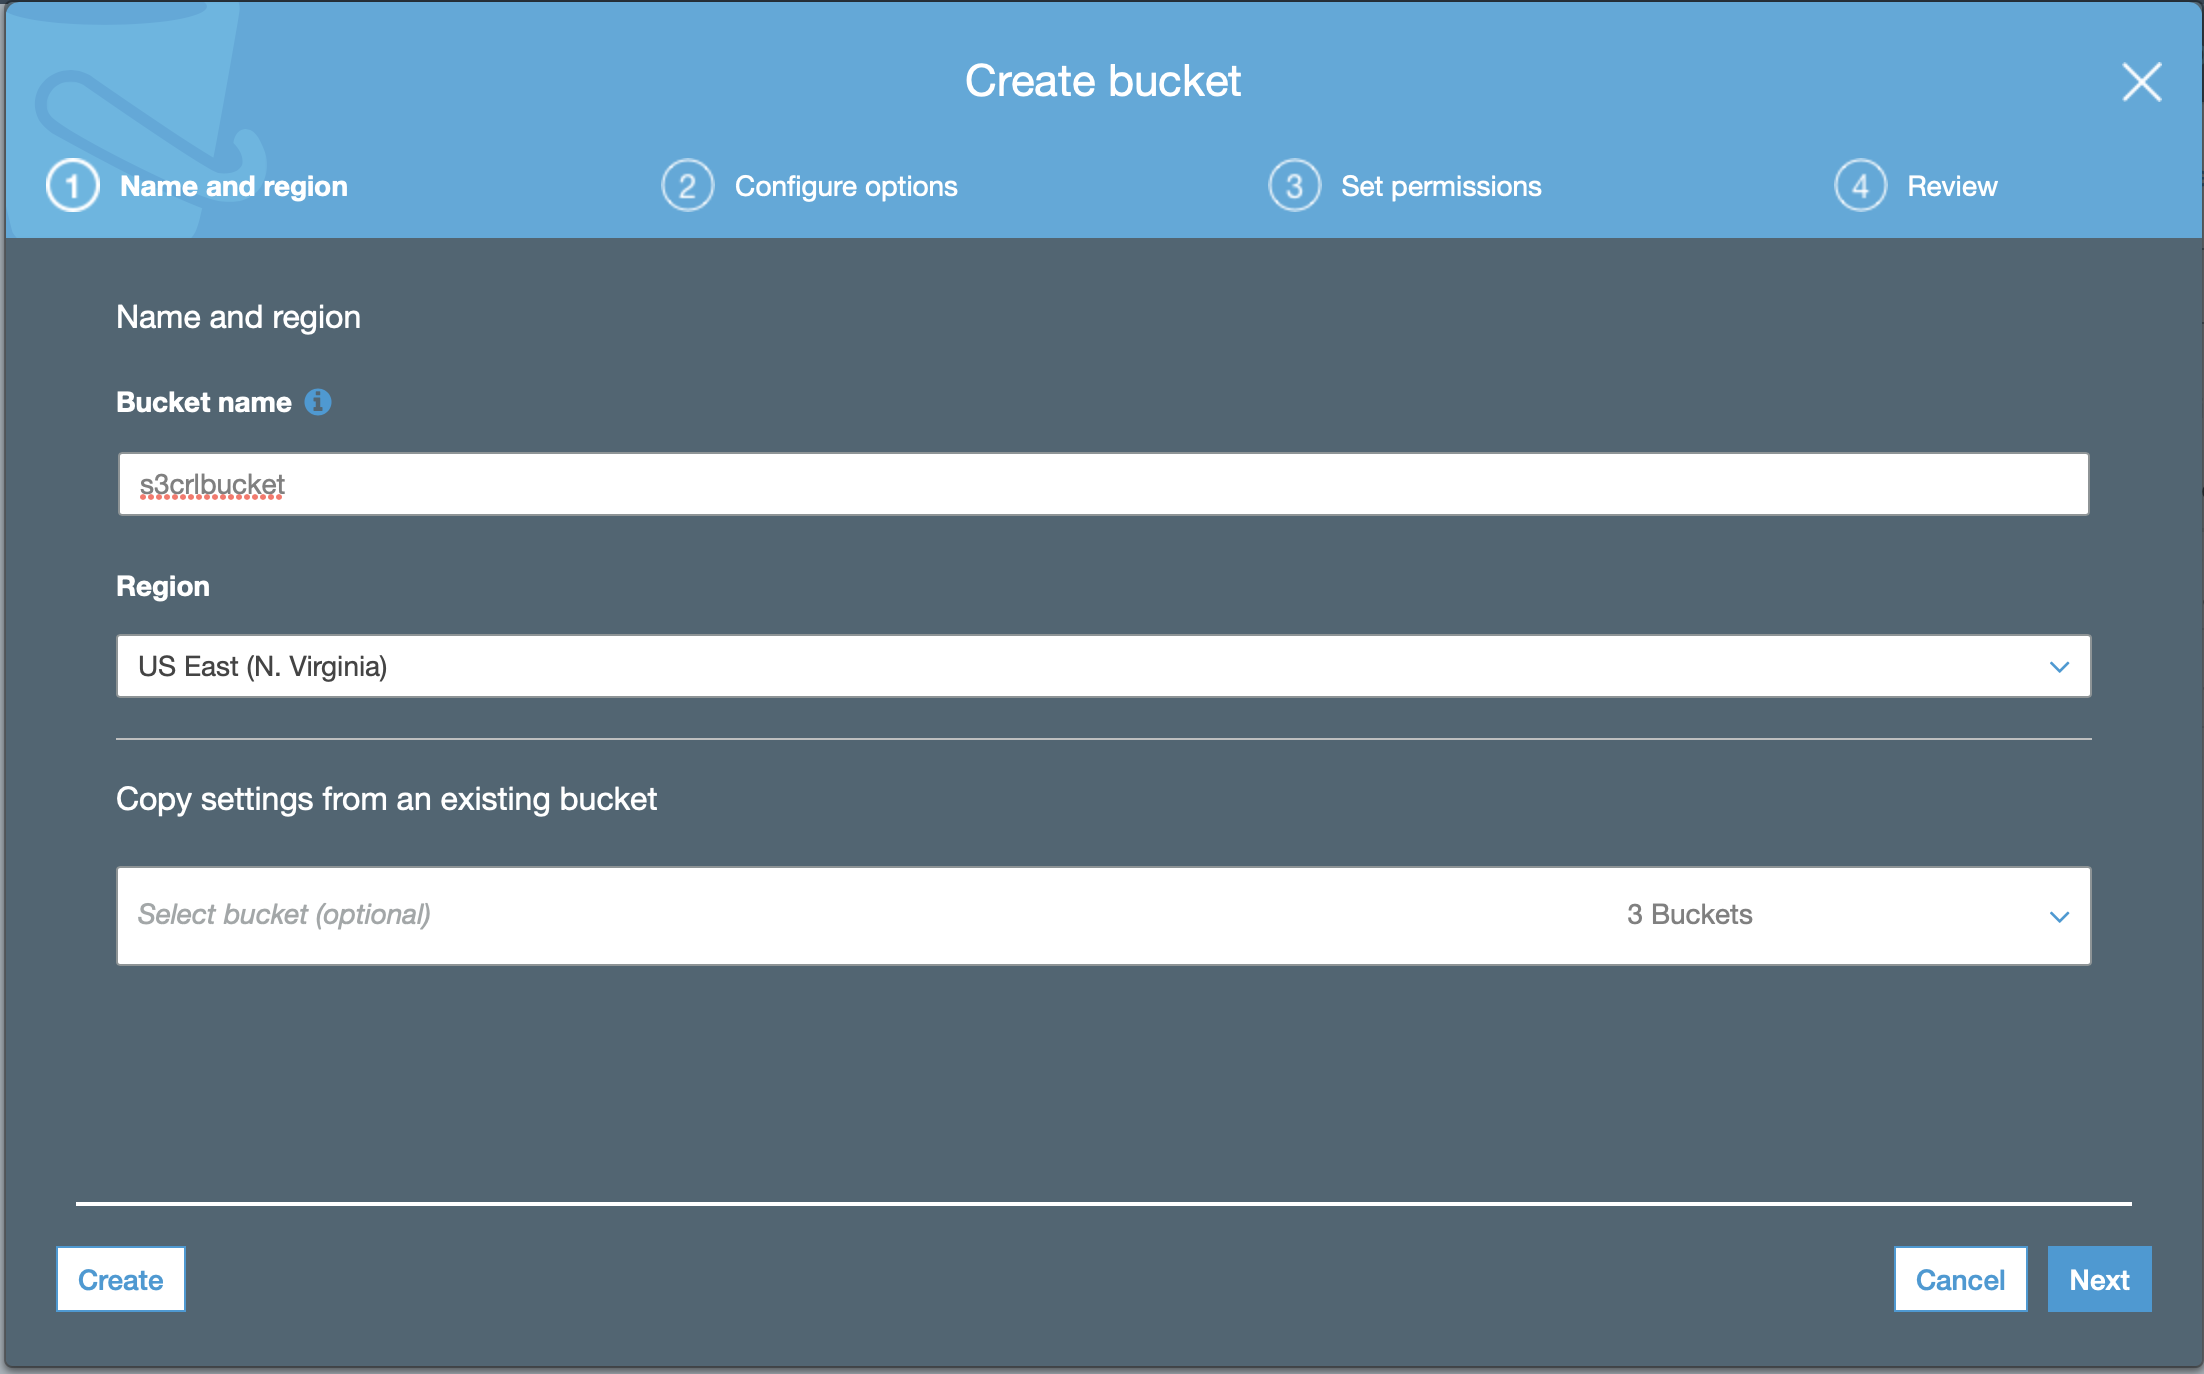
- Select Services, S3 and click Create Bucket.
- Enter a name for the S3 bucket in the Bucket Name field.
- Select the appropriate bucket region.

- Click Next and configure options.
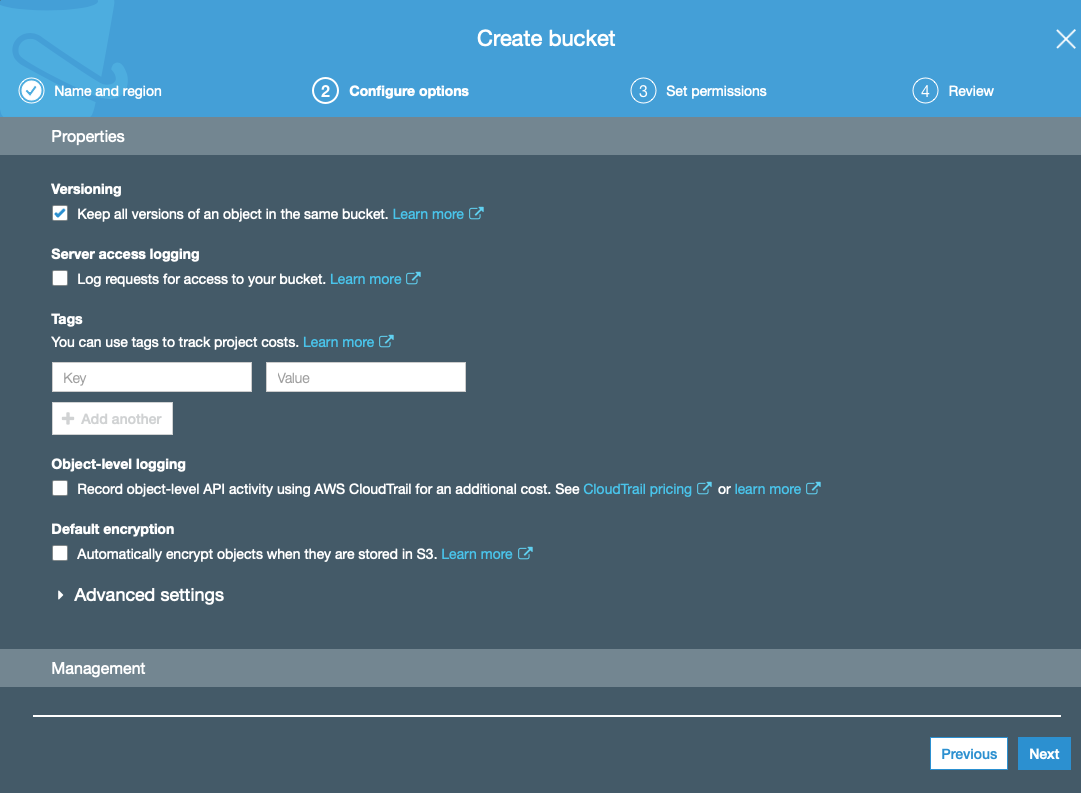
To retain all versions of the CRL uploaded to the S3 bucket, select Keep all versions of an object in the same bucket. Otherwise, the default options are adequate.
- Click Next and set permissions. CRLs need to be available publicly and do not contain sensitive information. To make them public, clear the Manage public access control lists (ACLs) for this bucket restriction options.

- Click Next and then click Create bucket at the confirmation screen.
- The newly created bucket appears in the list of buckets:

The S3 bucket can now be used to store CRL files from the AWS S3 CRL Publisher.
Enable Versioning on an Existing Bucket
S3 has the ability to keep all files that are uploaded to S3. By default, every time the AWS S3 Publisher pushes a CRL to S3, it will be overwritten.
To enable versioning in order to store all CRL files for historical purposes, do the following to set the S3 bucket properties:
- Login to the AWS console and access the S3 service.
- Select the S3 bucket that will be used for storing the CRL files. In this example, s3crlbucket is used.

- Select the S3 bucket containing the CRL files.
- Select the Properties tab and click Versioning.

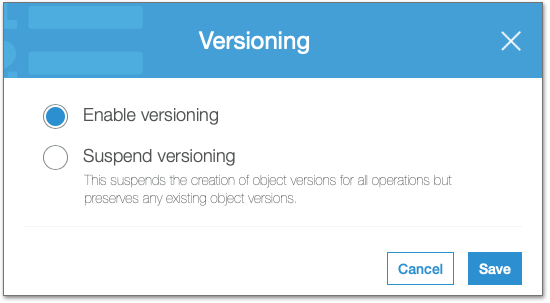
- Select Enable Versioning to keep all files in this bucket as new ones are uploaded, and then click Save.

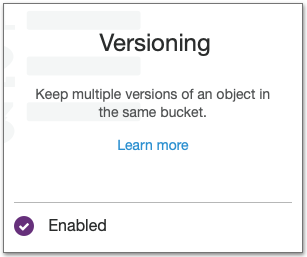
- Confirm that Versioning now displays as Enabled.

Next, Configure Custom S3 Publisher.
.png)