The following sections describe how to create a Root CA Profile and the AWS Issuing CA Profile.
Introduction
Certificate Profiles model how our CAs look with regards to the different types of certificates, DN contents, extensions and so on.
To manage Certificate Profiles, open the Manage Certificate Profiles page (CA Functions > Certificate Profiles).
The following section describes how to create a Root CA Profile.
Create Root CA Profile
Follow these steps to create a Root CA Profile:
-
Clone the ROOTCA profile to create your own for the Root CA you are going to create:
-
Click Clone next to the ROOTCA profile.
-
Specify Corporate Root CA Certificate Profile and click Create from template in Name of new certificate profile.
-
-
Click Edit on the Corporate Root CA Certificate Profile and specify the following:
-
Available key algorithms: Select desired key algorithm, such as RSA.
-
Available bit lengths: Select desired bit lengths, such as 2048-4096.
-
Validity or end date of the certificate: Keep the validity at the default 25y7d.
-
CRL Distribution Points: Select if desired. CRLs hold the revocation status of certificates.
Note To make your CRL Distribution Point be on an internal server to your network, use an internal DNS name. It is recommended to put the CRL URL behind a CNAME or load balanced VIP. This way it is stamped in the certificate as something that should not ever change, but the system serving the CRL behind the VIP can.
To make your CRL Distribution Point public, use a public DNS name that points to an IP. If using EJBCA Cloud AWS, using an Elastic IP is not recommended since this IP/URL will change if the node is shut down invalidating the CRL location.To allow clients to fetch the CRL from the CA directly and have Apache in front of EJBCA, remove port 8080 from the URL and change the DNS name as required. EJBCA does not know if Apache exists and internally responds to 8080 in most cases.
Example URLs:
From EJBCA server directly: http://ip-172-16-0-148.ec2.internal/ejbca/publicweb/webdist/certdist?cmd=crl&issuer=CN=Corporate_Root_CA,O=Corporation,C=US.
Served from Webserver: http://crl.corporate-dns-url.com/corporate_root_ca.crl (you must setup a script to fetch and copy the file to the URL you choose).
-
-
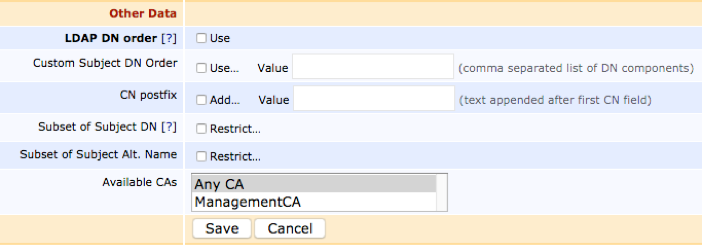
Clear LDAP DN order (to get X509 DN ordering) for greater compatibility with systems that use certificates.
-
Click Save to save the Root CA Profile.
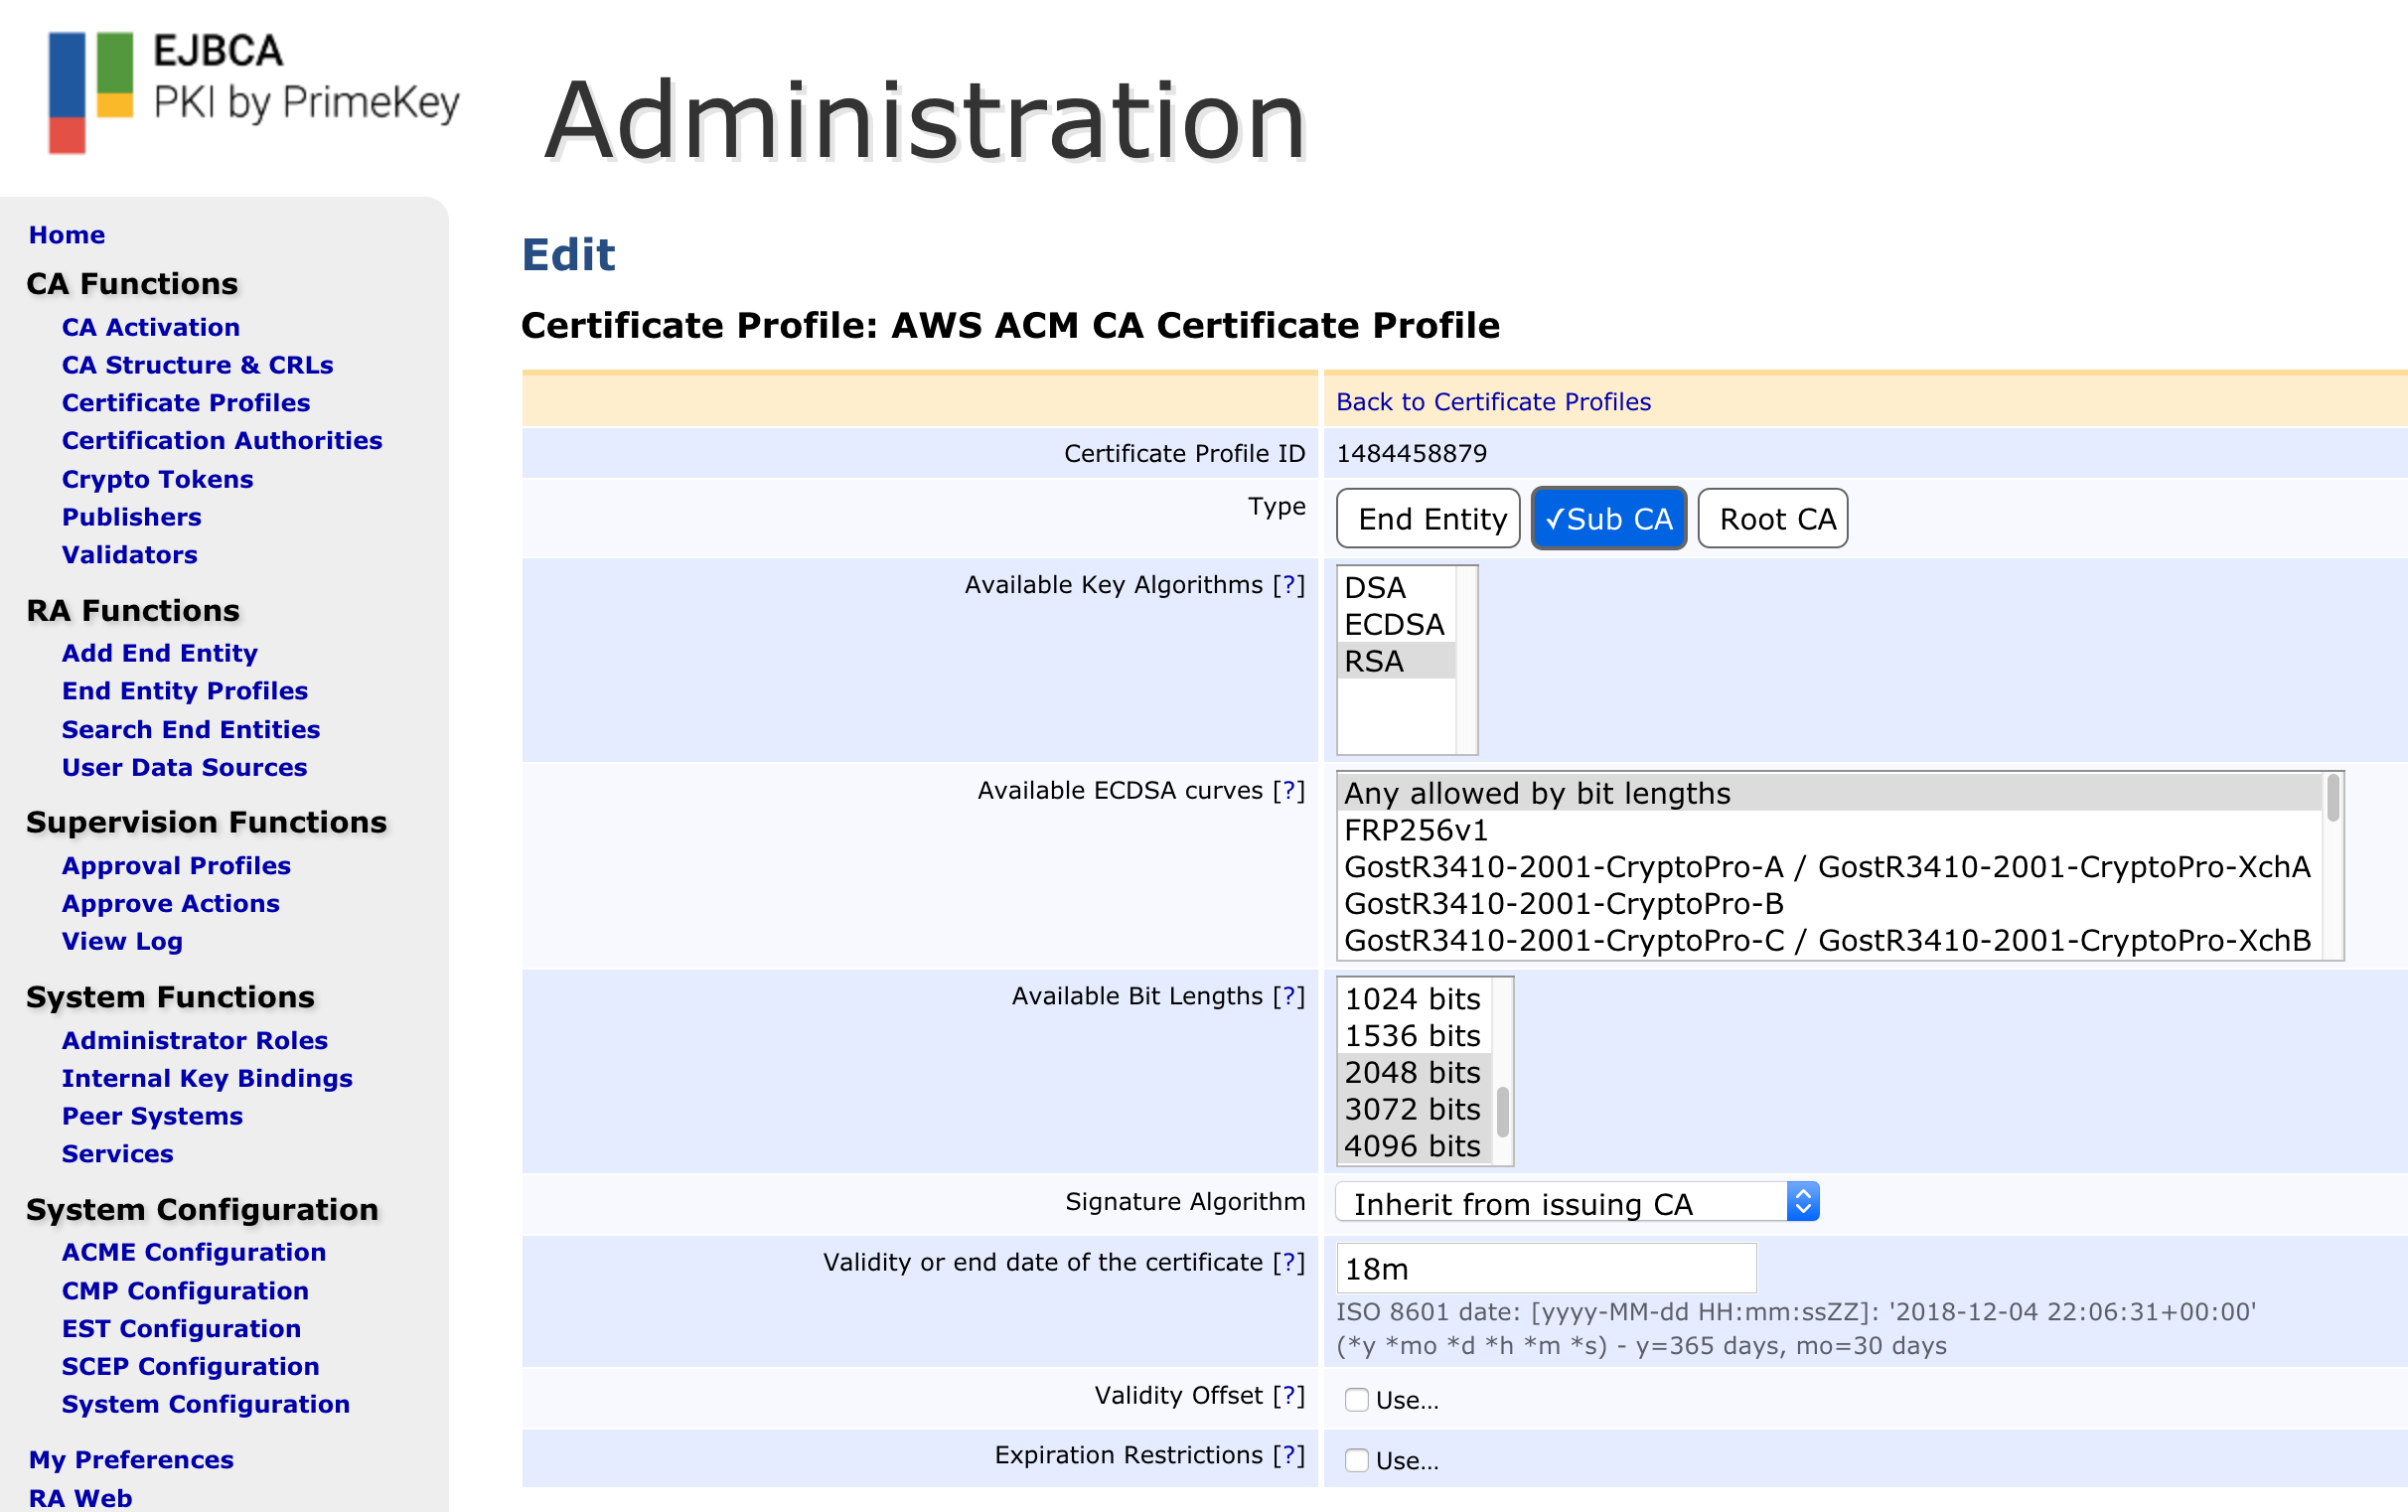
Create AWS ACM Issuing CA Certificate Profile
Follow these steps to create the AWS Issuing CA Profile:
-
Click Clone next to the SUBCA profile.
-
In Name of new certificate profile, specify AWS ACM CA Certificate Profile and click Create from template.
-
Click Edit on the AWS ACM CA Certificate Profile and specify the following.
-
Available key algorithms: Select desired key algorithm, for example, RSA.
-
Available bit lengths: Select desired bit lengths, for example, 2048-4096.
-
Validity or end date of the certificate: Specify the validity 18m (this value will be overridden by the AWS ACM CSR)
-
-
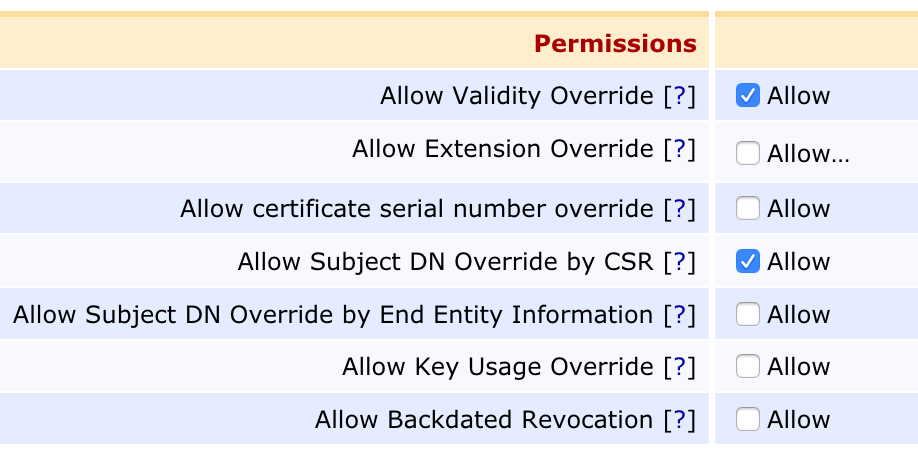
Check the box titled "Allow Subject DN Override by CSR" under the Permissions section.
-
Clear LDAP DN order (to get X509 DN ordering) for greater compatibility with systems that use certificates.
-
Click Save to save the Issuing CA Profile.