Quick Start Guide - PQC Lab Test Drive
Try out Post-Quantum Cryptography (PQC) using the PQC Lab on Azure which provides a free sandbox environment where you can generate your own quantum-safe certificates using EJBCA.
The PQC Lab Test Drive launches a pre-built, functional Public Key Infrastructure (PKI) with a configured EJBCA Enterprise instance, allowing you to run EJBCA with fully configured PQC certificate authorities (CAs) and profiles, as well as pre-configured and enabled enrollment protocols.
Follow this guide to generate PQC certificates using the NIST candidate algorithm Dilithium over enrollment protocols such as EST, ACME, and the REST API.
This guide shows you how to:
Launch the Keyfactor Test Drive Instance
Access EJBCA
Generate PQC certificates using different enrollment protocols: EST, ACME, and REST API
View issued certificates
Prerequisites
Before you begin, you need a valid Microsoft Account to launch the PQC Lab Test Drive on the Azure Marketplace.
In addition, to use the EJBCA Client CLI, you need Java installed.
This 30-day trial includes the components EJBCA Enterprise, MariaDB, and WildFly version 26.1.3. Azure automatically terminates the instance after 30 days so do not put any data on this host that you want to retain. You can export your configurations before the 30-day period using the EJBCA user interface.
The PQC Lab Test Drive is designed as a demonstration instance and is not a production-grade server.
Launch the Keyfactor Test Drive Instance
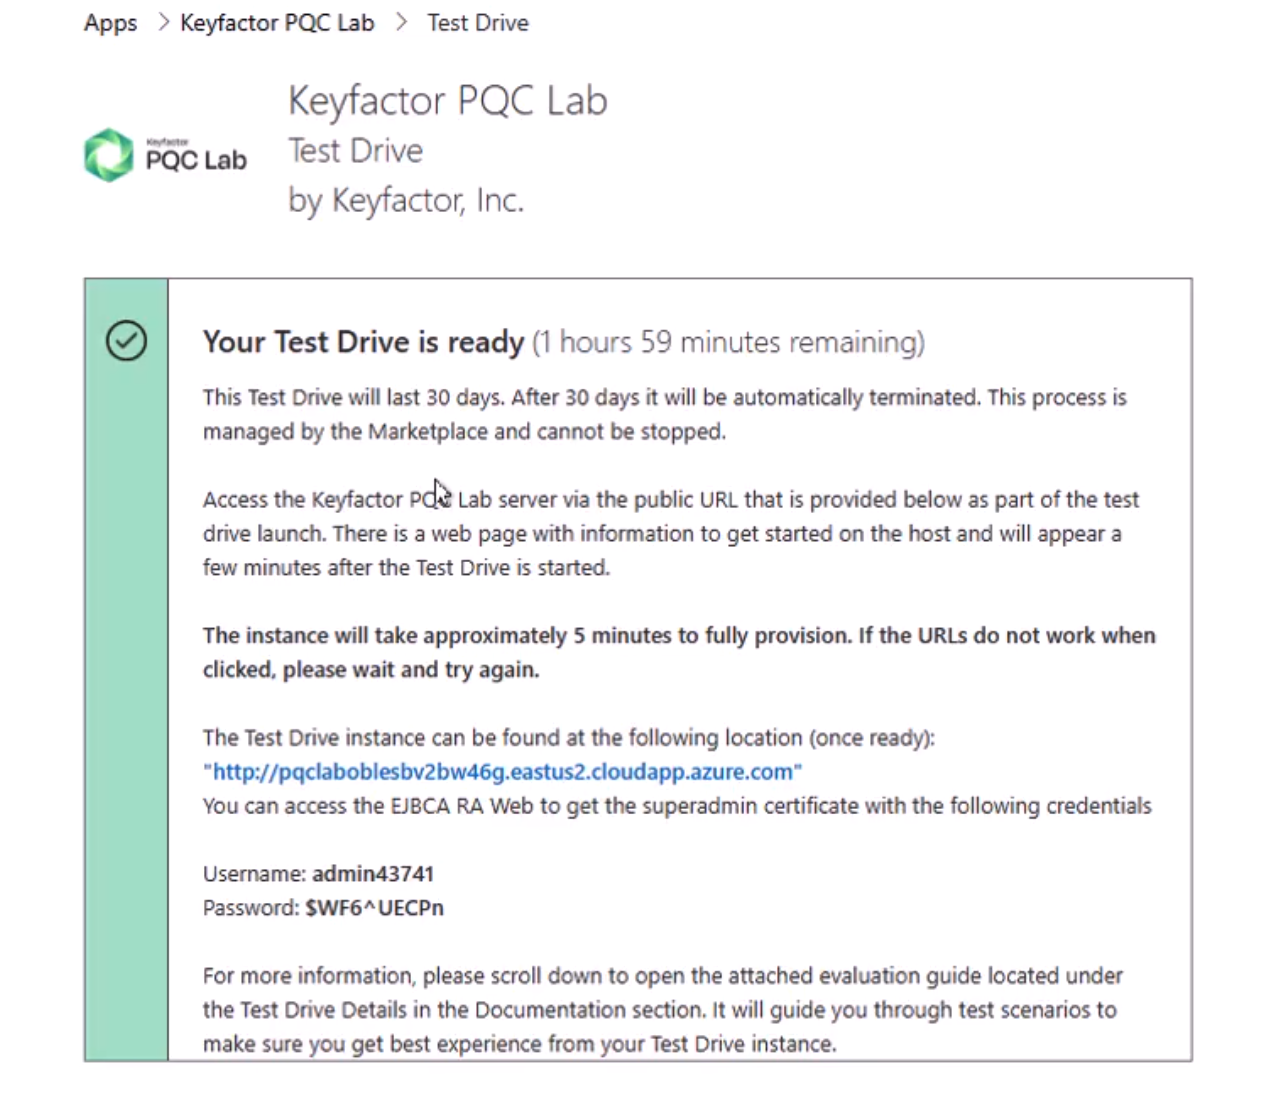
Navigate to Keyfactor PQC Lab on the Azure Marketplace and click Test Drive.
During the Test Drive launch, you are provided with the location and credentials to access all the Keyfactor resources on the instance. The values are generated specifically for your instance and will expire in 30 days. Make a secure note of the credentials as you will use the username and password to retrieve the EJBCA administrator certificate.

The instance will take approximately 30 minutes to complete. Once completed, you will be brought to the complete Test Drive start page with some useful links.

Once ready, use the provided Test Drive instance URL and the username and password to access the EJBCA RA user interface and retrieve the administrator (superadmin) certificate.
Follow this tutorial video that walks you through the step-by-step process of issuing PQC certificates using standard protocols and APIs like REST, EST, and ACME.
Access EJBCA
To access EJBCA, the credentials need to be retrieved from the server and installed in your browser. We recommend using Mozilla Firefox as it has self-enrollment capabilities and its own keystore separate from the operating system.
Step 1 - Download the EJBCA administrator certificate
Access the EJBCA RA interface to retrieve the administrator (Superadmin) certificate, using the username and password provided by the test drive in the Azure Marketplace.
To download the certificate:
In your browser, navigate to the EJBCA RA interface.
 If you selected the EJBCA Registration Authority Web Superadmin Enrollment link on the start page, the username will be populated for you. The enrollment code is the password that was supplied to you during the Azure Test Drive provisioning process.
A browser warning is shown if you have not added the Management CA to the list of trusted roots in your certificate store. Click through the security warning, and accept the risk and continue.
To enroll, select Enroll > Use Username and specify the following:
Username: Enter the Administrator username that was provided to you in the Azure marketplace when you launched the instance.
Enrollment code: Enter the Administrator password that was provided to you in the Azure marketplace when you launched the instance.
Click Check.
For Key algorithm, select RSA 2048 bits to limit the type of keys to be used.
Click Download PKCS#12 to download and save the keystore.
The P12 file is now downloaded to your download directory.
Step 2 - Import certificate into browser
Next, add the downloaded P12 keystore to your browser's certificate store.
The procedure for importing a certificate may vary depending on the web browser you are using. This example describes how to import a certificate to Mozilla Firefox.
To import the certificate in your browser:
Open the Firefox application menu and click Settings.
Go to Privacy & Security and in the Security section, click View Certificates.
On the Your Certificates tab, select Import.
Browse to the downloaded P12 file, select the file, and click OK.
Enter the password you specified as the enrollment code in the previous step, and click Sign in.
Click OK to close the Firefox Certificate Manager.
The administrator certificate is now imported and installed in your browser.
Step 3 - Access EJBCA
To access EJBCA using the certificate you just installed:
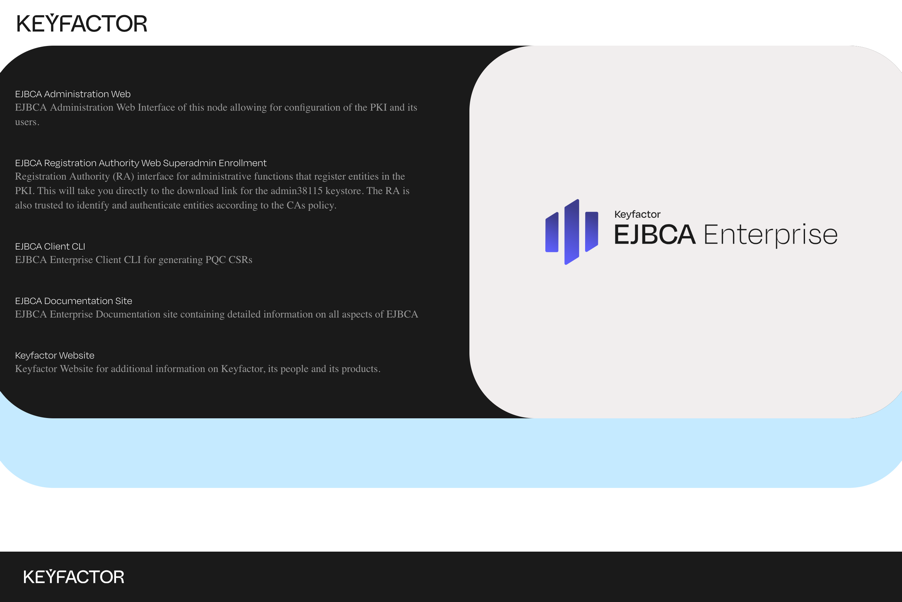
On the Test Drive start page, click the EJBCA Administration Web or point your browser to https://<localhost>/ejbca/adminweb/ to access EJBCA using the imported certificate.
When prompted with a request for your browser to use the imported certificate, click OK to access EJBCA with the certificate.
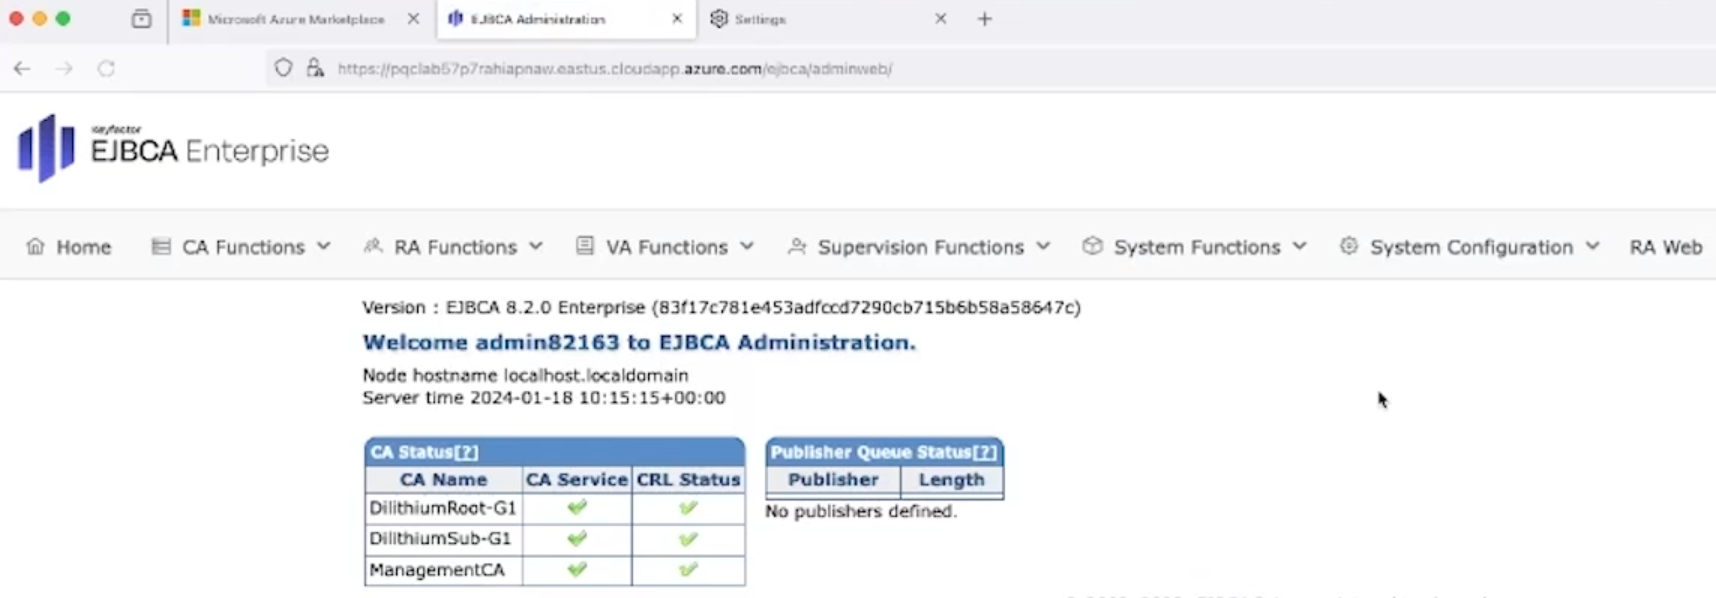
EJBCA opens displaying the administration page.

Along with the Management CA, a Dilithium Root CA (trust anchor) and a Dilithium Subordinate CA are listed among the certificate authorities.
Download EJBCA Client CLI
Download the EJBCA Enterprise Client CLI that will allow you to generate PQC Certificate Signing Requests (CSRs) with Dilithium.
Navigate to the Test Drive instance start page.
Click EJBCA Client CLI to download the EJBCA CLI file.
In your terminal, in the downloads directory, unzip the EJBCA Client CLI ZIP file.
Issue PQC certificates
The following provides steps to enroll for a certificate using the enrollment protocols ACME, EST, and EJBCA REST API.
EST
To generate a CSR and enroll for a certificate using the Enrollment over Secure Transport (EST) protocol with basic authentication, follow these steps:
Open a terminal window and change to the unzipped EJBCA Client CLI directory.
Create a new directory for the EST enrollment:
CODE$ mkdir est && cd estGenerate a CSR:
CODE$ ../ejbca-cli/ejbca.sh gencsr --keyalg DILITHIUM3 --subjectdn "C=ZZ,O=Keyfactor PQC Lab,OU=Devices,CN=pqc-EstTestDevice01"Convert the CSR to DER encoding:
CODE$ openssl req -inform PEM -outform DER -in certificateSigningRequest.csr -out pqc-estTestDevice01.csrDownload the Dilithium CA certificate:
CODE$ curl -k https://<EJBCA FQDN>/.well-known/est/pcqra/cacerts -o cacerts.p7Base64 encode the CSR:
CODE$ openssl base64 -in pqc-estTestDevice01.csr -out pqc-estTestDevice01.b64 -eEnroll for a certificate using the EST protocol with basic authentication:
CODE$ curl -kv --user "pqcclient:foo123" --data @pqc-estTestDevice01.b64 -o pqc-estTestDevice01-p7.b64 -H "Content-Type: application/pkcs10" -H "Content-Transfer-Encoding: base64" https://<EJBCA FQDN>/.well-known/est/pcqra/simpleenrollConvert the response into a PEM encoded certificate:
CODE$openssl base64 -in pqc-estTestDevice01-p7.b64 -out pqc-estTestDevice01-p7.der -d openssl pkcs7 -inform DER -in pqc-estTestDevice01-p7.der -print_certs -out pqc-estTestDevice01-cert.pemReview the certificate with OpenSSL:
CODE$ openssl x509 -noout -text -in pqc-estTestDevice01-cert.pemChange back to the root of the EJBCA CLI directory:
CODE$ cd ../
ACME
To generate a CSR and enroll for a certificate using the Automatic Certificate Management Environment (ACME) protocol and the ACME Certbot client, follow these steps:
Create a new directory for the ACME enrollment:
CODE$ mkdir acme && cd acmeGenerate a CSR:
CODE$ ../ejbca-cli/ejbca.sh gencsr --keyalg DILITHIUM3 --subjectdn "C=ZZ,O=Keyfactor PQC Lab,OU=Devices,CN=<DNS RESOLVABLE FQDN>" --subjectaltname "dNSName=<DNS RESOLVABLE FQDN>"Copy the CSR to a host that has an ACME client such as Certbot installed using SCP.
SSH to the ACME host.
Enroll for a certificate using the ACME certbot client:
CODE$sudo certbot certonly --standalone --server https://<EJBCA FQDN>/ejbca/acme/pqcdilithium/directory --agree-tos --email your.email@yourdomain.com --no-eff-email --no-verify-ssl --csr pqc.csrParse the certificate with OpenSSL:
CODE$ openssl x509 -noout -text -in 0000_cert.pemLogout of the remote session.
Change back to the root of the EJBCA CLI directory.
CODE$ cd ../
REST API
To generate a CSR and enroll for a certificate using the EJBCA REST API and the REST API enrollment script, follow these steps:
Create a new directory for the REST API enrollment:
CODE$ mkdir rest && cd restDownload the REST API enrollment script:
CODE$ curl -LO https://github.com/Keyfactor/keyfactorcommunity/blob/main/apps-integration/ejbca-rest-api/pkcs10Enroll.shDownload the Management CA certificate from the EJBCA instance:
CODE$ curl -k https://<EJBCA FQDN>/ejbca/ra/cert\?caid\=-1782614762\&chain\=false\&format\=pem -o ManagementCA.pemGenerate a CSR:
CODE$ ../ejbca-cli/ejbca.sh gencsr --keyalg DILITHIUM3 --subjectdn "C=ZZ,O=Keyfactor PQC Lab,OU=Devices,CN=pqc-RestTestDevice01"Enroll for a certificate using the pkcs10Enroll.sh script:
CODE$ ./pkcs10Enroll.sh -c certificateSigningRequest.csr -P ../admin82163.p12 \ -s foo123 -H <EJBCA FQDN> -u pqc-RestTestDevice01 \ -p "dilithiumDeviceAuthentication-1y" -e "pqcDeviceAuth" -n DilithiumSub-G1Parse the certificate with OpenSSL:
CODE$ openssl x509 -text -noout -in pqc-RestTestDevice01.crtChange back to the root of the EJBCA CLI directory:
CODEcd ../
You have now obtained Dilithium certificates out of the enrollment protocols ACME, EST, and EJBCA REST API.
View issued certificates
To view the PQC certificates you have issued, do the following:
Navigate to the Test Drive start page.
Click the EJBCA Administration Web link.
On the EJBCA administration page, click the menu option RA Web.
Click Search > Certificates and enter PQC in the search field.
The issued PQC certificates are listed in the overview.
You can display detailed information about the certificates by clicking View.
Next steps
This tutorial has demonstrated how you can use the PQC Lab on Azure to try post-quantum cryptography and generate your own quantum-safe certificates with EJBCA.
To explore other tools and resources and get ready for the quantum leap, go to the Keyfactor PQC Lab webpage.
.png)