This section describes how to launch SignServer Enterprise Cloud from AWS Marketplace.
All operating system and installed software patches are current at the time the image is published to the marketplace. After deployment, the image runs within the customer’s environment, and Keyfactor does not have access to manage updates. Customers are responsible for maintaining the image and applying ongoing security and software updates.
The EC2 Console is a web interface that allows you to configure the SignServer Cloud instance details from a web browser before you launch it. Follow the instructions below to launch a SignServer Cloud EC2 instance:
Step 1: Select SignServer Cloud Instance
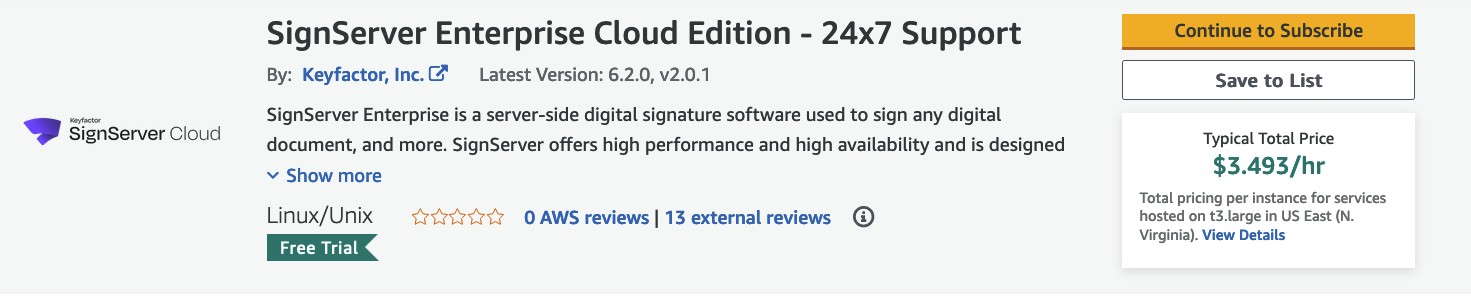
Locate SignServer Cloud on AWS Marketplace
Browse to the AWS Marketplace and search for "keyfactor" to display results.
Select the instance type to use and click the title of the desired listing, in this case SignServer Enterprise Cloud Edition 24x7 Support. Review the details and click Continue to Subscribe.
Accept the Terms
Click Accept Terms to agree to the terms of use and subscribe.
Continue to Configuration
Review the terms and click Continue to Configuration to review your instance.
Step 2: Configure SignServer Cloud
Select the options desired for Software Version and Region. The defaults should be sufficient.
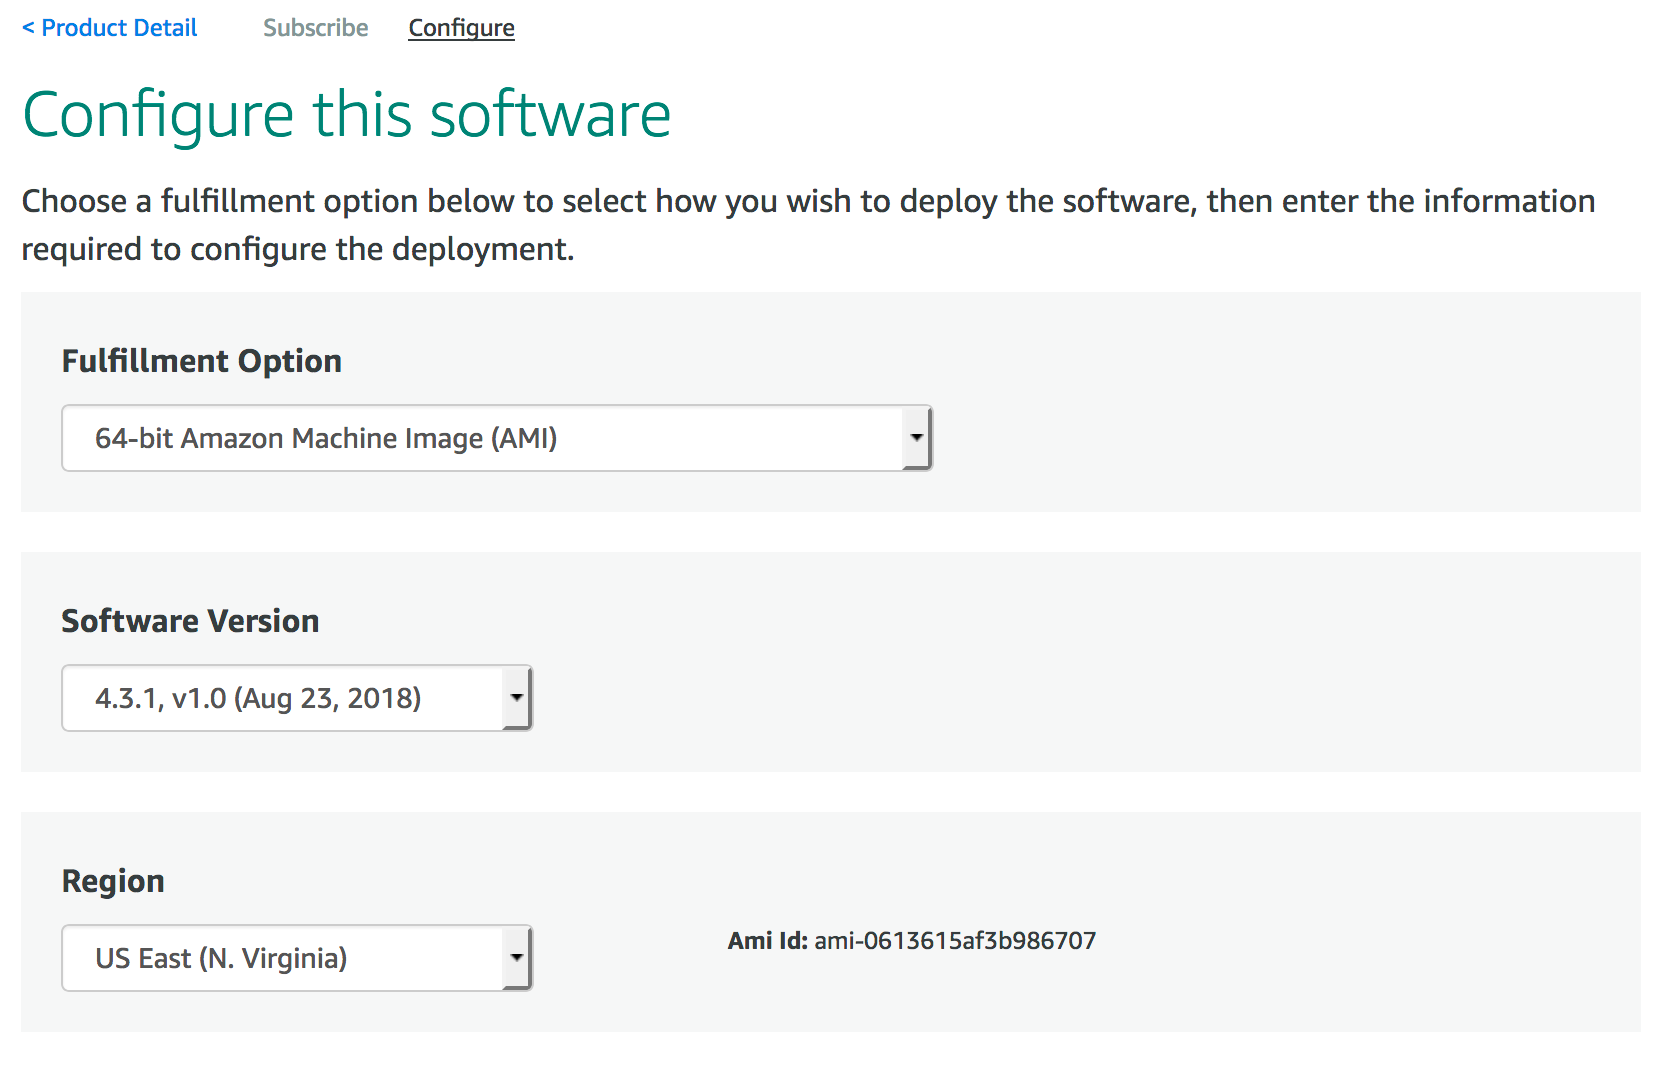
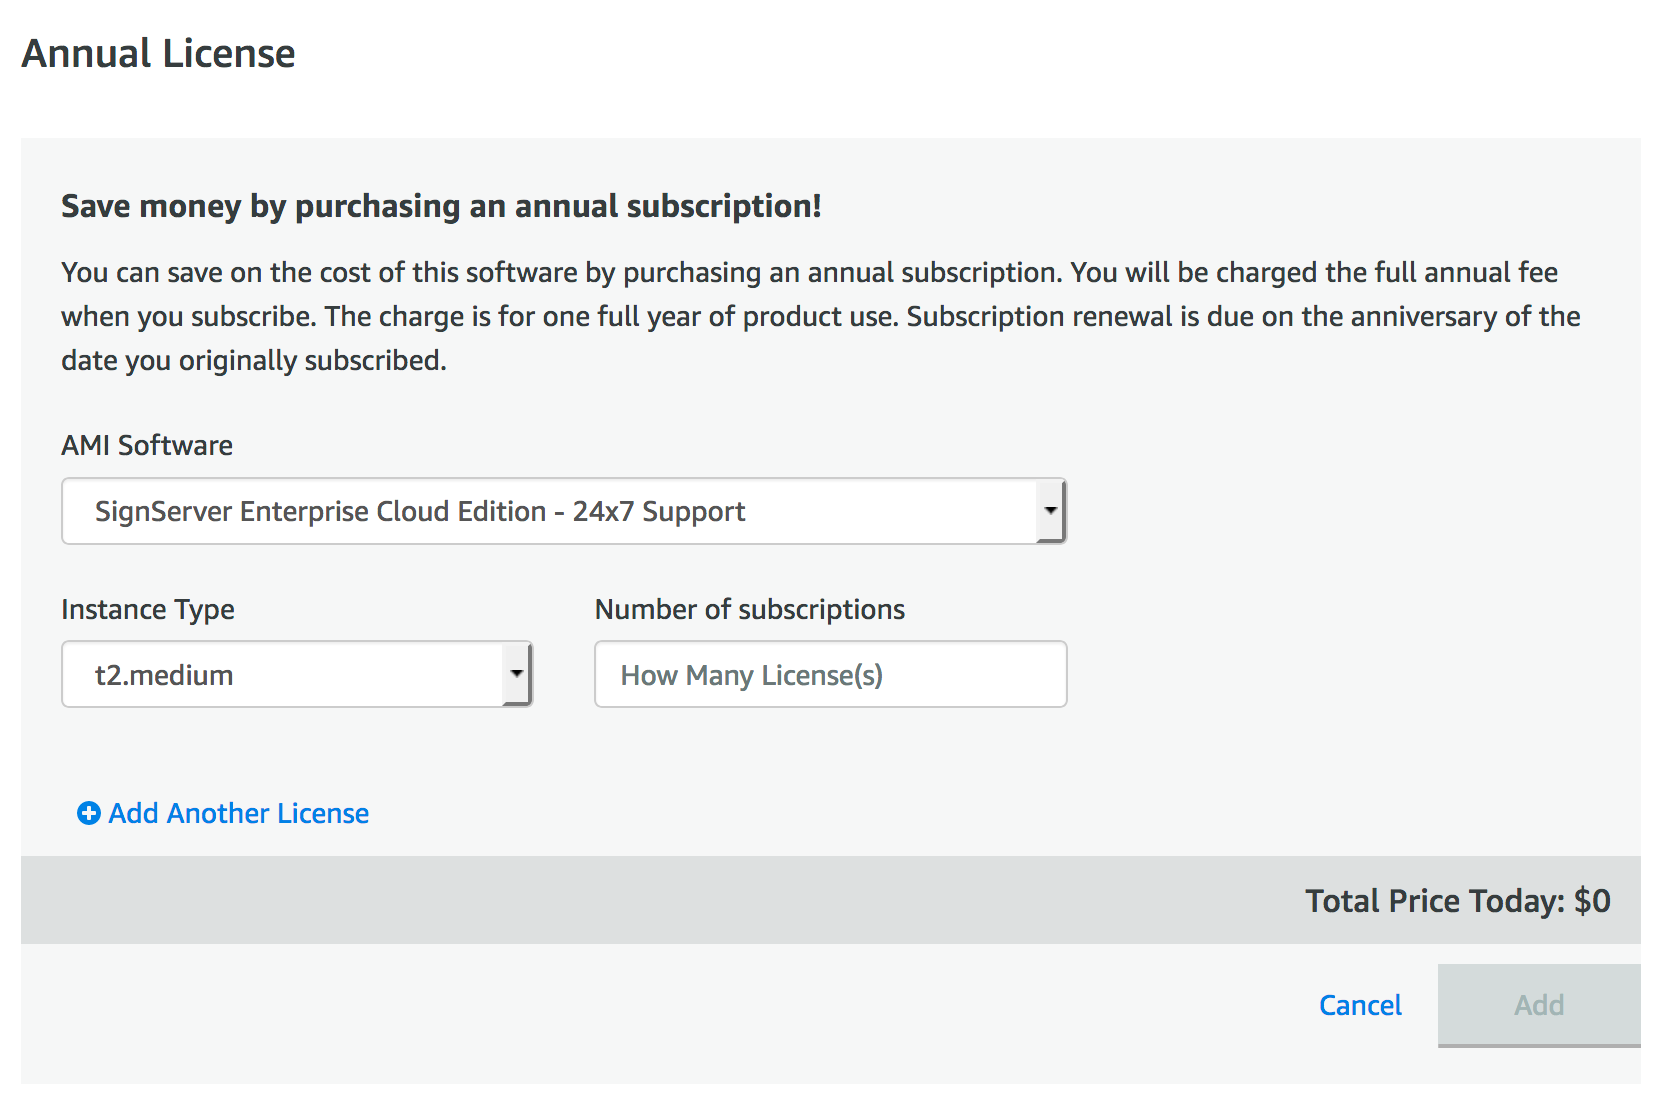
Optionally, you can select an annual option to save 20% off the AWS list price. Skip this section if this is not desired. If you choose this option, select the Instance Type, and number of subscriptions desired.
Click Continue to Launch to continue the setup.

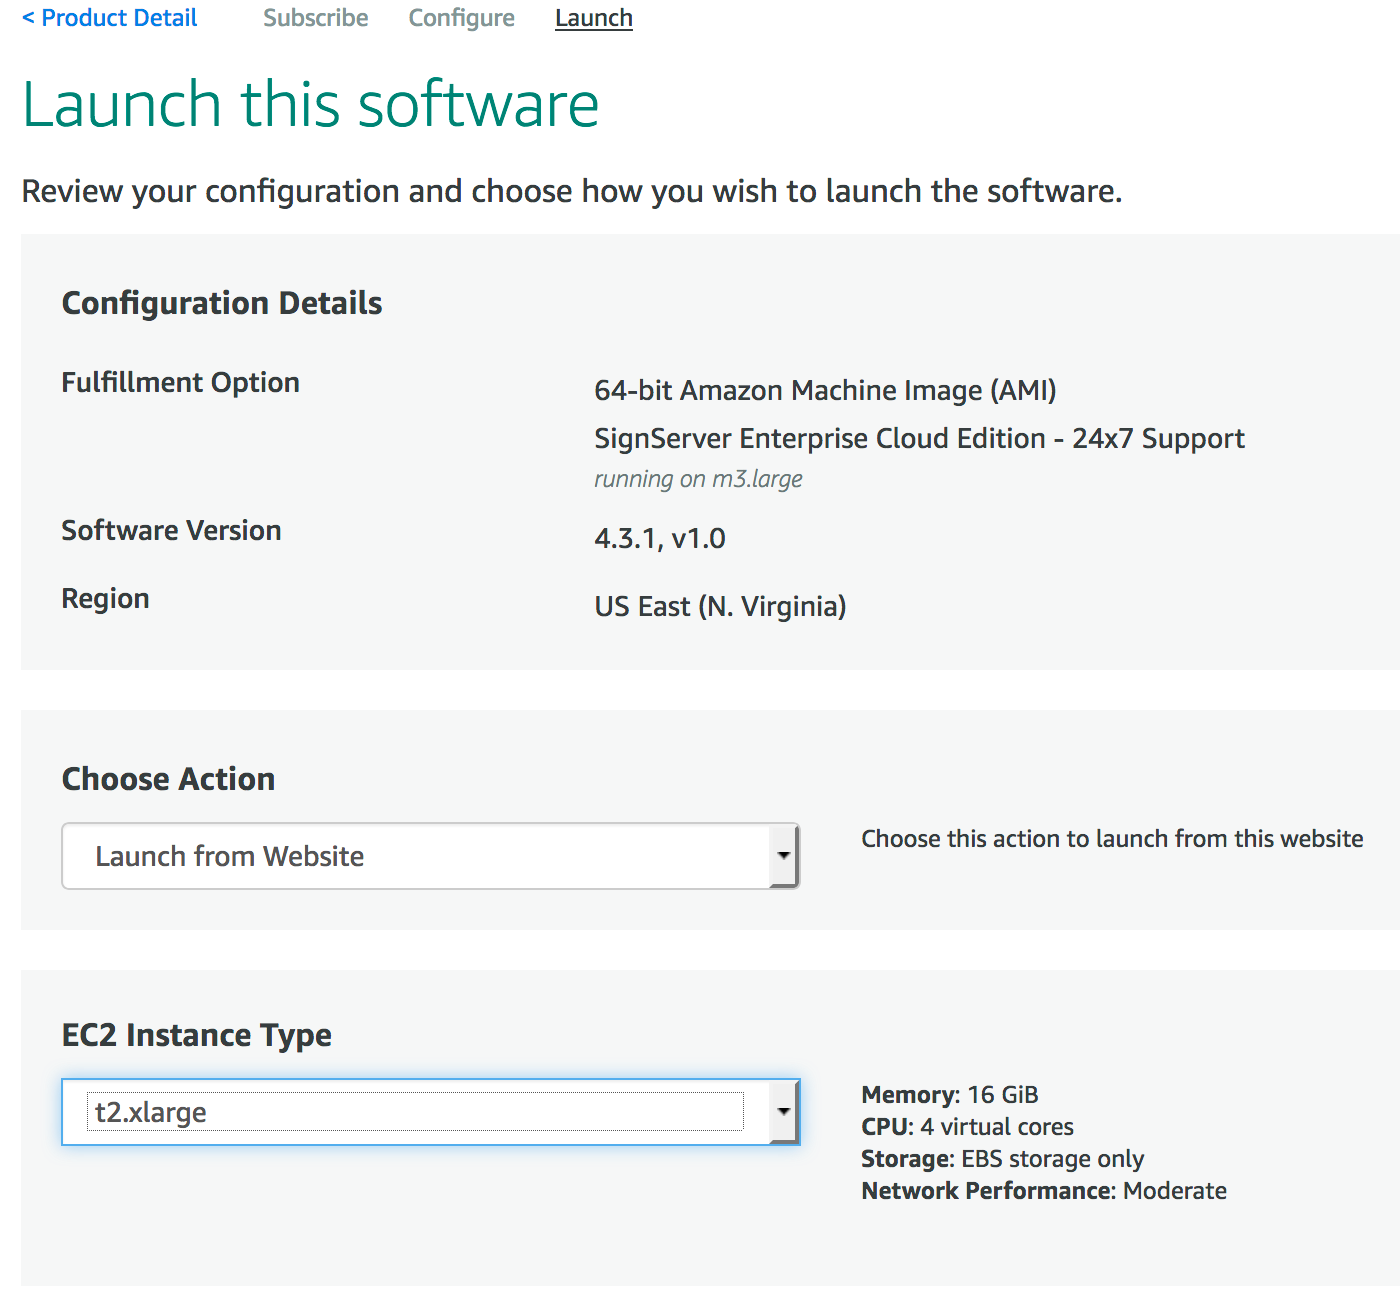
Step 3: Launch SignServer Cloud
Review your configuration and select instance type and settings.
Instance Type
Amazon EC2 provides a selection of instance types optimized to fit different use cases. Instance types comprise varying combinations of CPU, memory, and storage.
The following instance types are available:
|
Size Type |
Memory |
CPU |
Storage |
|---|---|---|---|
|
m3.large |
7 GiB |
6.5 EC2 Compute Units (2 virtual cores with 3.25 EC2 Compute Units each) |
1 x 32 GB SSD |
|
t2.2xlarge |
32 GiB |
8 virtual cores |
EBS storage only |
|
t2.xlarge |
16 GiB |
4 virtual cores |
EBS storage only |
|
t2.medium |
4 GiB |
2 virtual cores |
EBS storage only |
Select one of the supported instance types, in this case t2.xlarge.
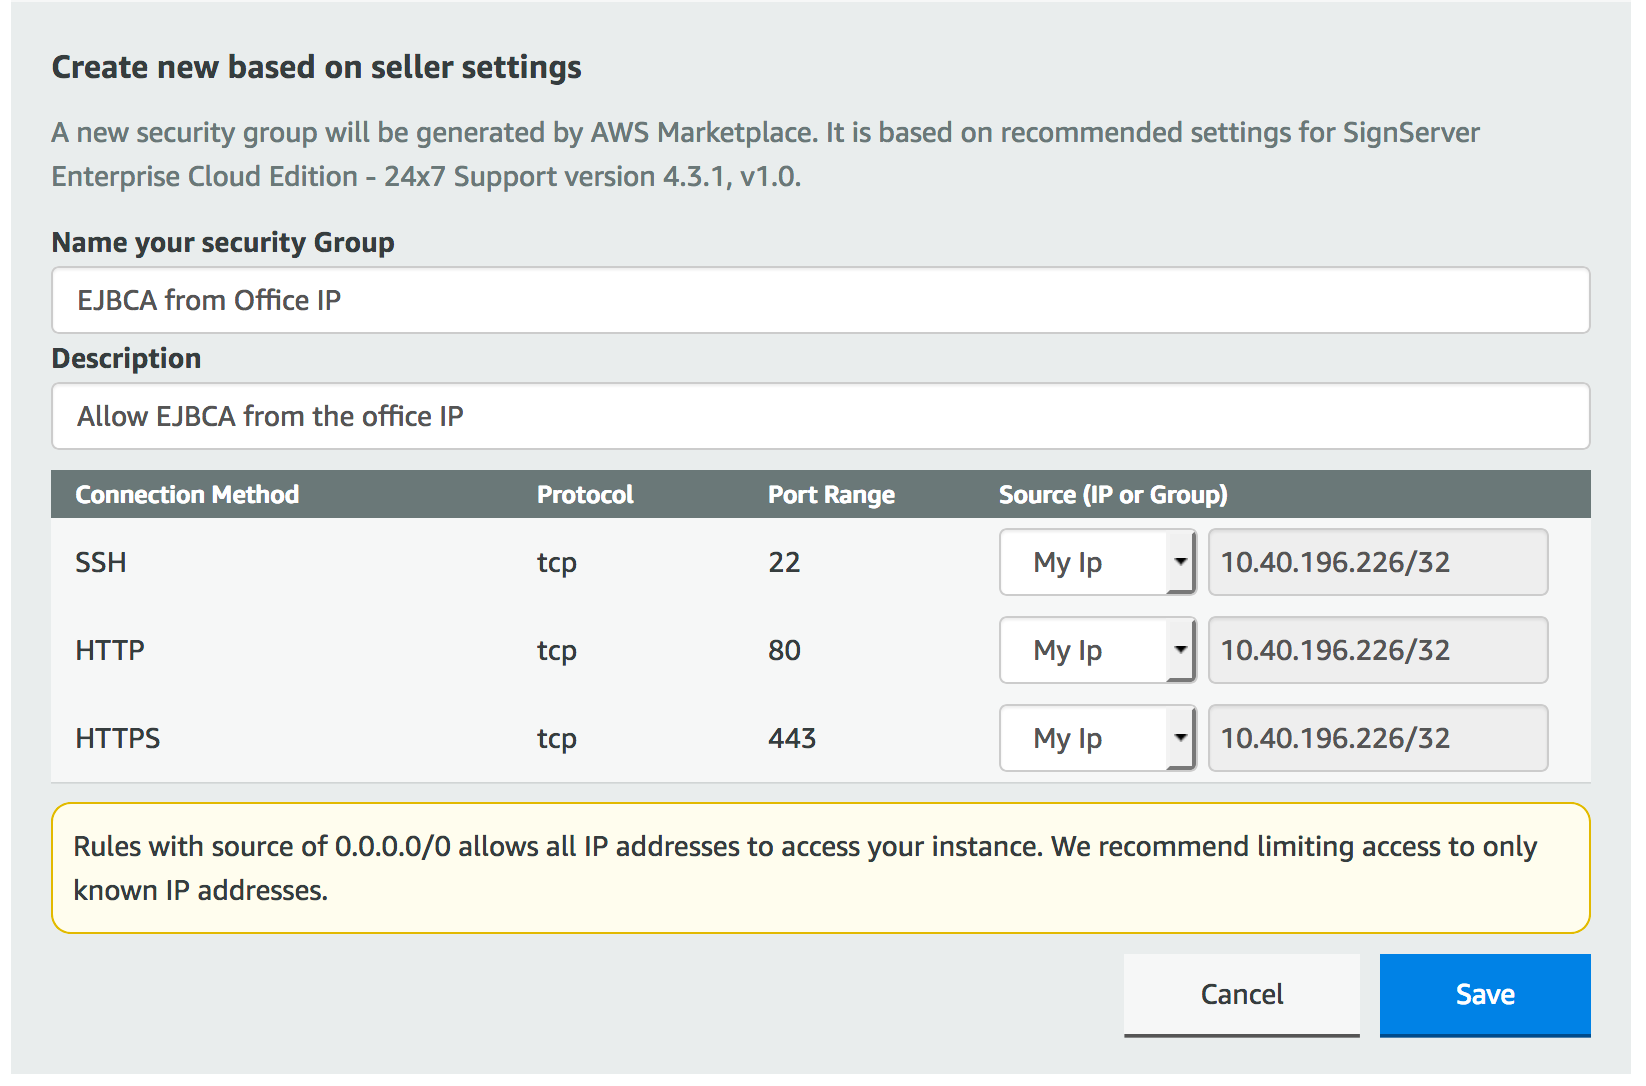
VPC and Security Group
Select the desired VPC and Subnet. For more information on getting started with Amazon Virtual Private Cloud (Amazon VPC), refer to AWS Documentation on VPCs and Subnets.

For the Security Group, click the button that allows Create New Based on Seller Settings.

If you wish to create your own Security Group, you need to allow port range 80, 443 and 22. For details, see VPC and Security Group.
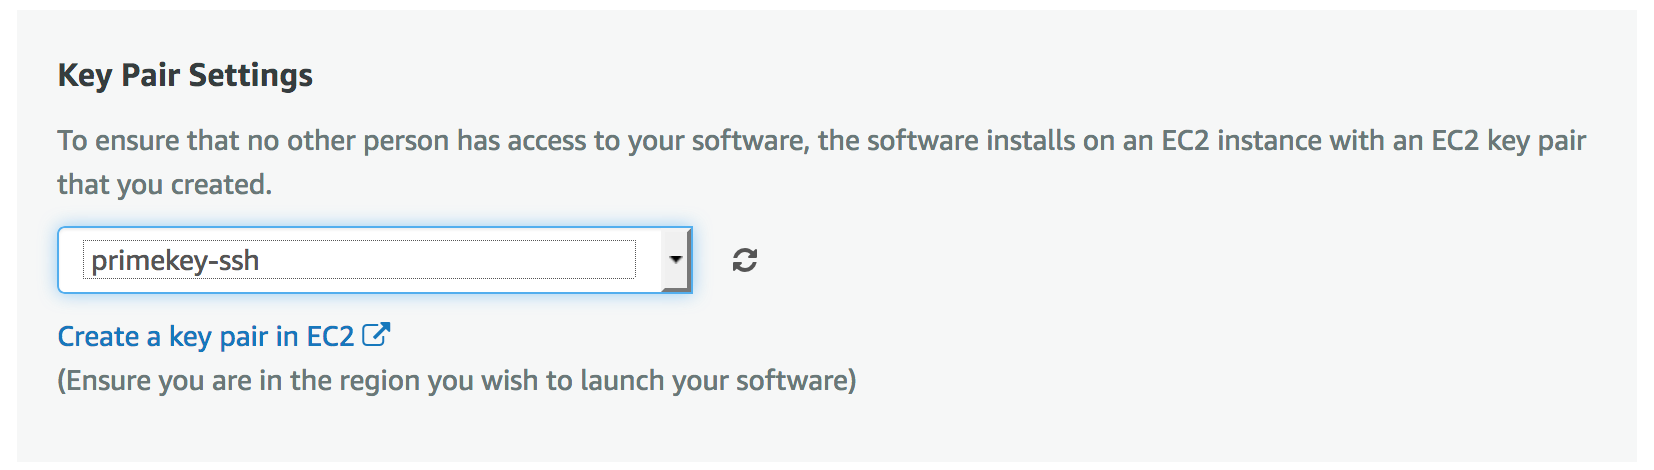
Key Pair
Choose a Key Pair to associate with this SignServer Enterprise Cloud Edition EC2 instance.
Specify the name of the key pair you plan to use to access the command line of the SignServer instance. When you later connect to the instance, you must specify the private key that corresponds to the key pair you specify now when launching the instance. For information on creating a key pair using Amazon EC2, refer to AWS Documentation on Amazon EC2 Key Pairs.
Click Save and then click Launch.

Step 4: View Software Installation Details and Status
After launching, the AMI details are displayed, and the status of the deployment is available in the EC2 Dashboard.
Click EC2 Console to view your instance.
Confirm Running SignServer Cloud Instance
It may take several minutes for your instance to launch. After the Instance State changes from pending to running, the SignServer Cloud instance is started.

Click the pencil icon in the Name column 
