.png)
This guide upgrades a single node from SignServer Enterprise version 5.4.0 to SignServer Enterprise 5.5.0. In this example, the SignServer host has an IP Address of 172.1617.130. Change this IP address to be the IP Address that matches the SignServer node being upgraded.
Download the SignServer binary file from your customer download folder or obtain a copy from support at support@primekey.com.
-
Copy the upgrade package to the SignServer node using one of the following methods:
-
Using the CLI:
If using a Mac or Linux based computer, use the following command to copy the file to the host. If using AWS, ensure you specify the user as ec2-user with your SSH key and in Azure, specify the user provisioned with your instance.scp ~/Downloads/signserver-ee-5.5.0.Final-bin.zip root@172.16.17.130:/opt/dist/ -
Using a program such as WinSCP or CyberDuck:
Click Open Connection.
Enter the host credentials and click connect.
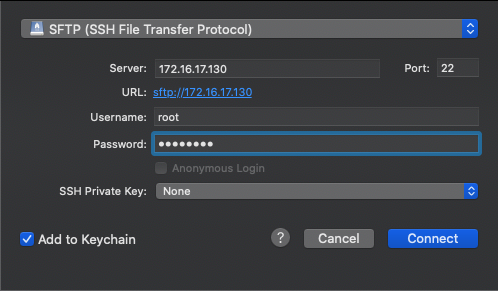
Select the
/opt/distdirectory.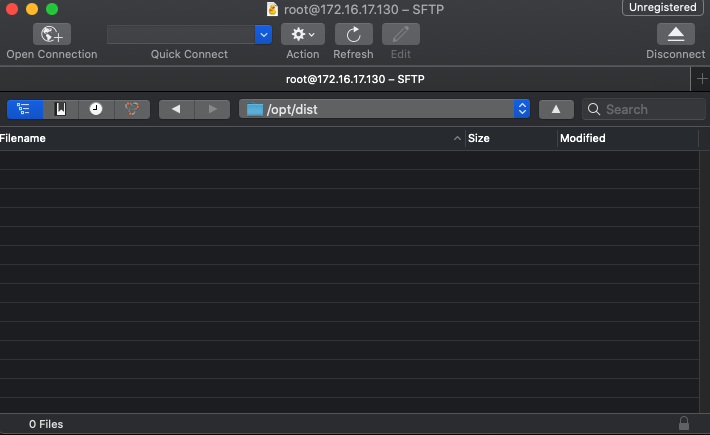
Drag and drop the file to the SignServer host in the
/opt/distdirectory.
-
-
SSH to the SignServer host and log in as root.
ssh root@172.16.17.130 -
Change directory to the
/optdirectory.cd /opt -
Unzip the upgrade file into the
/opt/directory.unzip dist/signserver-ee-5.5.0.Final-bin.zip -
Ensure the file is extracted into the
/opt/directory by doing a directory listing.[root@signserver-node-01 opt]# ls -la total 0 drwxr-xr-x. 8 root root 148 May 15 17:34 . drwxr-xr-x. 17 root root 261 May 14 20:19 .. drwxr-xr-x. 2 root root 60 May 15 17:29 dist lrwxrwxrwx. 1 root root 22 May 14 18:20 signserver -> /opt/signserver-ee-5.4.0.Final/ drwxr-xr-x. 7 wildfly wildfly 80 May 14 20:22 signserver-ee-5.4.0.Final drwxr-xr-x 6 root root 52 May 14 12:20 signserver-ee-5.5.0.Final drwxr-xr-x. 6 wildfly wildfly 90 May 14 20:23 PrimeKey drwxr-xr-x. 3 root root 21 May 14 17:54 rh lrwxrwxrwx. 1 root root 25 May 14 18:03 wildfly -> /opt/wildfly-10.1.0.Final drwxr-xr-x. 10 wildfly wildfly 237 May 14 18:20 wildfly-10.1.0.Final [root@signserver-node-01 opt]# -
Copy the existing config files to the new SignServer install folder overwriting the default files with the existing files.
/bin/cp -f signserver/conf/*.properties signserver-ee-5.5.0.Final/conf/ -
Stop WildFly.
systemctl stop wildfly -
Remove
signserversymlink.rm signserver -
You are asked to remove the symbolic link. Select "y" and press enter.
rm: remove symbolic link ‘signserver’?
Make sure the command asks you to remove symbolic link.
-
Create a new symbolic link.
ln -s signserver-ee-5.5.0.Final signserver -
Ensure the symbolic link points to the new SignServer directory.
lrwxrwxrwx 1 root root 16 May 15 17:53 signserver -> signserver-ee-5.5.0.Final -
Change the ownership of the new SignServer files. Ensure the trailing "/" in the command below so the permissions of the directory are changed and not the symlink itself.
chown -R wildfly:wildfly /opt/signserver/ -
Copy the "signserver.ear" file to the WildFly deployments directory.
/bin/cp -f signserver/dist/signserver.ear /opt/wildfly/standalone/deployments/ -
Restart Wildfly.
systemctl start wildfly -
Ensure the new version of SignServer is 5.5.0 in the Admin UI.