SSL Configuration for Secure Replication
This step is optional but recommended. If SSL/TLS keys and certificates for encrypted Cluster Traffic are not desired, skip to the section Restarting and Verifying Cluster.
To perform these steps using openssl, follow the Galera guide available on: http://galeracluster.com/documentation-webpages/ssl.html.
This configuration guide assumes you are using EJBCA. To configure TLS with EJBCA, continue following the steps in this section. Otherwise, substitute similar steps for use with your PKI.
Configure EJBCA
EJBCA needs to be configured to have a certificate profile that allows the certificate permissions needed to be able to perform SSL replication functions.
Log into the EJBCA Admin GUI.
Select Certificate Profiles:
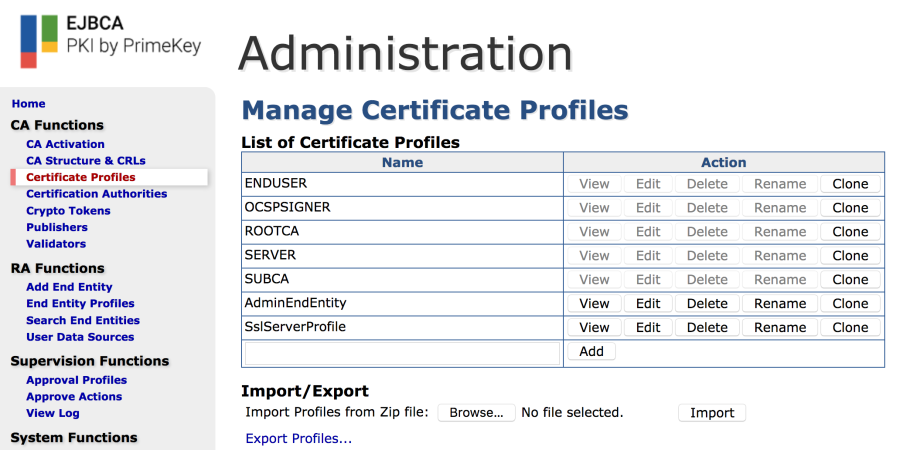
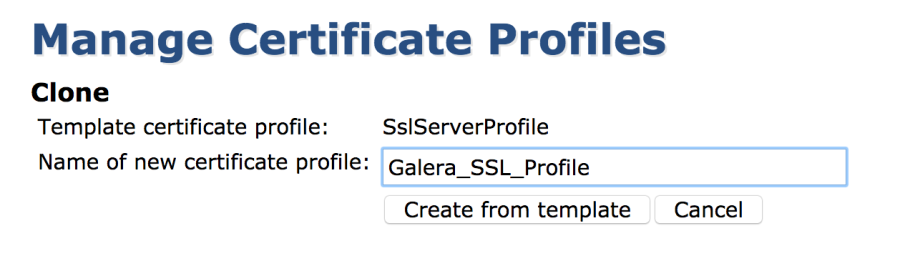
Click Clone for the SslServerProfile.
Enter a name for the certificate profile, for example "Galera_SSL_Profile".
Click Create from Template.
It will return back to the list of certificate profiles.
Click Edit on the Galera_SSL_Profile.
Certificates from this profile last 5 years by default. Cluster replication stops when the certificates expire. If it is desired to have certificates that last longer, edit the Validity or end date of the certificate to be the desired length of time, such as 10y 1d.
In the Extended Key Usage section, multi-select (Ctrl + click) both Client Authentication and Server Authentication.
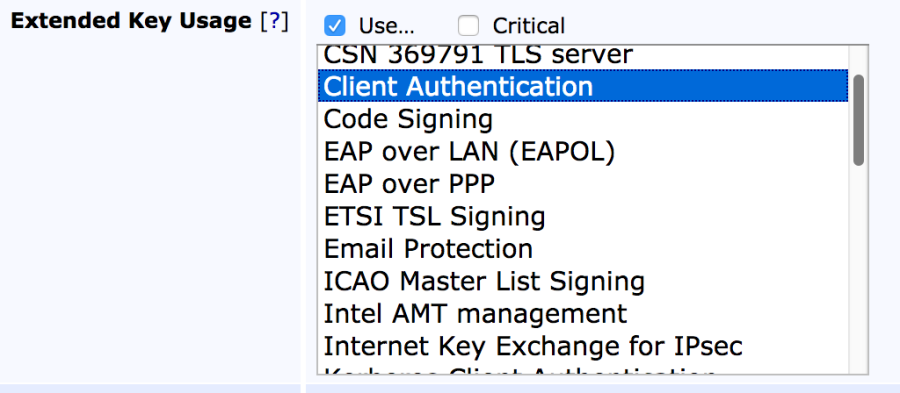
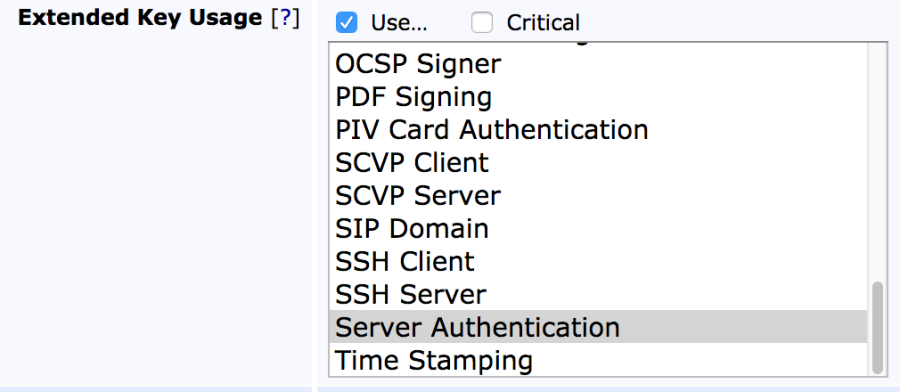
Click Save.
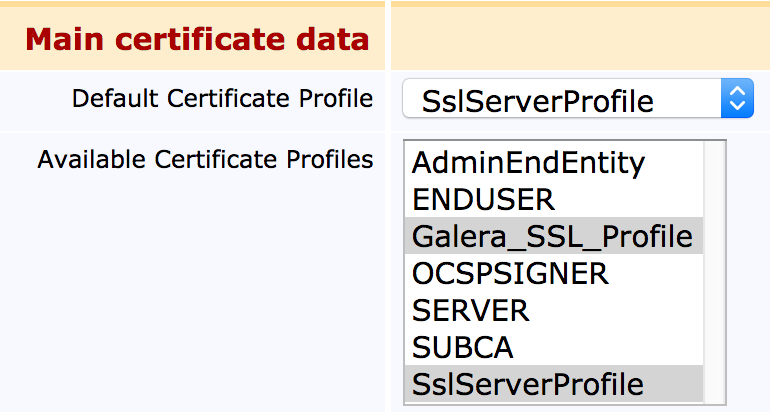
Navigate to End Entity Profiles, select the SslServerProfile, and click Edit End Entity Profile (a new one can also be created).
In the Available Certificate Profiles section, multi-select (Ctrl + click) so that Galera_SSL_Profile is added to the list of available profiles, and click Save.
Key and Certificate Generation for SSL Replication
Create a certificate and key for the nodes to communicate with via SSL. Galera needs access to the key and certificate so soft keys are required for this. EJBCA or OpenSSL can be used for the following steps. To use OpenSSL, refer to the Galera Clustering documentation.
SSH into your EJBCA instance and access the EJBCA CLI.
Change the Subject Alternative Names in the command to the IP addresses for each of the three nodes in the cluster. Change the
--canamevalue to be the name of the Issuing CA used, if desired.
# /opt/ejbca/bin/ejbca.sh ra addendentity --username repl_user --password "<PASSWORD>" --dn CN=localhost --altname "ipaddress=172.31.0.115, ipaddress=172.16.0.188, ipaddress=172.16.0.202" --caname "ManagementCA" --type 1 --token PEM --certprofile Galera_SSL_Profile --eeprofile SslServerProfileThe command creates the end entity with the proper fields specified, so the certificates can be used on all nodes in the cluste
Generate the certificate, key and CA cert onto the server for Galera to use by executing the following:
# /opt/ejbca/bin/ejbca.sh ra setclearpwd --username repl_user <PASSWORD>
# /opt/ejbca/bin/ejbca.sh batch --username repl_user
This outputs three certificates into the /opt/ejbca/p12/pem directory:
localhost-CA.pem: CA Certificate
localhost-Key.pem: System Key
localhost.pem: System Certificate
The certs and key are used on every node in this guide. A unique certificate can be created for each node by altering the EJBCA addendentity command above (changing username, dn, and altname values) to be unique for each node.
Copy these files to each of the SignServer nodes to be clustered. This should be done over a secure channel between the nodes, via SSH or whatever method meets the organizations security needs. Copy the files to
/home/ec2-user, then move them into the appropriate position in/etc/mysqlon each node.Once the copy is completed, move the files to the proper directory and change the permissions.
# mkdir /etc/mysql
# mv /home/ec2-user/localhost* /etc/mysql
# chown -R mysql.mysql /etc/mysql/
# chmod -R o-rwx /etc/mysql/
Change the permissions of the files on all nodes they are copied to.
Galera SSL Replication Node Specific Configuration
The following step needs to be done on all three SignServer nodes. Edit the /etc/my.cnf.d/server.cnf and change the server.cnf file to add in the wsrep_provider_options value with the proper certificate values. If the paths in this document have been used, the following can be copied and pasted into the server.cnf file on each node:
# vim /etc/my.cnf.d/server.cnf
# wsrep_provider_options="socket.ssl_key=/etc/mysql/localhost-Key.pem;socket.ssl_cert=/etc/mysql/localhost.pem;socket.ssl_ca=/etc/mysql/localhost-CA.pem;gcache.size=6G;gcache.page_size=512M; pc.npvo=true;"
The wsrep_provider_options line exists in the server.cnf already and can be uncommented if all the paths and file names have remained the same as in this documentation.