Security: Configuring an Entrust nShield HSM Devices
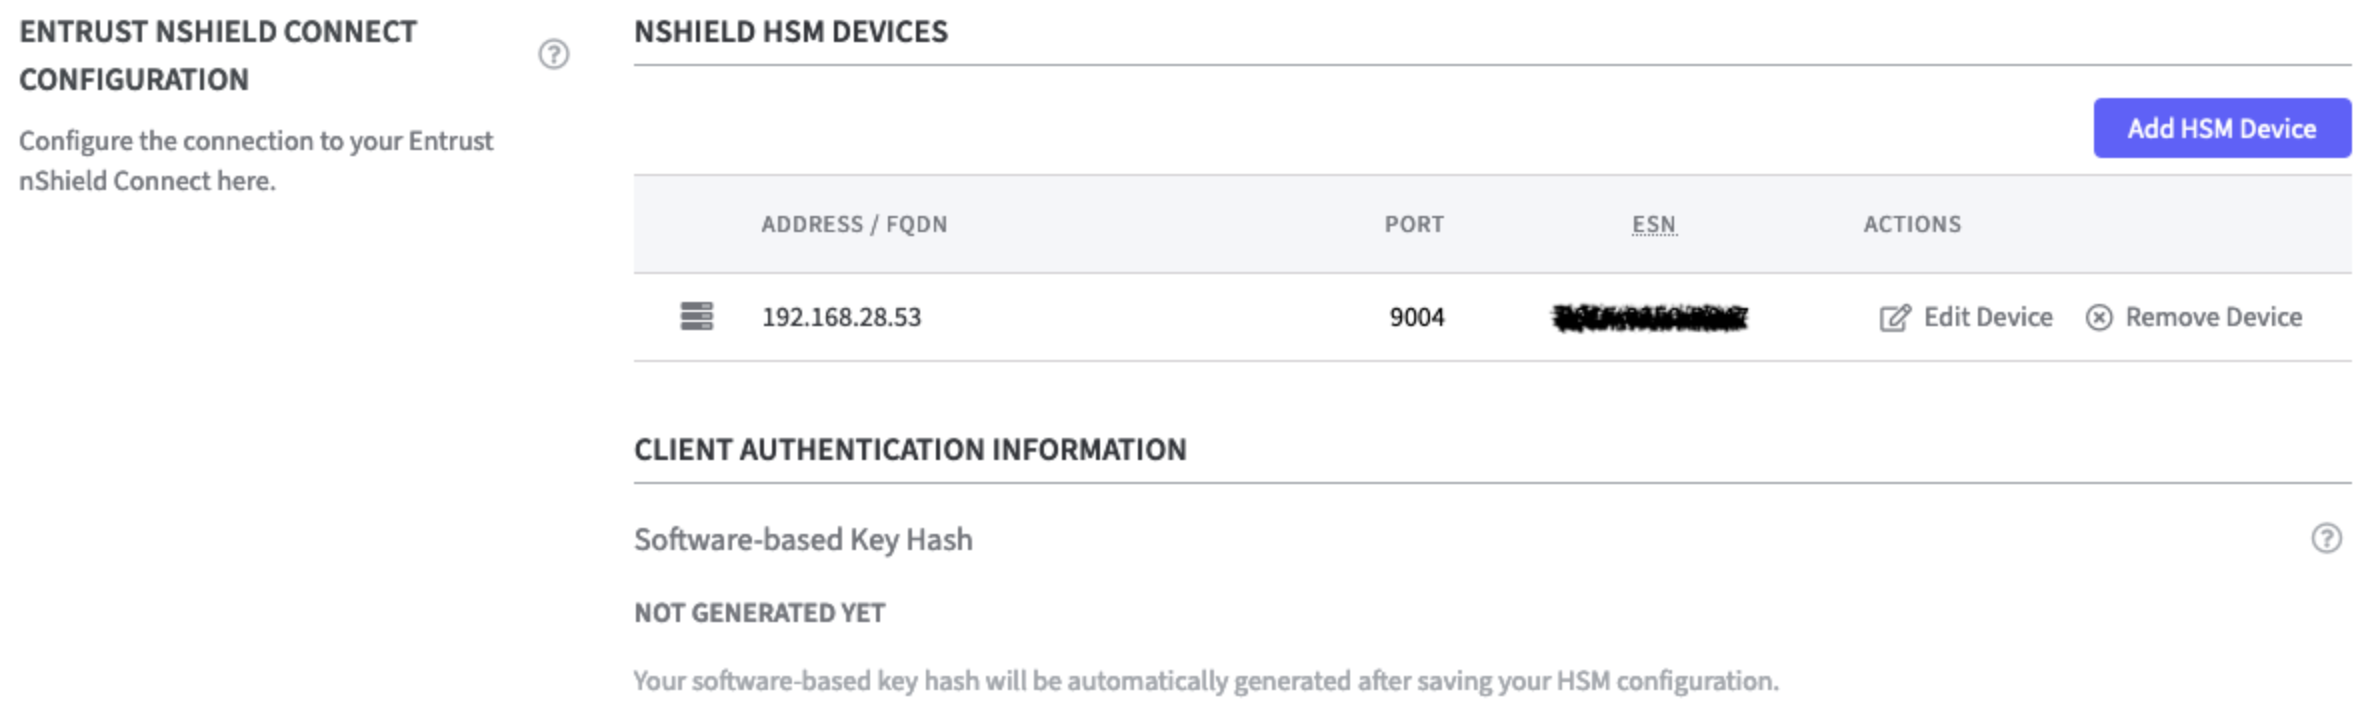
Entrust nShield HSM Devices
After connecting the Entrust nShield HSM the device is listed.
The Software-based Key Hash is not generated yet. To do so configure the RFS IP Address in the next step.
Remote File System Settings
In the Remote File Settings the following can be configured. Select the appropriate option.
RFS Mode:
Two options are available:
Readonly: (default)
Local changes are not synchronized with the RFS server. External changes are loaded from the RFS server every 2 minutes.Read and Write: (recommended)
Local changes are detected every 3 seconds and transmitted to the RFS server if necessary. External changes are loaded from the RFS server every 2 minutes.
RFS IP Address and RFS Port:
Enter the IP Address and the port of the RFS server.

Local Key Management Data:
Use the Wipe Local Key Management Data function to delete this data, including keys that have not yet been synchronized with the RFS.

A warning will appear asking you to confirm the decision. As confirmation type:WIPE LOCAL KEY MANAGEMENT DATA
in the confirmation field.
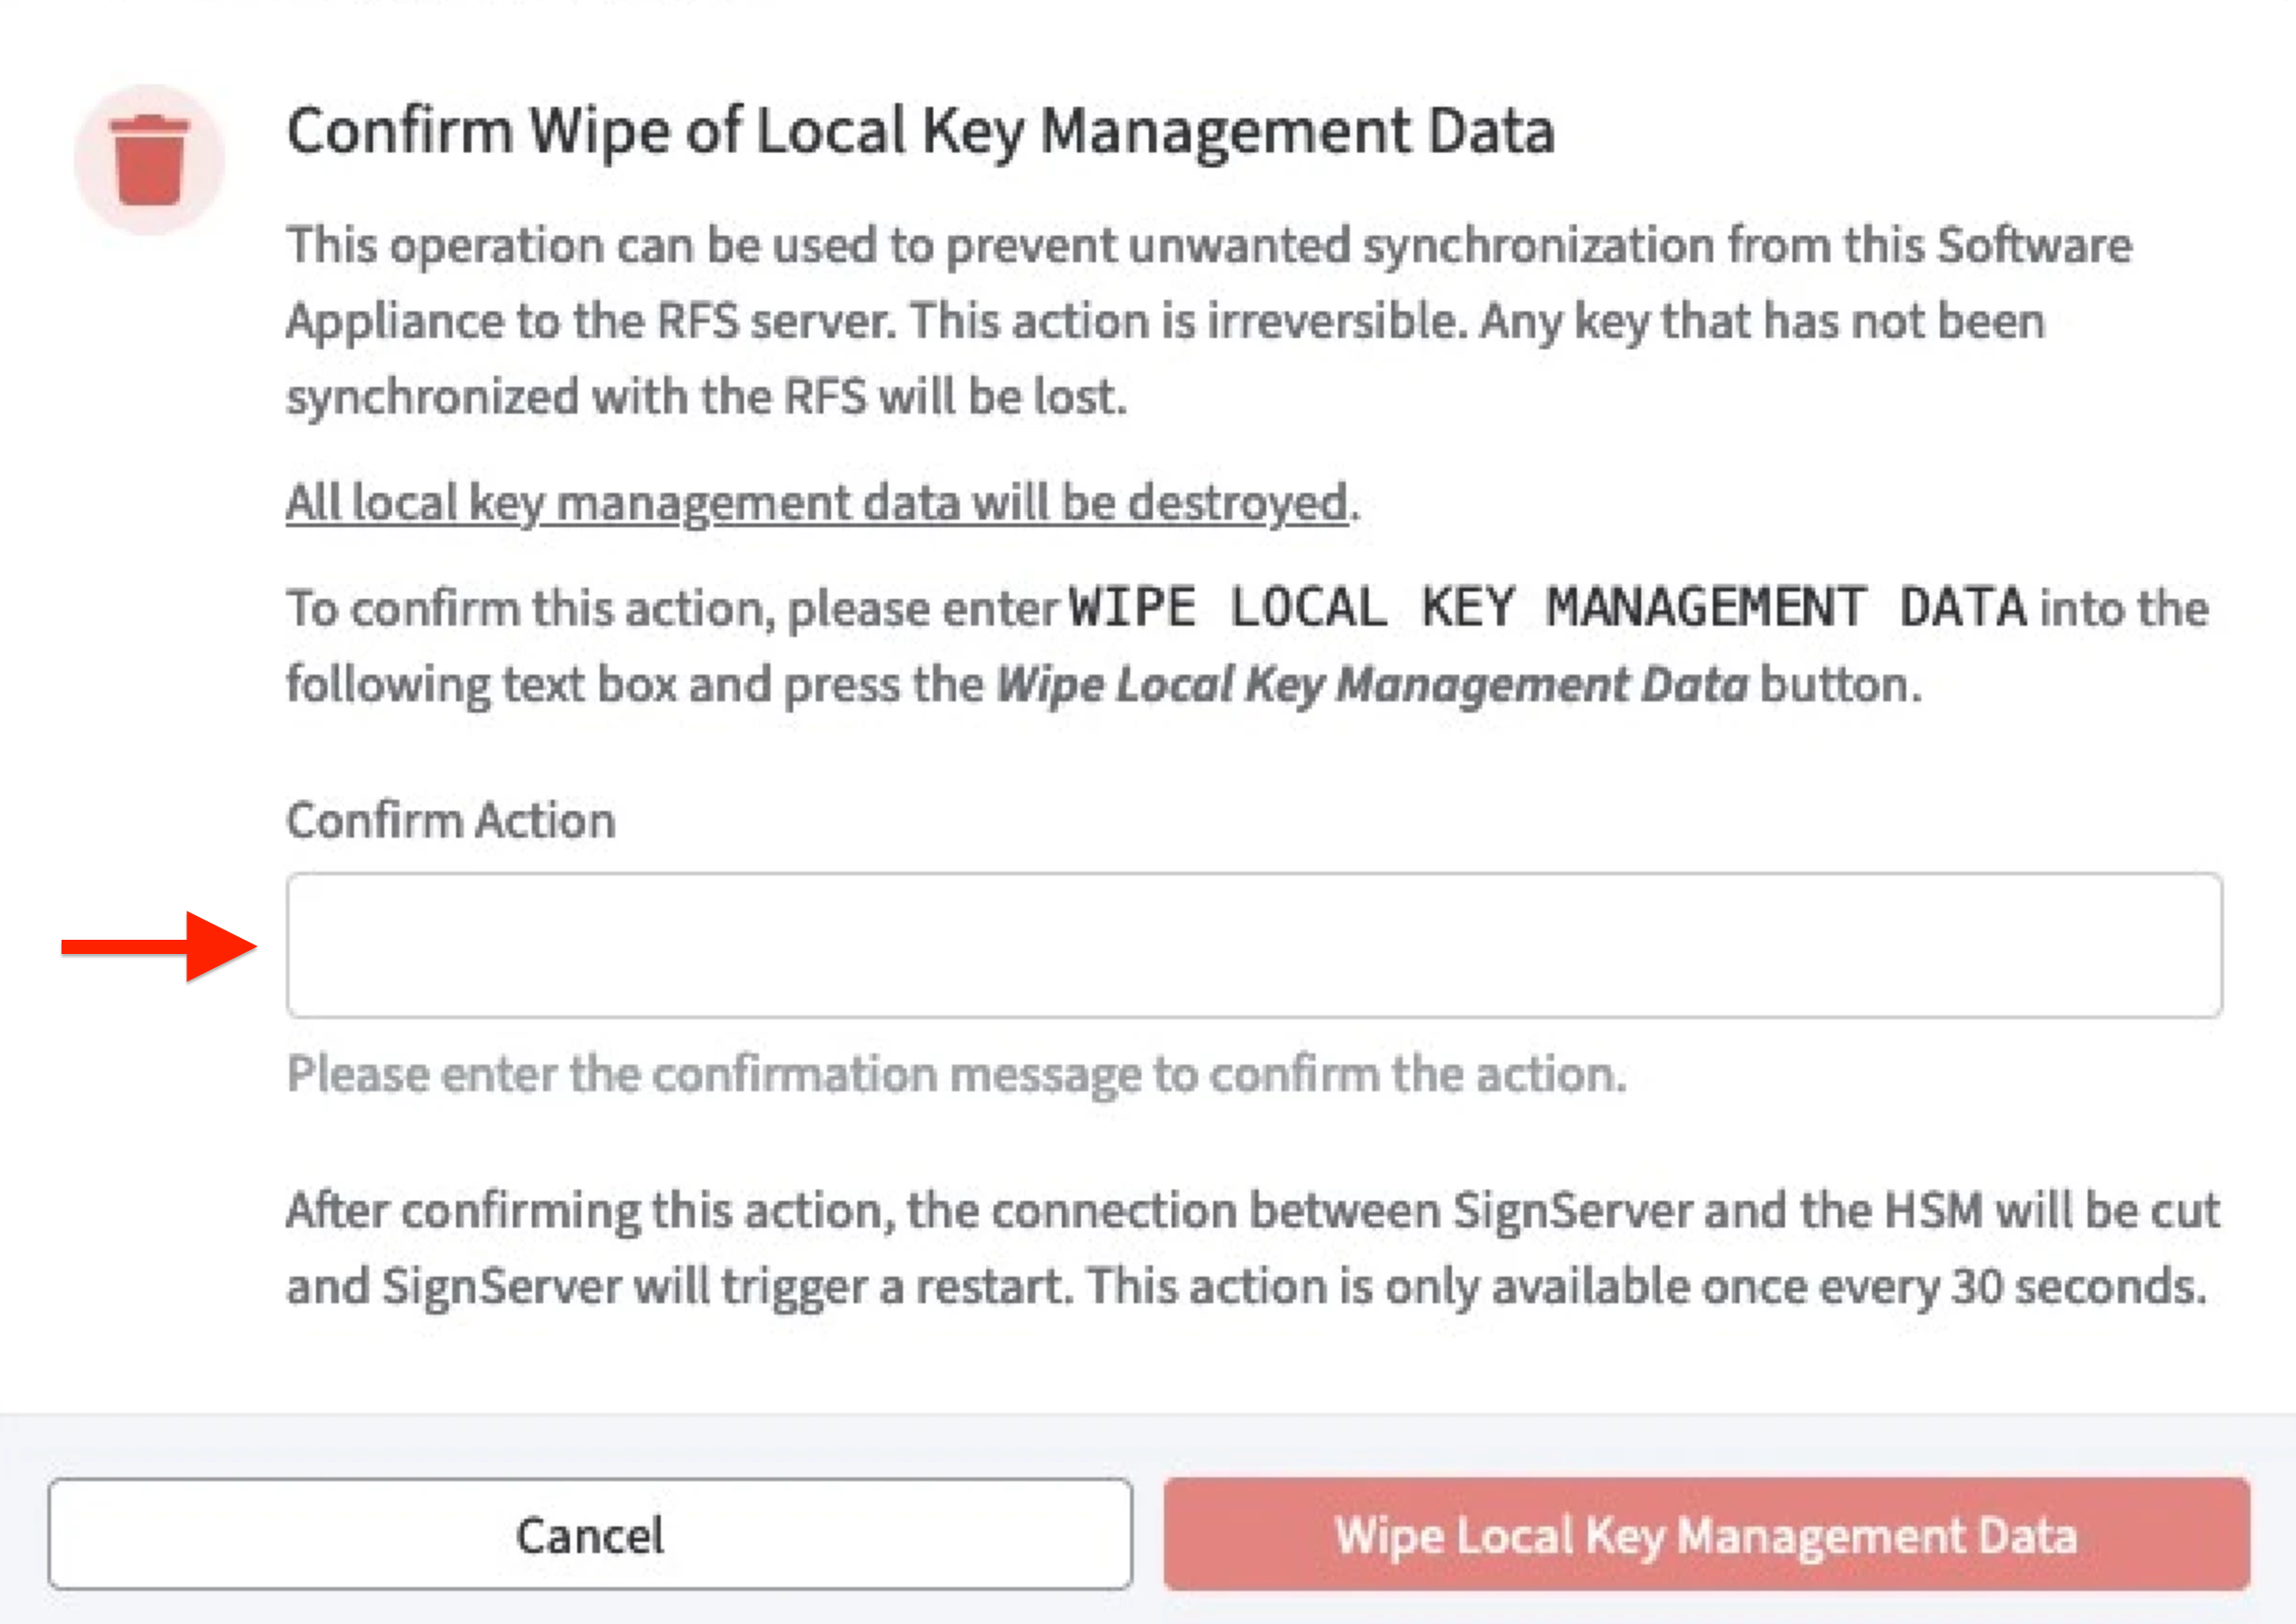
Click Wipe Local Key Management Data to confirm.
The function Wipe Local Key Management Data is not available for the next 30 seconds after pressing the button!
Client Authentication Information
There are two options to fetch the software-based key hash.
Software-based Key Hash
The software-based key hash will appear automatically once you added at least 1 HSM and provided information about the RFS (Remote File System). The value displayed here can be used to register the Software Appliance to the HSM using the software-based authentication.Enable: Allow nShield HSMs to fetch Software-based Key Hash.
This opens port 9004 on the Software Appliance to allow the Software Appliance to be registered as an nShield client with software-based authentication.
This step is only required if you want to further secure the connection between the Software Appliance and the Entrust nShield Connect HSM.
After you have registered the client with the nShield HSM, please deactivate this option to avoid security risks by opening port 9004.
On the Security page, the status of the HSM Driver Status will change from Not Connected to Connected as soon as the configuration is completed.
The connection is now listed in the table nShield HSM Devices. Here you can now perform actions such as Edit Device or Remove Device.

On the Overview page, the status in the HSM Overview also changes to Connected as soon as the configuration is completed. During configuration, the appliance is in the Restarting status. During this time, it is not available.
Remote Operator Cards
To support remote operator cards for Entrust nShield HSM's activate the checkbox.
Enable: Allow any Remote Administration Ready Smartcard

CardSet Operations
For CardSet Operations please refer to Security: Entrust nShield CardSet Operations.
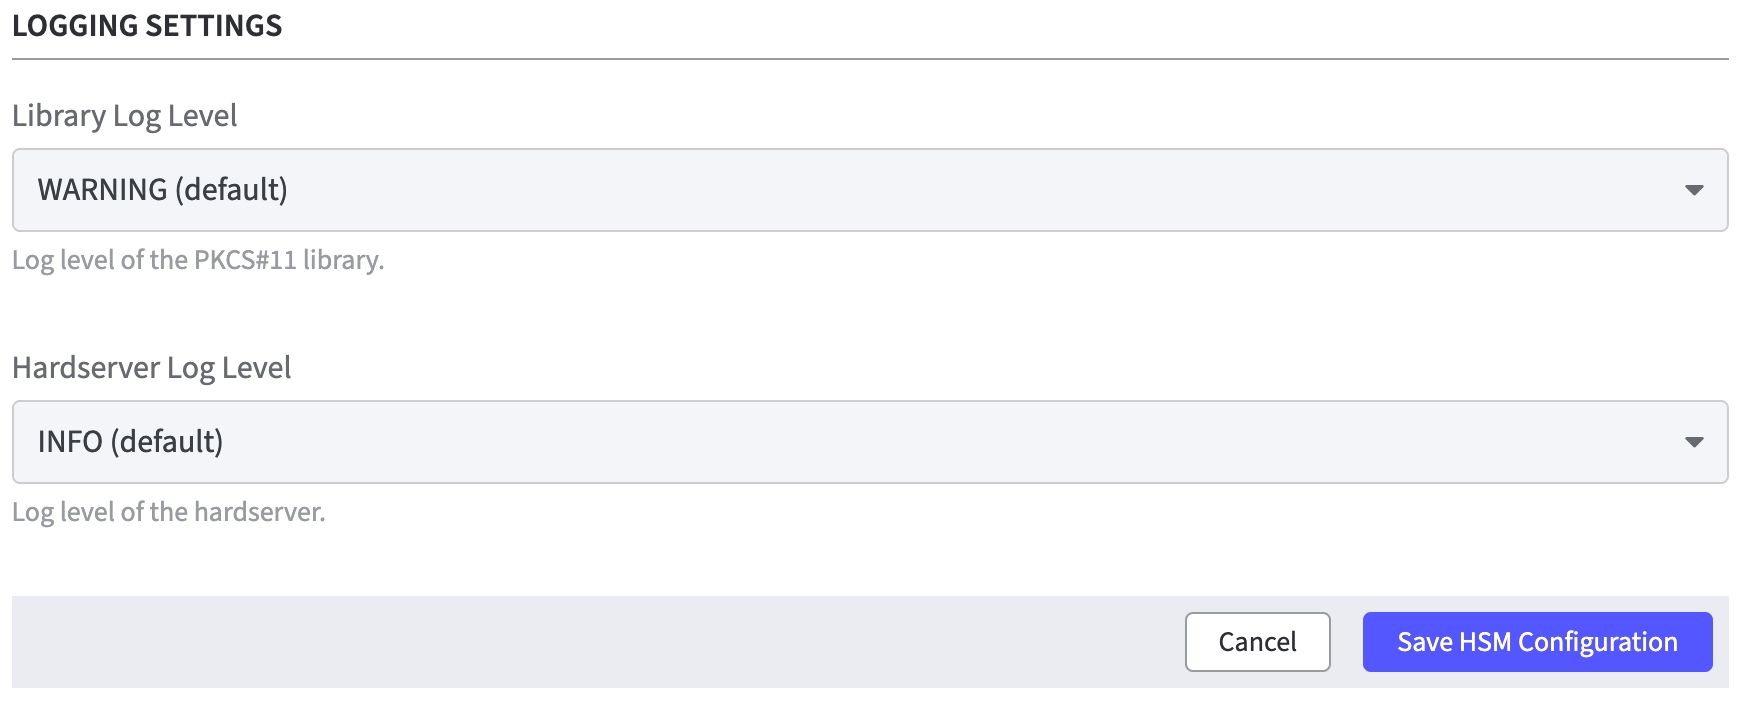
Logging Settings
Library Log Level: Select the appropriate log level option of the PKCS#11 library.
The default log level is WARNING.
Hardserver Log Level: Select the appropriate log level option of the hardserver.
The default log level is INFO.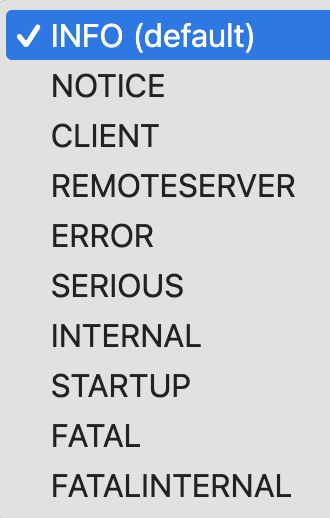
Click Save HSM Configuration to confirm all changes.
A warning is displayed after changing the HSM configuration.
The HSM restarts all applications on the Software Appliance.
Click Save to confirm.
Once the SignServer is running again, you can proceed with adding a Crypto Worker.
Add a Crypto Worker in SignServer
To create a Crypto Worker:
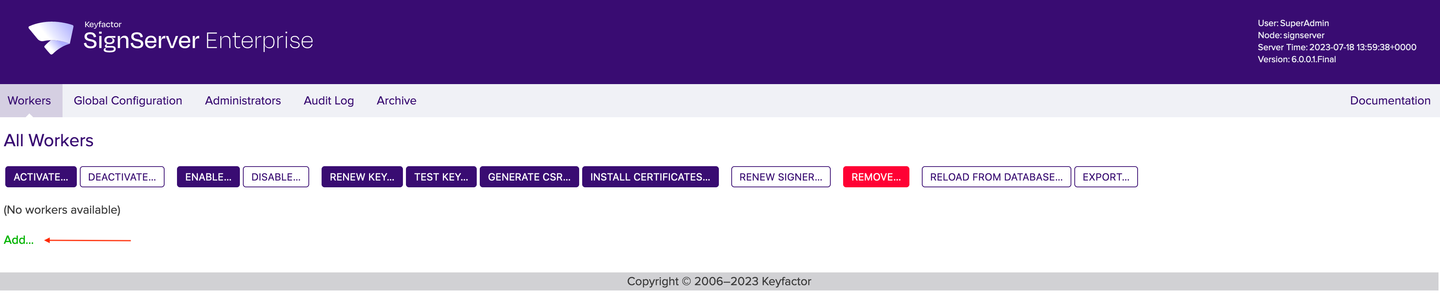
In the Overview page of the Software Appliance, click Admin Web for SignServer.
The SignServer page opens.
Click Add... to continue.
In the top menu, select Worker. You can choose the method you want to use to configure the Worker. In this example we will work with From Template.
Click From Template to continue.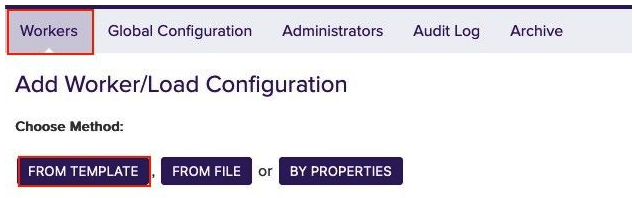
Open the drop-down menu under Load from Template. Here you can select the worker to be configured. In this example we will work with p11ng-crypto.properties.
Click Next to continue.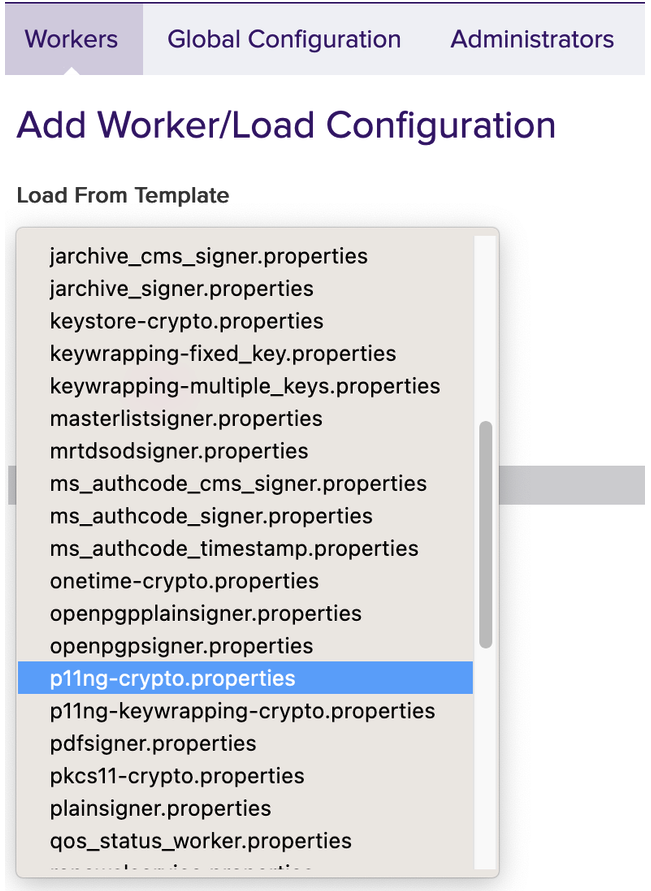
The Configuration page opens.
WORKERGENID1.NAME=CryptoTokenP11NG1: this name can be customized (CryptoTokenP11NG1) as desired.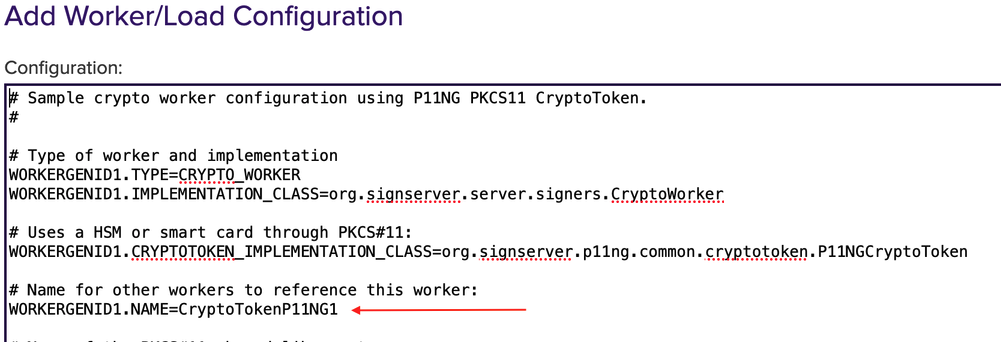
WORKERGENID1.SHAREDLIBRARYNAME=P11 Proxy should be configured as default.

# Method will specifying the slot to use. Here it is important to know if the HSM uses SLOT_NUMBER or SLOT_INDEX. Select the applicable one.
To deselect it, put # in front of it.
To enable it, remove # in front of it.
The # can be replaced for the slot to be used and specify the number of the HSM slot instead.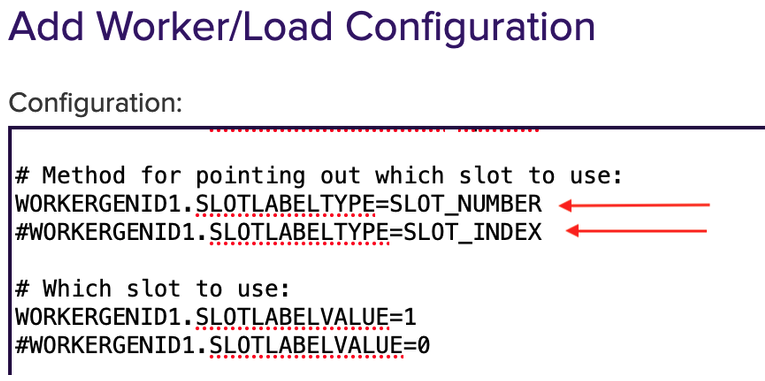
#WORKERGENID1.PIN=foo123 here the password can be enabled or disabled.
To deselect it, put # in front of it.
To enable it, remove # in front of it.
# Optional PKCS#11 attributes is used for key generation, you can select the attributes.
To deselect it, put # in front of it.
To enable it, remove # in front of it.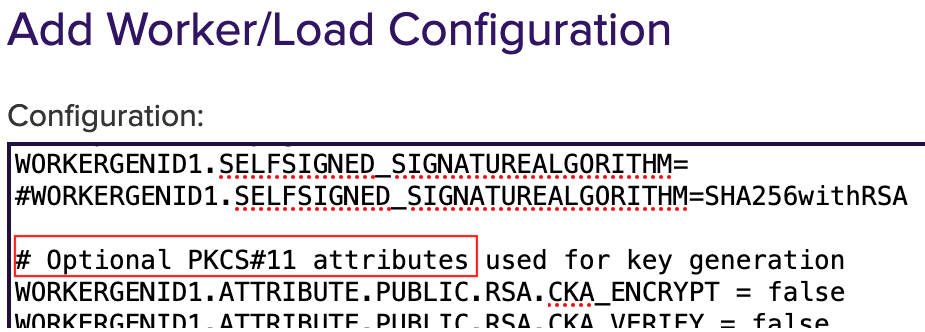
WORKERGENID1.DEFAULTKEY=testkey0 here you can add an existing key or use the default key.
Click Apply to save the settings.
The token (CryptoTokenP11NG1) is automatically logged in when the PIN is set in the Crypto Worker configuration.
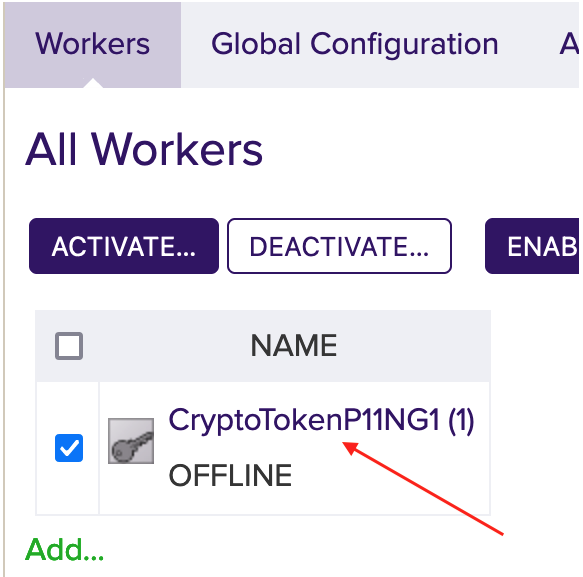
The worker is not activated yet. Click on the created token and you will see the information about the token in the Status Summary.
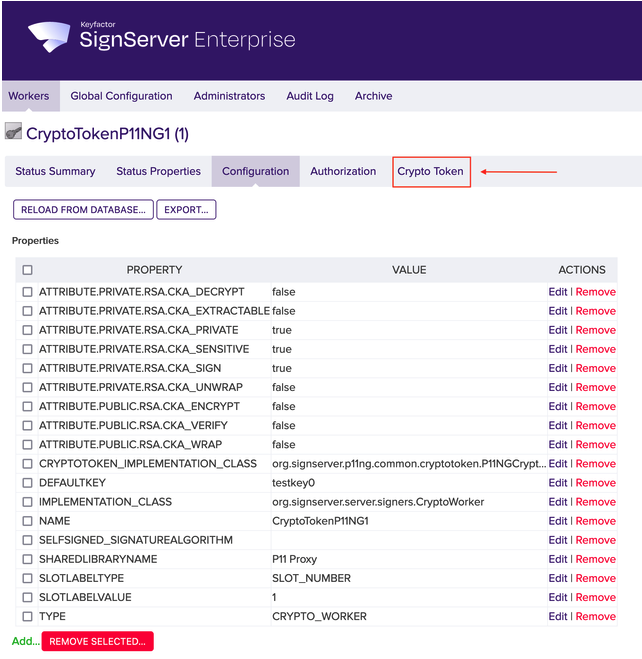
Click the Configuration tab to view the full configuration of the token.

If the configuration meets your needs, click the Crypto Token tab. Edit them if necessary.
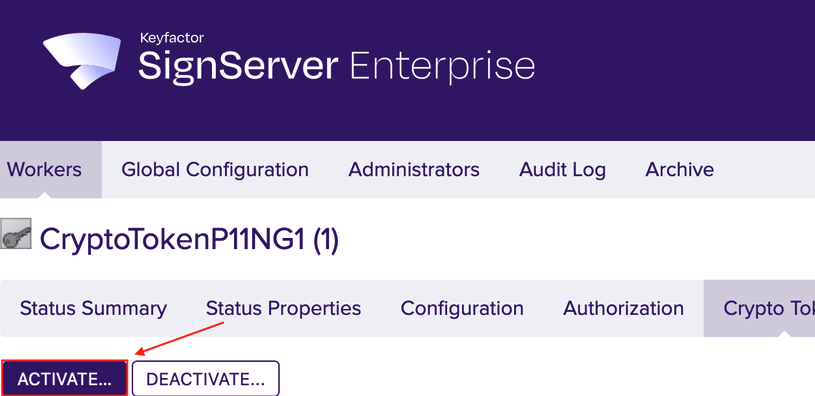
Click Activate.
This step is optional!
The latest version of SignServer logs on automatically if the correct PIN is defined in the configuration as described in step 6.In the field Authentication Code enter the optional password from Step 6. Here foo123.
Click Activate.
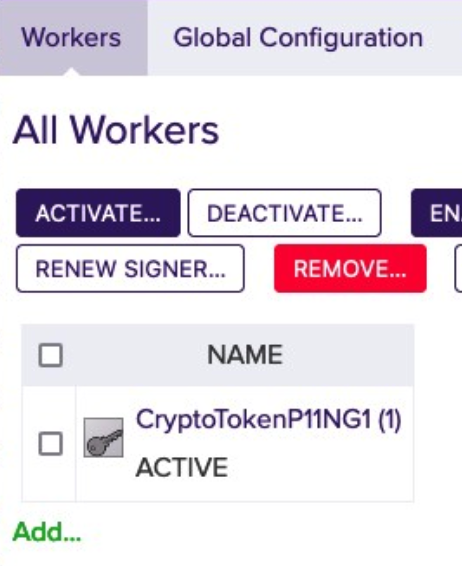
If the default key exists and has been activated, the Crypto Worker is now ACTIVE.
For more information please see Worker Crypto Token Page.
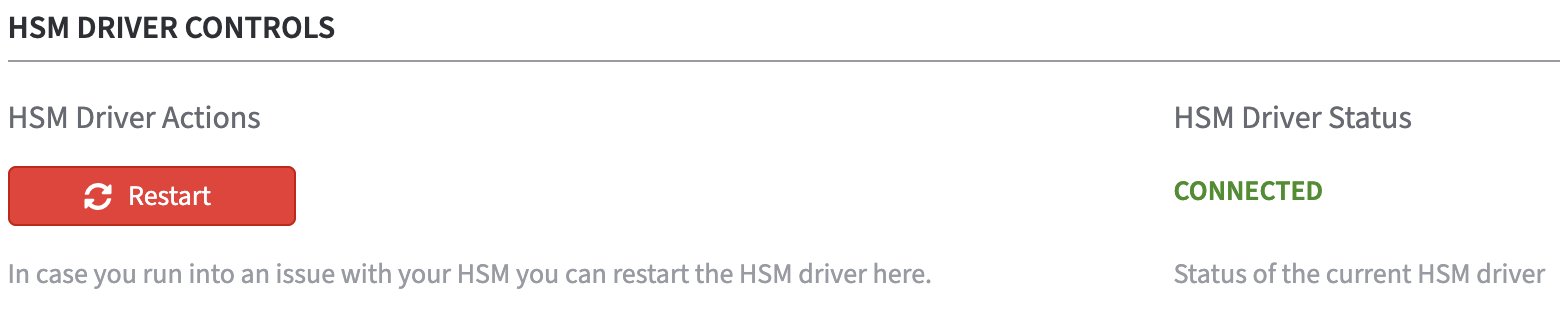
HSM Troubleshooting
In the section HSM Driver Controls the current HSM Driver Status is displayed.
In case of HSM problems, the HSM driver can be restarted via the Restart button.