After completing the Initial Setup of the Command Test Drive, you’re ready to begin exploring Keyfactor Command’s certificate lifecycle capabilities and core functions. This page provides guided examples of the most common workflows and use cases.
Configure synchronization with EJBCA
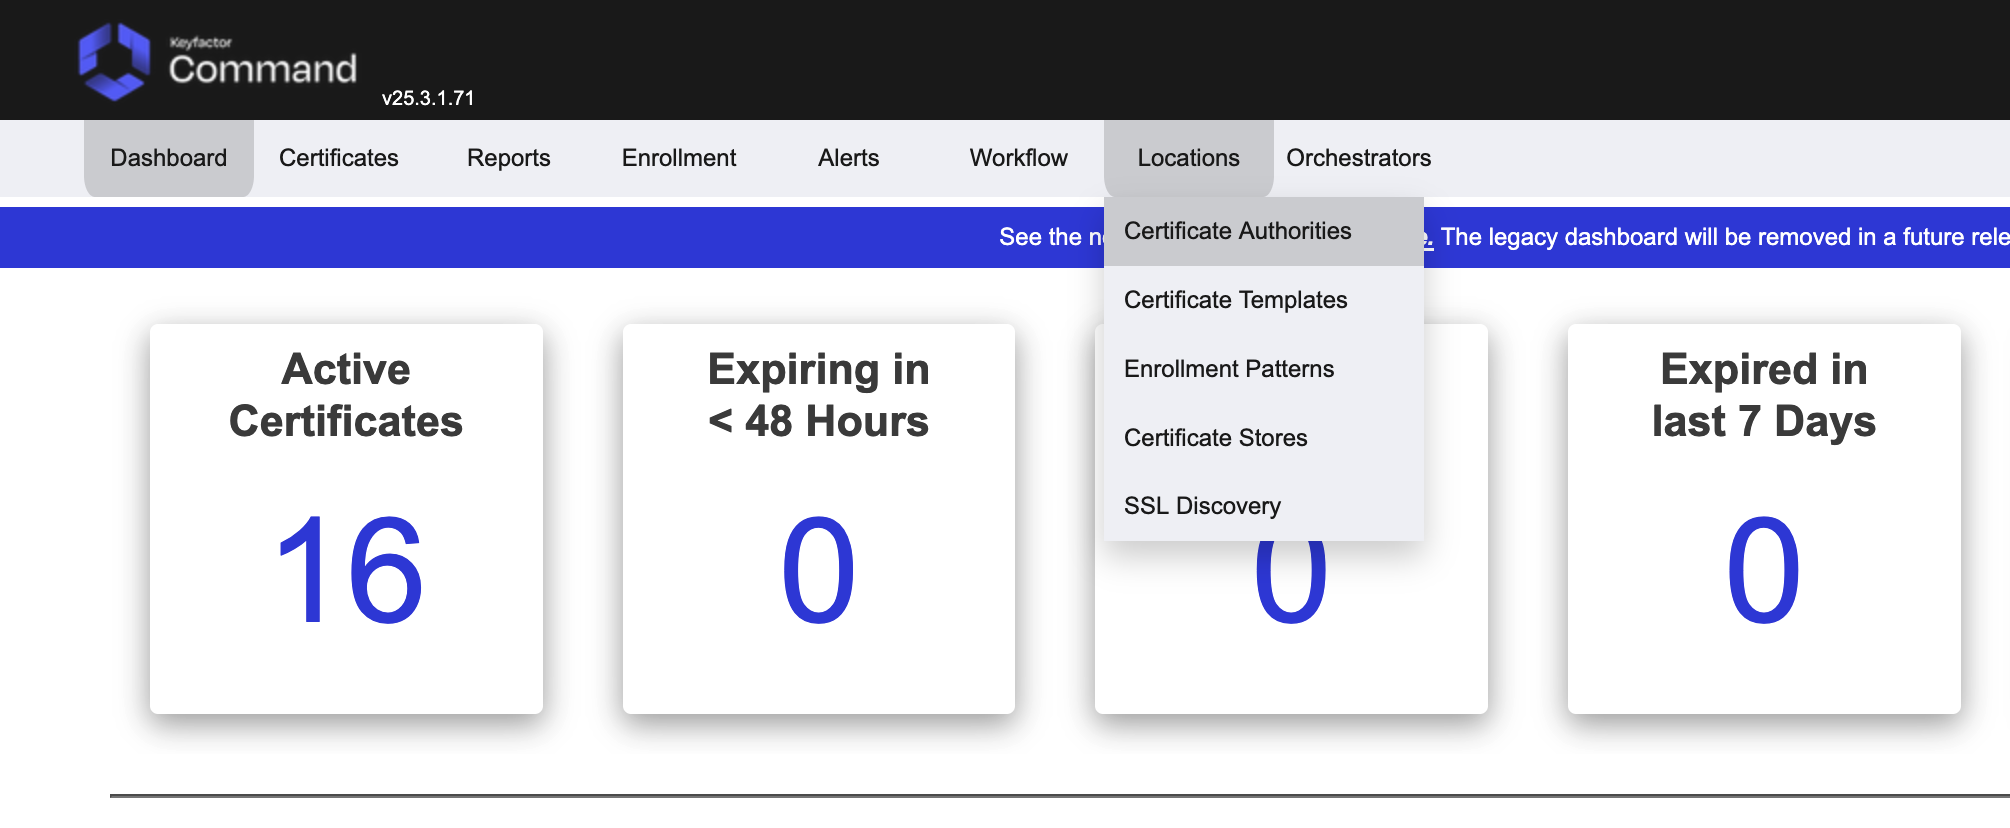
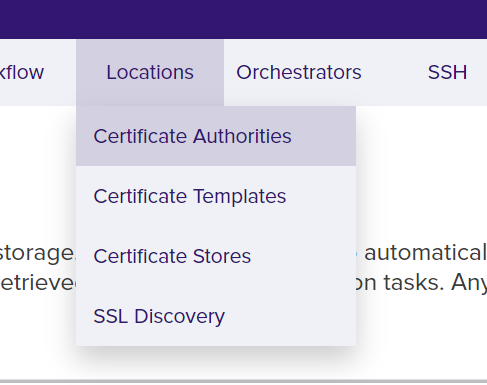
Once logged into Keyfactor Command, the Dashboard will appear with navigation links across the top. Click Locations and access the Certificate Authorities tab.
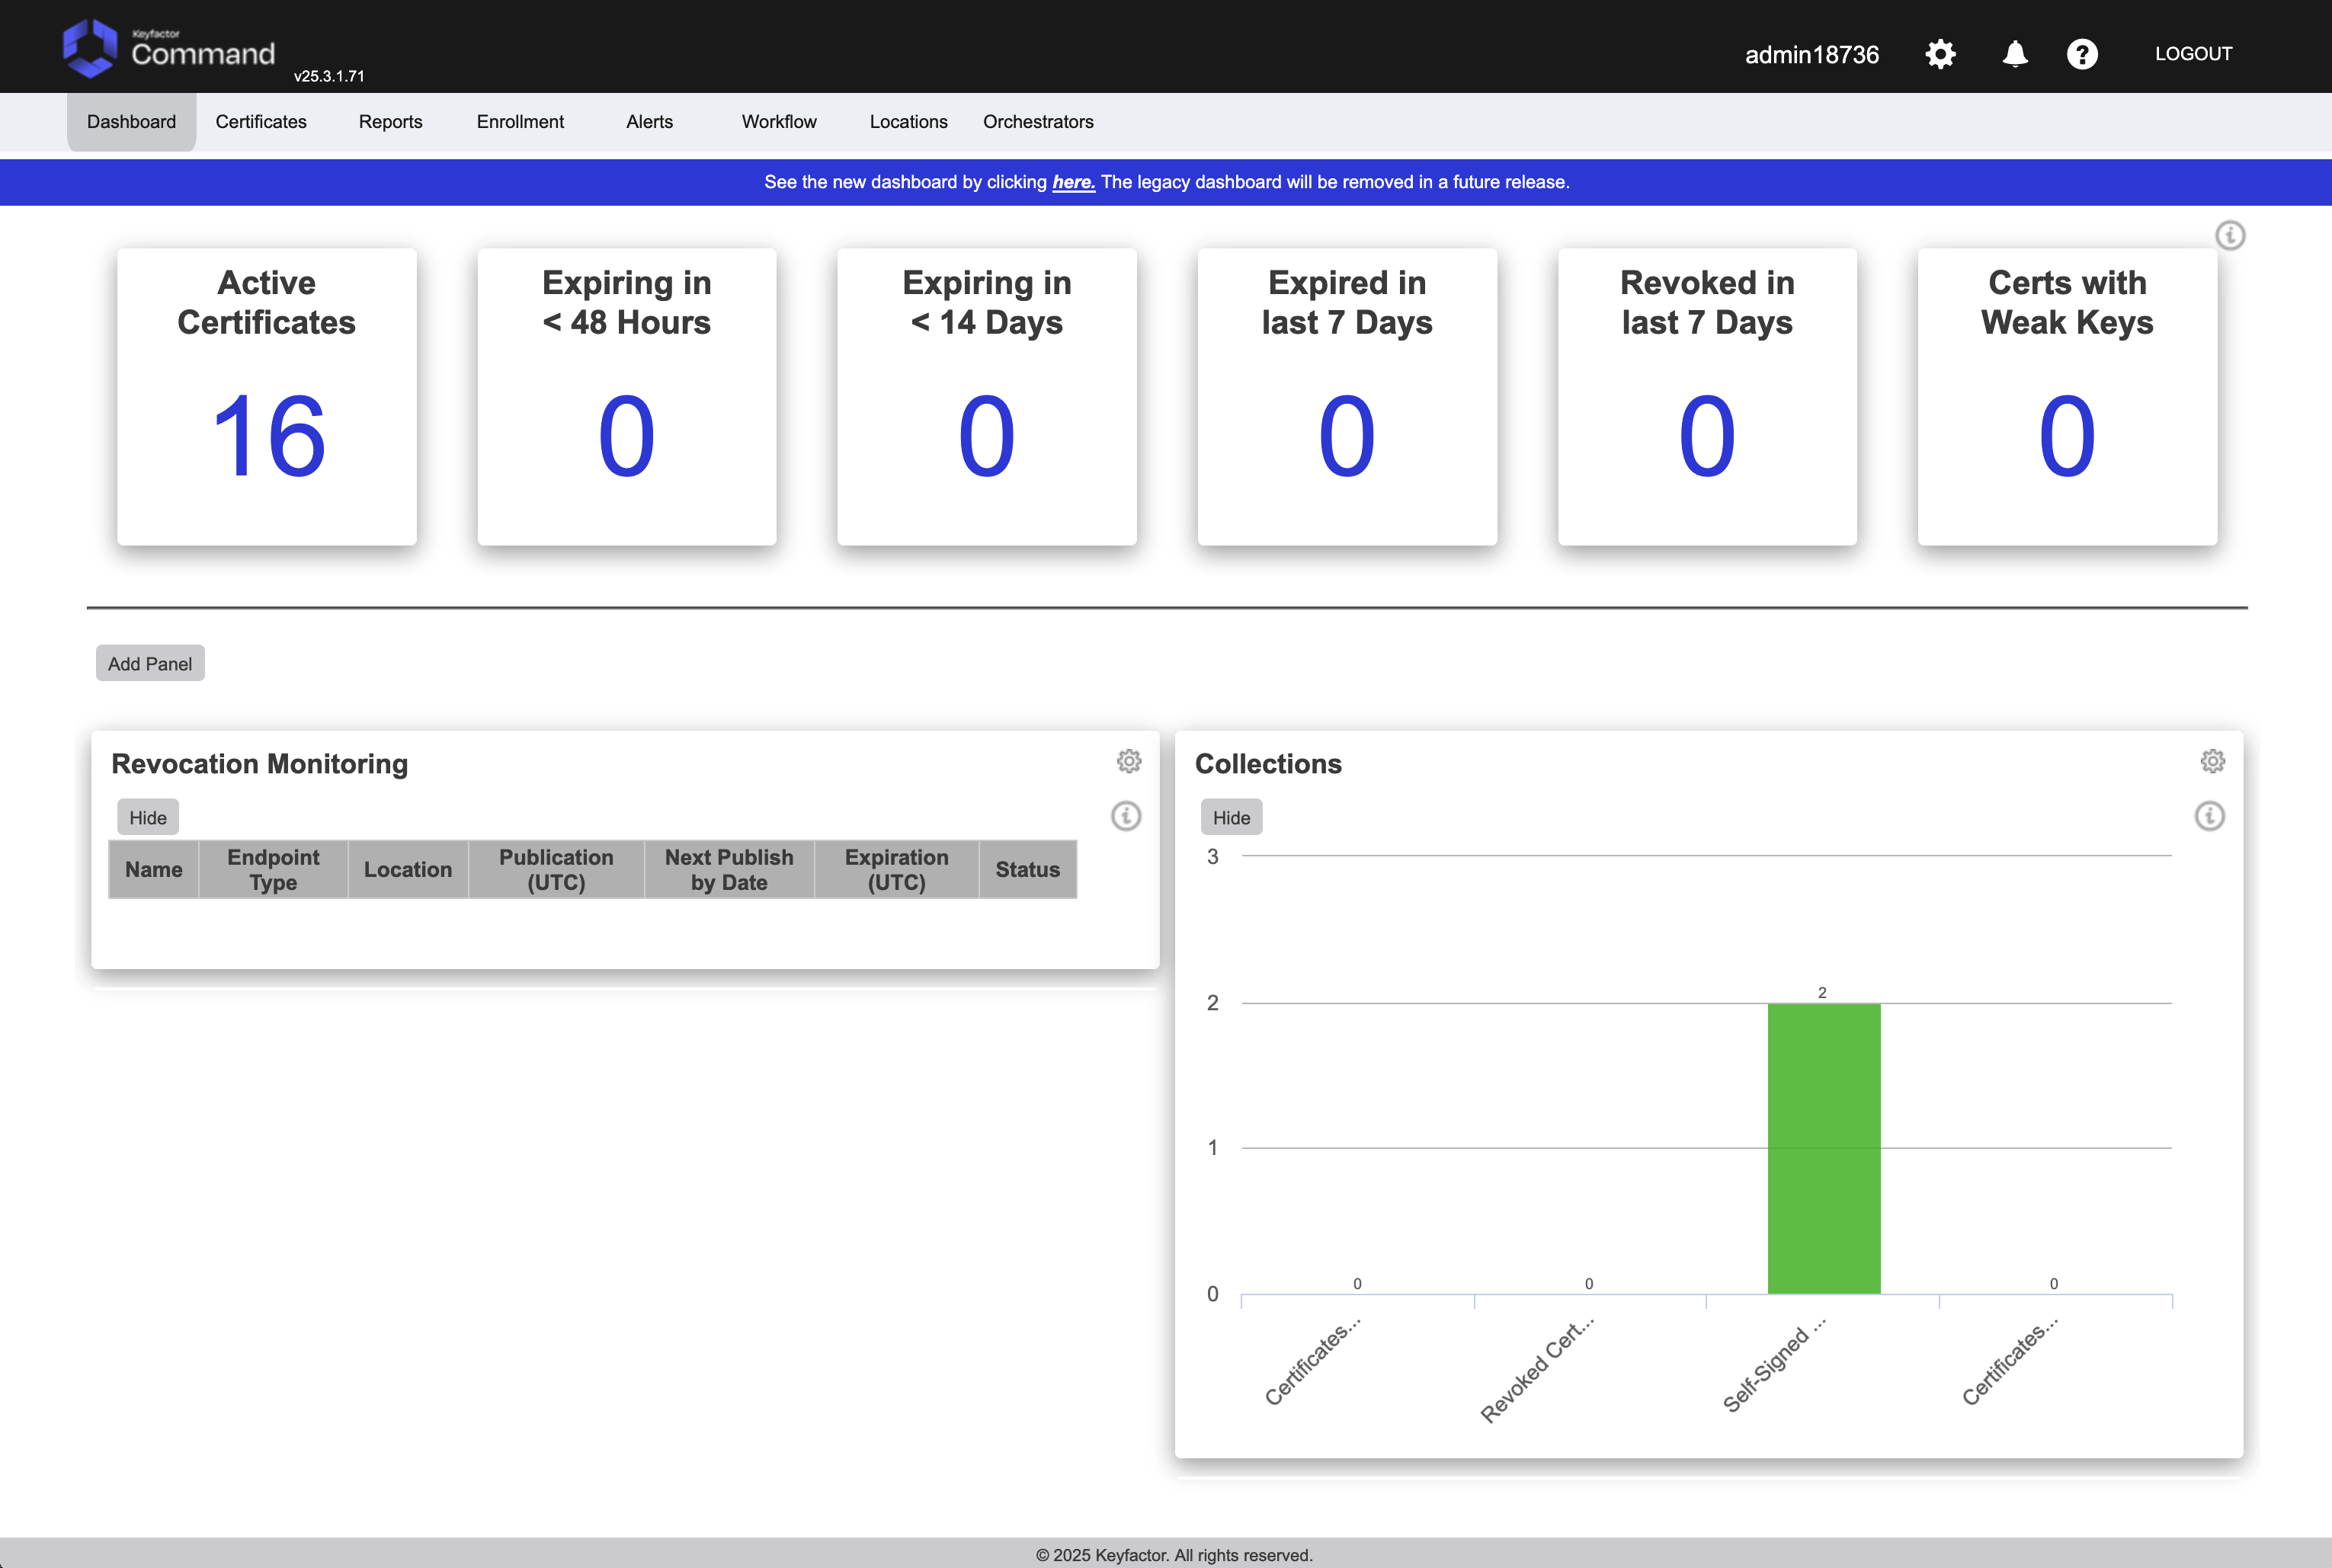
To view the synchronization settings of the preconfigured EJBCA Certificate Authority, click Locations then Certificate Authorities.
EJBCA comes pre-configured with both the ManagementCA and the IssuingCA integrated into Command. Select the EJBCA ManagementCA and click Edit.
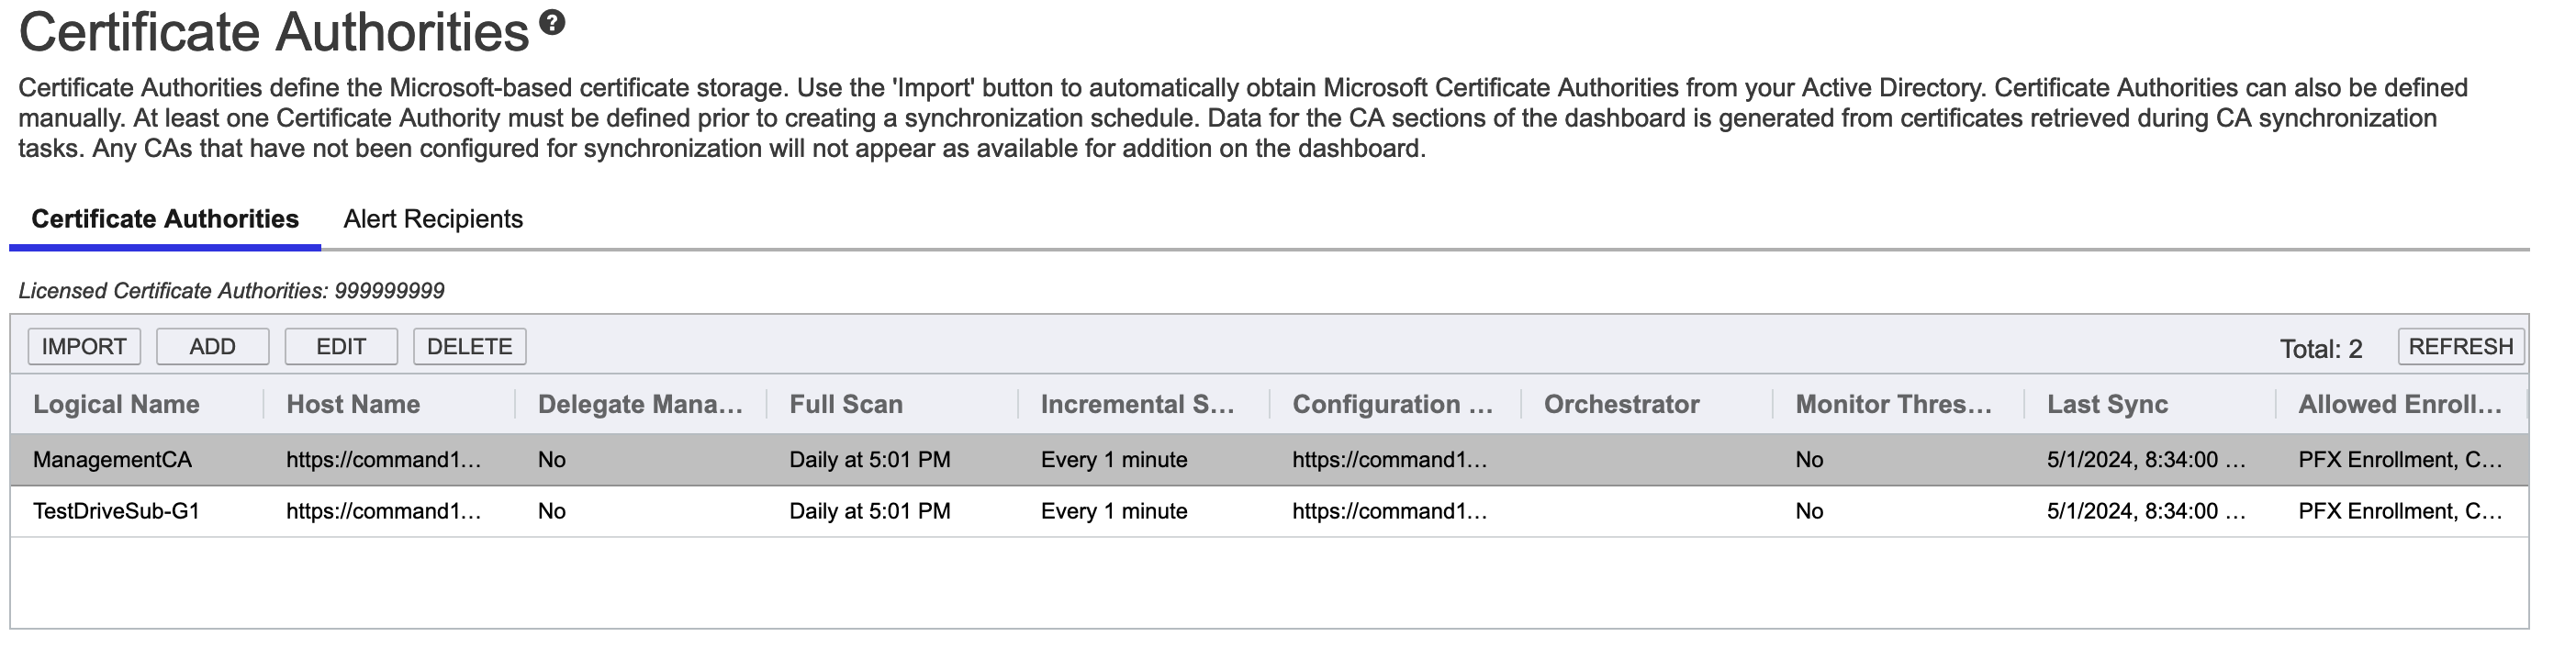
EJBCA integrations are native to both platforms leveraging the REST API of EJBCA. Here you can view or change the interval for the Incremental Scan. This is the interval that Keyfactor Command checks EJBCA for certificates that have been issued. A full scan is only required the first time a CA is synchronized as the Incremental Scan will find the delta of the certs that were issued since the previous scan completed. Since a full scan has never been performed on this node, the first scan will automatically be a full scan. For the scan interval, we recommend 5 minutes, but you can make it lower if you would like certificates to appear sooner. (Note that as part of the enrollment process via Keyfactor Command the certificate is imported from the CA after issuance out of band of the scan schedule). These settings do not need to be changed, but you are welcome to edit them to your liking.
Enrollment Patterns
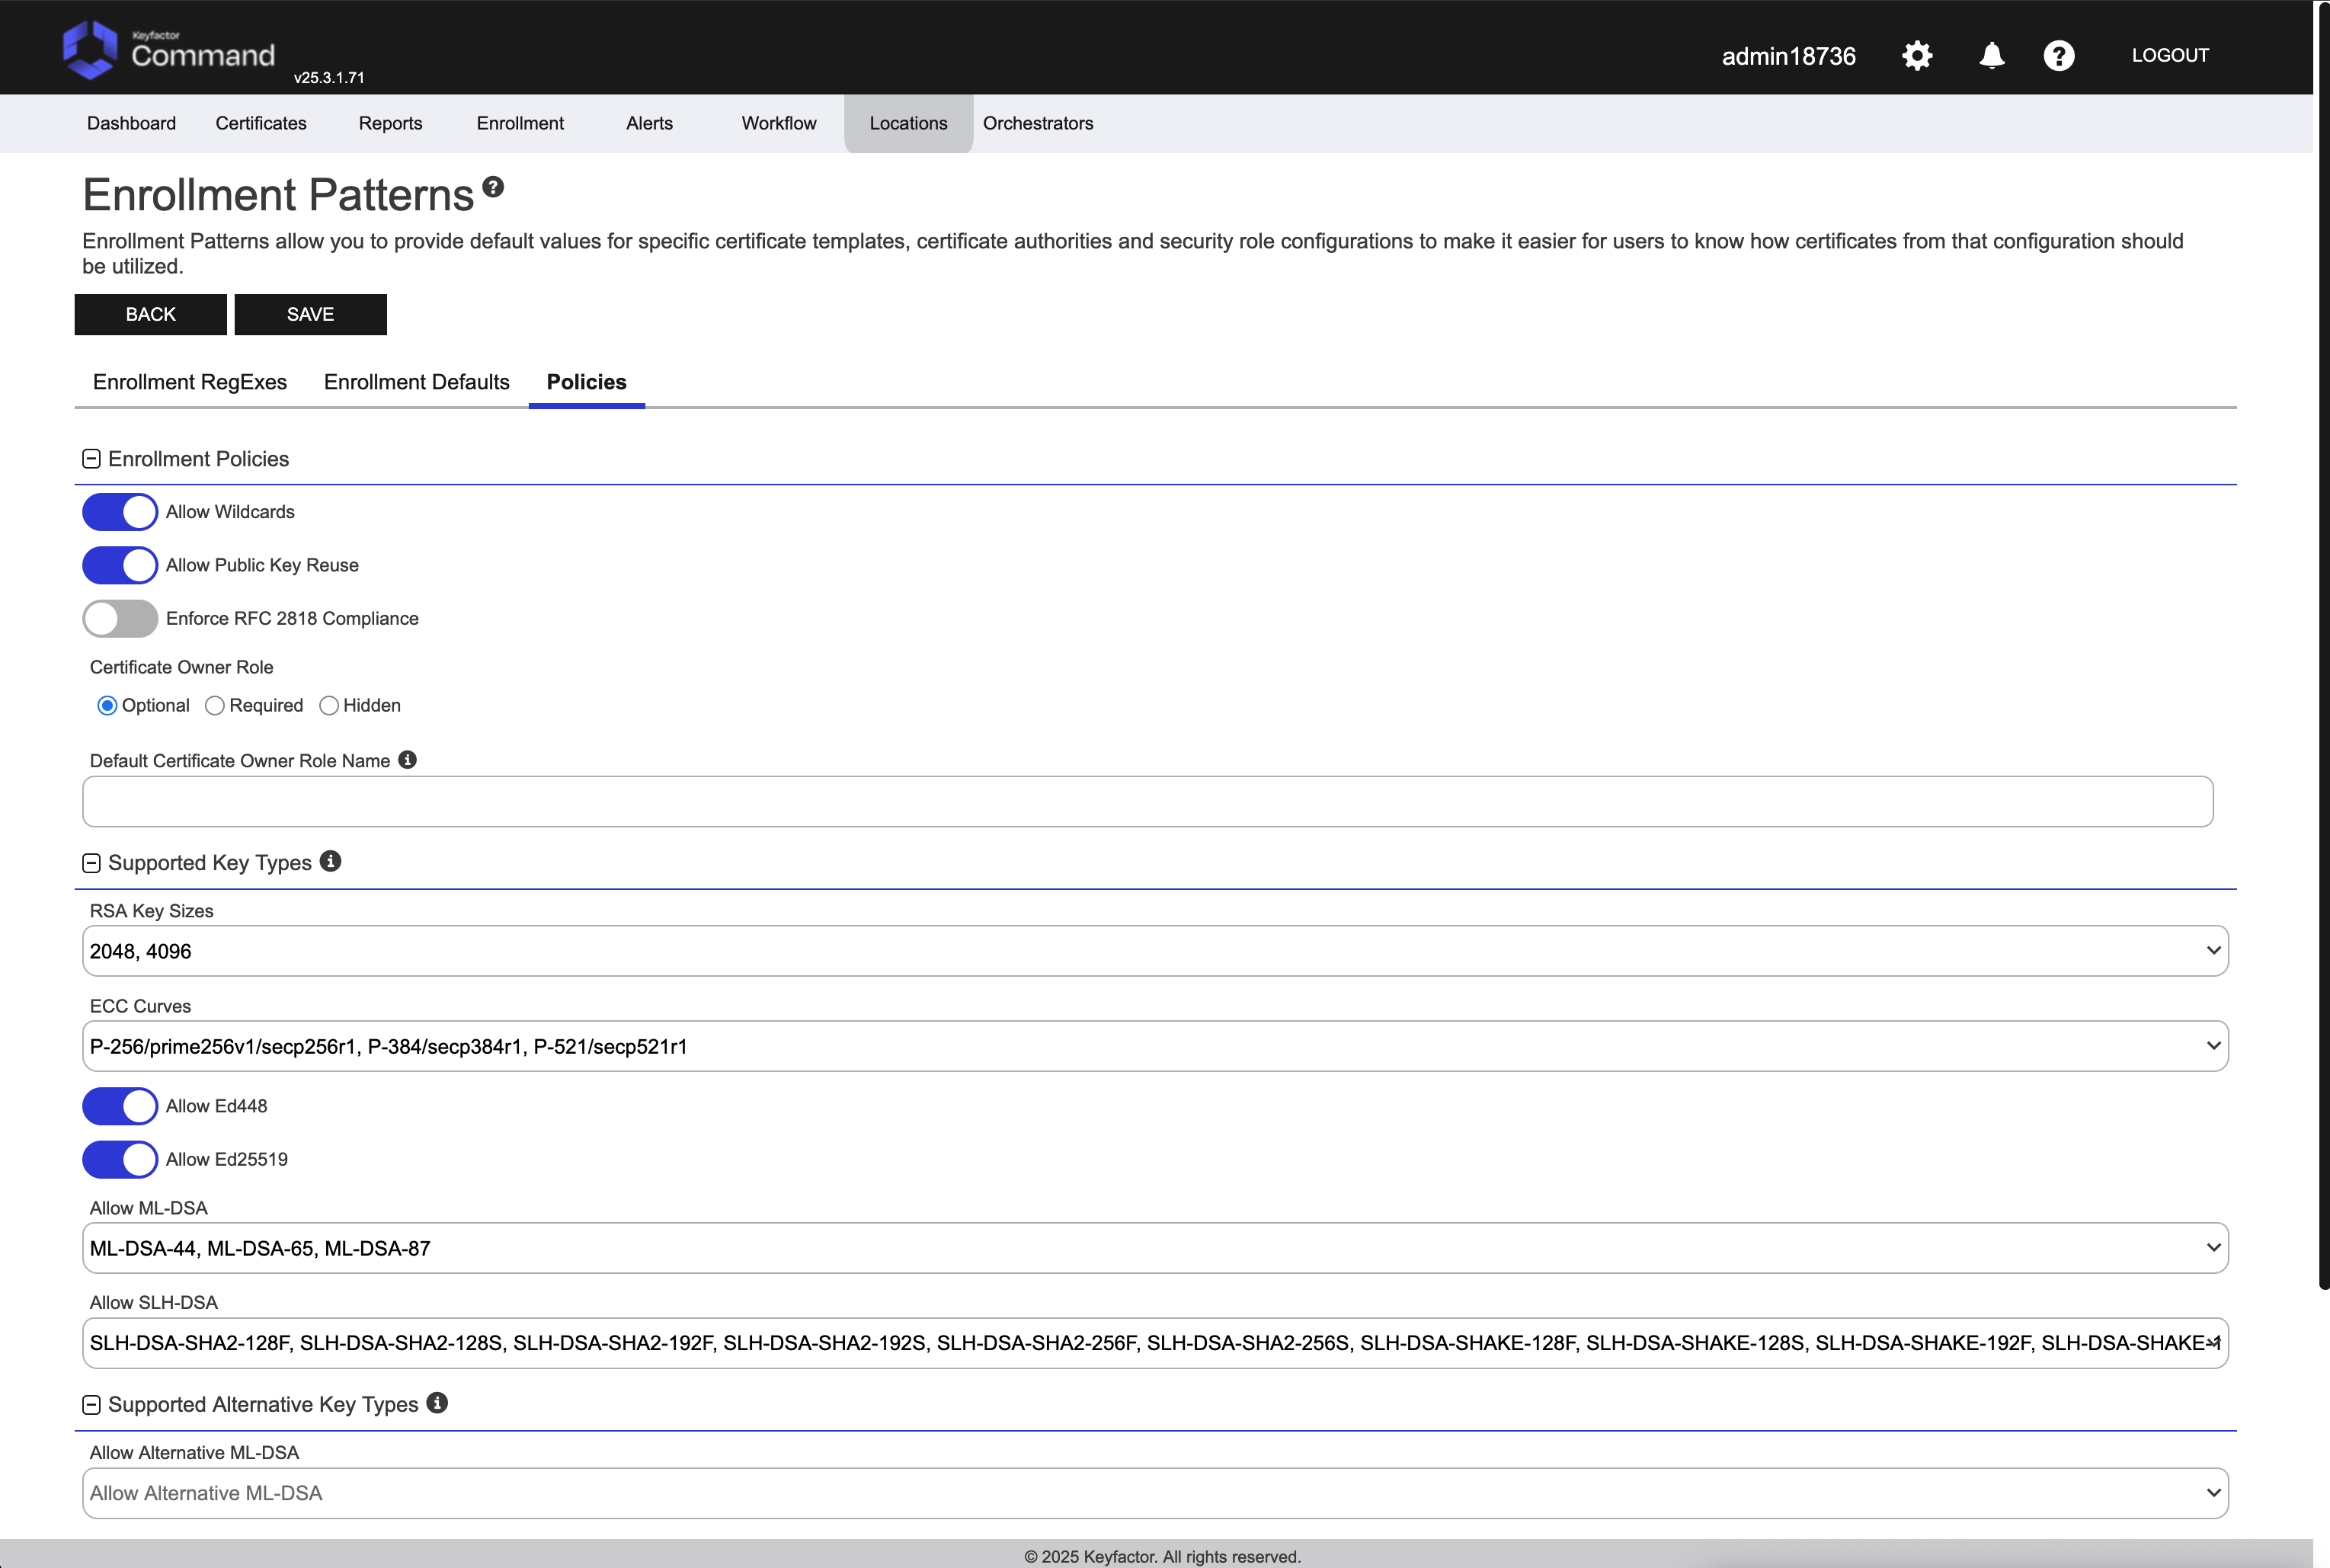
Enrollment patterns in Keyfactor Command provide a flexible way to streamline certificate enrollment by defining default values, policies, and access configurations for specific certificate templates and certificate authorities. This functionality helps reduce duplication of templates at the CA level while meeting diverse business requirements. On this page, you can manage enrollment patterns by adding, editing, and deleting them, configuring system-wide settings, and copying existing patterns to create new ones. These operations ensure enrollment processes are tailored to user groups, enforce security policies, and simplify certificate management.
System-wide settings apply to all enrollments done through Keyfactor Command unless they are overridden by settings configured in the specific enrollment pattern. Although system-wide settings are configured on the enrollment patterns page, they also apply to enrollments done without an enrollment pattern (e.g., standalone CAs).
-
Allow Wildcards - Enable this option to allow certificates to be created containing wildcards (e.g., *.keyexample.com). The default is enabled.
-
Allow Public Key Reuse - Enable this option to allow public keys to be reused on certificate renewals. The default is enabled.
-
Enforce RFC 2818 Compliance - Enable to require at least one DNS Subject Alternative Name (SAN) on TLS server certificates. In PFX enrollment, the CN you enter is copied to a read-only DNS SAN. In CSR enrollment, if the CSR lacks a DNS SAN matching the CN, one is added at issuance. Default: Disabled.
Any of these settings can be set at the individual template level, or at the system side level for all templates to inherit.
Enroll a Certificate from Keyfactor Command using EJBCA
Select Enrollment, then PFX Enrollment.
Select the SslServerProfile template, EJBCA CA, and fill out the remaining fields as desired. Only the Common Name is required, which will be the name that goes into the certificate. Organization, Organizational Unit, City, State, Country, and email are optional but can be used to further establish identity in the certificate. Optionally, under Subject Alternative Names, click ADD, select DNS Name and type the same value as the common name. Once complete, click Enroll.
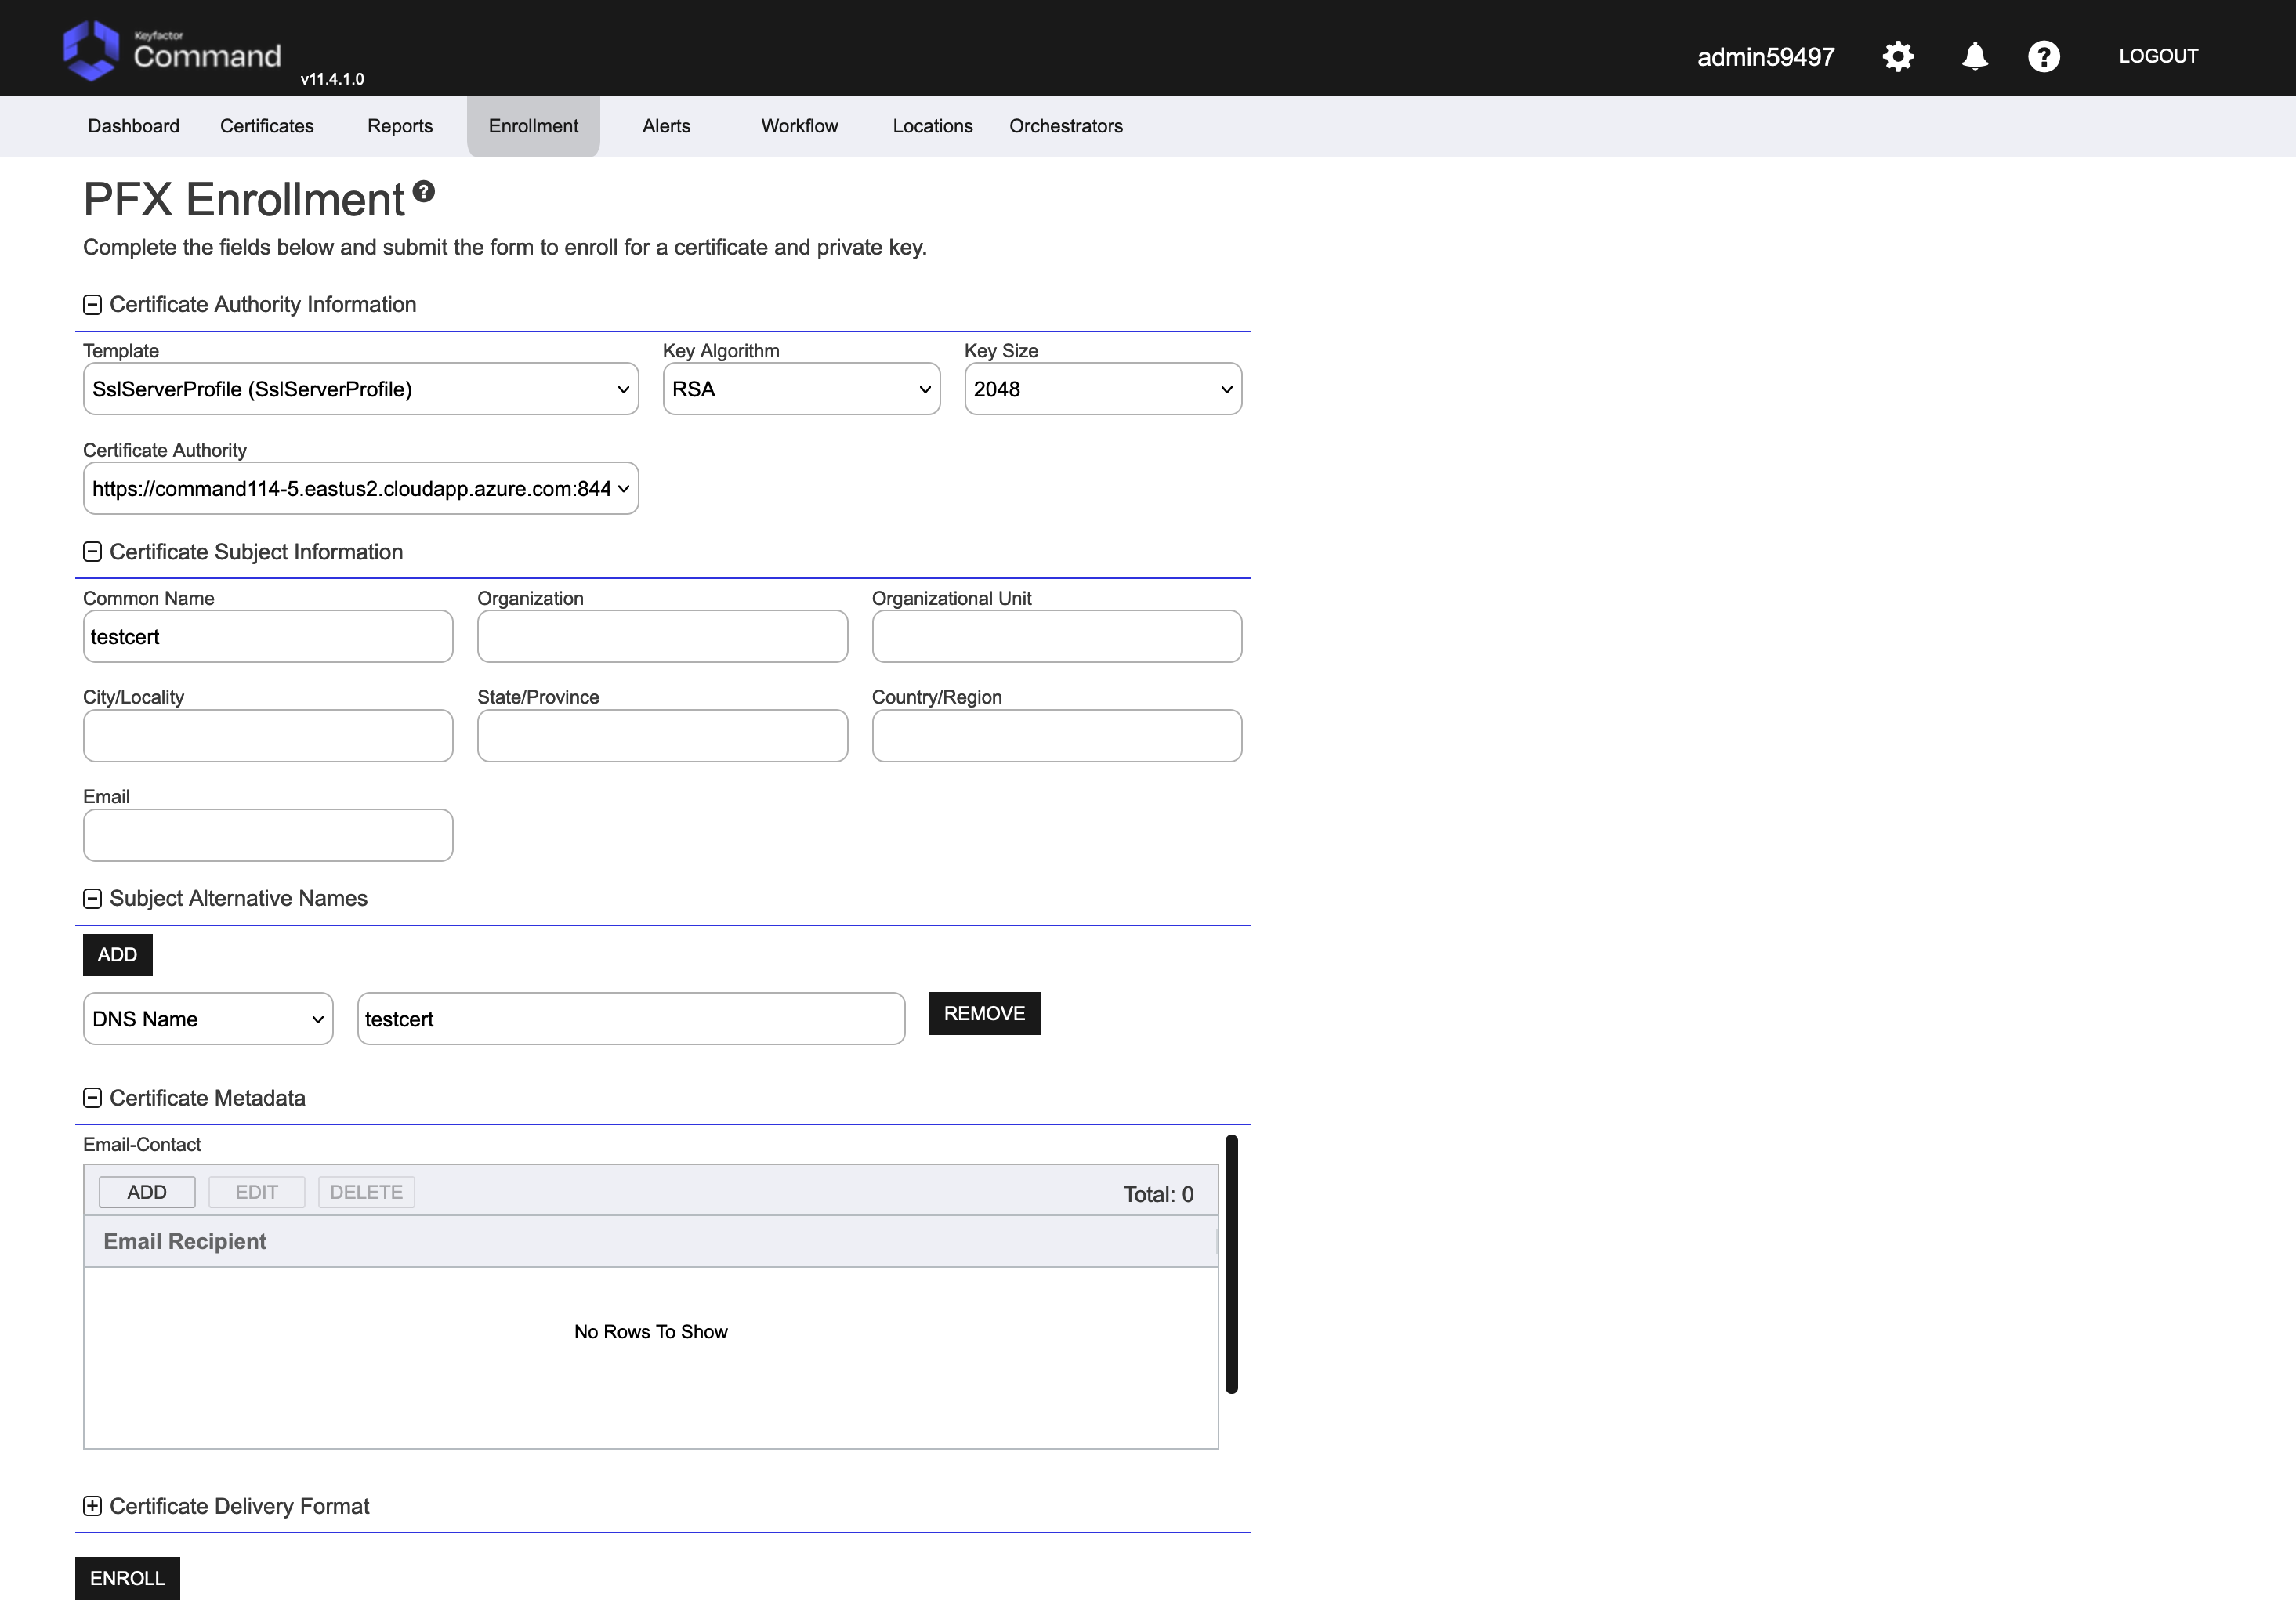
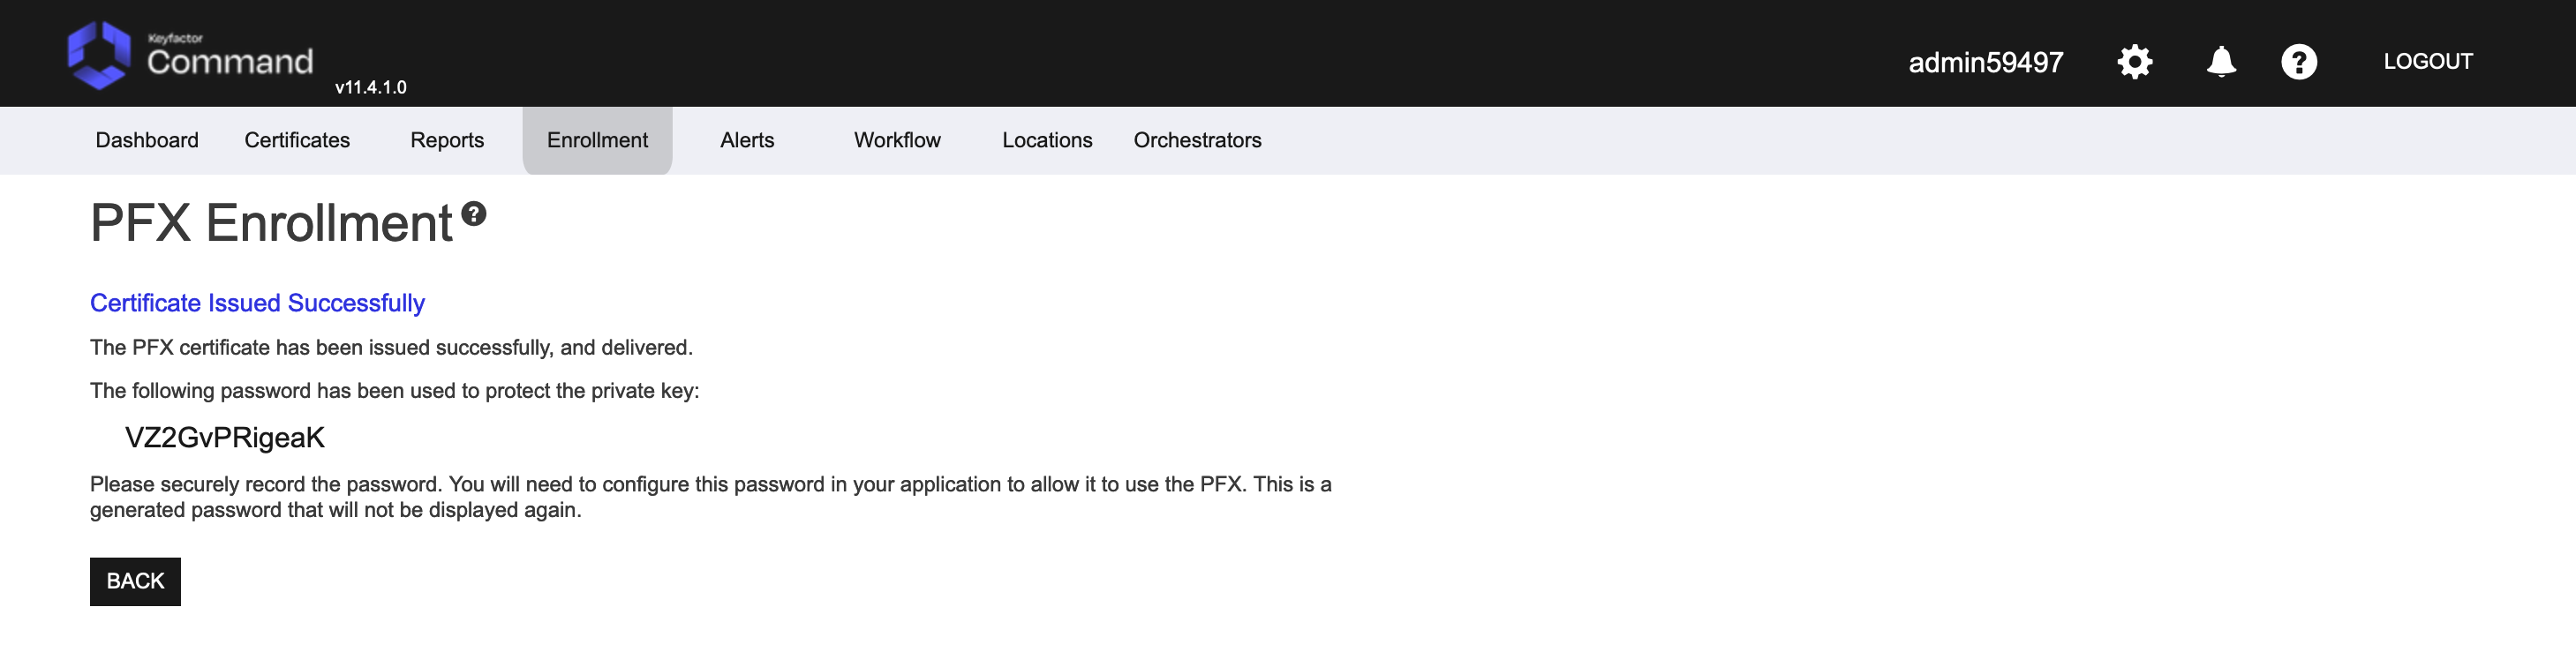
Click Enroll to save the certificate to your computer. After enrollment, Keyfactor Command will display the password used to protect that keystore. Once you have securely recorded the password, click Back to return to the enrollment tab.
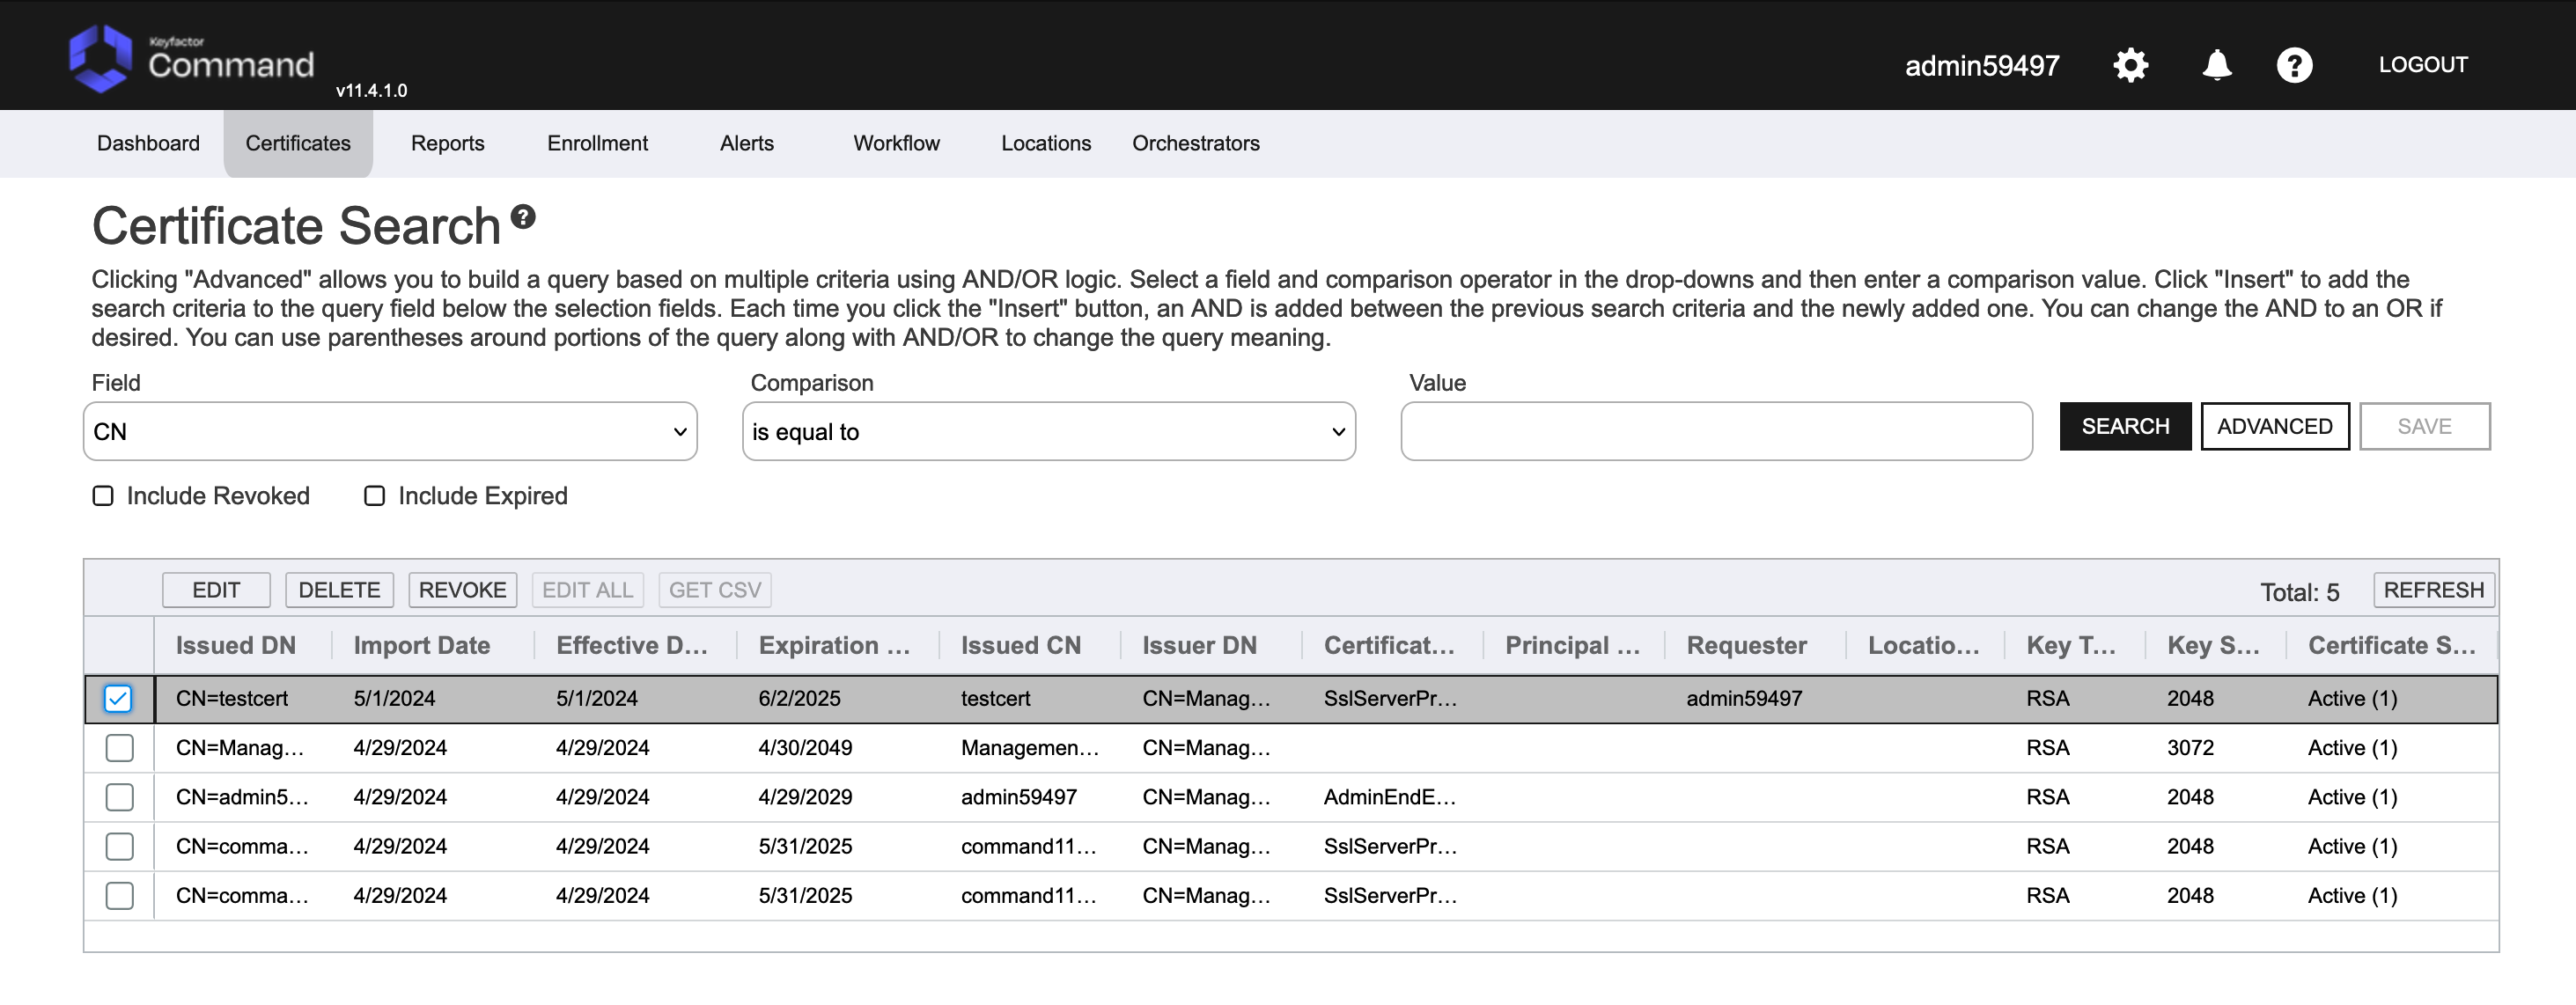
To see the issued certificate, click on Certificate Search in the Certificates menu in the top menu drop downs.
If desired, you can go back to the EJBCA Admin interface and search for the certificate to see if it was issued from EJBCA. You can do this from the Search End Entities item under the RA Functions section of the navigation menu on the left. Look for the search entity status drop-down and select All, then click Search. Look for a certificate with a username that starts with “Keyfactor_” and matches the Organization Unit and Organization fields you specified during enrollment. This is the certificate you enrolled.
Configure Keyfactor Universal Orchestrator
On the Test Drive landing page is an installation script that can be downloaded to help with the installation of the Universal Orchestrator. There are both Linux and PowerShell versions for convenience, and they will install all dependencies and connect back to the test drive automatically. All you need to do is supply the Test Drive password to the installer. See below for further instructions for Windows and Linux.
Windows 2016, 2019 or 2022
Launch a server that can be used to install the Keyfactor Universal Orchestrator. In this case we are using a Windows 2019 VM (Virtual Machine). This host will need outbound internet access so it can install any needed packages to run the Universal Orchestrator and connect back to the Test Drive. There are no firewall requirements to get the orchestrator to communicate back to the Test Drive instance other than port 443 outbound.
Once the server used to run the Universal Orchestrator has been identified, on the console for that server, go to the Test Drive Landing Page and download the Universal Orchestrator bundle.

Clicking the Orchestrator Bundle link will prompt you for a password to download a zip file containing the Universal Orchestrator, a public certificate from the Test Drive instance (so it can make a TLS (Transport Layer Security) connection back to the Test Drive host), and an installer script. Enter the Test Drive username and password from the Test Drive interface in the Azure Portal.
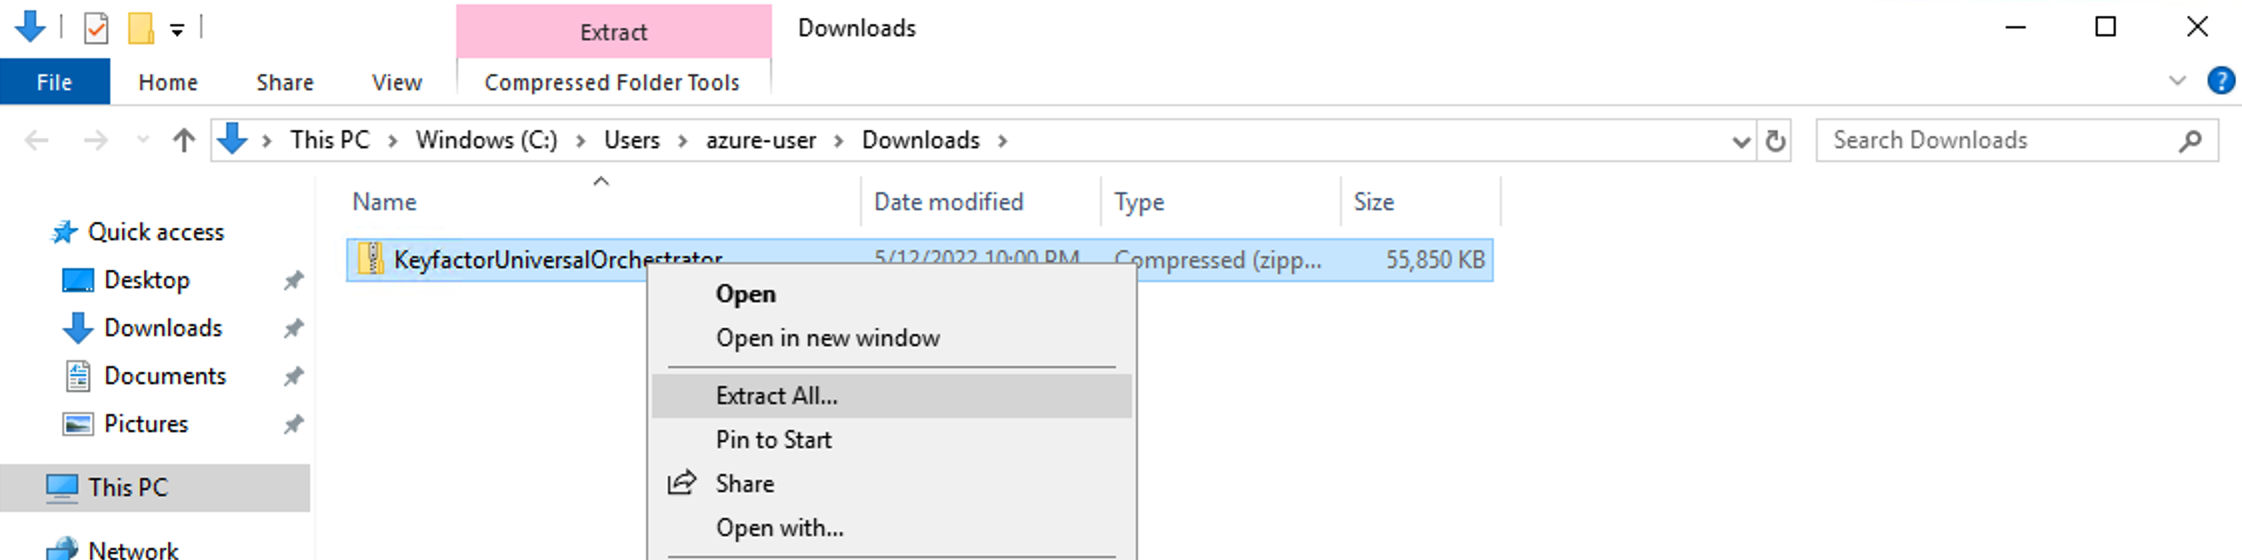
Download the bundle, right-click on the file, and select Extract All.
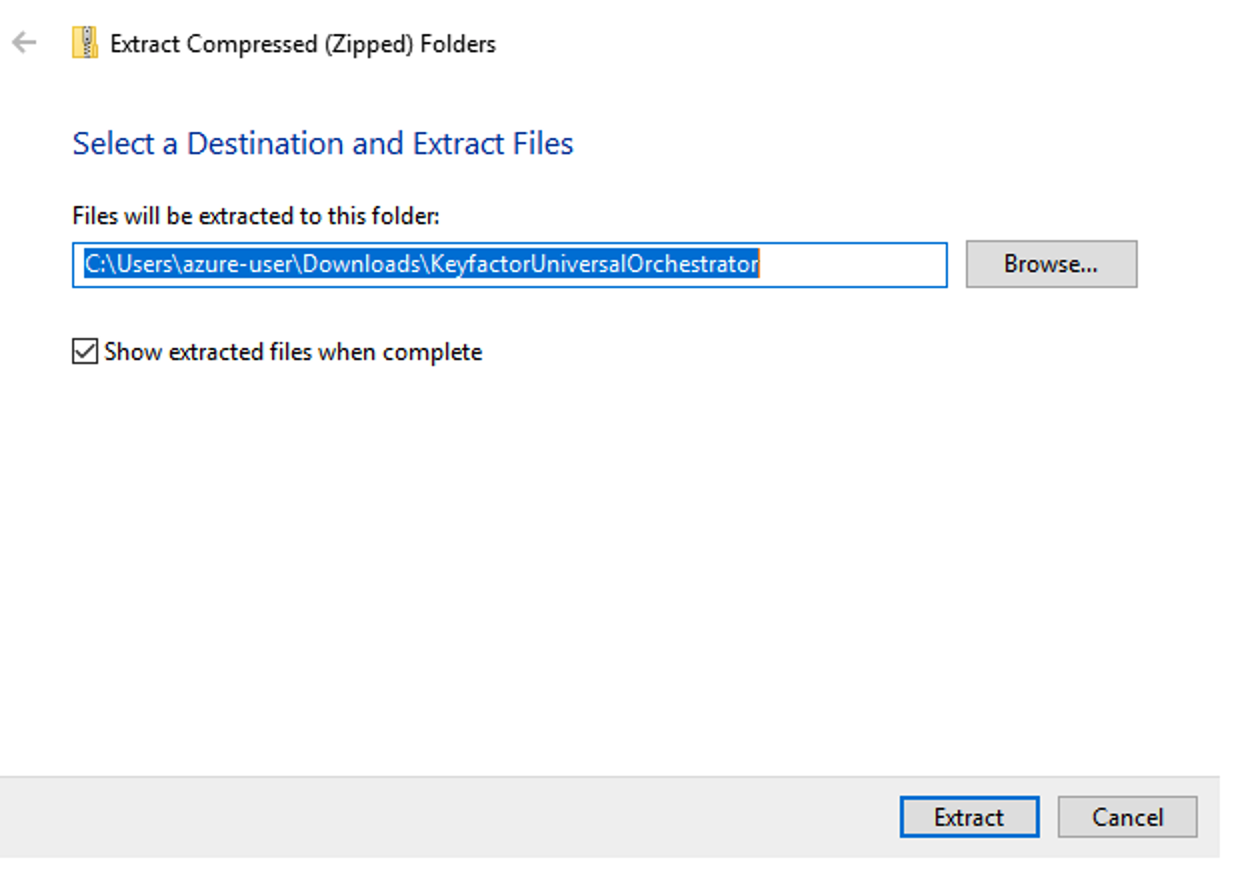
Pick a location for the file to extract, or just click Extract.
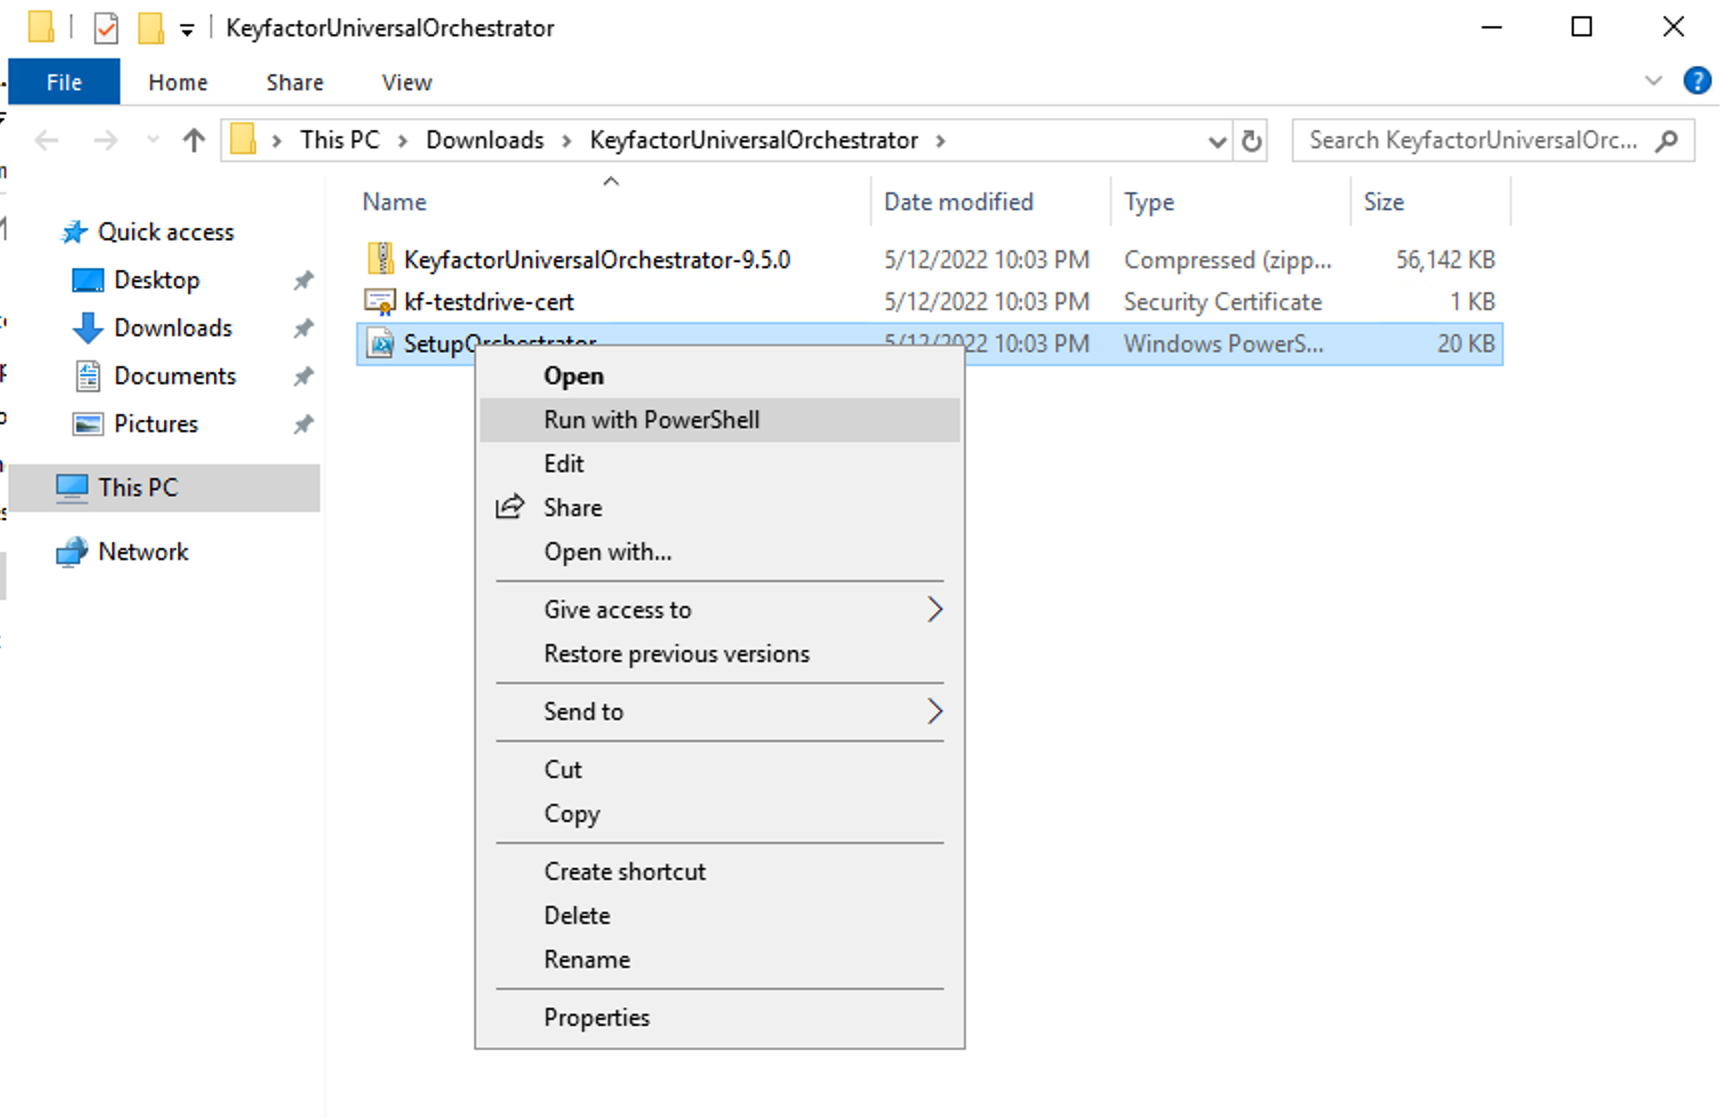
The extracted files will appear. If you are logged in as an administrator proceed to option A below. If not, proceed to option B.
Right click on the SetupOrchestrator.ps1 file and select Run with PowerShell.
NOTE: If you run the SetupOrchestrator.ps1 script in ISE, make sure to change directory (cd) to the location of the downloaded files. It is recommended to run the script in a standard PowerShell session.
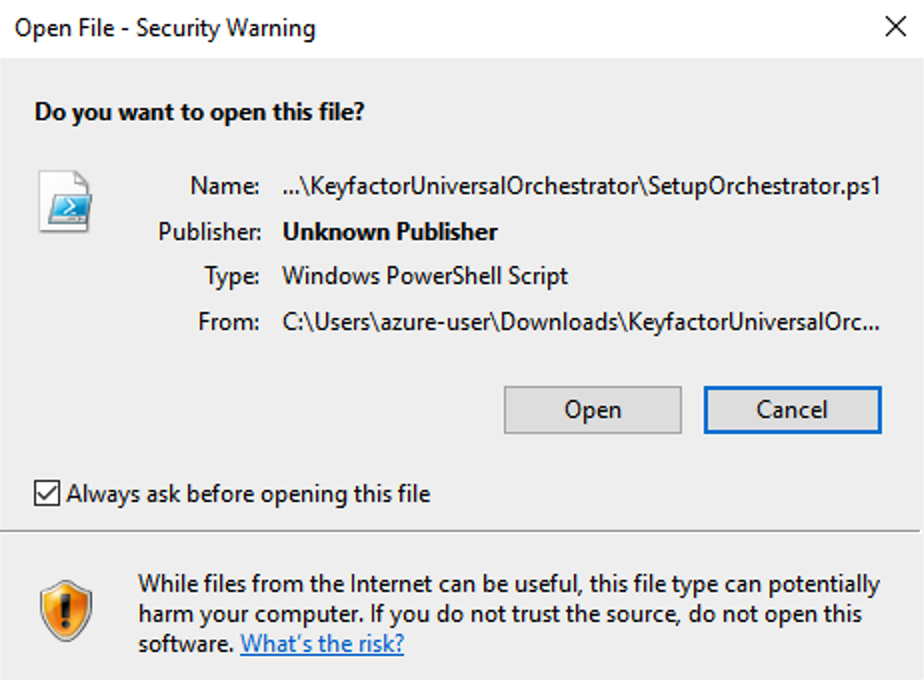
On the open file dialog click Open
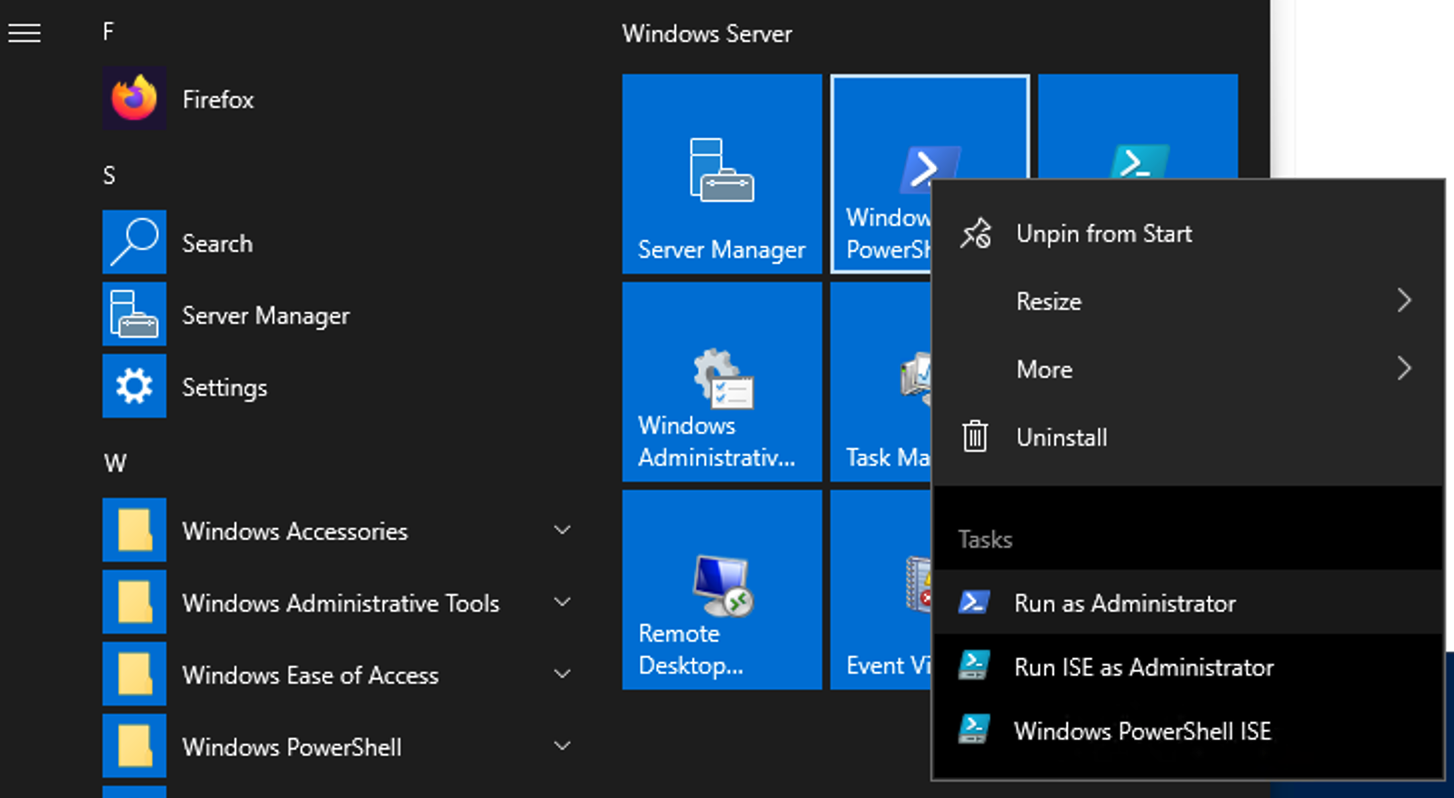
If you are not logged in as an administrator, right click the PowerShell icon and select Run as Administrator.
Change directory (cd) to the directory containing the script and run it.
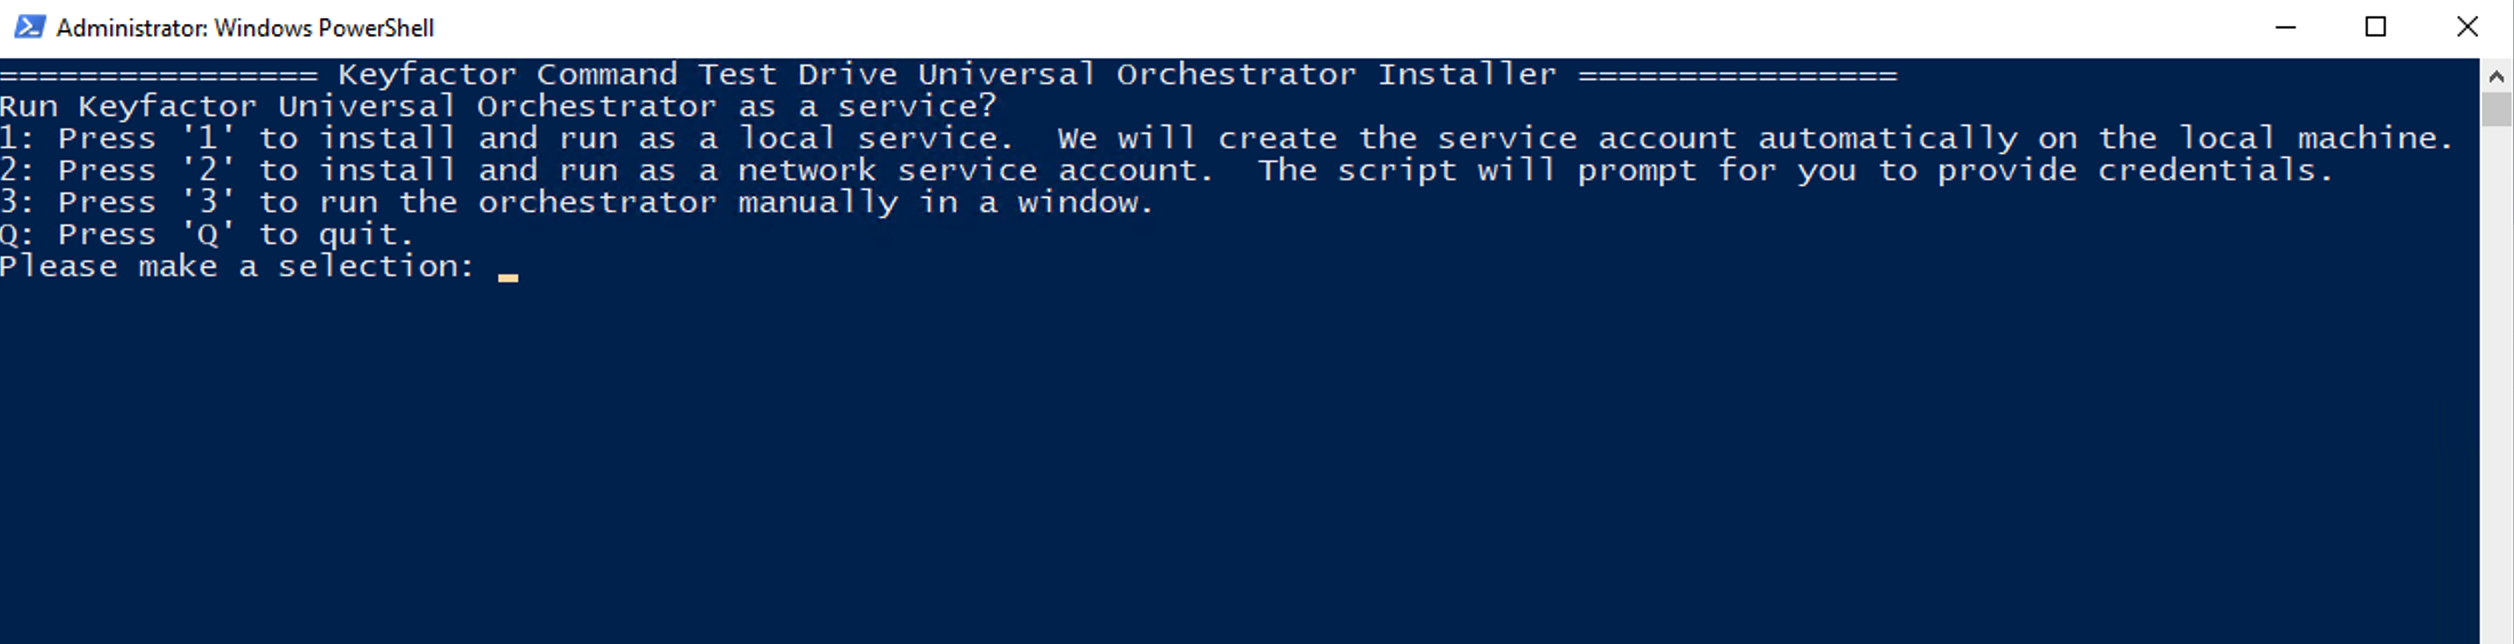
A PowerShell window will appear with options for installation. There are 4 options:
-
Install and run the Keyfactor Universal Orchestrator as a Service with credentials added by the script: The script will generate a local user with administrative privileges on the local computer.
-
Install and run the Keyfactor Universal Orchestrator as a Service with user provided credentials: You will be prompted to enter a domain\username and password combination during the installation. This can be on the local computer or a user/service account on the domain.
-
Run the Keyfactor Universal Orchestrator in a PowerShell window: This will mean that you need to manually start the Universal Orchestrator each time the system is logged off or rebooted.
-
Quit: Exits the script.
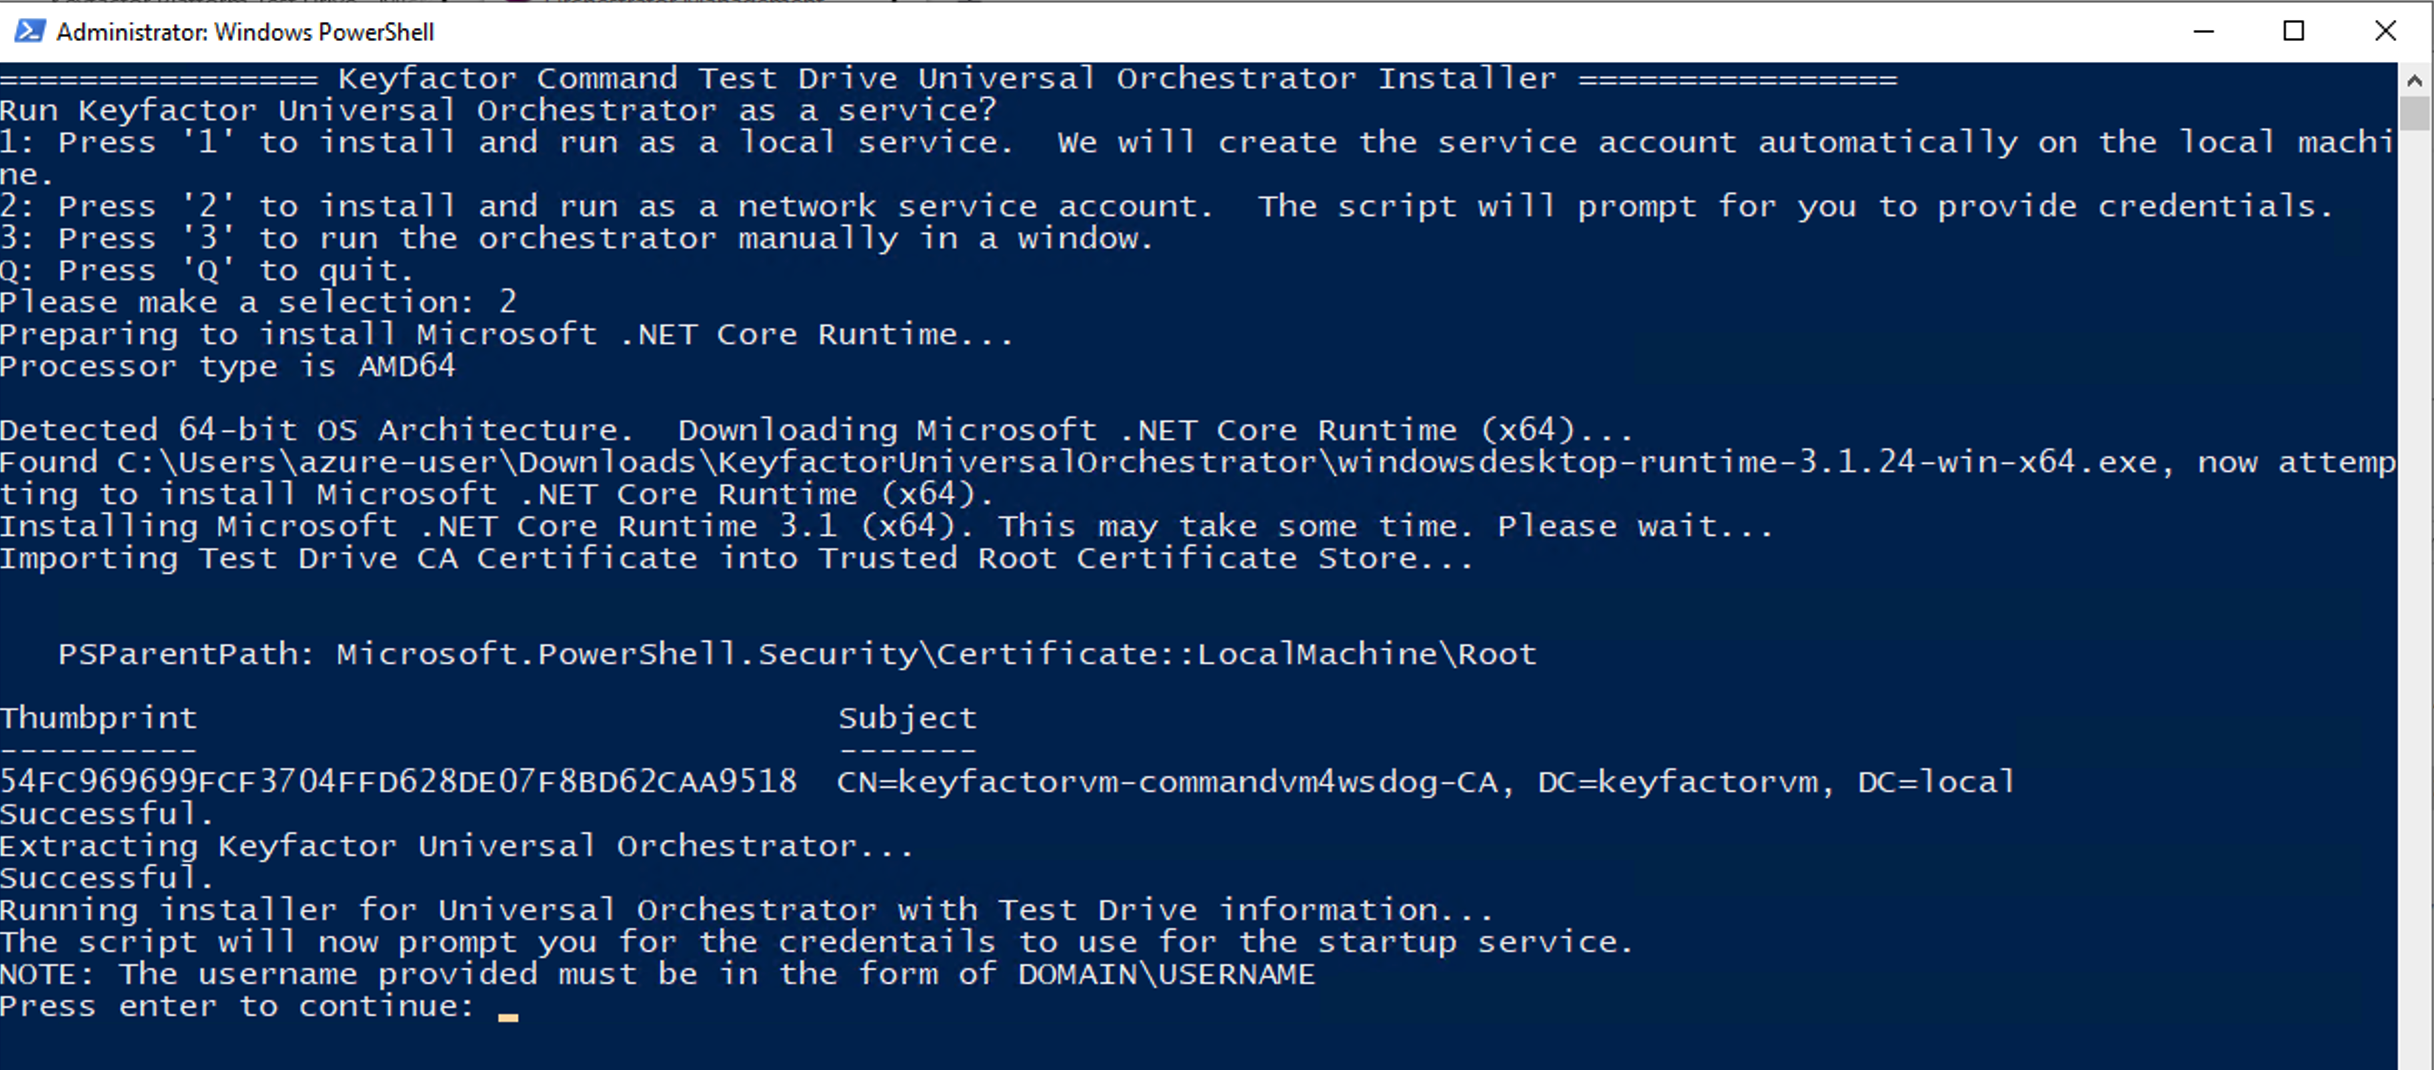
Selecting any of the options will check to see if “.NET Core 3.1” is installed. If it is not, the script will automatically install either the 32-bit or 64-bit version for you depending on your system. If it is already installed, but in a non-default location, it will still download the installer, but skip installation. After this it will add the public certificate for the Test Drive into the local Trusted Root Certification Authorities computer store. Then it will extract the Keyfactor Universal Orchestrator and configure it. If you need access to the setup or Orchestrator logs, refer to Appendices 2 or 3.
Option 1 – Run as a service with user provided credentials
Selecting Option 1 will run the Universal Orchestrator as a service with credentials you provide. Once the installation steps outlined above are completed, it will stop and ask you to press enter before you need to provide the credentials. This can also be useful if you are installing the orchestrator on a domain joined system where local users will not be able to access domain resources.
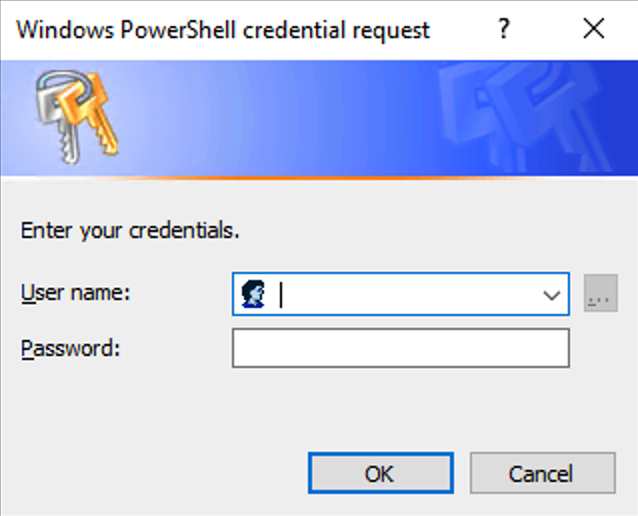
Pressing enter will make a Windows Get-Credential dialog appear so you can enter the desired credentials.
If you fail to supply valid credentials, the script will ask you if you want to try again.
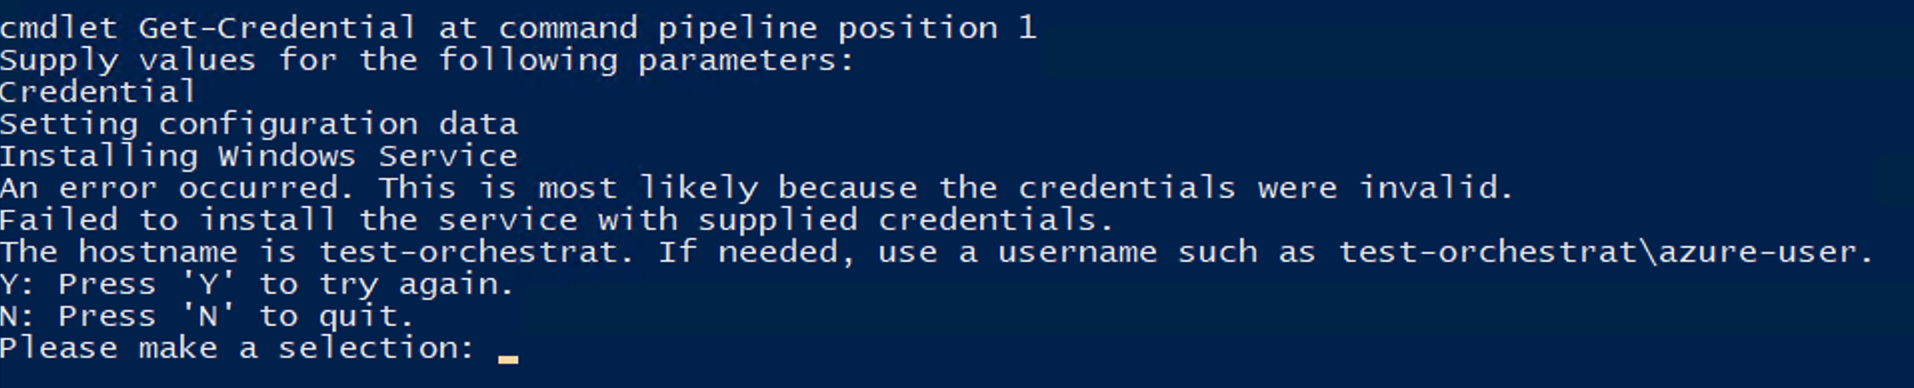
Press Y to repeat the process, or N to exit the script. Pressing Y will prompt you for credentials. If the credentials are valid, the script will prompt you for the Test Drive instance password. Use the password that was generated as part of the Test Drive. Once prompted, paste your password using the powershell Edit → Paste the value into the script using the PowerShell Edit/Paste method in the terminal window. Once pasted into the PowerShell window, the service will be installed and started automatically.
You can then continue with the next section to set up the Universal Orchestrator in the Command Server Portal.
Option 2 – Run as a service with generated credentials
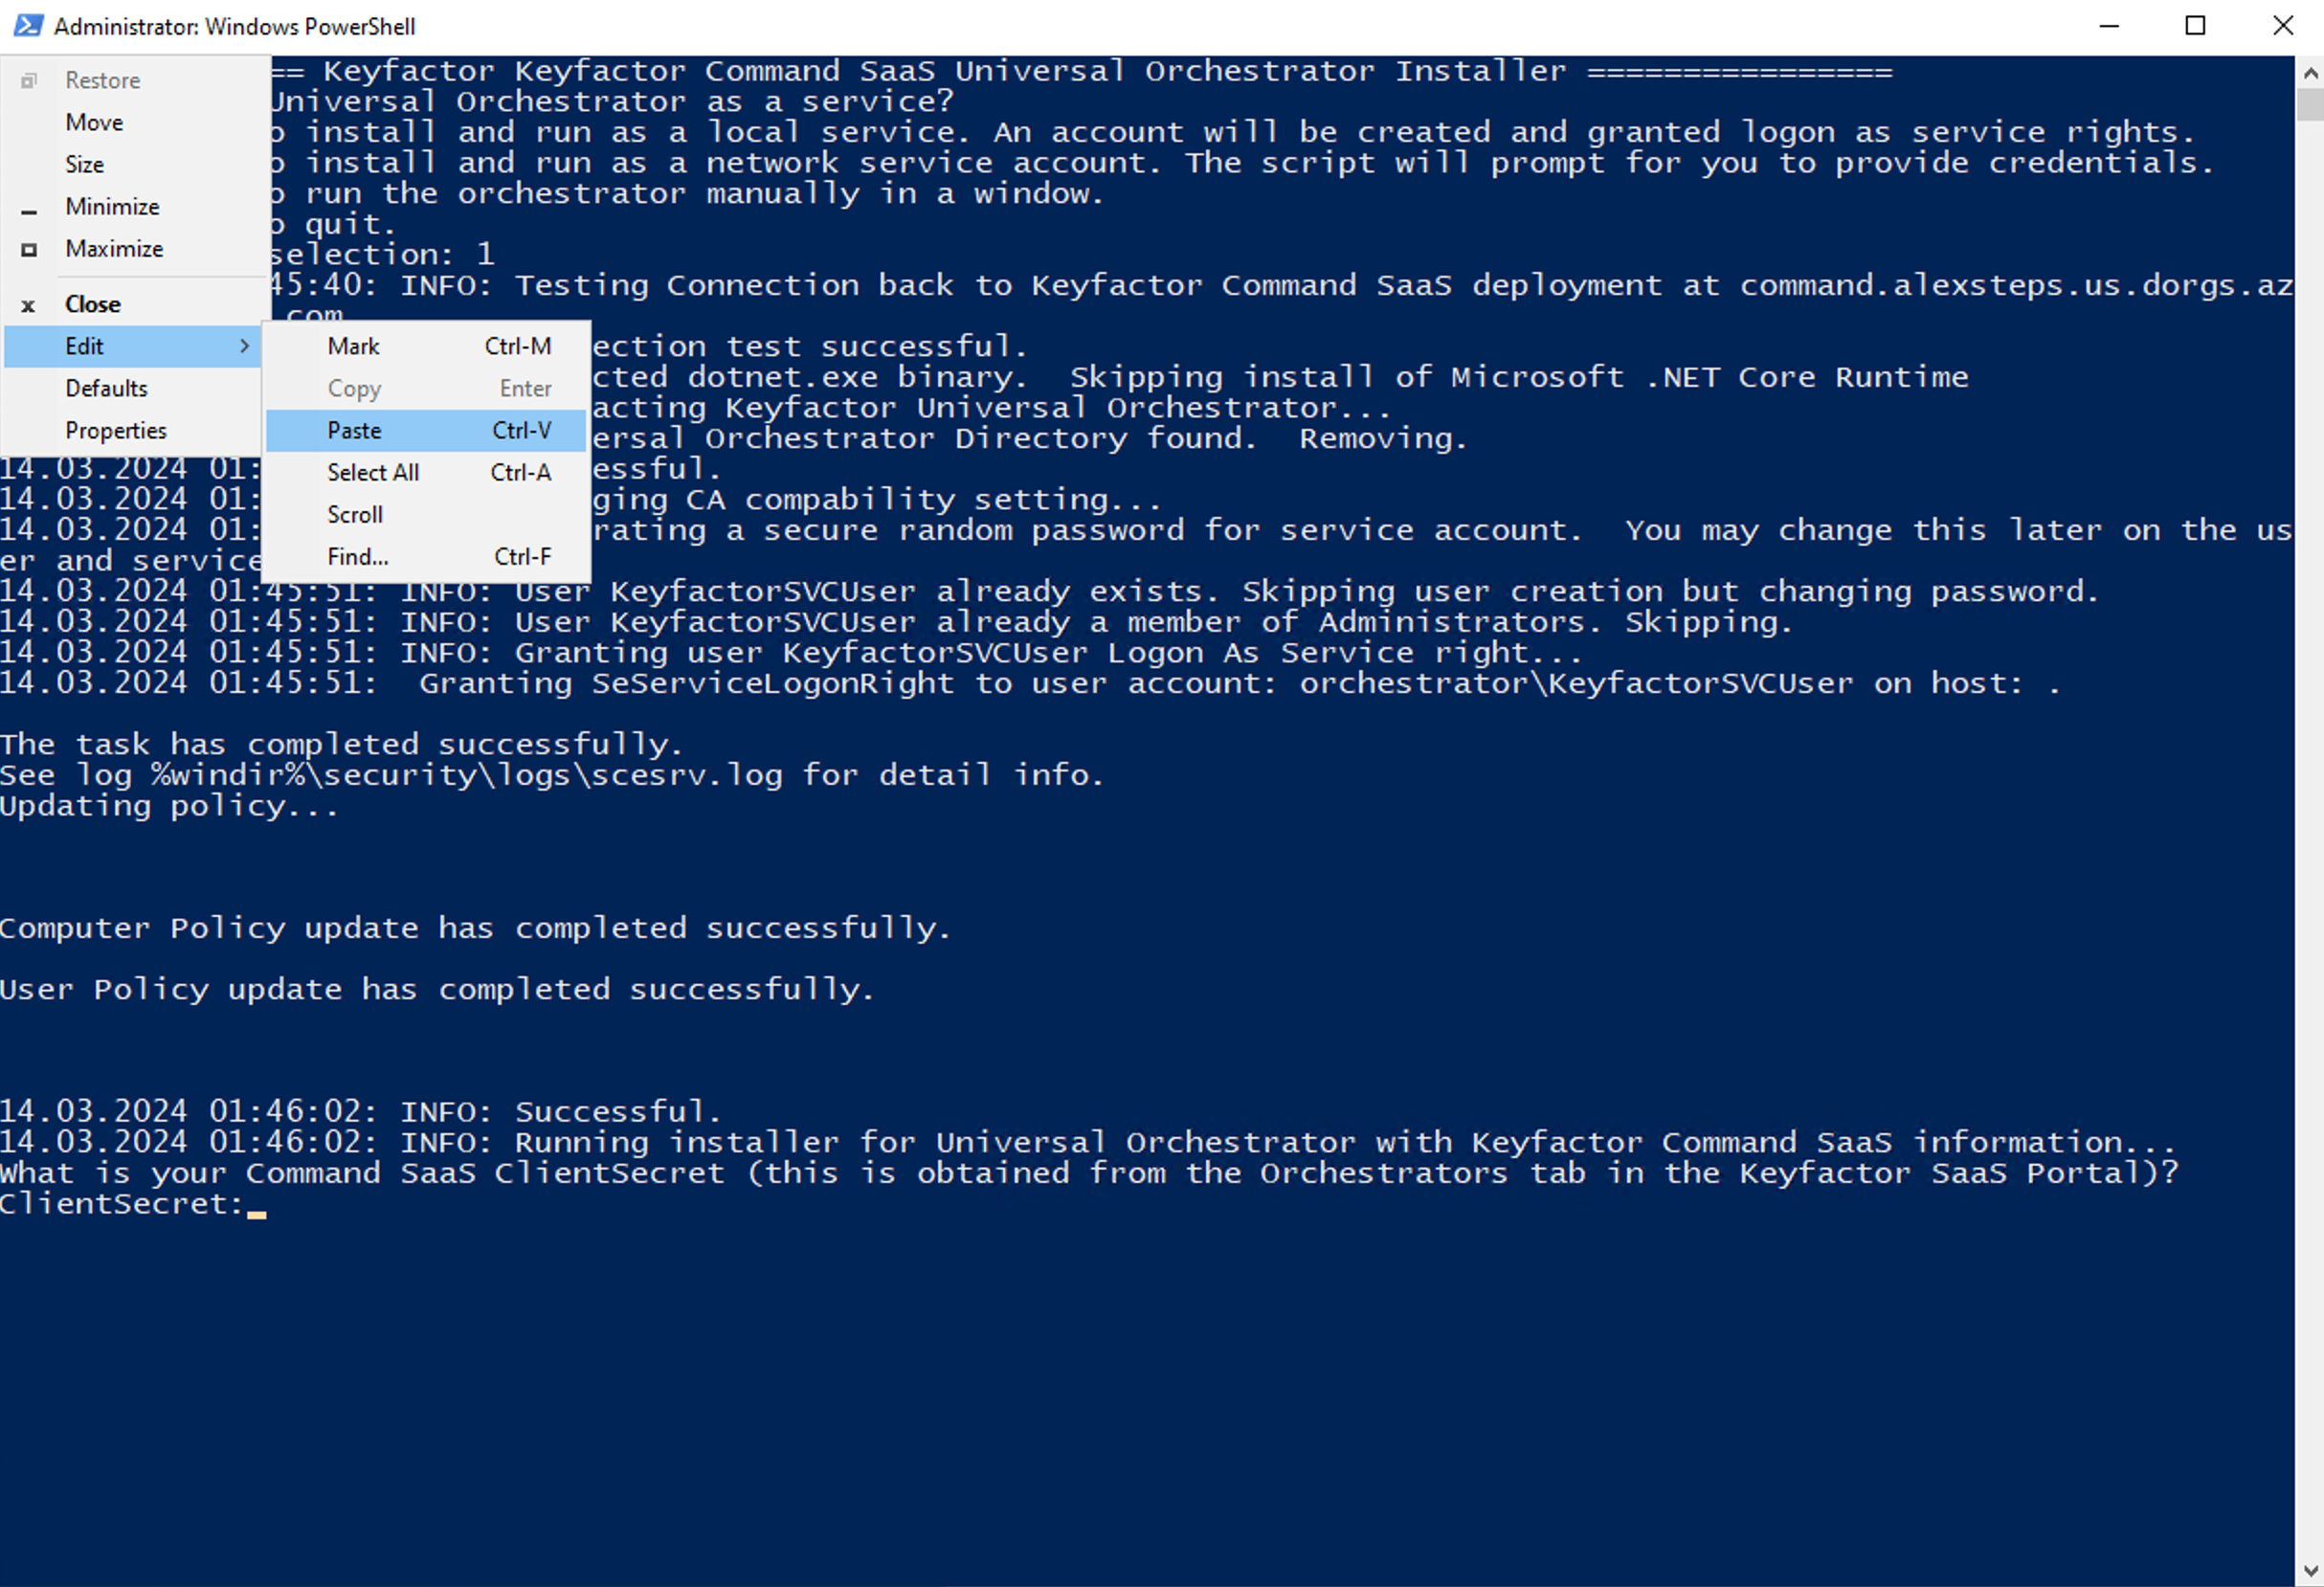
Selecting this option will run the Keyfactor Universal Orchestrator as a service with credentials generated from this script. It will create a user called “KEYFACTOR_TESTDRIVE” and give it the same password that is used to access your Test Drive instance. This is the easiest and most straightforward way to get the orchestrator running. During the installation, the script will prompt you for the Test Drive instance password. Use the password that was generated as part of the Test Drive. Once prompted, paste your password using the PowerShell Edit → Paste the value into the script using the PowerShell Edit/Paste method in the terminal window. Once pasted into the PowerShell window, the service will be installed and started automatically.
You can then proceed with the next section to set up the Universal Orchestrator in the Command Server Portal.
Option 3 – Run in a window
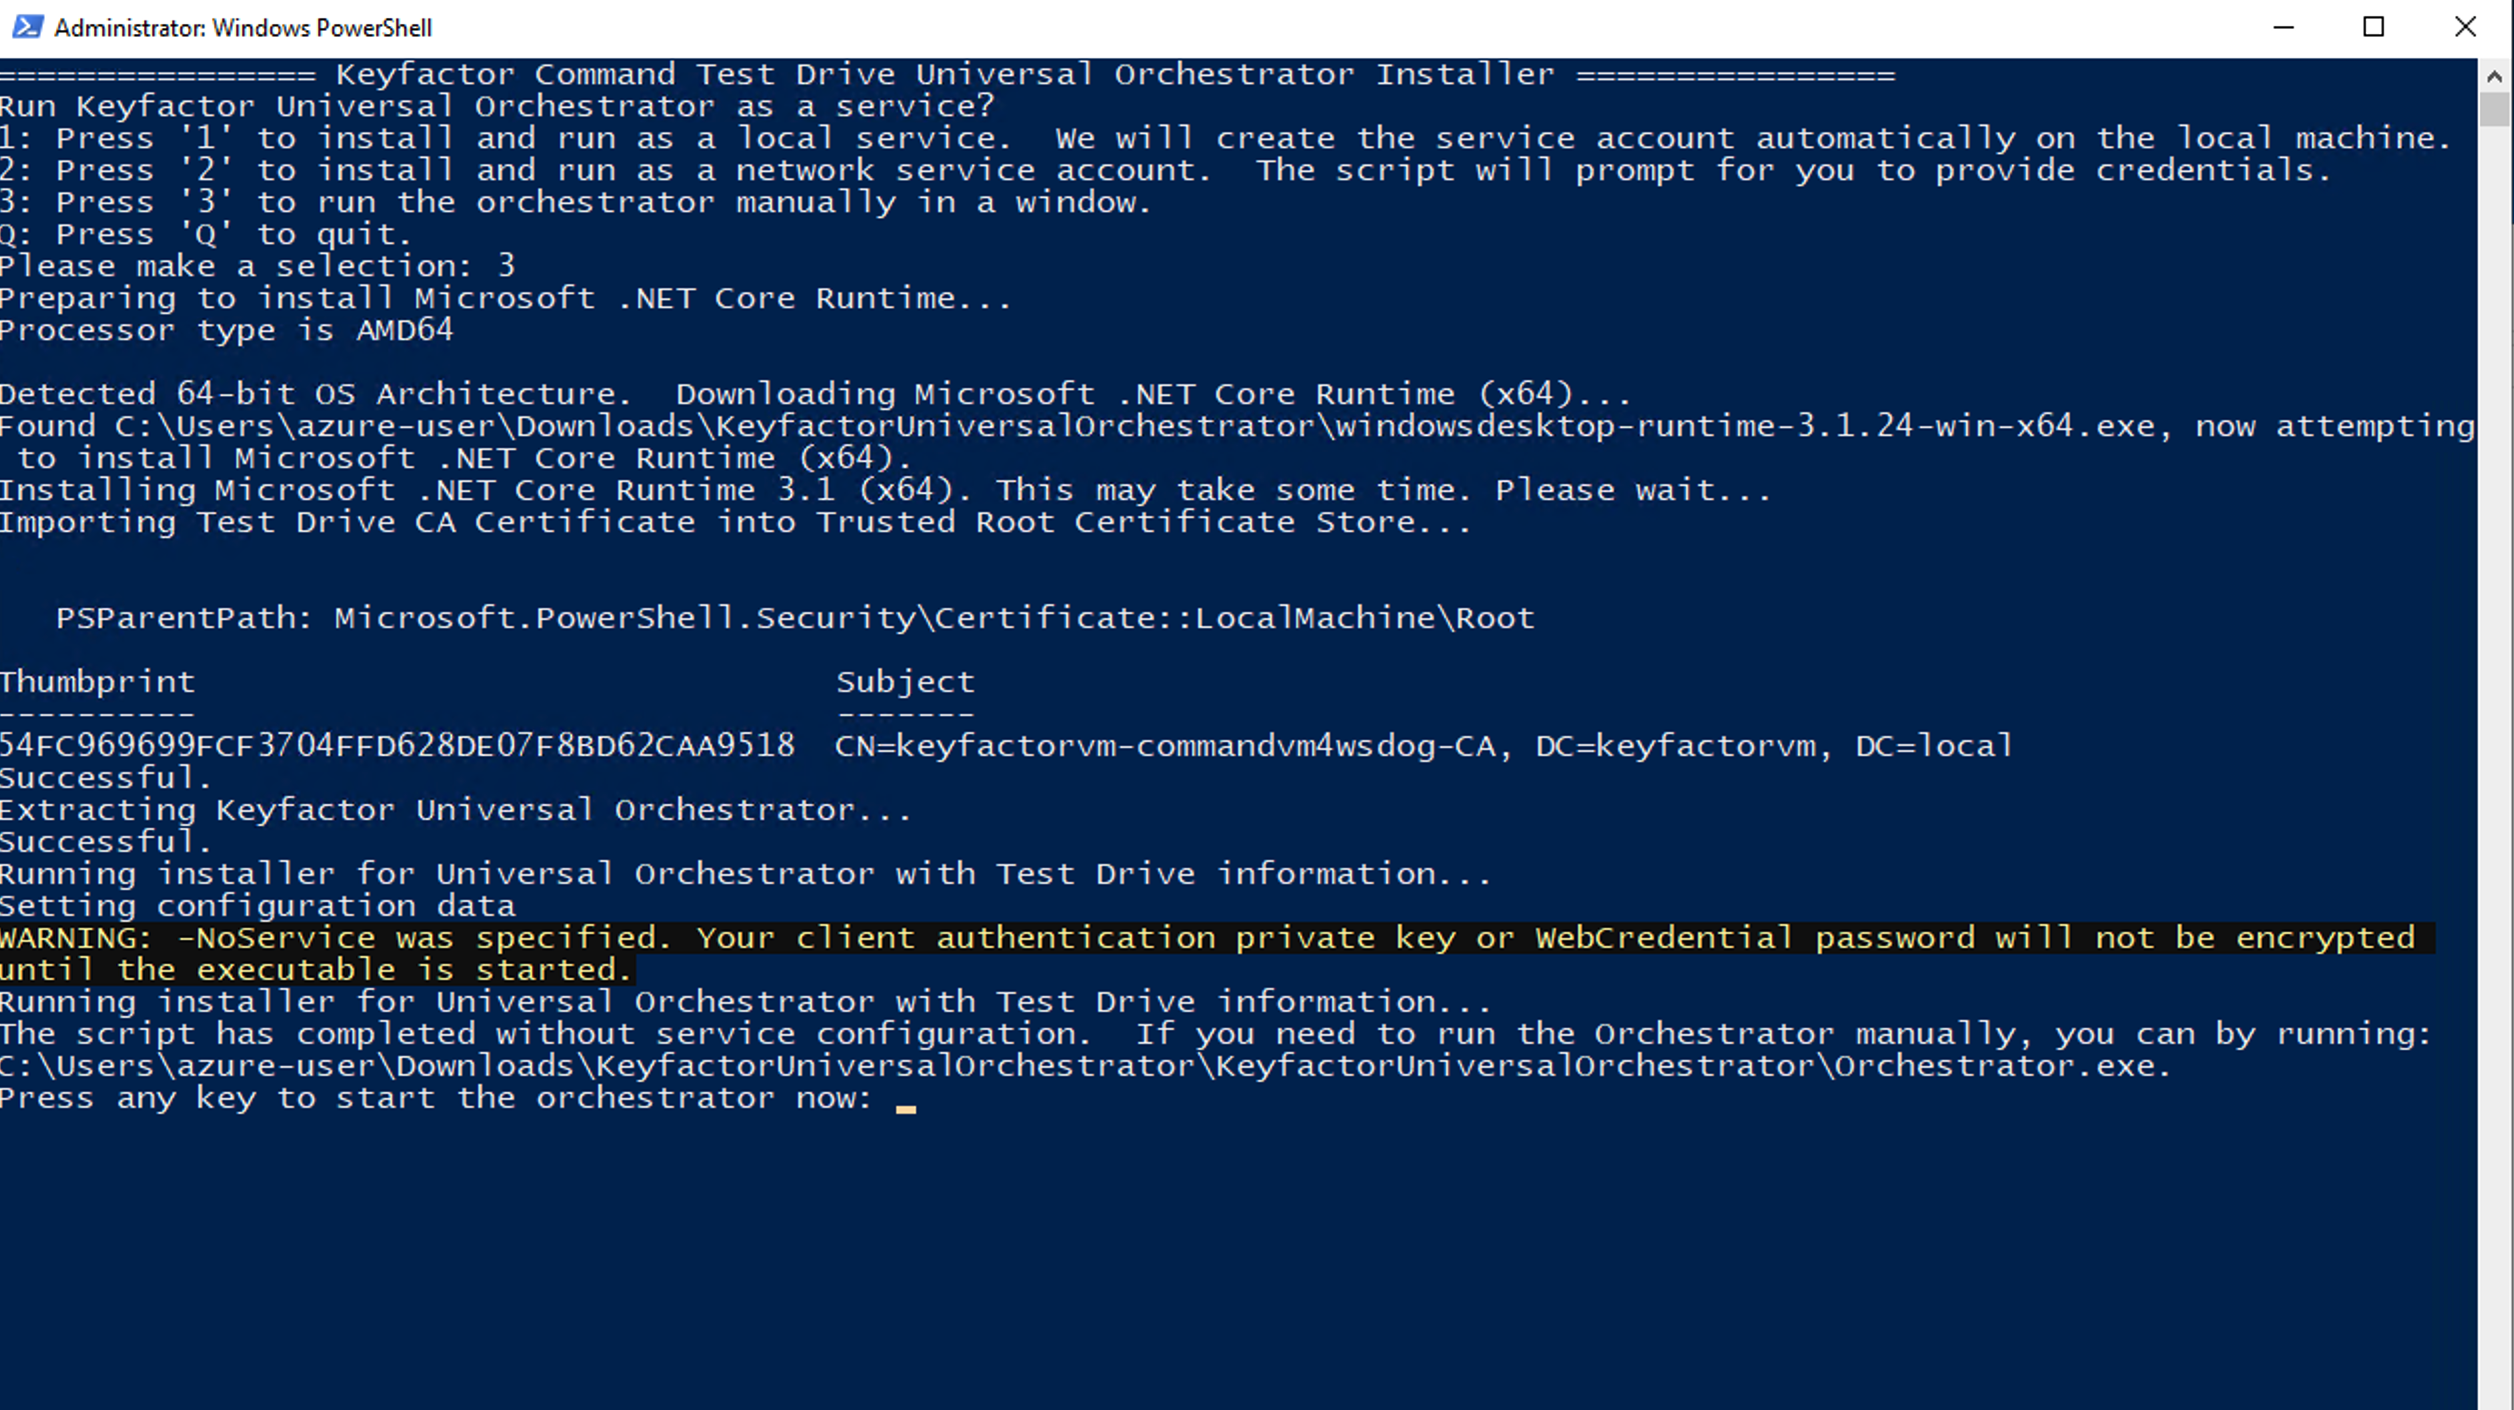
Selecting option 3 will run the orchestrator in a window for you. During the installation, the script will prompt you for the Test Drive instance password. Use the password that was generated as part of the Test Drive. Once prompted, paste your password using the powershell Edit → Paste the value into the script using the PowerShell Edit/Paste method in the terminal window. Once pasted into the PowerShell window, the service will be installed and started automatically.
Once the installation steps outlined above are completed, it will stop and ask you to press enter before starting the orchestrator for you. Make a note of the path noted in the Window. This is the path that you can use to manually start the orchestrator later.
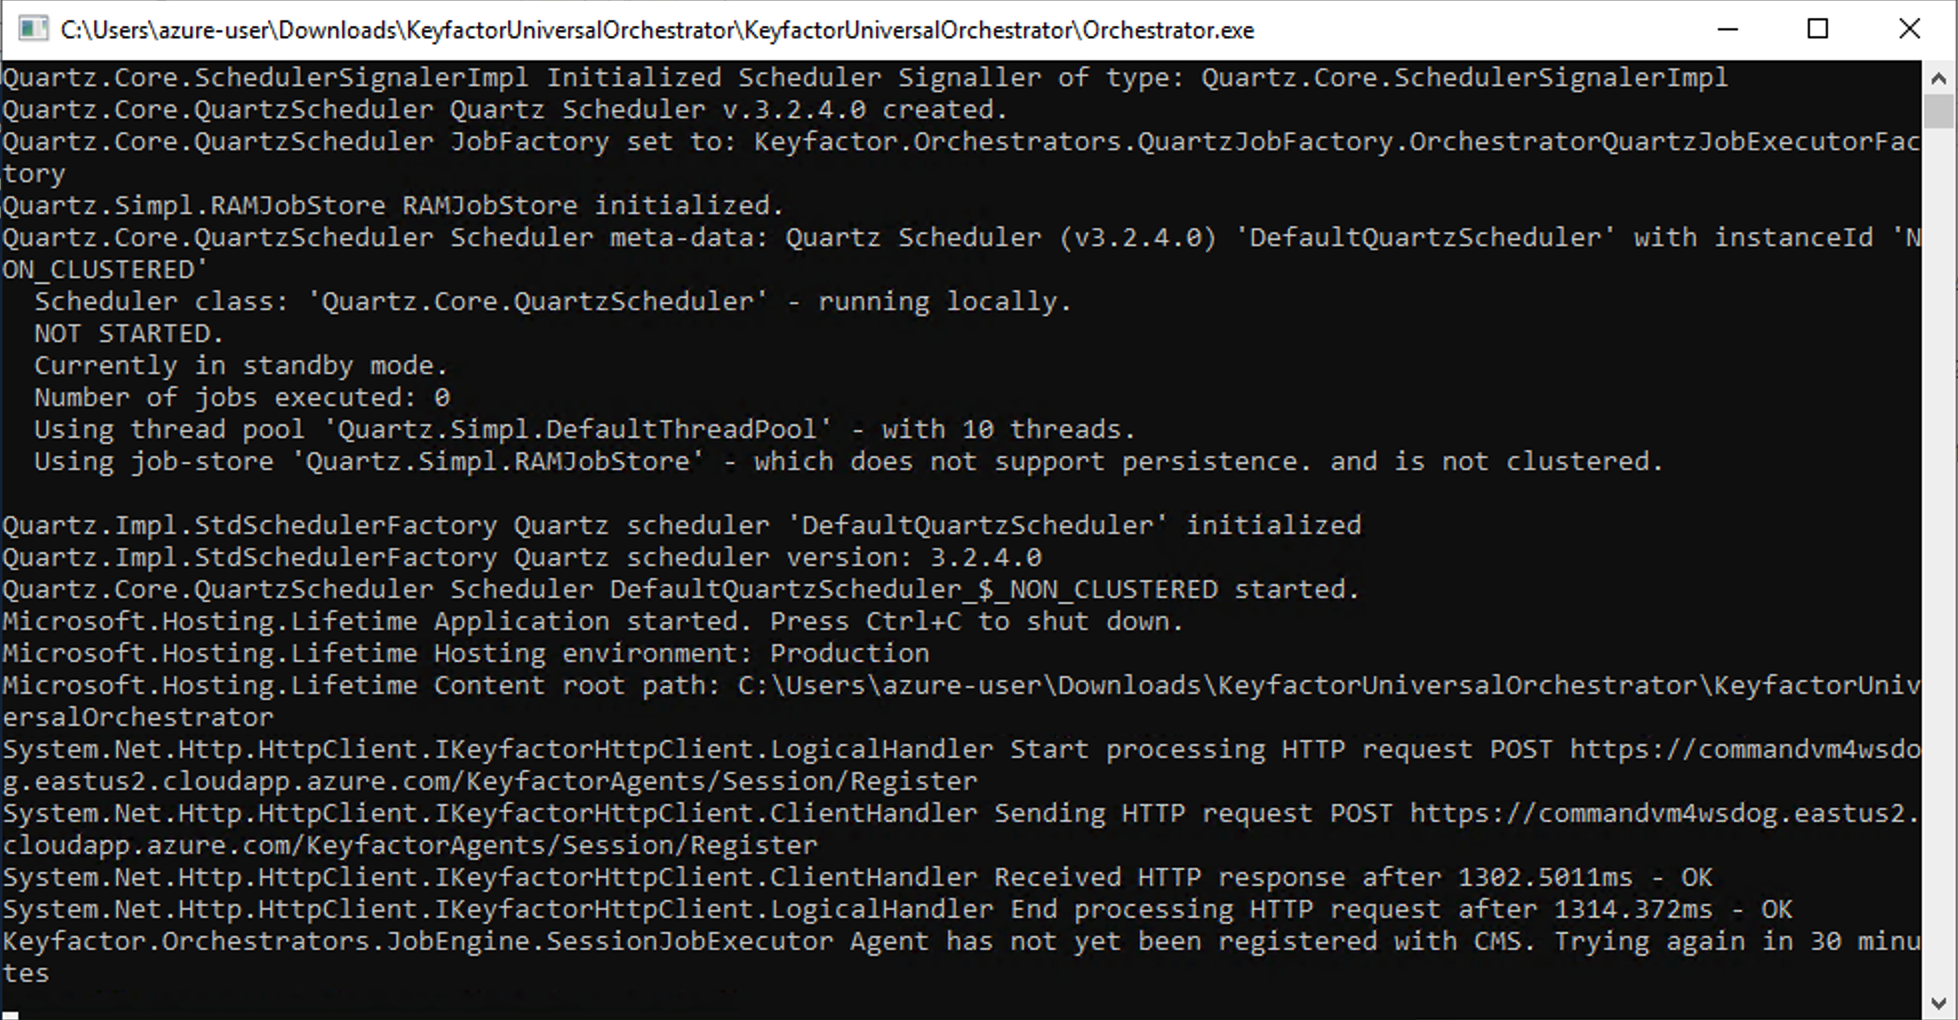
Once you press enter, a new window will appear with the Universal Orchestrator log output, and the install window will close.
You can then proceed with the next section to set up the Universal Orchestrator in the Command Server Portal.
Linux Install
Start a Linux host and download the install bundle from the test drive. Use a browser on the host to access the Test Drive start page. If using the terminal, use wget. For example (replace the URL with the one from your Test Drive:
# wget https://<mytestdriveurl>.eastus2.cloudapp.azure.com/KeyfactorUniversalOrchestrator.zip -O /opt/KeyfactorUniversalOrchestrator.zip

# cd /opt

# unzip KeyfactorUniversalOrchestrator.zip

# chmod +x SetupOrchestrator.sh
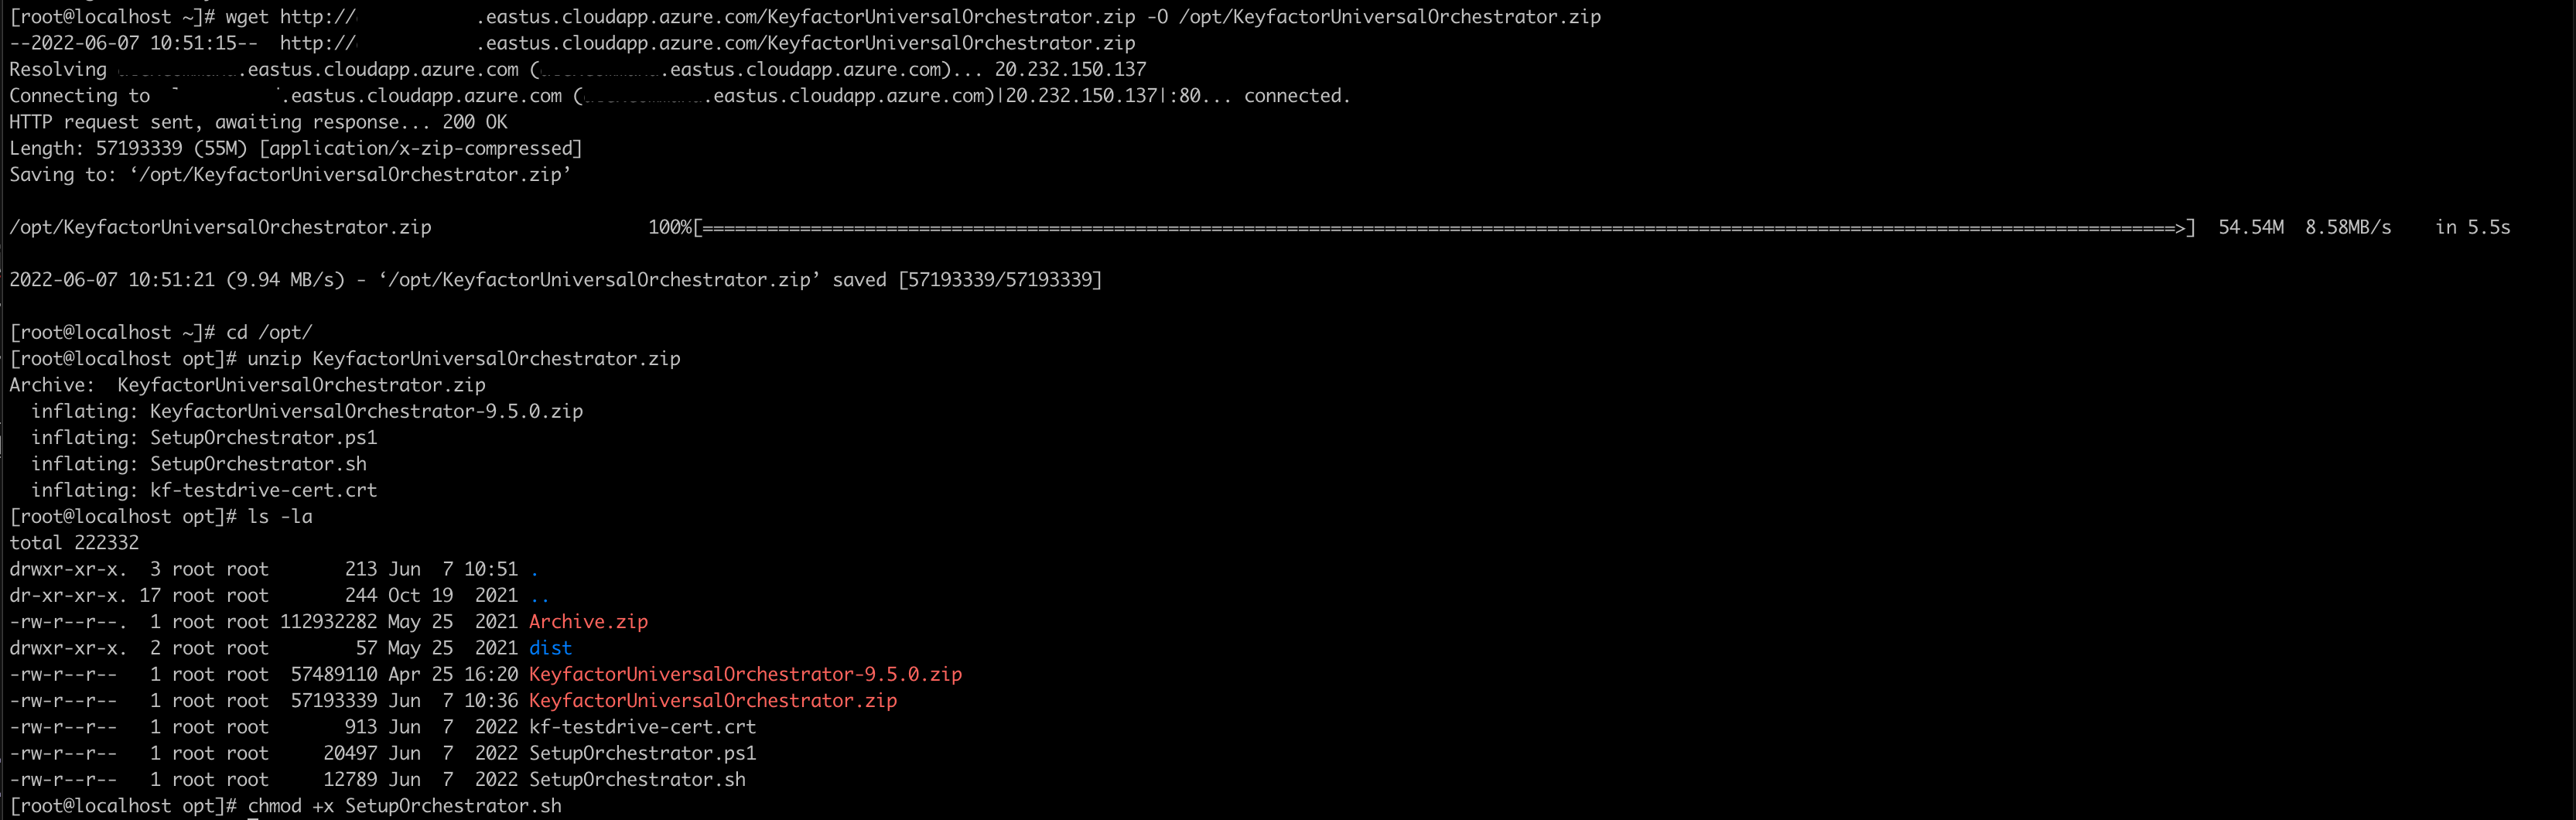
Once the above steps are performed, run the script:
# ./SetupOrchestrator.sh
The following options are presented:
-
Install and run the Keyfactor Universal Orchestrator as a Service with systemd.
-
Install and run the Keyfactor Universal Orchestrator in the terminal manually: This will mean that you need to manually start the Universal Orchestrator each time the system is logged off or rebooted.
-
Quit: Exits the script.
Option 1 – With Service
Selecting option 1 will install the Universal Orchestrator and allow it to run in the background. First the script will install dotnet core 3.1 if it is not already installed. It might find some other dependencies that it also needs to install to perform the install automatically.
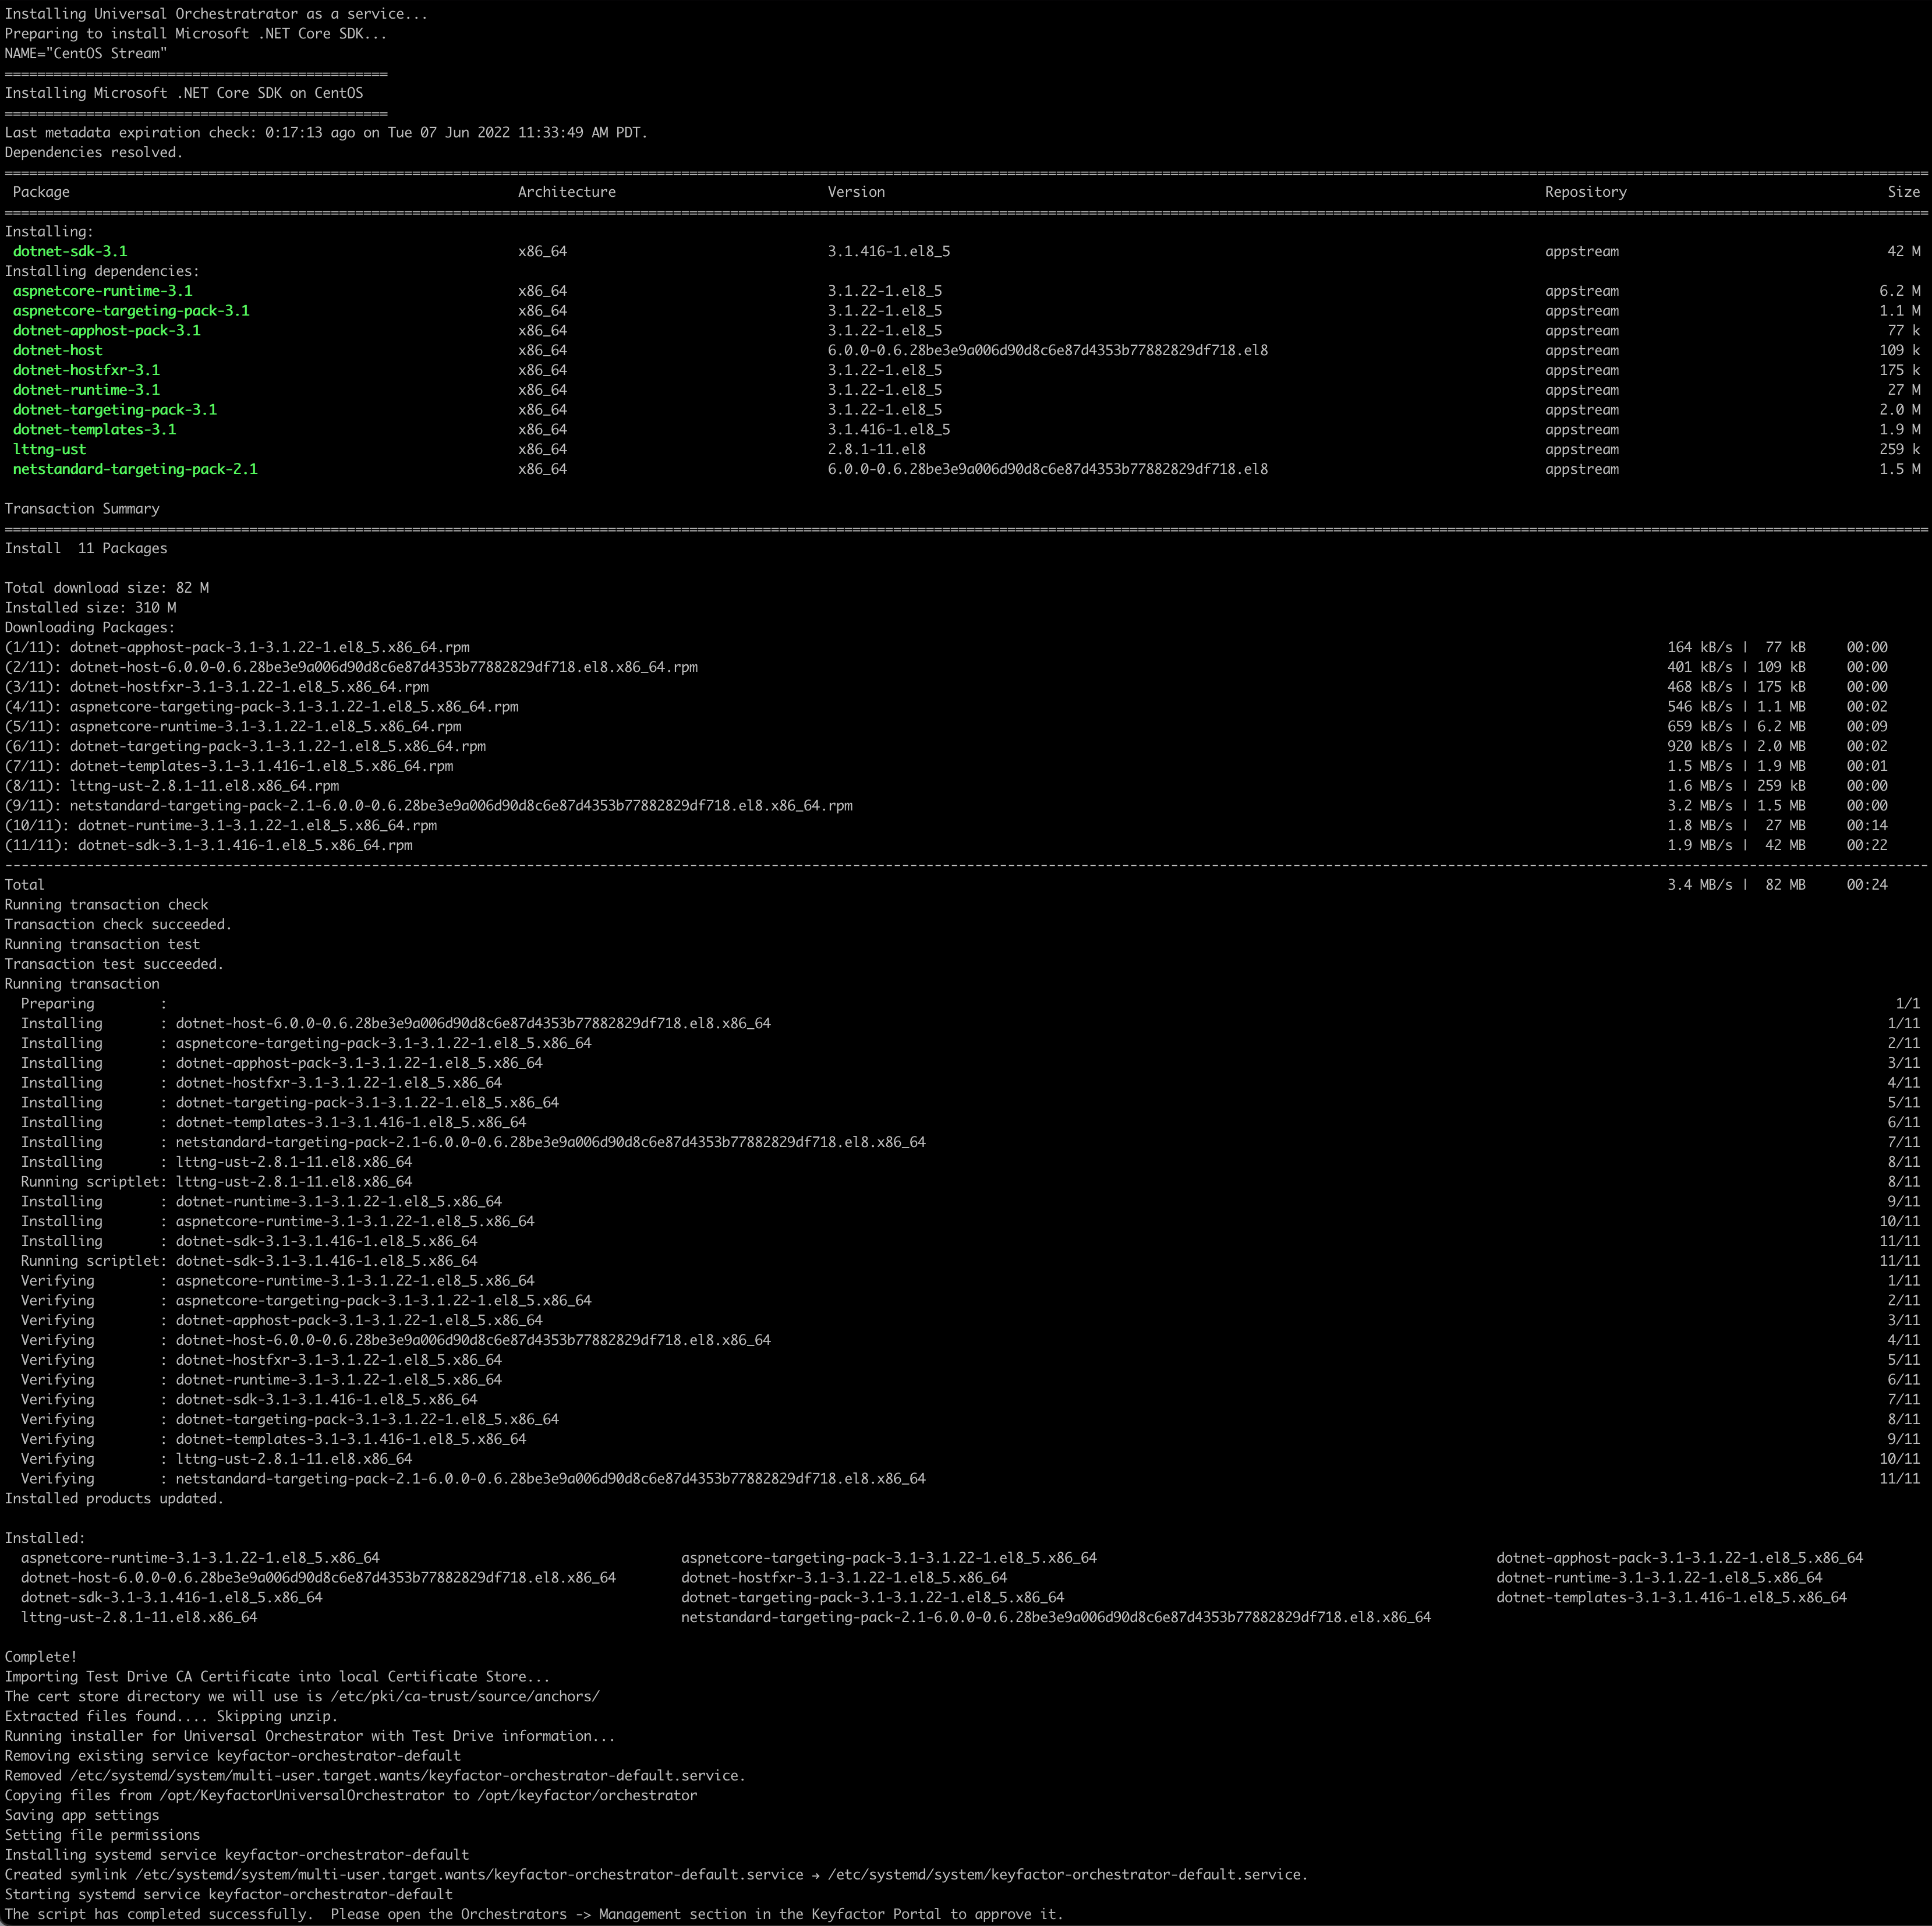
At the end, the script will start the service and ask you to register it in Keyfactor Command.
Option 2 – No Service
Selecting option 2 will install the Universal Orchestrator and run it in the current terminal session. First the script will install dotnet core 3.1 if it is not already installed. It might find some other dependencies that it also needs to install.
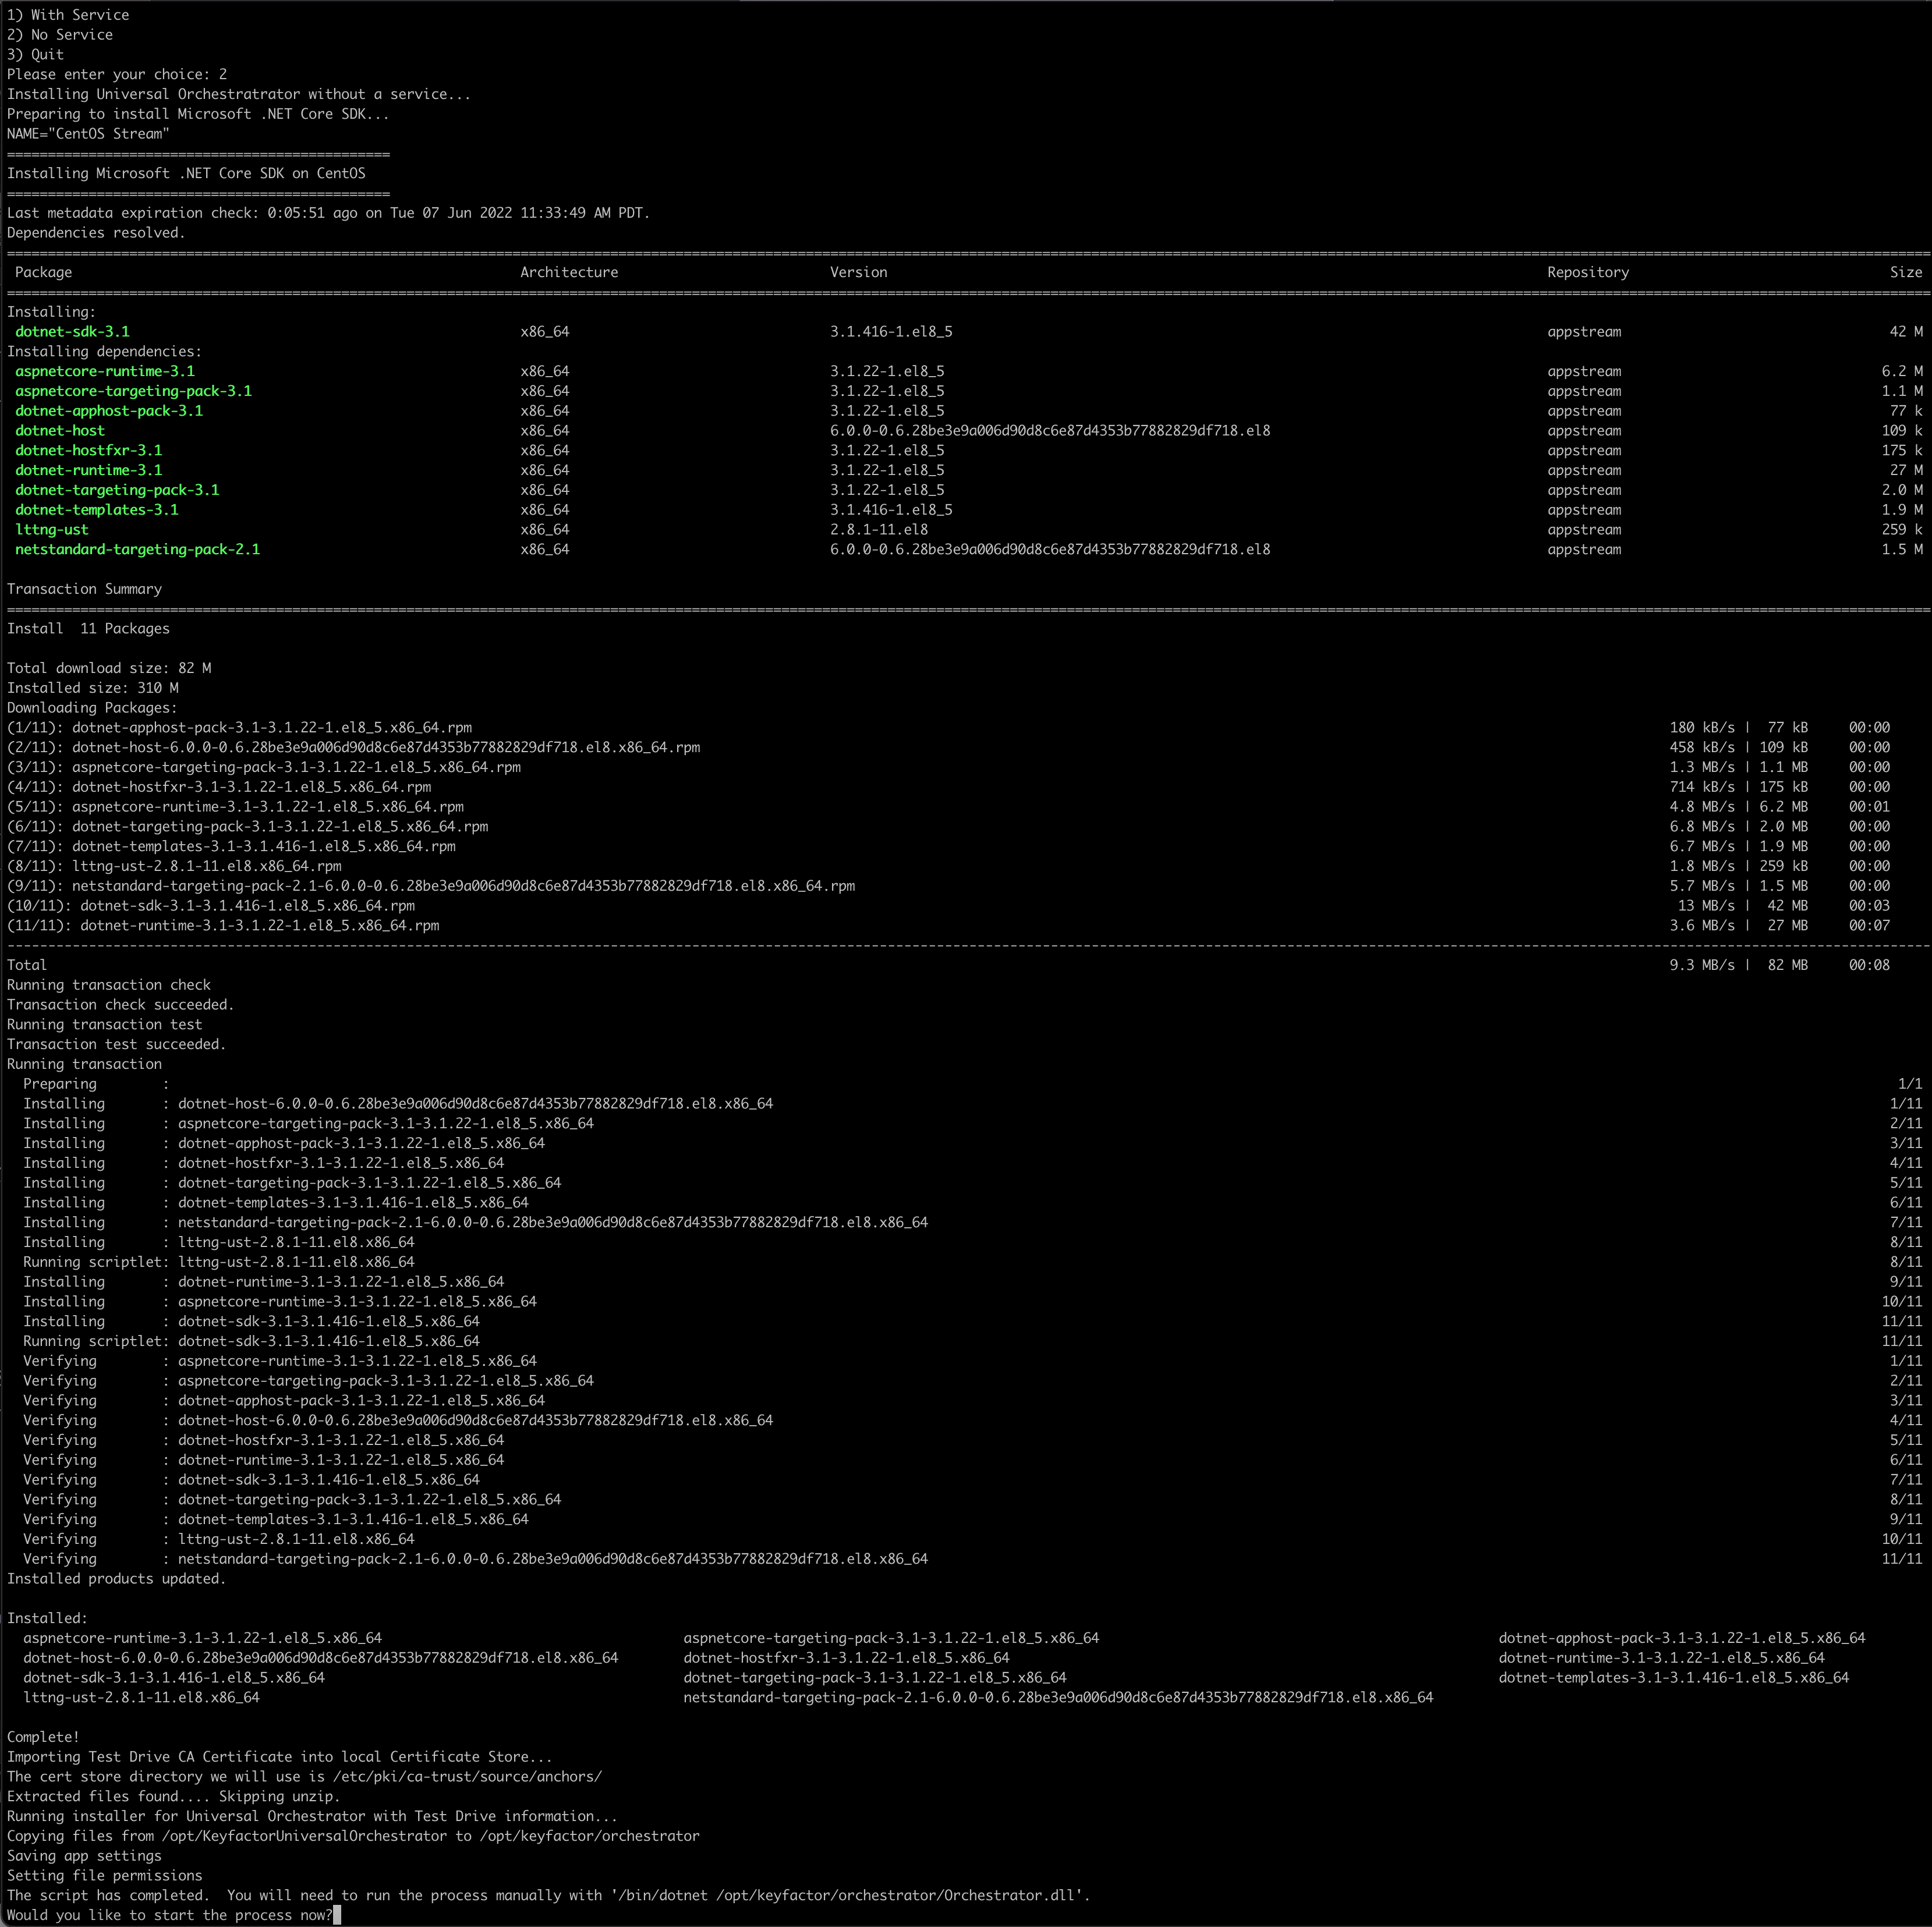
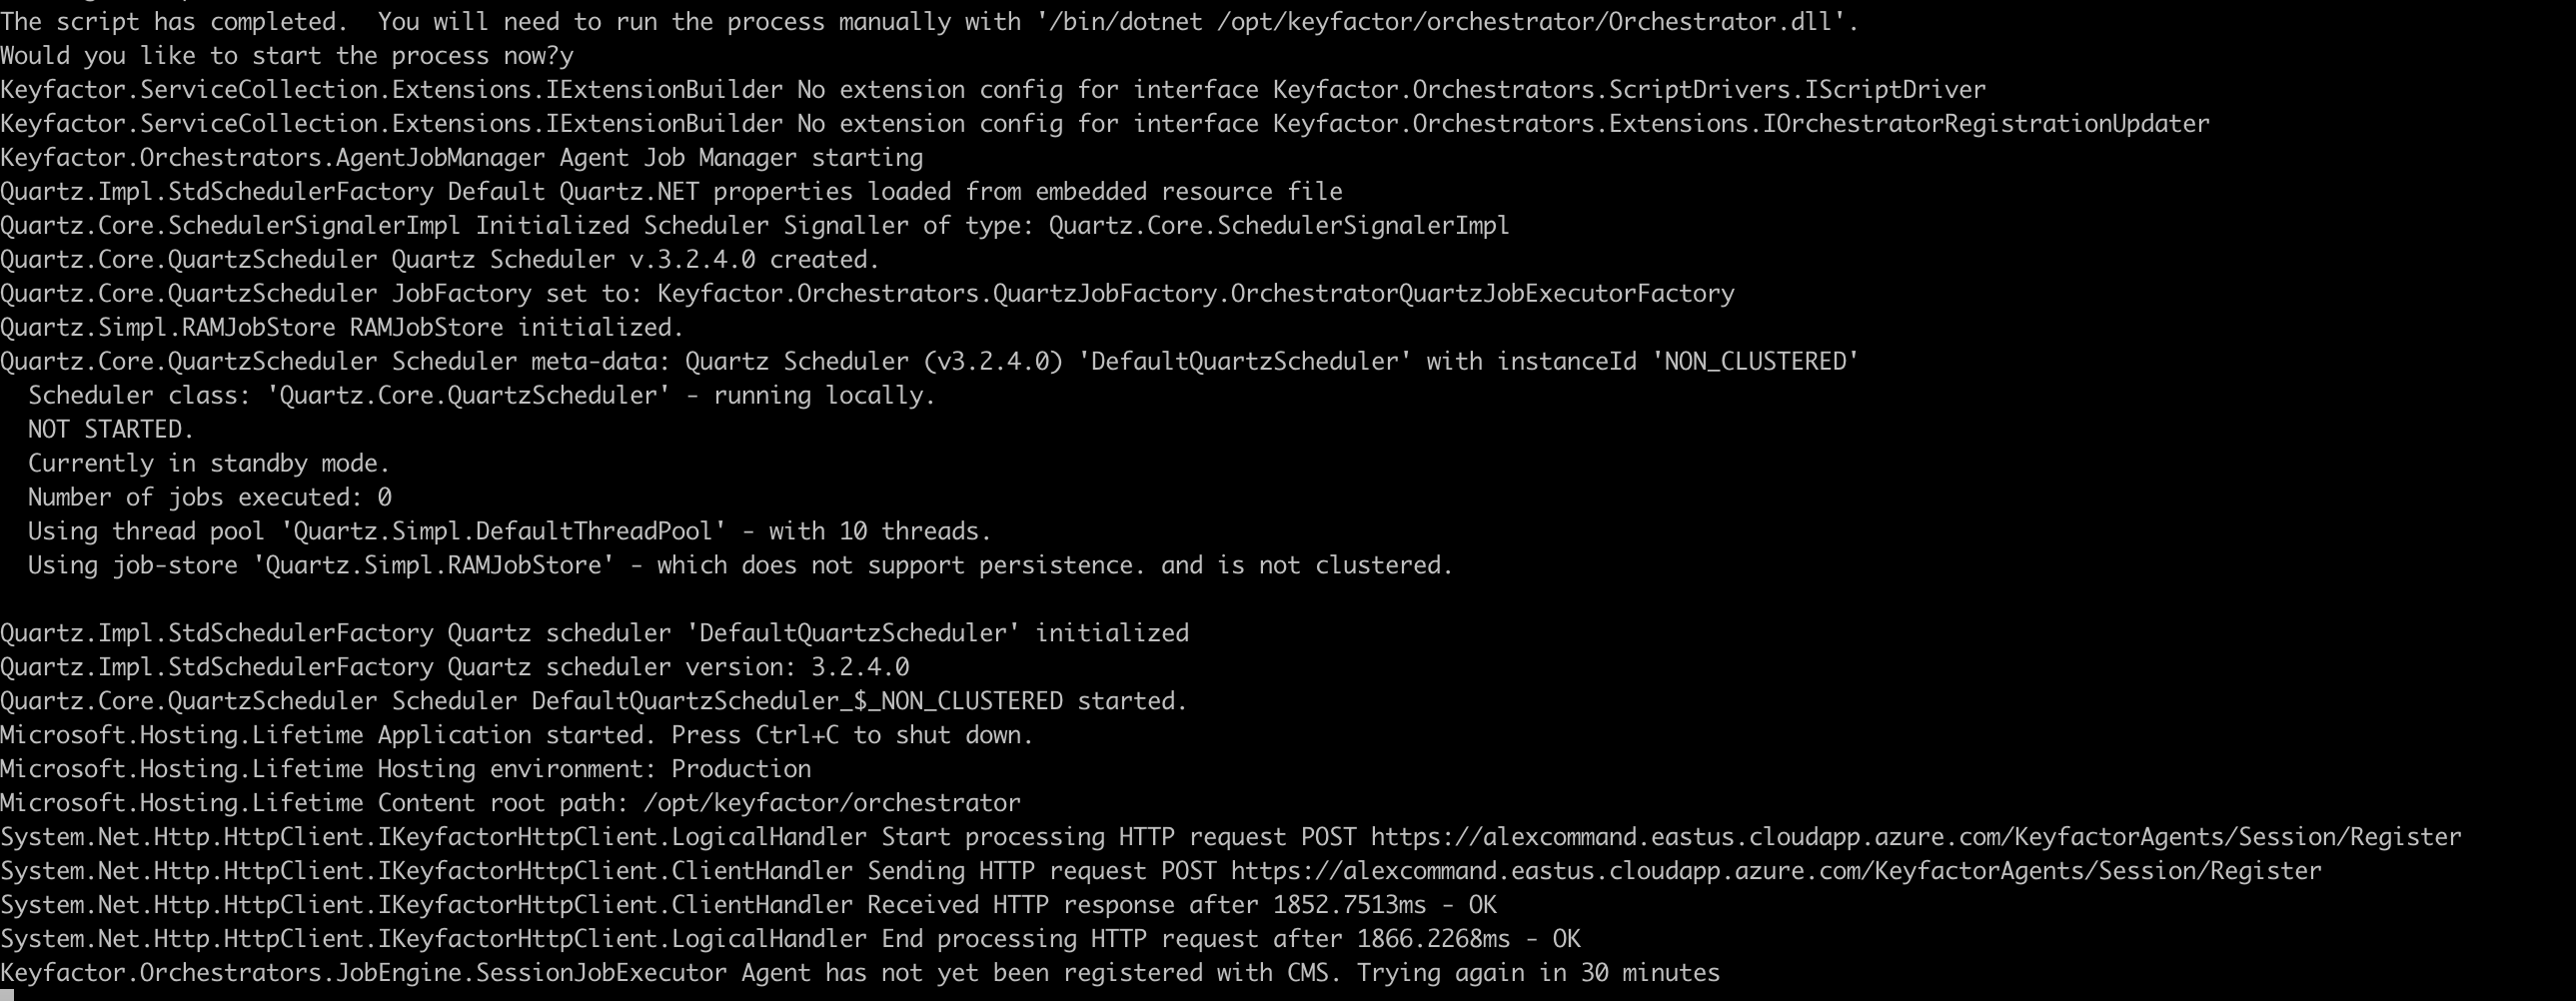
At the end, the script will ask you if you would like to start the Universal Orchestrator process. Press Y to start it and then proceed to the next section to approve it.
Configure the Universal Orchestrator in Keyfactor Command
If accessing Keyfactor Command for the first time on a new machine, accept the certificate warning. You can add the certificate to your browser that came with the Orchestrator bundle. For steps on how to do this, refer to Reference 1.
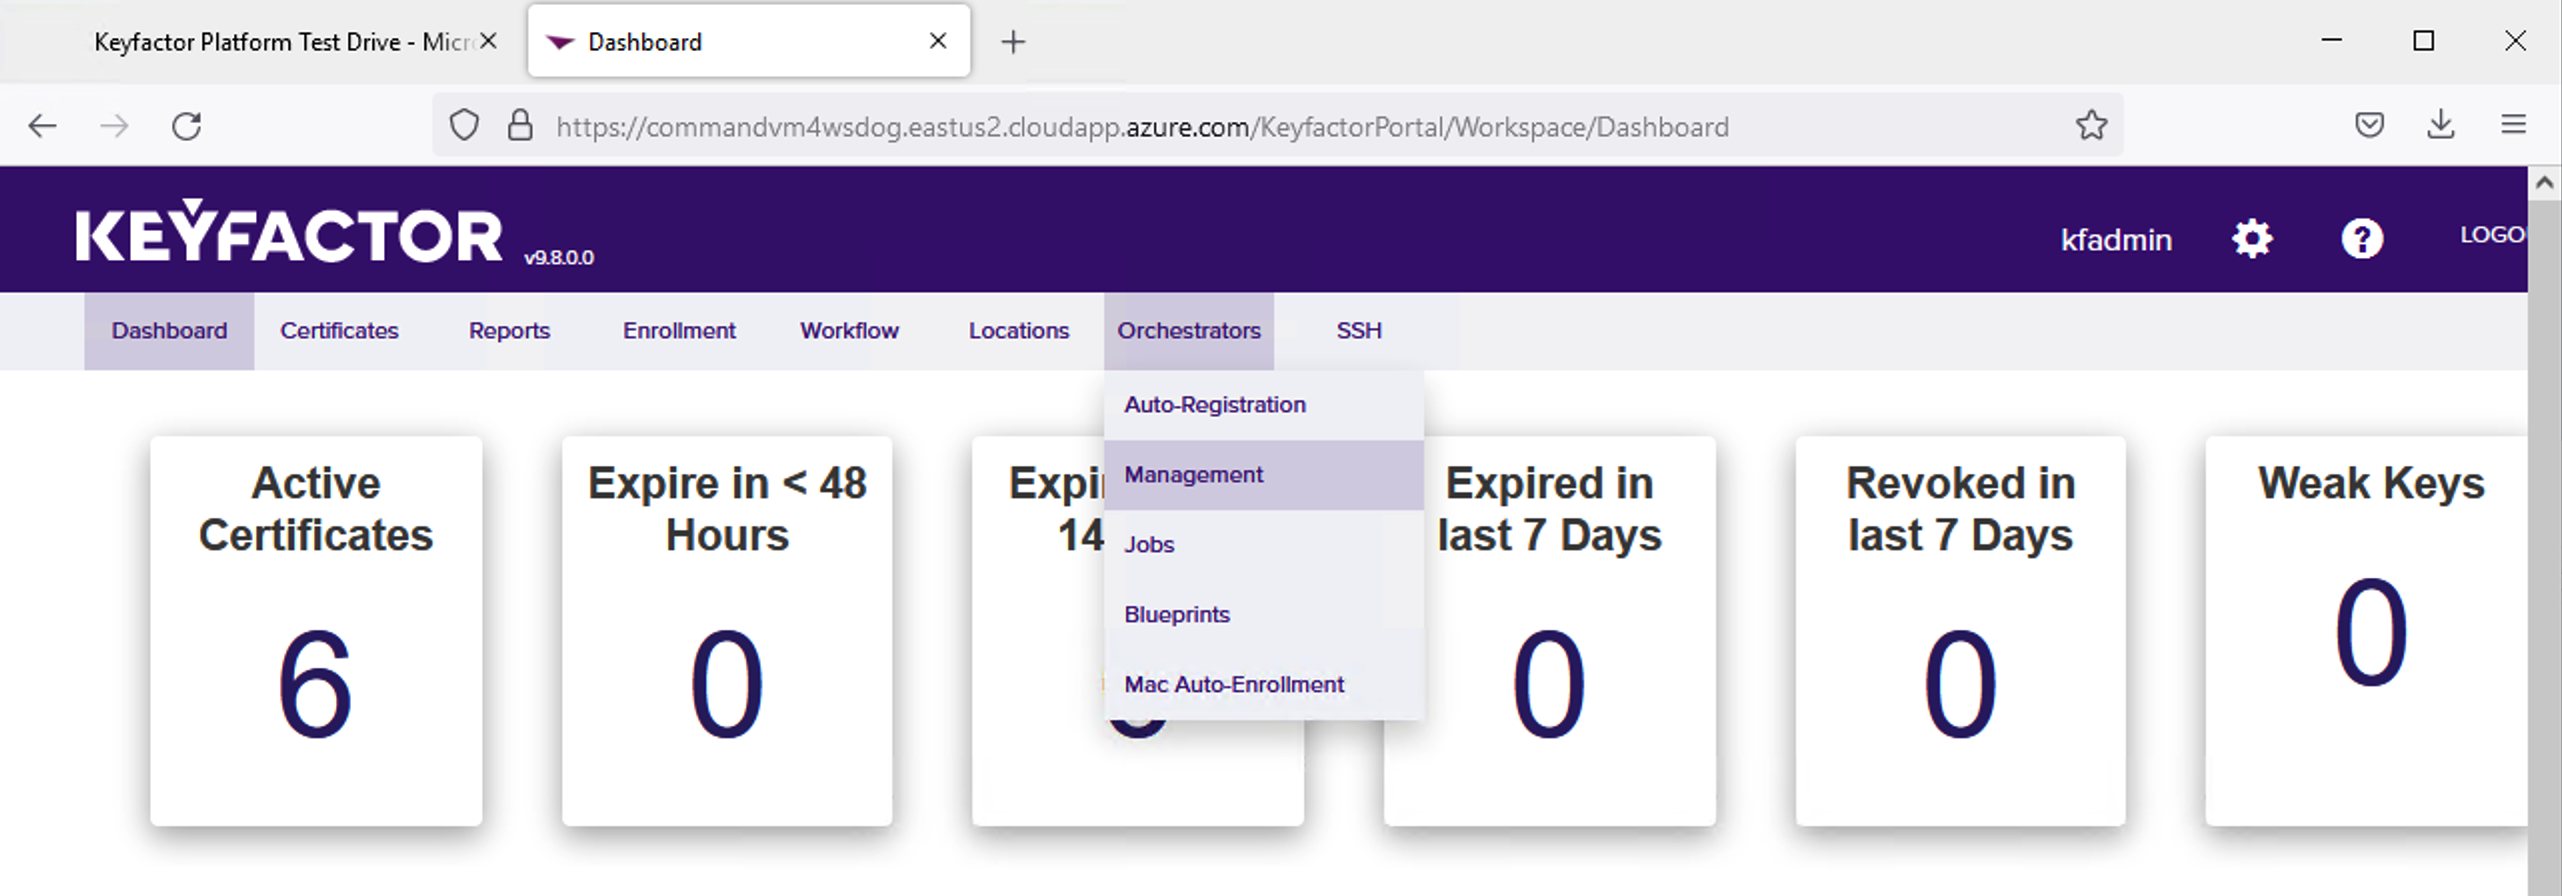
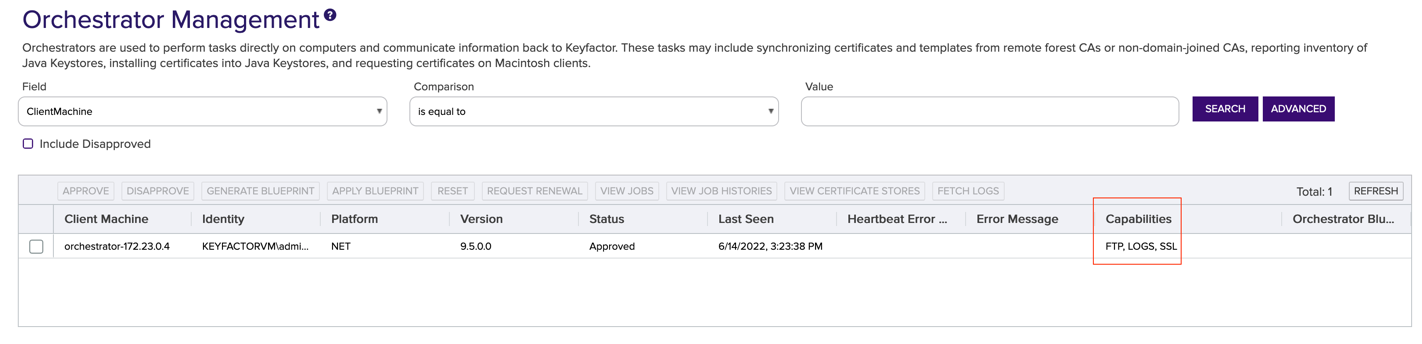
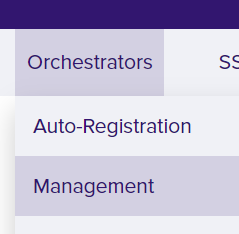
Navigate to the Orchestrators menu and select Management.
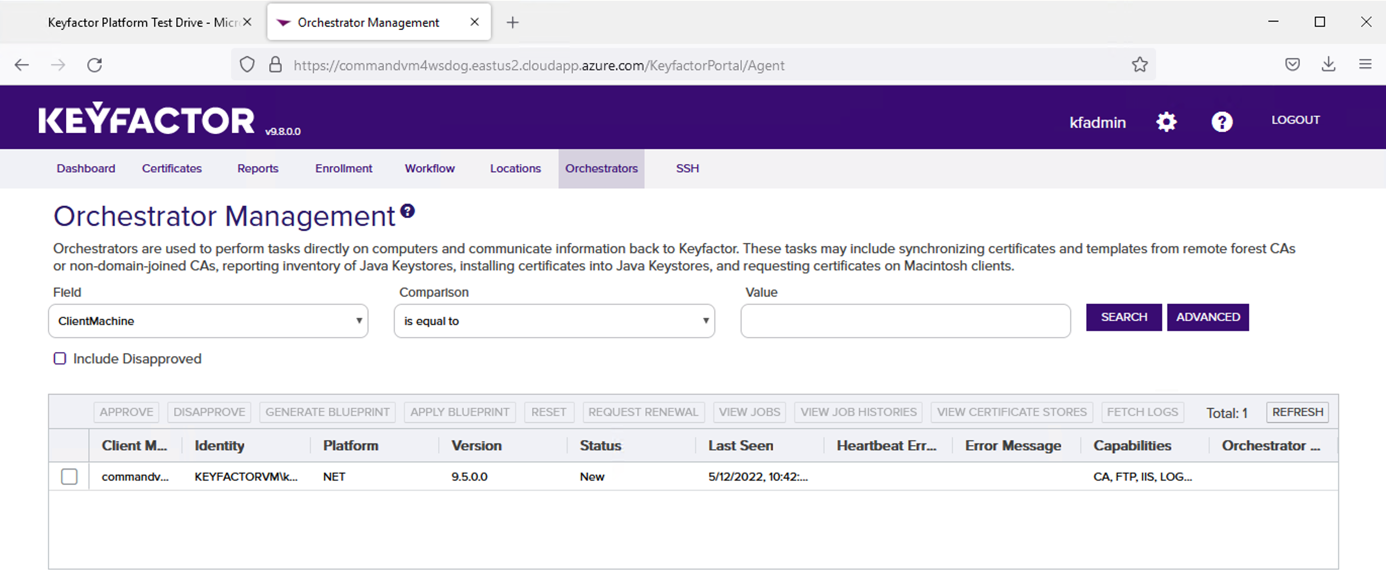
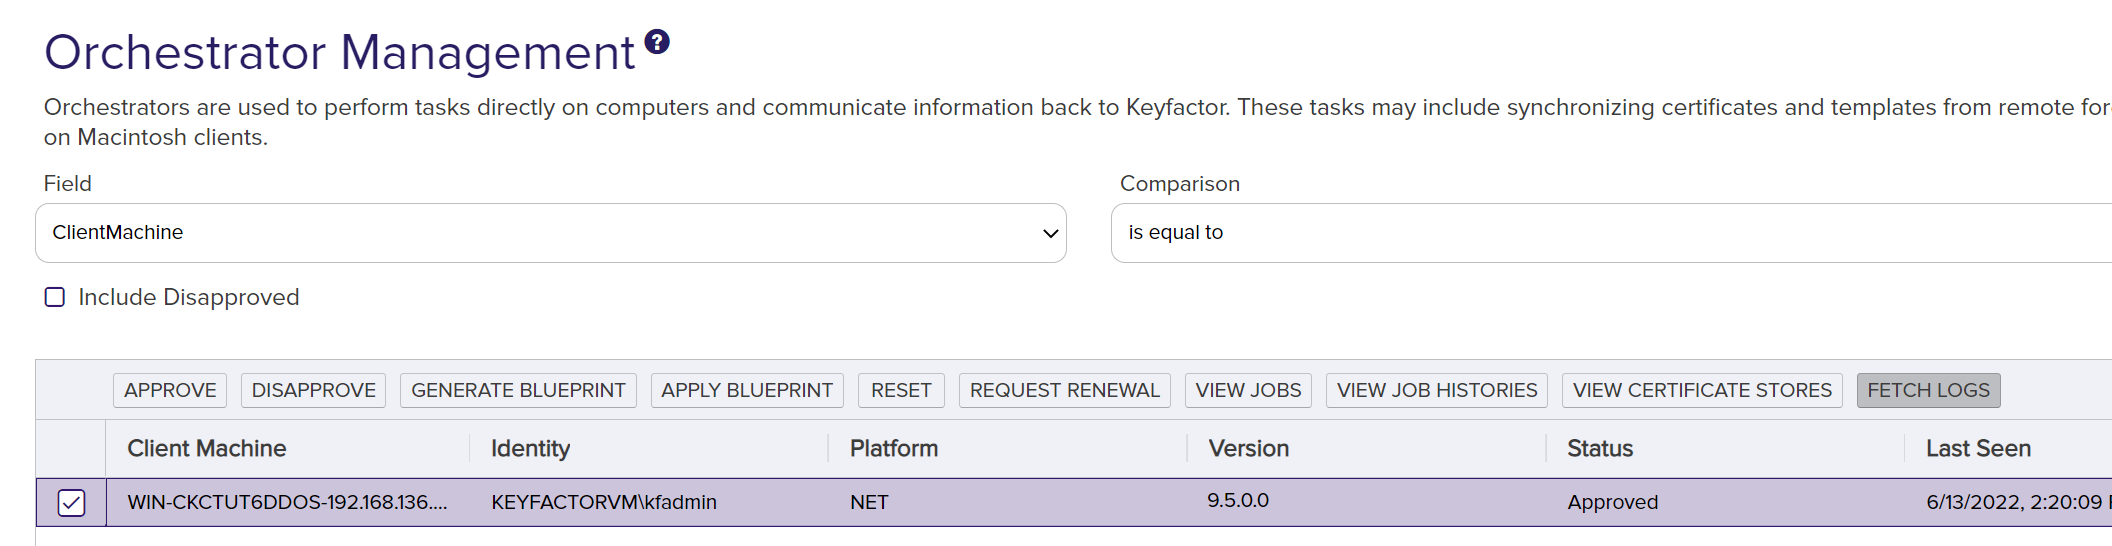
If the orchestrator successfully reaches the Command Server, you will see the orchestrator listed in the table on that screen.
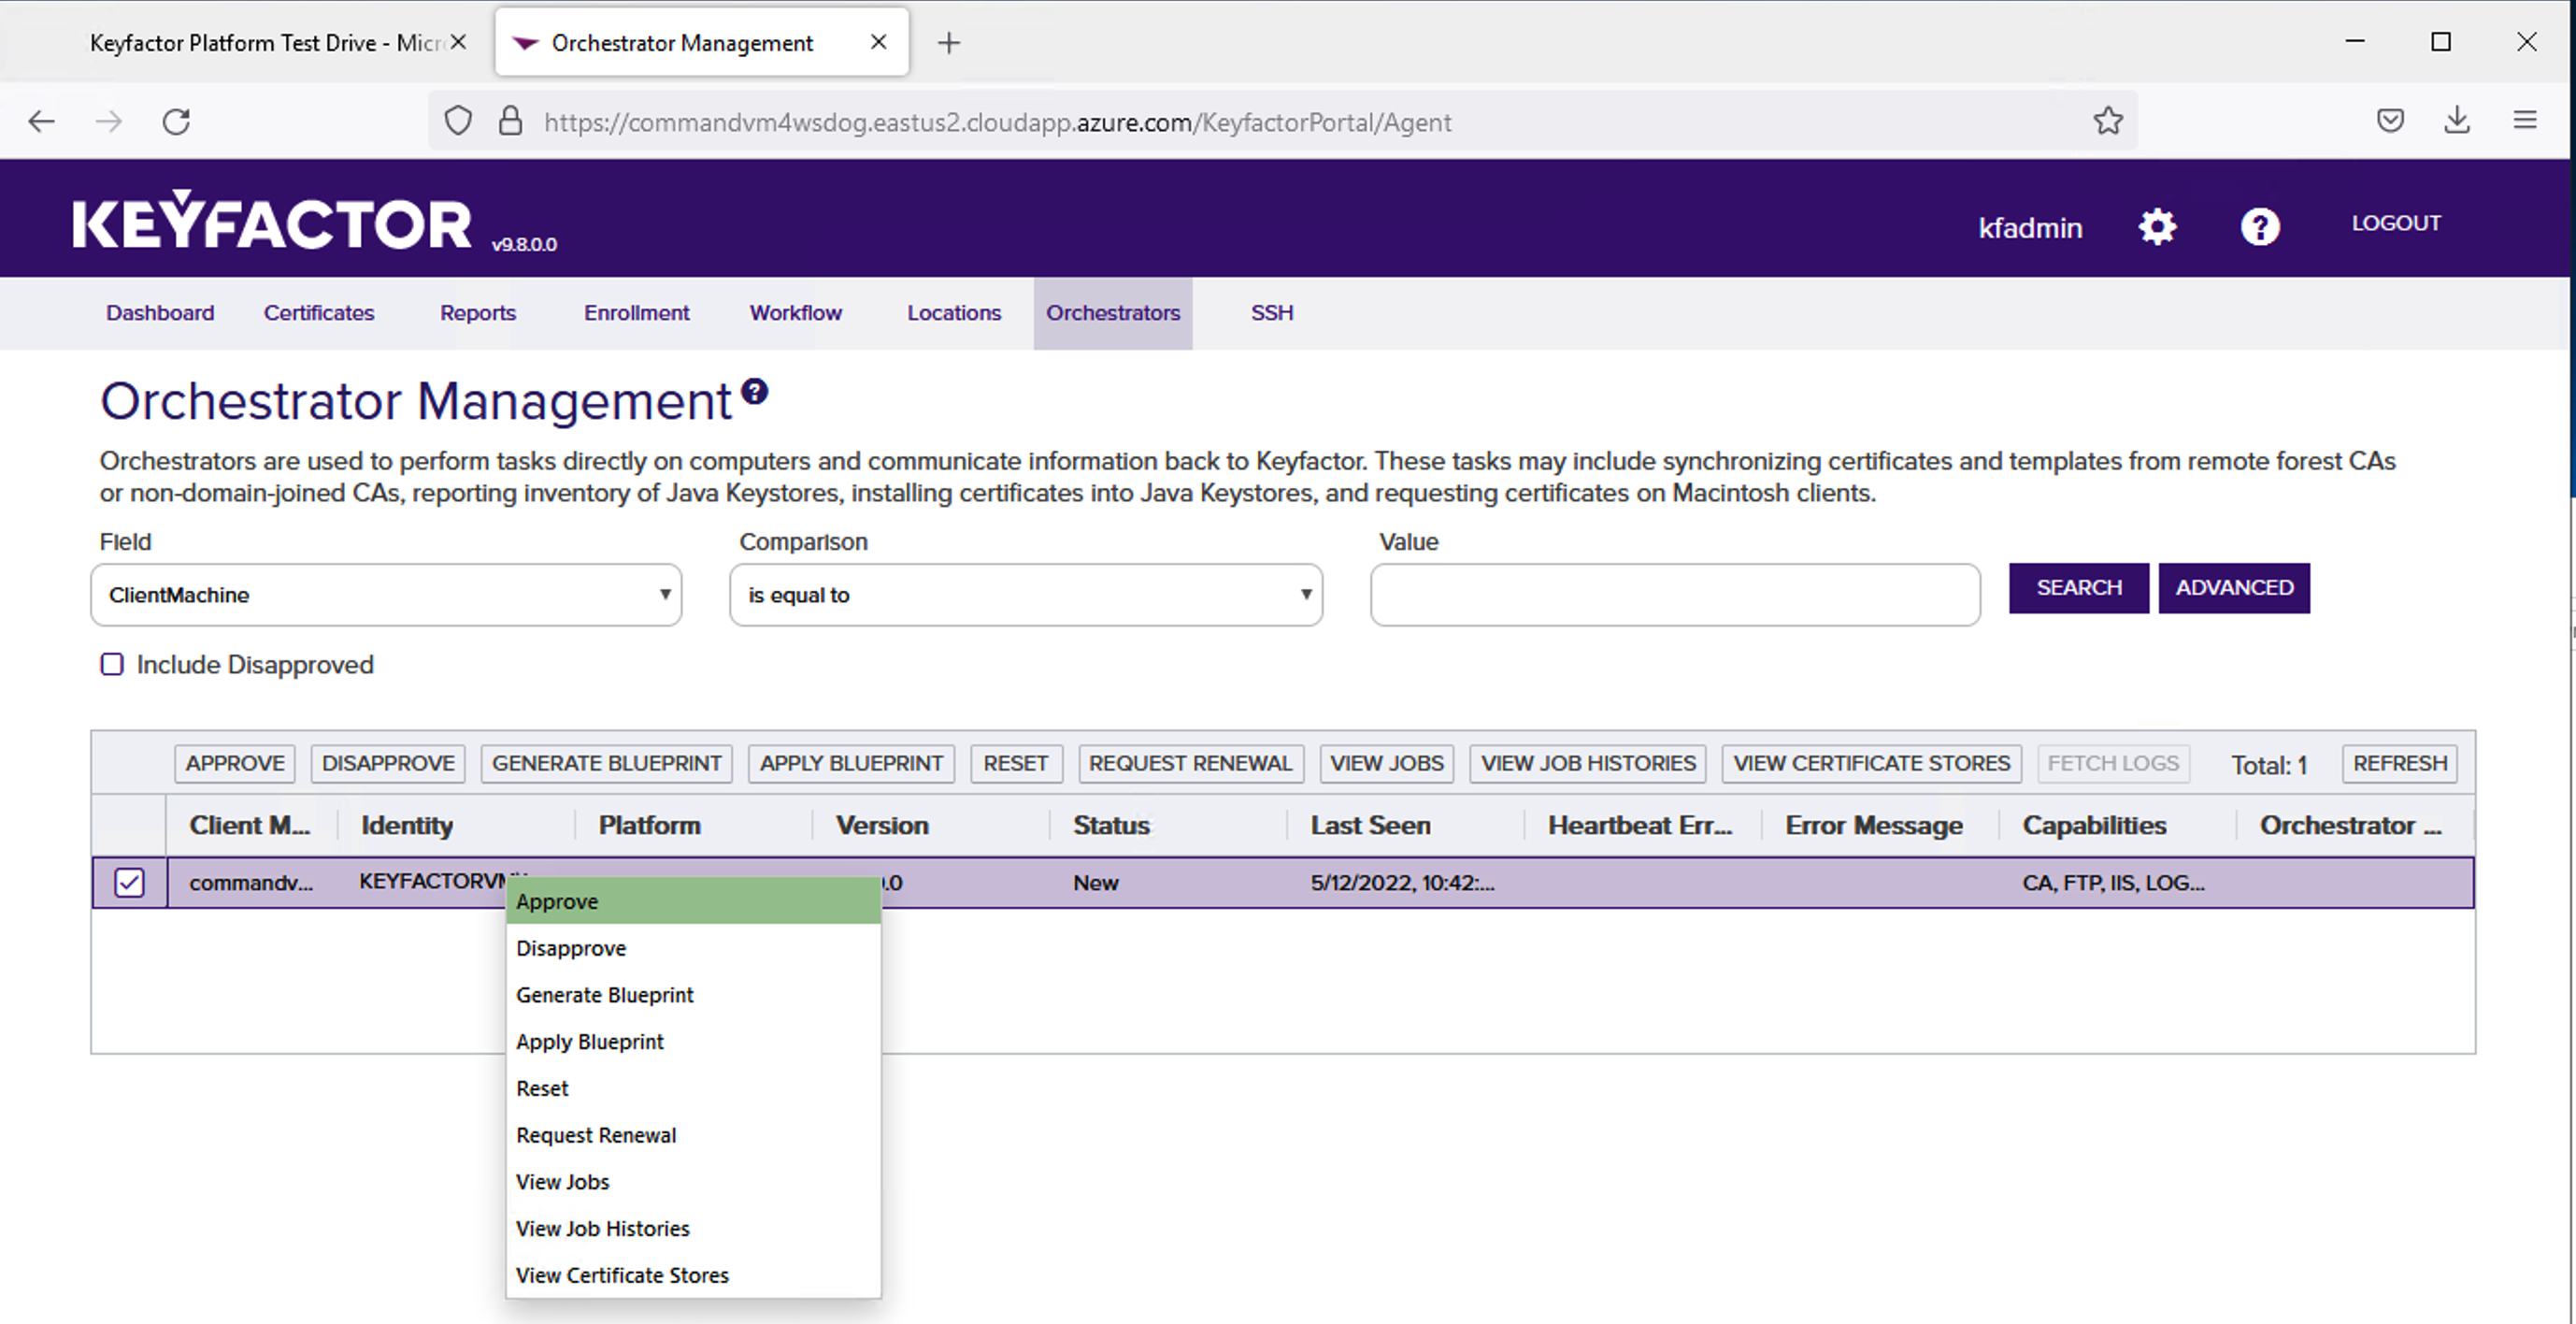
Right click the listed Orchestrator and select Approve.
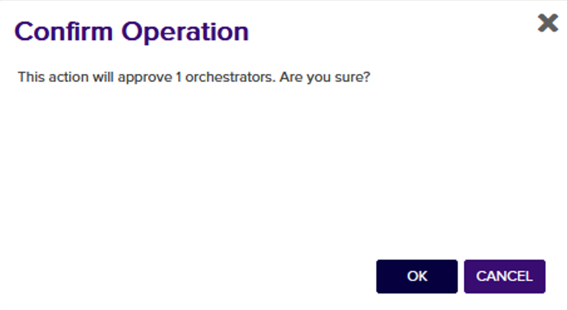
A confirmation dialog will appear. Click OK.
An important thing to note is the orchestrator Capabilities which can be seen in the orchestrator grid. These capabilities default to CA, FTP, IIS, LOGS, SSL, and TemplateSync for Windows based Universal Orchestrators and FTP, LOGS, and SSL for Linux based Universal Orchestrators. Refer to the next sections to learn how to use each of these capabilities.
Windows:

Linux:
Configure SSL in Keyfactor Command
Since the Orchestrator has the SSL capability, it can be used to run SSL Scans.
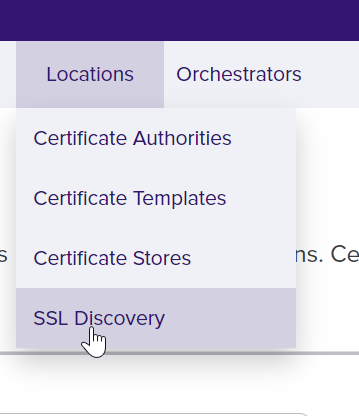
Navigate to the Locations menu and select SSL Discovery.
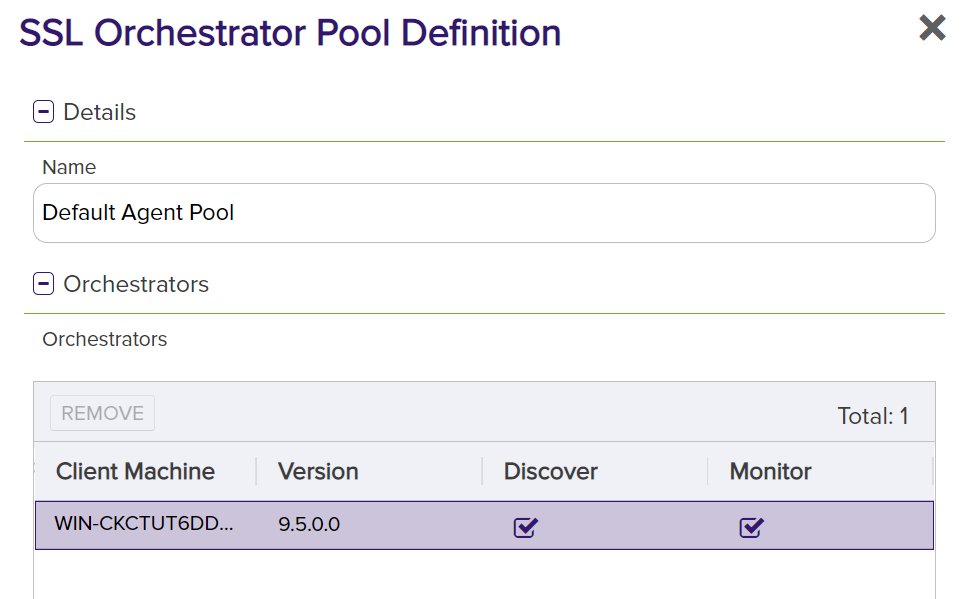
On the SSL Discovery page, click on the Orchestrator Pools Definition tab. Highlight the Default Agent Pool and click Edit.

See that the orchestrator that was just approved is in that pool. Pools are used to split SSL scanning work across multiple orchestrators. There should not be anything to change here unless you have more than one orchestrator approved.
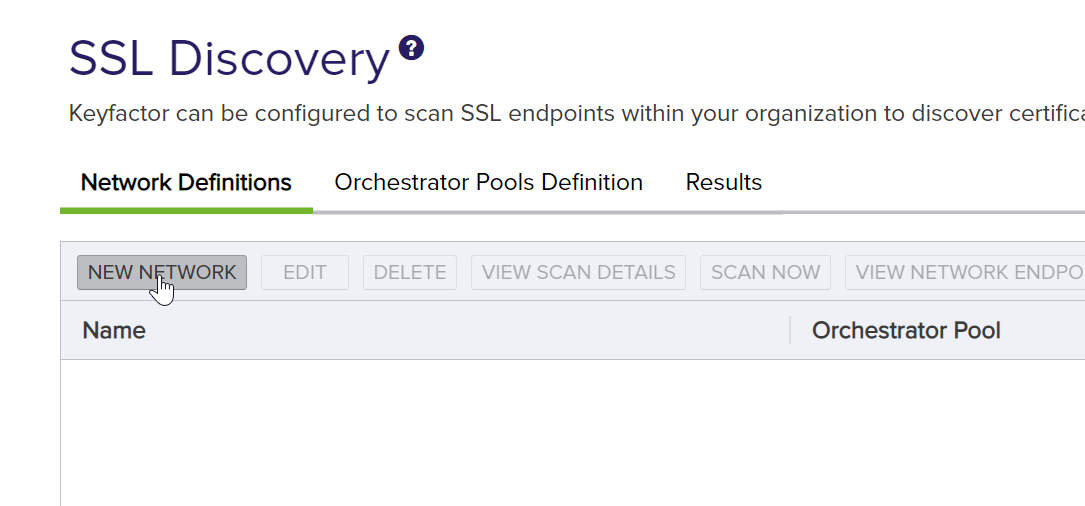
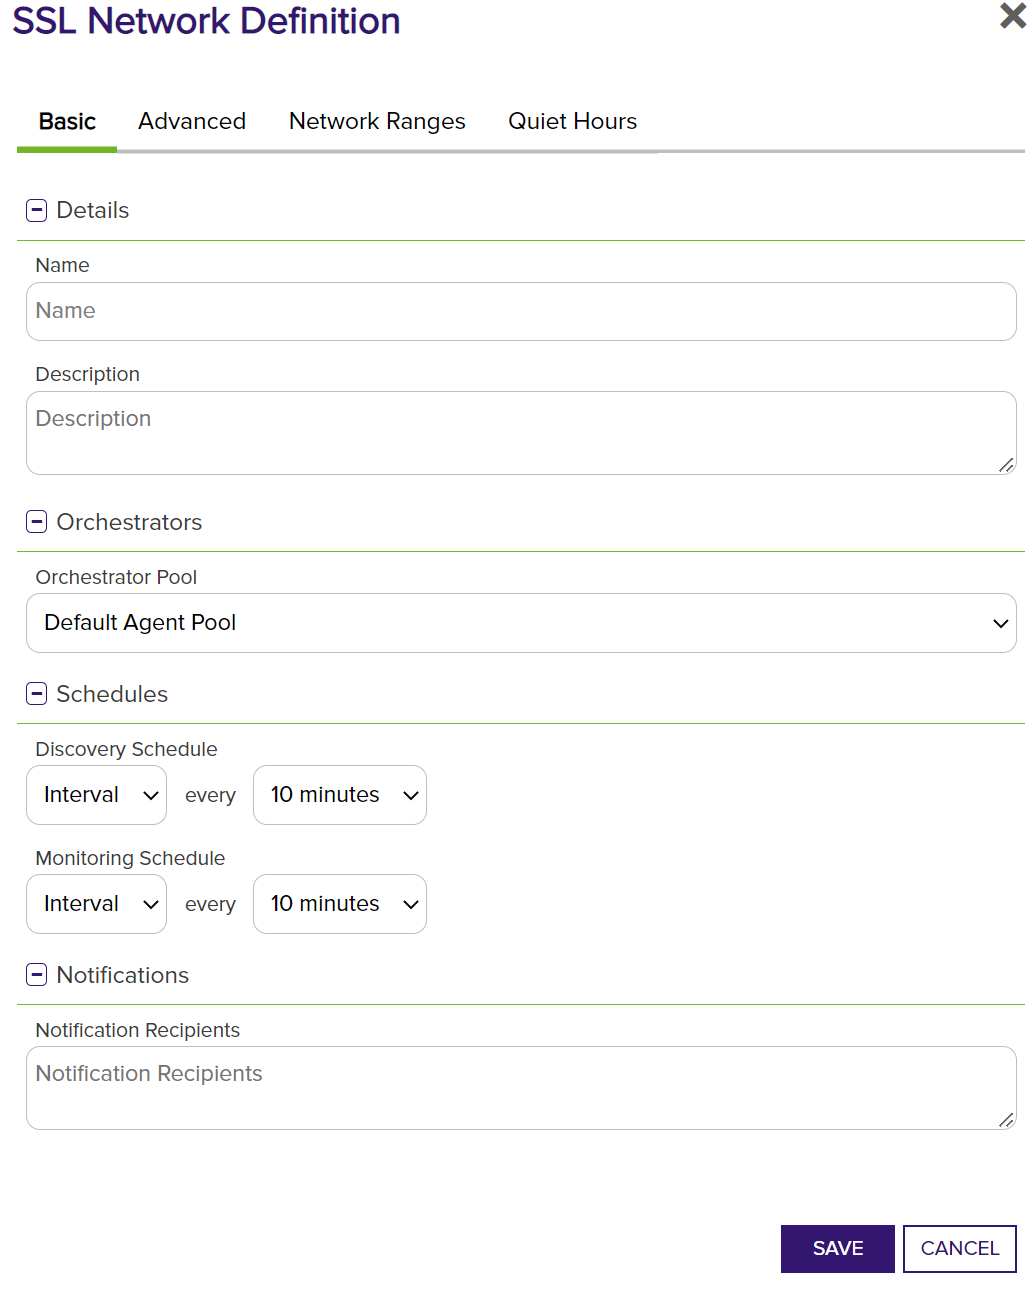
Close out of the Pool Definition dialog. Navigate to the Network Definitions tab and click New Network.
Configure the schedules, names, and other information. Make sure to select the Orchestrator Pool that your new orchestrator is in.
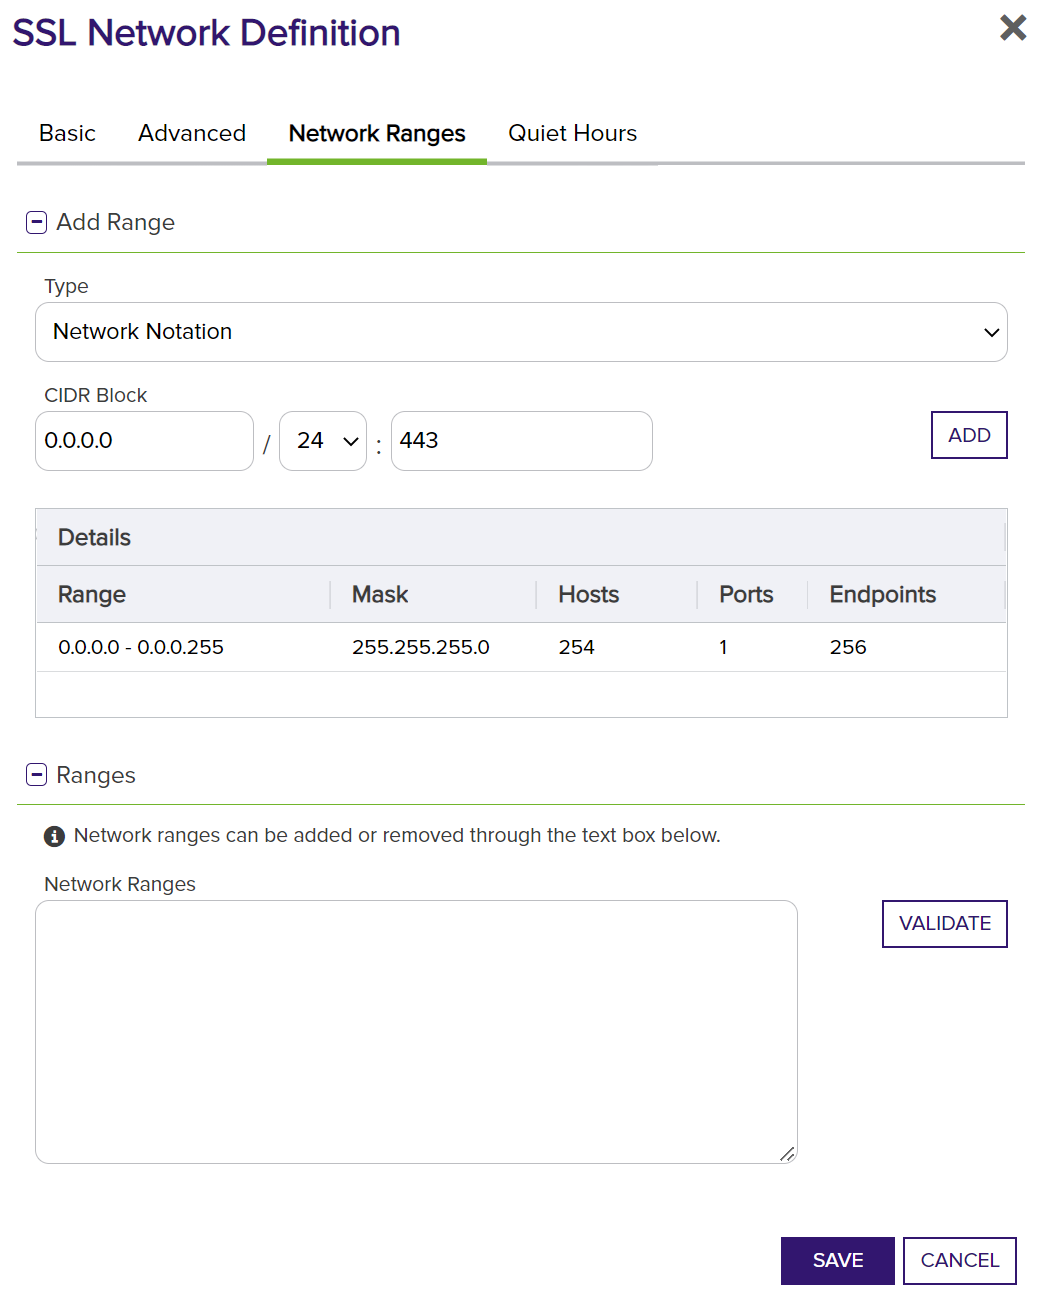
Next, in the same dialog, navigate to the Network Ranges tab and add the locations to the ranges that need to be scanned. For any IP address range that you would like to add, click the ADD button to the right to add that IP address range to the scan.
Lastly, the Quiet Hours can be configured. These are specific times scans will not run to help limit unwanted scan traffic.
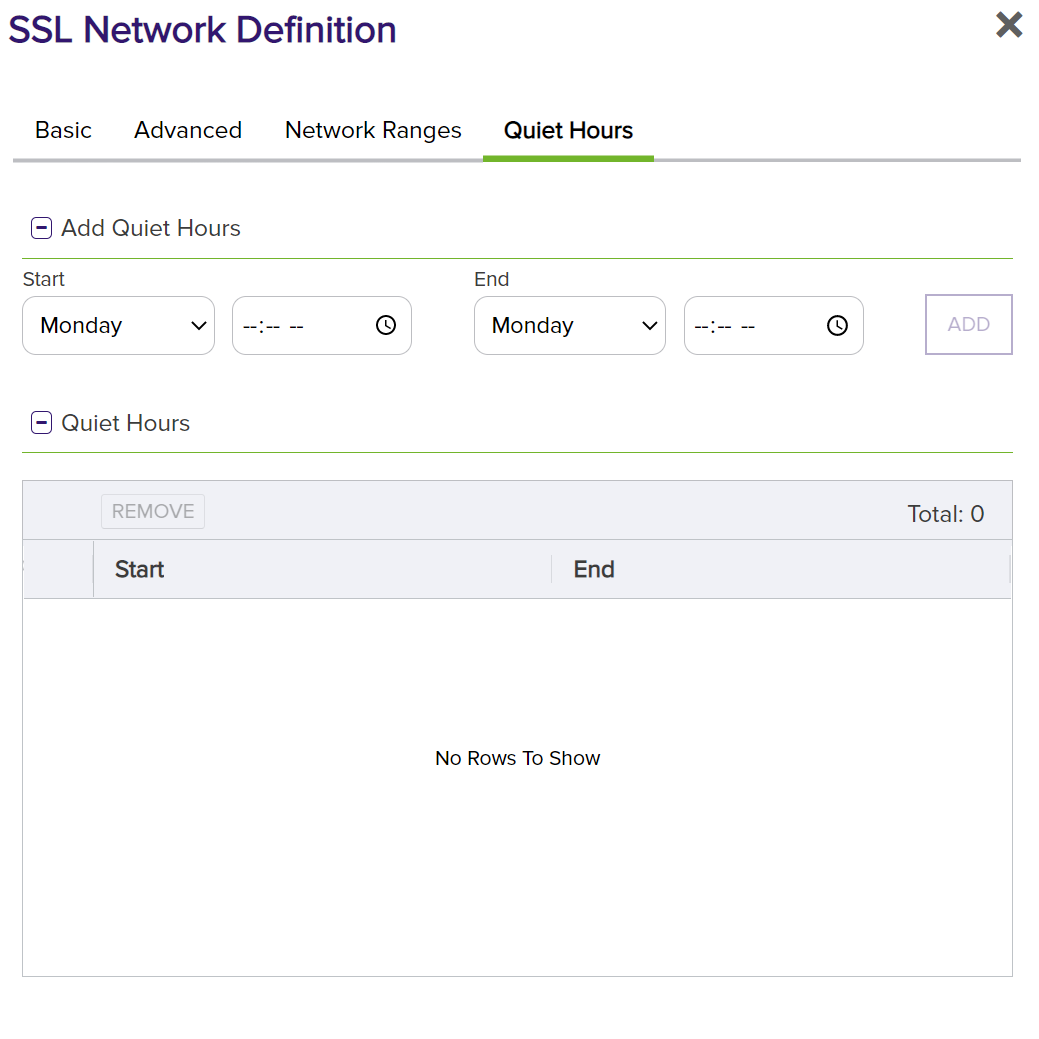
Click Save and the jobs will start to run to get certificates from SSL endpoints.
Orchestrator Configuration
Since the Orchestrator has the TemplateSync and CA capabilities, it can be used to run operations with the Certificate Authority. These operations include gathering templates from the Certificate Authorities’ Forest and scanning the Certificate Authority for its certificates.
Grant Permission for the Orchestrator to Read from the Microsoft CA
For the Orchestrator to sync certificate data between the Microsoft CA and the Keyfactor Command Test Drive, it is necessary to grant security permission for the Orchestrator to have Read access to the Microsoft CA. The following configuration steps take place on the local Microsoft CA server.
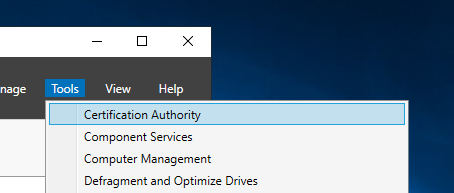
Launch the Server Manager and select Certification Authority from the Tools menu.
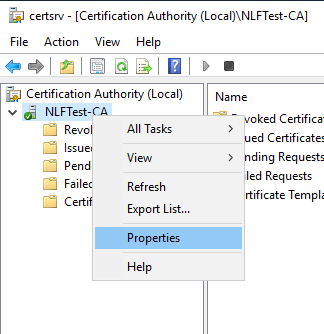
Right-click on the CA name and Select Properties.
Click the Security tab.
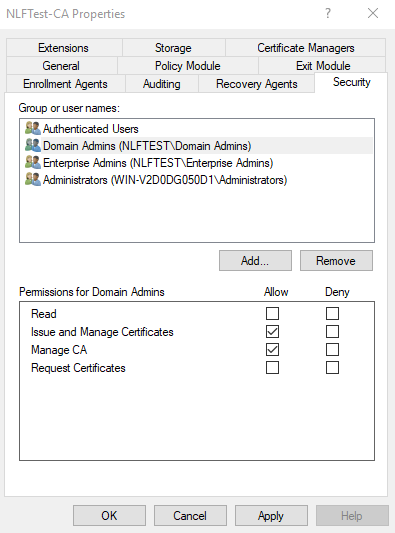
Click Add.

Enter the name of the Domain Account that the Universal Orchestrator is running under and click OK.
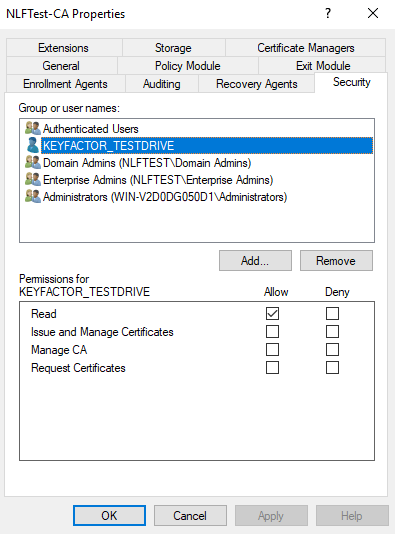
Ensure the account from the previous step is highlighted (i.e. “KEYFACTOR_TESTDRIVE”)
Select Allow for Read permission, and then click OK.
Edit the Orchestrator Configuration File
If you want the Orchestrator to be able to synchronize with the local Microsoft CA, there is some additional configuration required on the Orchestrator define the CA(s) that the Orchestrator will manage.
The first step is to get the CA and server names.
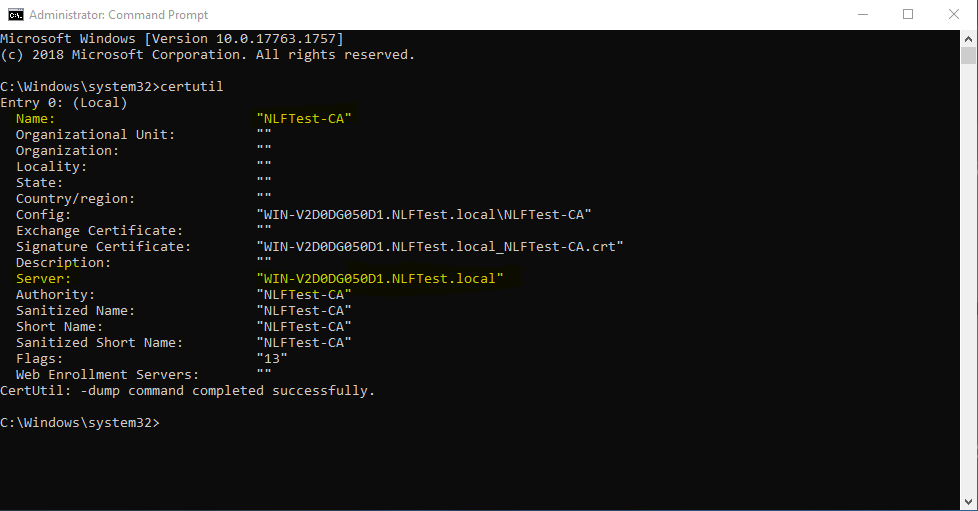
Launch CMD as an Administrator.
Type “certutil” and press Enter.
Make note of the values for “Name:” and “Server:” as you will need this information for the next step.
Open File Explorer and navigate to the “configuration” sub-folder where you installed the Universal Orchestrator (i.e. C:\Software\KeyfactorUniversalOrchestrator\configuration)
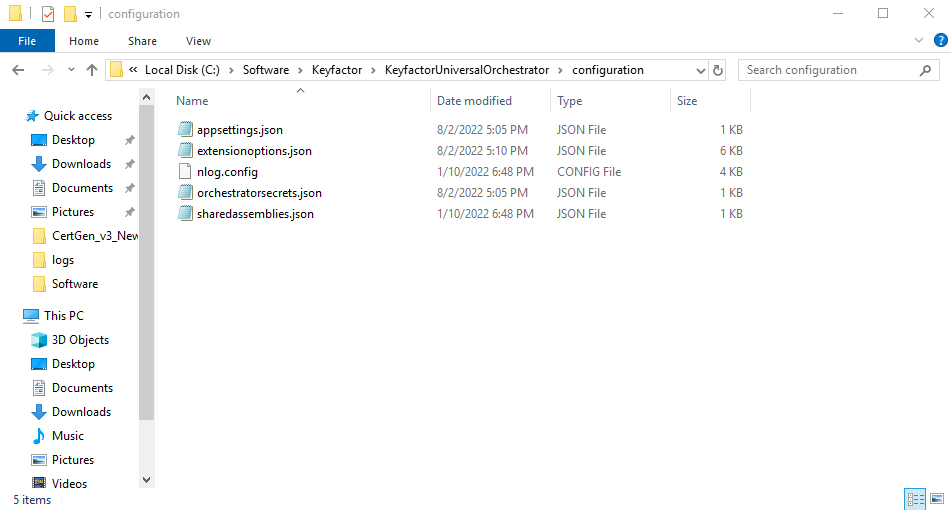
Open the “extensionoptions.json” file using a text editor, such as Notepad or Notepad++ as an administrator.
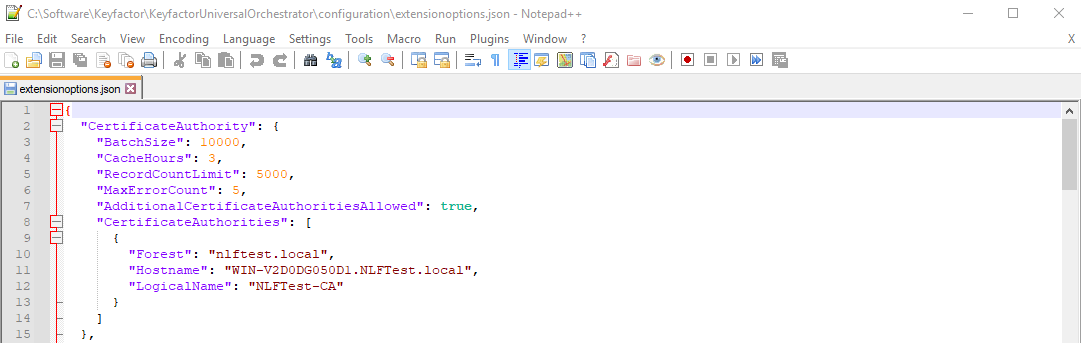
Edit the following lines:
"AdditionalCertificateAuthoritiesAllowed": true,

"CertificateAuthorities": [

      {

        "Forest": "nlftest.local",

        "Hostname": "WIN-V2D0DG050D1.NLFTest.local",

        "LogicalName": "NLFTest-CA"

      }

    ]
You will need to use the “Forest”, “Hostname” and “LogicalName” values that are specific for your environment.
Save the file.
Restart the Keyfactor Orchestrator service.
Configure Certificate Authorities in Keyfactor Command to use the Windows Orchestrator
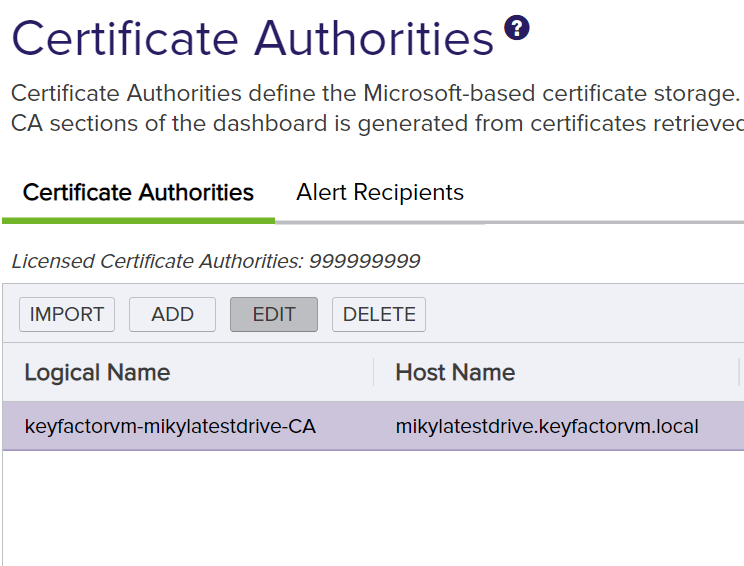
Navigate to the Locations menu and select Certificate Authorities.
Double-click the Certificate Authority that needs to be edited or highlight the Certificate Authority and click Edit.
Go to the Advanced tab. Select Use Orchestrator and select the correct orchestrator in the Remote Orchestrator.
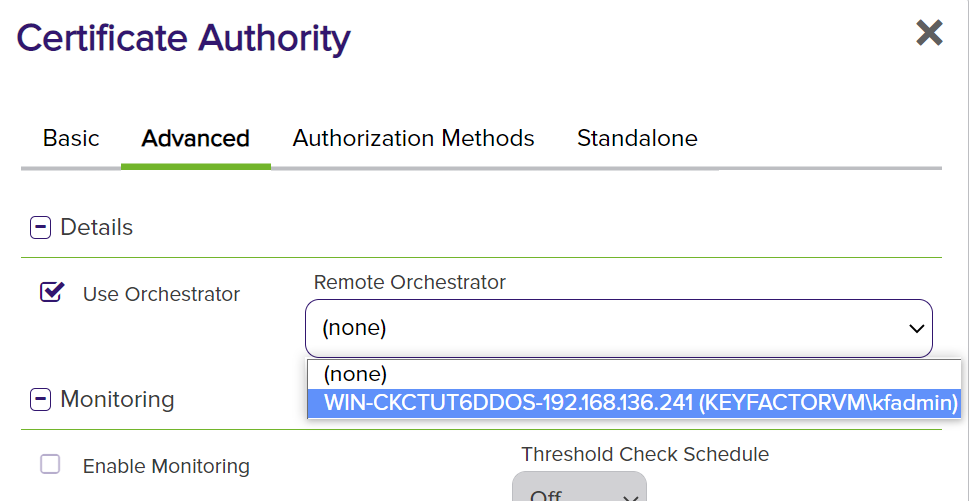
Upon clicking Save, the scans will run using the orchestrator.
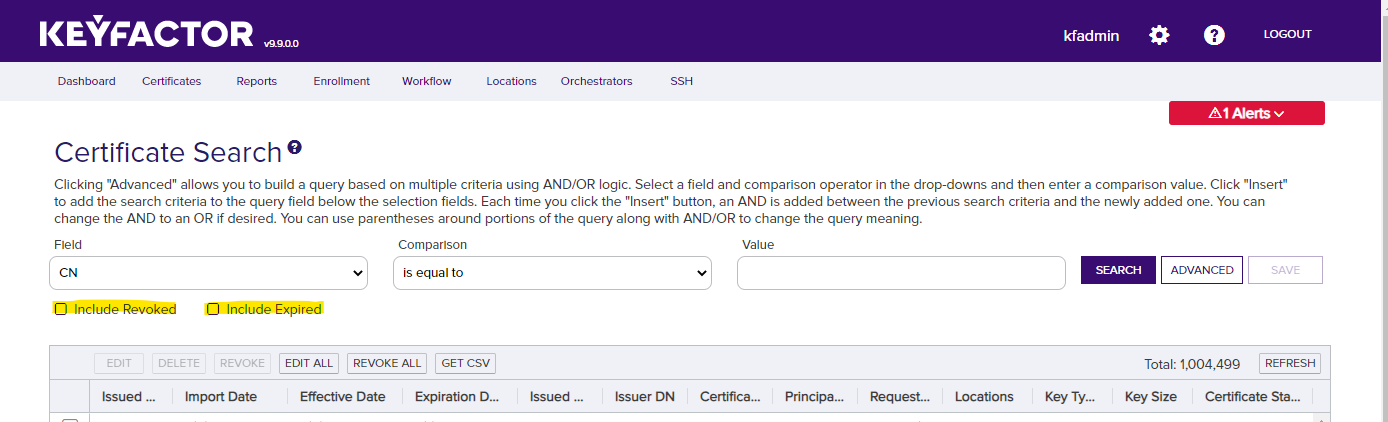
Depending on the size of your local Certificate Authority, it may take some time for the certificates to appear in Keyfactor Command. Additionally, by default, the Keyfactor Command web portal will only display those certificates that are active.
If you wish to include certificates that are expired or revoked, you will need to select the appropriate options on the Certificate Search page.
Use Keyfactor Command to Update an IIS Web Site Certificate
Prepare and Configure IIS for HTTPS
If your IIS web server does not have an existing certificate, you will need to install a certificate into the IIS Personal certificate store and update the bindings on the website. If there is already an existing certificate on your web server, you can skip this section and proceed to configure Keyfactor Command to manage the IIS Personal certificate store.
Create the Certificate Signing Request
Create a new certificate request for the IIS web server using MMC.
Launch MMC and load the Certificates snap-in. Select the option to manage the “Computer” account.
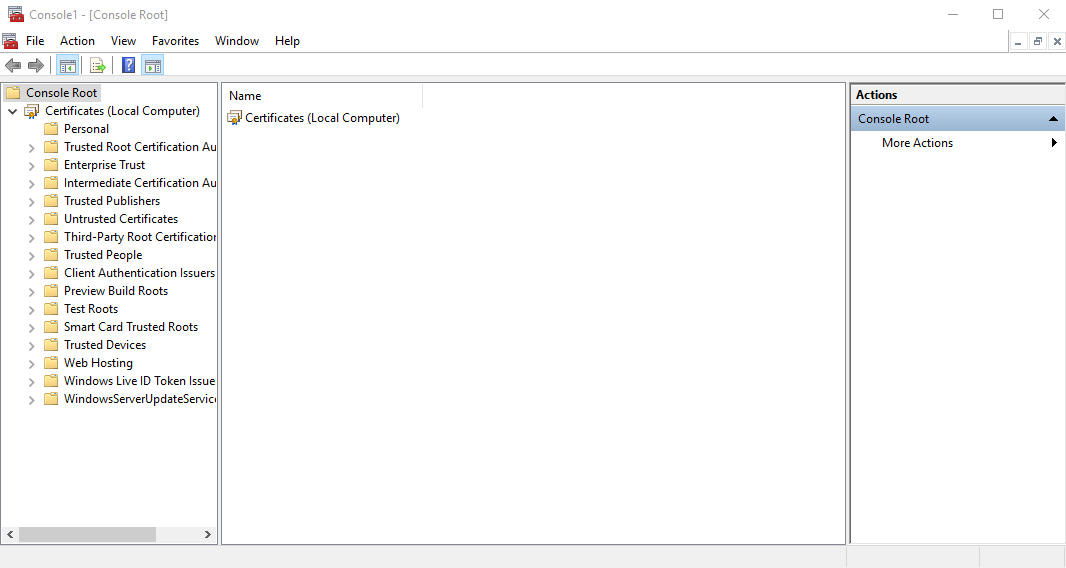
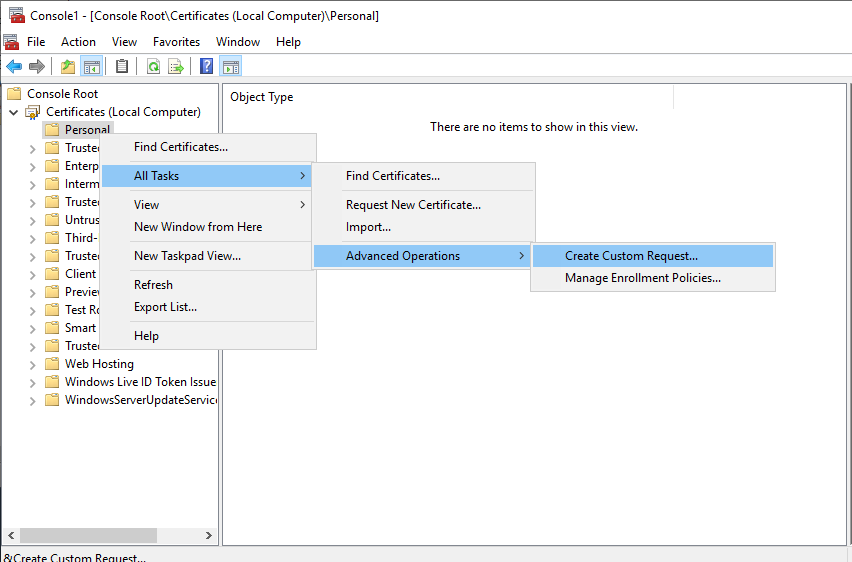
Right-click on the “Personal" store and select All Tasks -> Advanced Operation -> Create Custom Request.
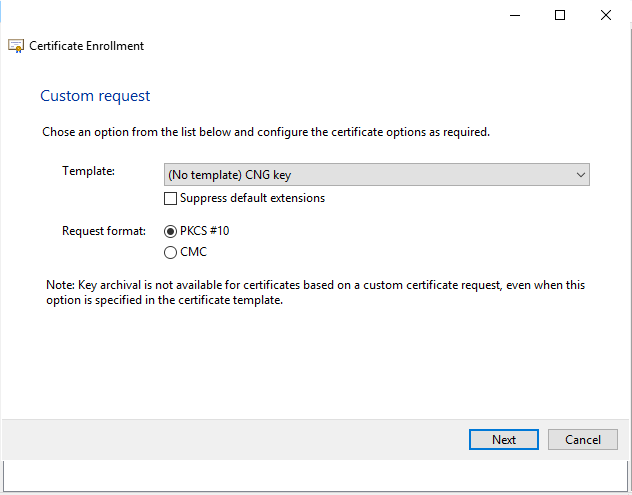
Select (No Template) CNG key for the Template and PKCS#10 for the Request format. Click Next.
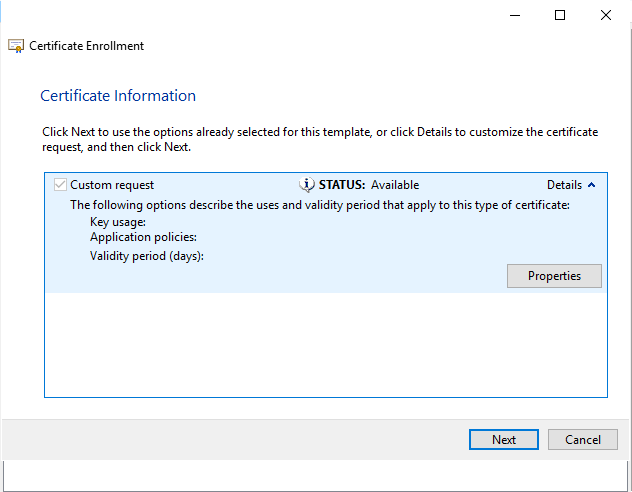
In the Certificate Information panel, expand the Details by clicking the down arrow next to Details. Click Properties.
On the Subject panel, enter the information for the certificate subject, such as Common Name or Full DN. Be sure add an Alternative name with the Type set to DNS and provide the value.
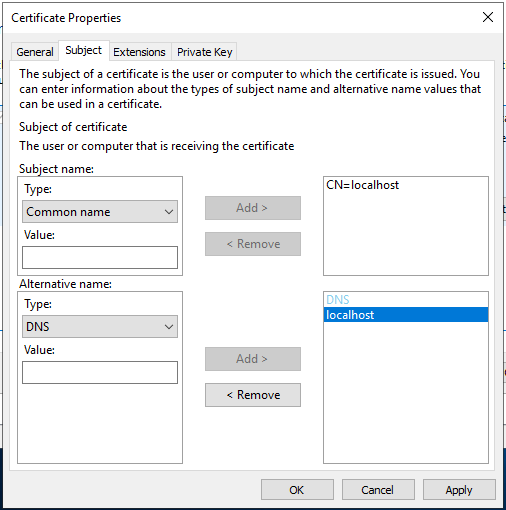
On the Private Key panel, set the Key size to 2048. Click OK.

Give the certificate signing request file a name and save it as a Base 64 file format. Click Finish.
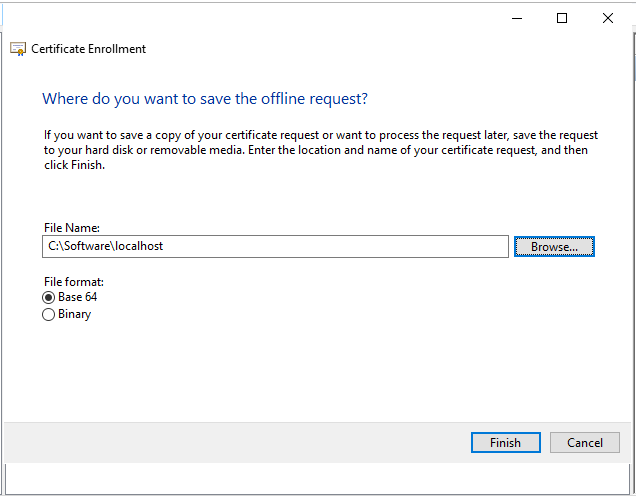
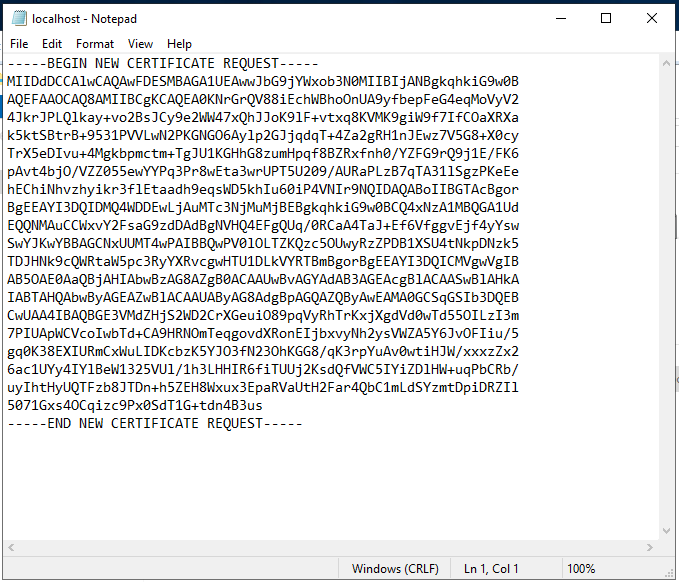
Open the resulting file using Notepad and confirm the file contents look like the picture below. Select the entire contents of the file and copy to the clipboard.
Submit the CSR to a Certificate Authority
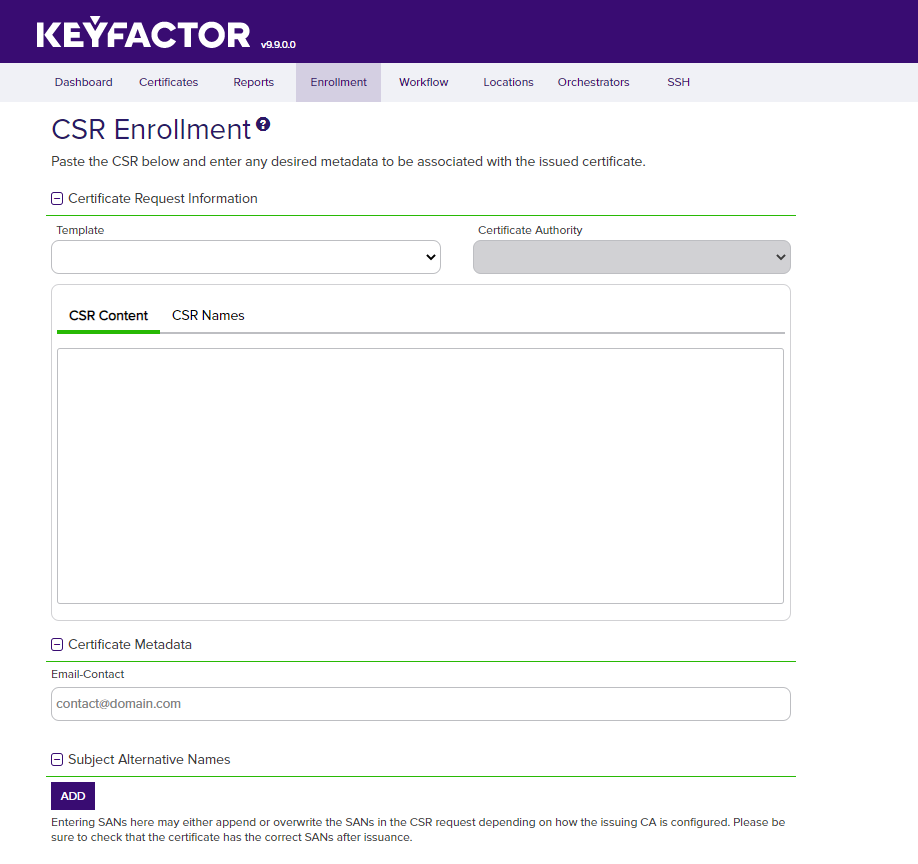
Connect to your Keyfactor Command Test Drive and navigate to the Enrollment -> CSR Enrollment page from the drop-down menu.
-
On the CSR Enrollment page, select Web Server Certificates for the template.
The Certificate Authority will already be selected. -
Paste the contents of the certificate signing request file into the field labeled CSR Content.
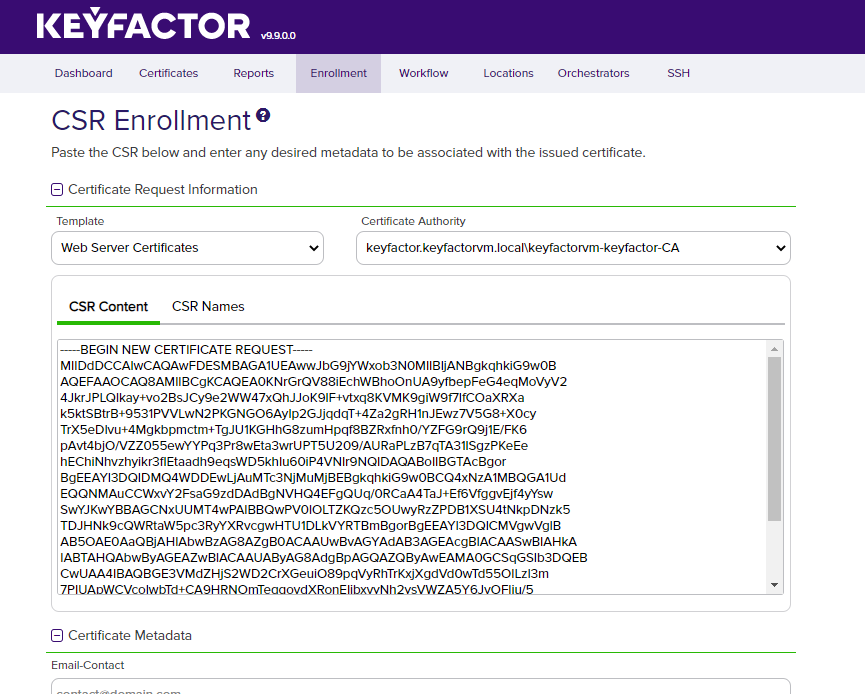
Select the CSR Names sub-panel to review and confirm that the CSR was pasted correctly and there were no errors with the data.
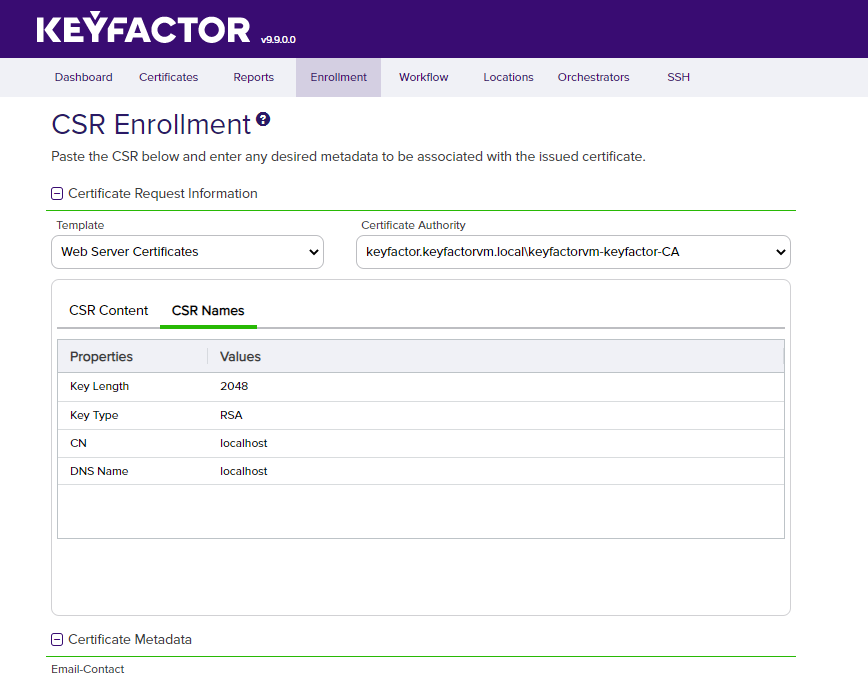
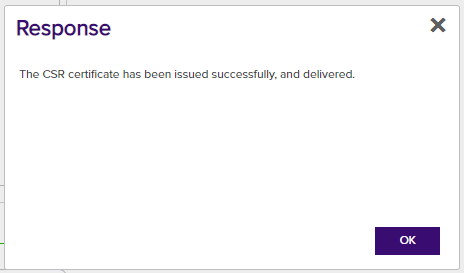
Click ENROLL at the bottom of the page. If the CSR was submitted correctly to the Certificate Authority, the following Response is displayed, and the new certificate is automatically downloaded to the local Downloads folder.
Import the New Certificate into IIS Personal Store
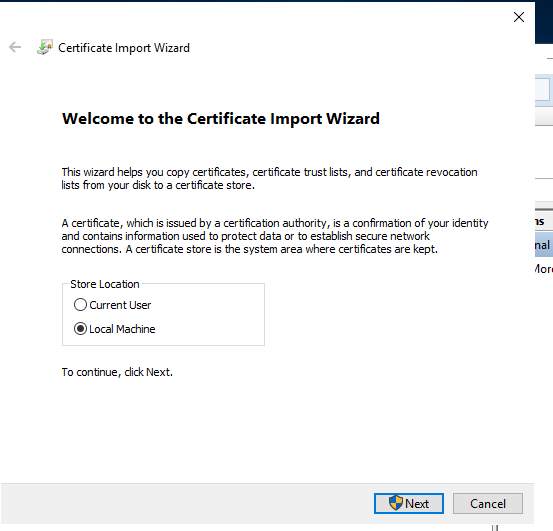
Copy the new certificate to the IIS web server. Double-click the certificate file to launch the Certificate Import Wizard. Be sure to set the Store Location to the Local Machine. Click Next.
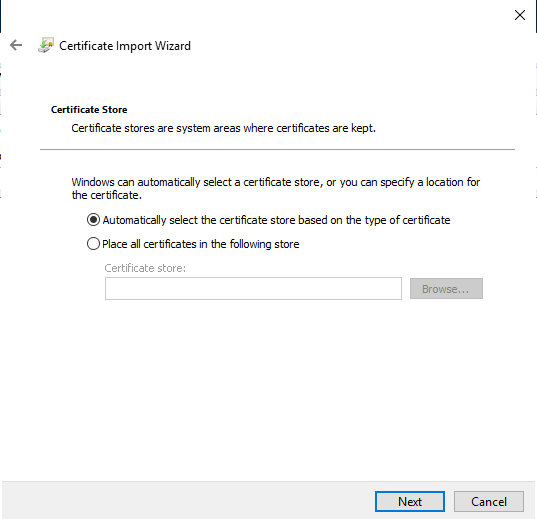
Leave the Certificate Store option set to Automatically select the certificate store and click Next.
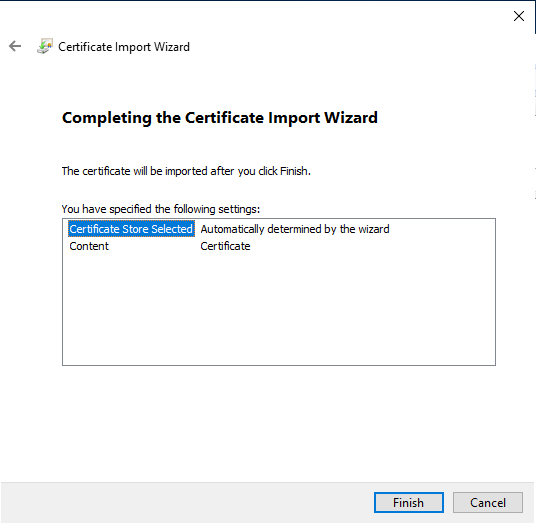
Click Finish to import the certificate.
Click OK to close the import success dialog box.
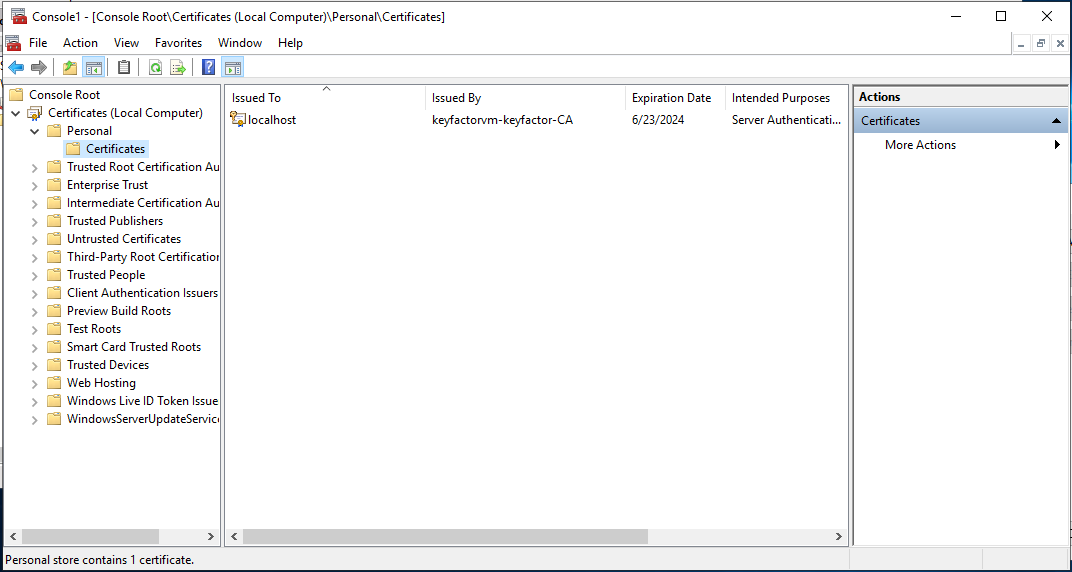
The new certificate will be visible in the MMC/Certificates console.
Update IIS Website Bindings to Use the New Certificate
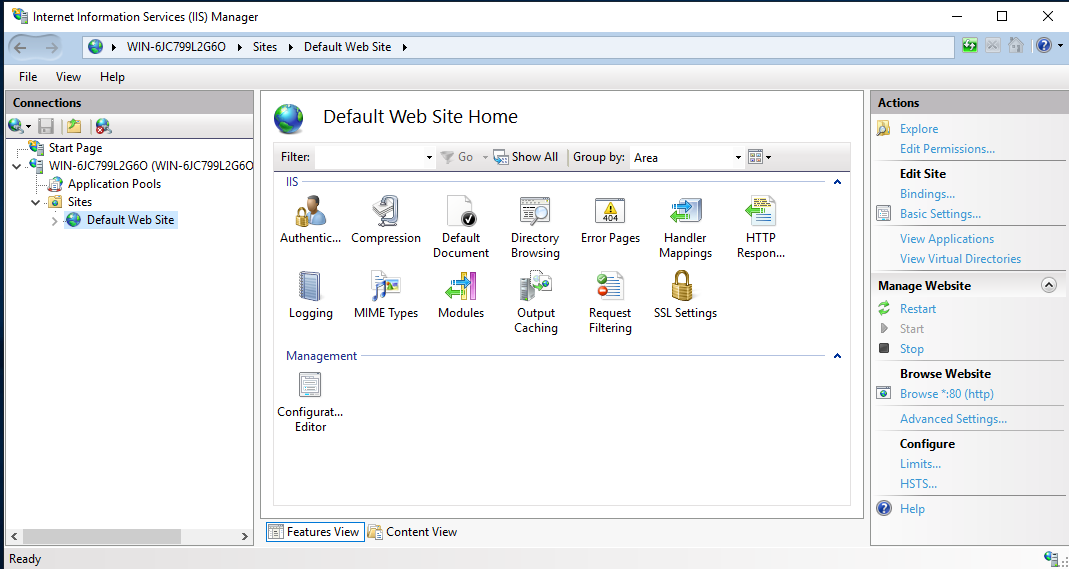
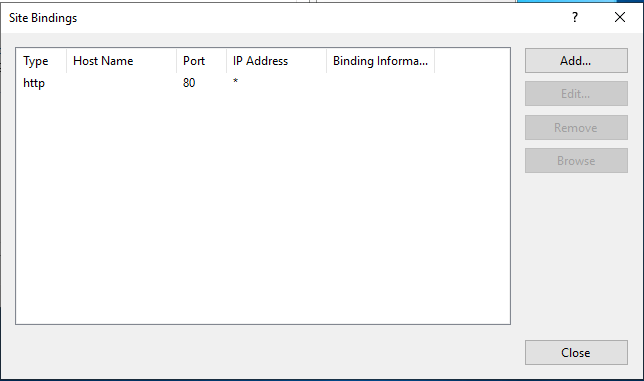
Launch IIS Manager and select the web site from the Sites navigation pane. Select Bindings from the Edit Site options under Actions.
Click Add to add a new binding.
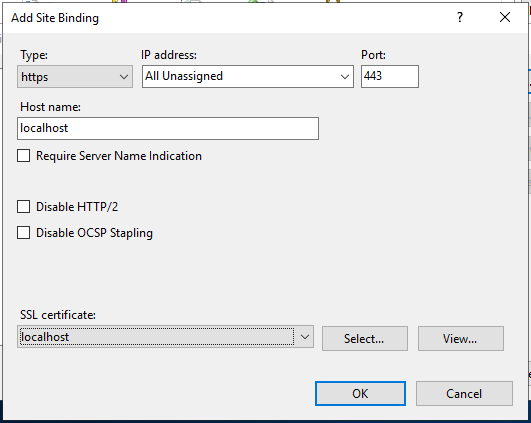
Select https for the binding Type and leave the port set to the default of 443. Enter a hostname, if desired. In the SSL certificate dropdown, select the certificate that was just imported in the previous steps. Click OK.
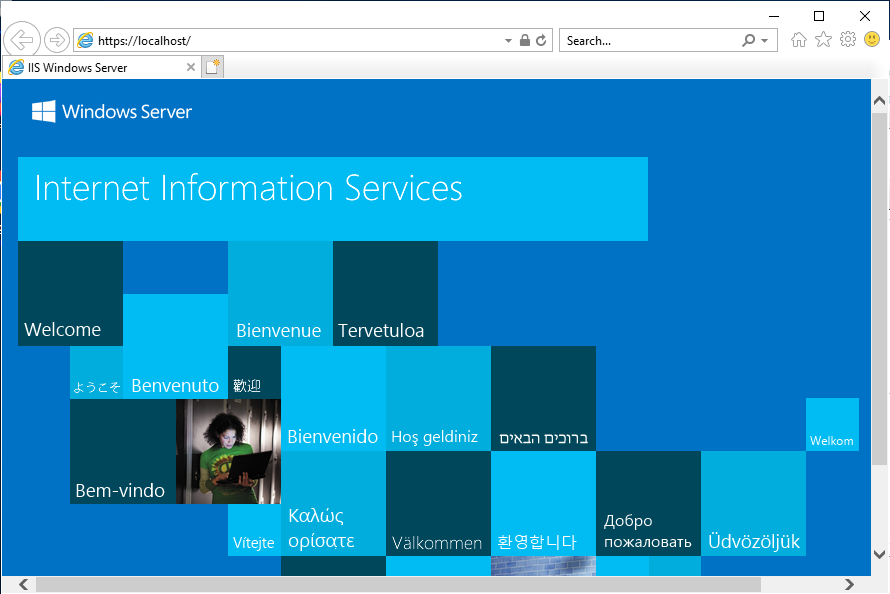
Browse to the website using the https URL to confirm that new binding works. The lock icon in the browser header bar should be a closed lock to indicate that the session is protected using the https protocol.
Configure Keyfactor Command to Manage the IIS Personal Certificate Store
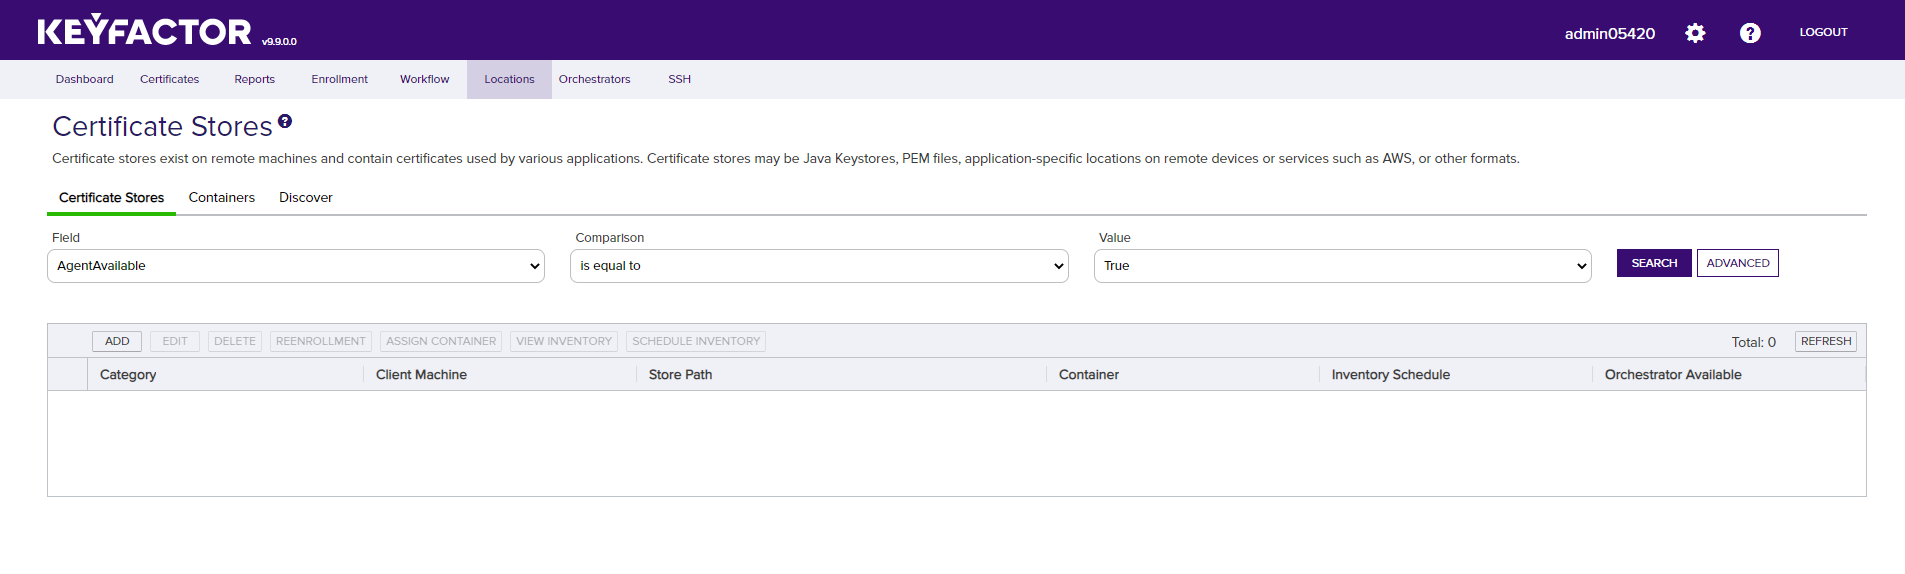
In the Keyfactor Command console, select Locations -> Certificate Stores from the navigation menu bar. Click Add.
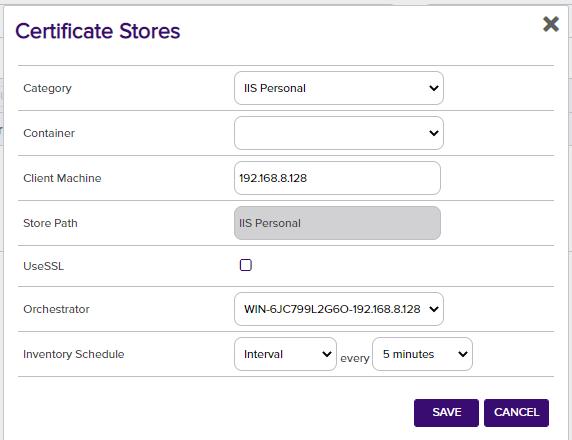
Set the Certificate Store Category to IIS Personal from the drop-down list. Enter the IP address of the IIS web server for the Client Machine. Select the Universal Orchestrator that you deployed with the Keyfactor Command Test Drive for the Orchestrator. Set the Inventory Schedule as desired. Click Save.
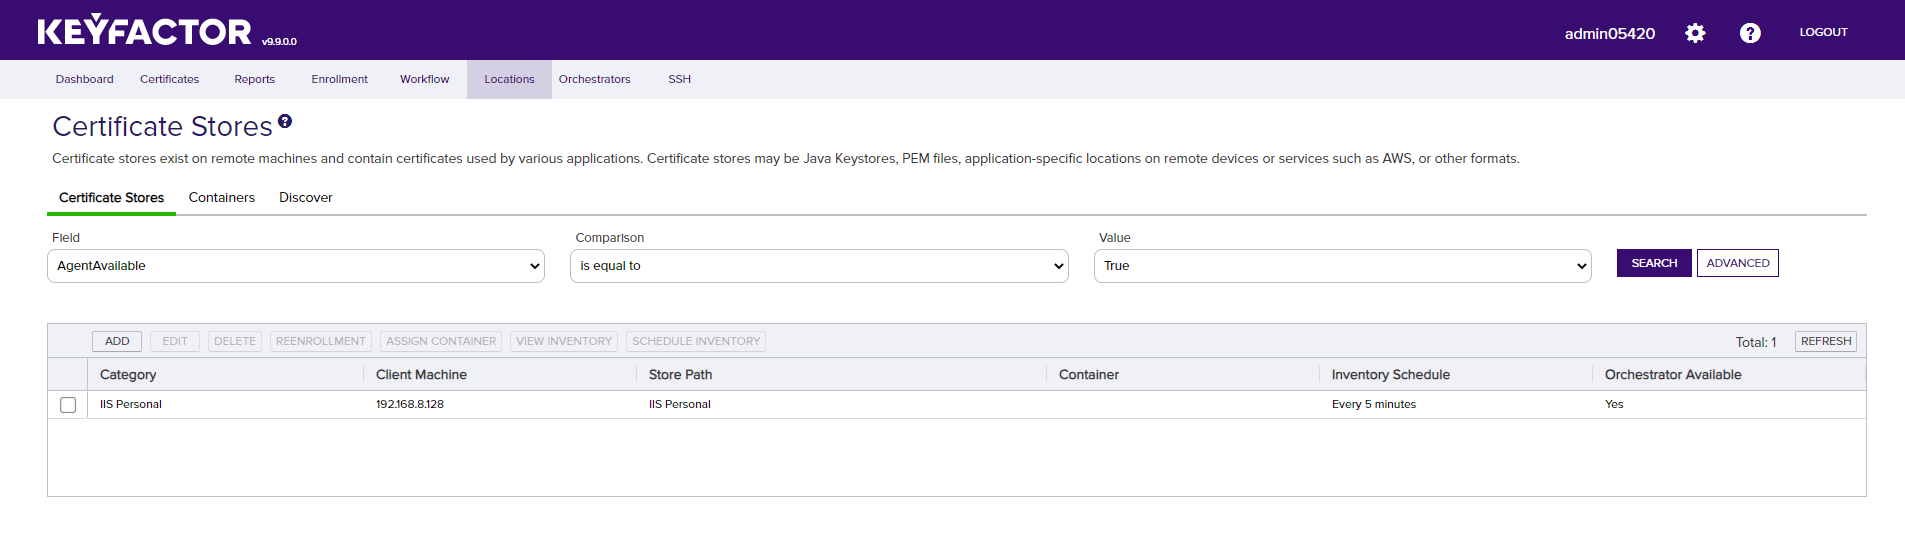
Confirm the IIS Personal certificate store was added successfully and that the Inventory Schedule matches your selection from the previous step.
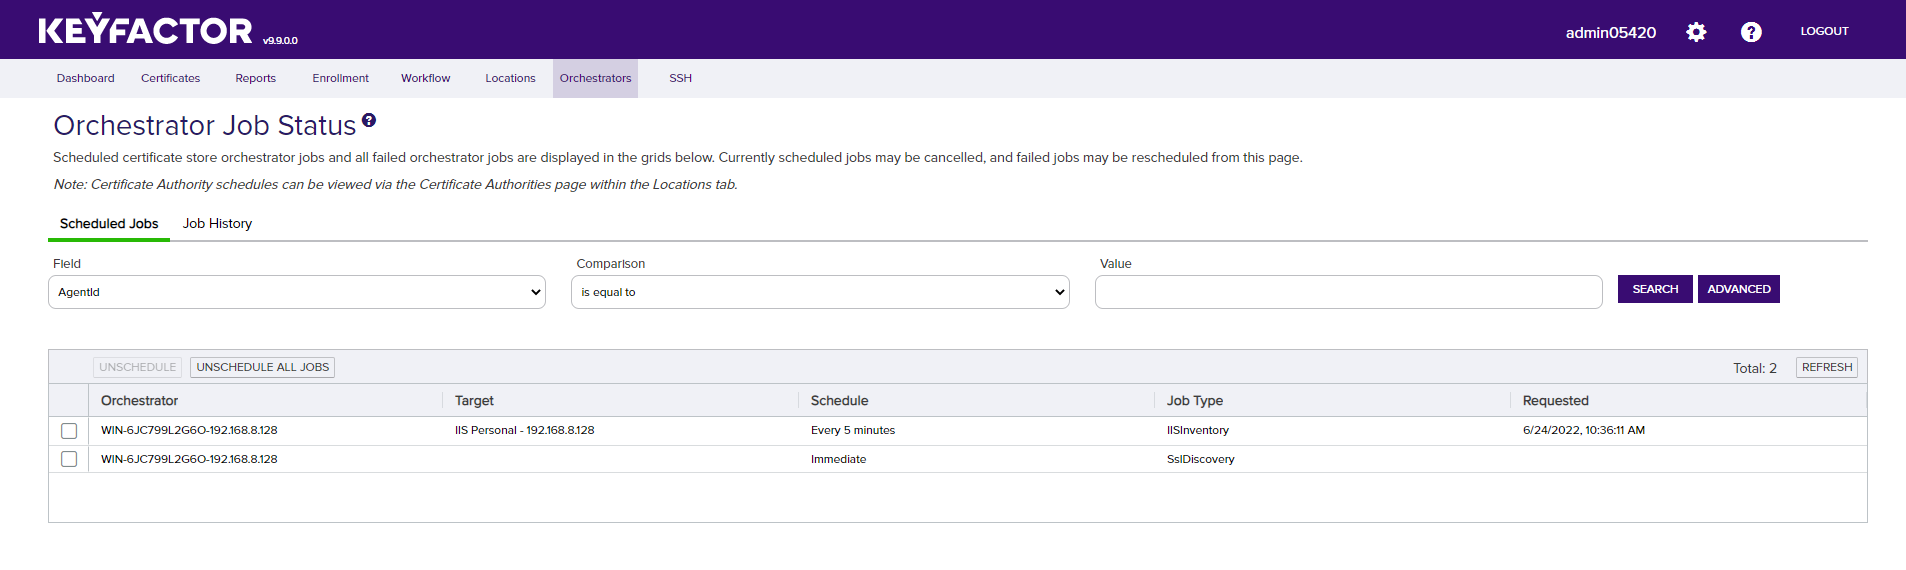
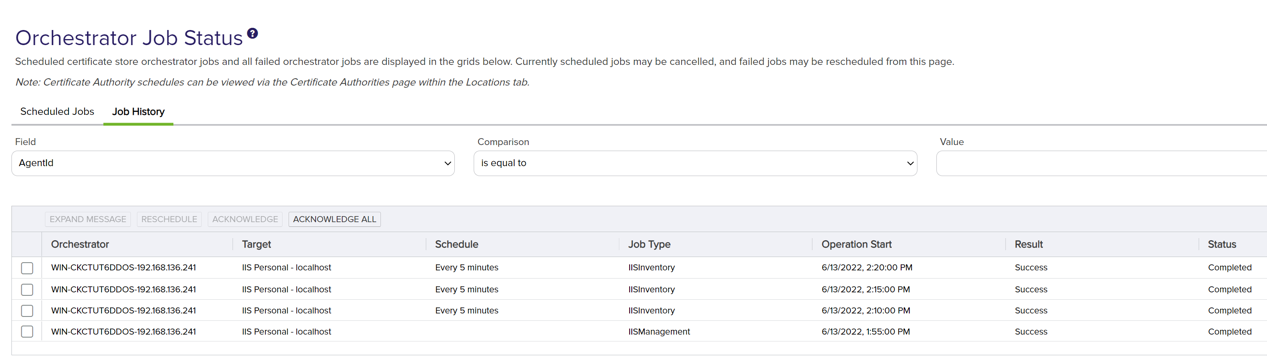
In the Keyfactor Command console, select Orchestrator -> Jobs from the navigation menu bar. The list of jobs should contain the job that was configured in the previous step. It may take up to 5 minutes for the Universal Orchestrator to pick up the new inventory schedule from Keyfactor Command. Once the Universal Orchestrator completes the job, the results will show up in the list on the Job History panel of the Orchestrator Job Status page.
Renew the Website Certificate
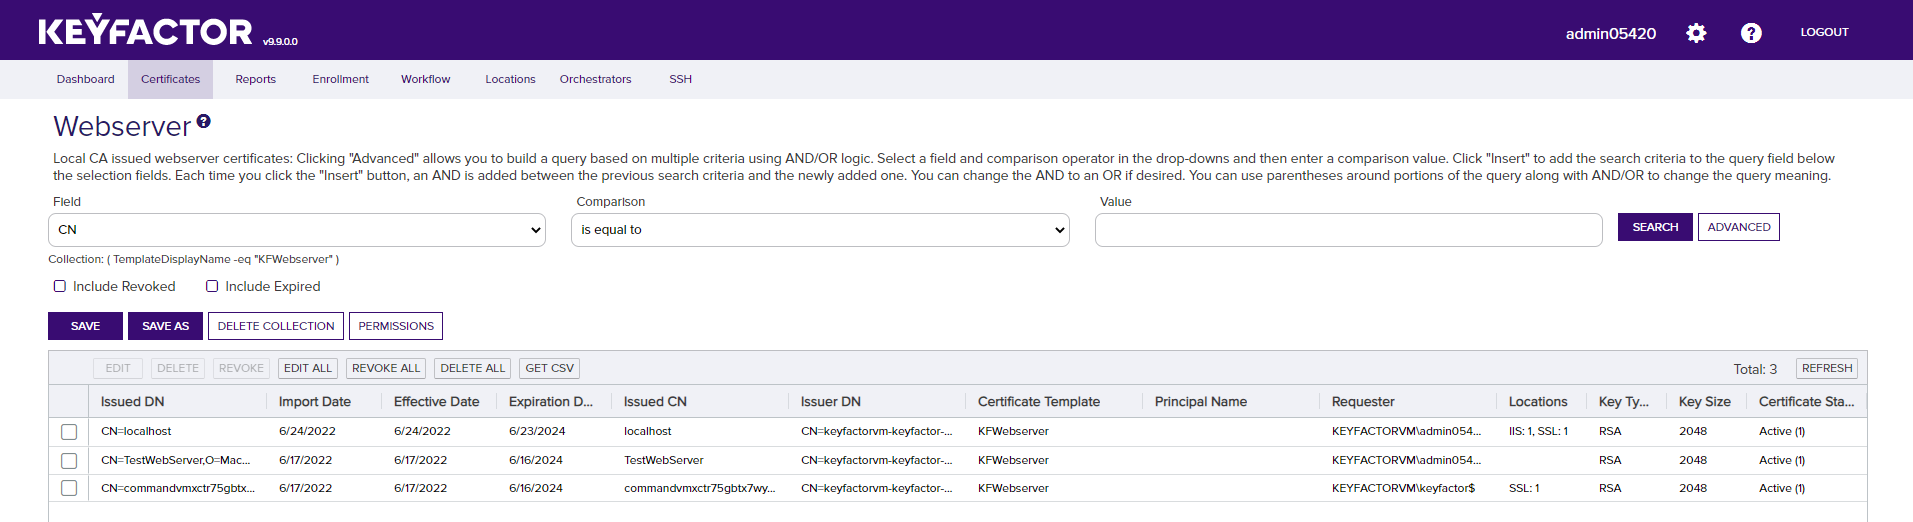
In the Keyfactor Command console, select the collection created during the initial configuration of the Test Drive. The collection shown in the following diagram is called “Webserver”. From the certificate list, select the certificate that was installed on the IIS web server.
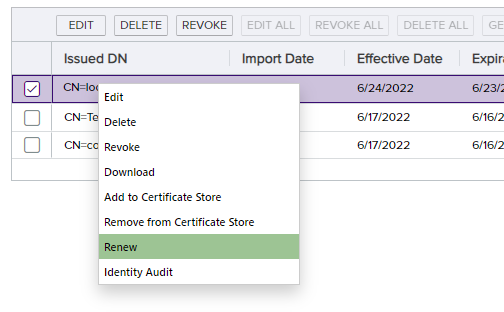
Right-click the certificate and select Renew.
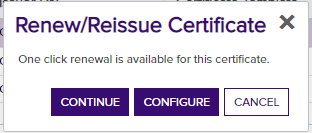
If the Universal Orchestrator is properly configured and working correctly, a dialog box will appear, indicating that one click renewal is available for the selected certificate. Click Continue.
-
A dialog box will appear indicating that the certificate was successfully renewed.

-
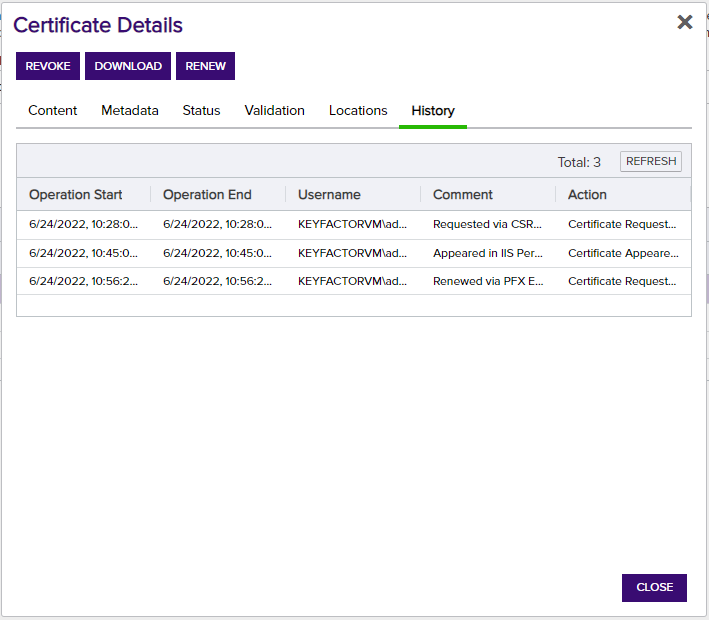
double-click on the renewed certificate from the list of certificates in the collection. Clicking on the History tab will show that the certificate was successfully renewed. Make note of the renewed certificate serial number. Once the Universal Orchestrator connects back to the Keyfactor Command Test Drive, the renewed certificate will be installed into the IIS web server and the Bindings will be updated to use the renewed certificate. Compare the serial number in the certificate from the collection with the serial number of the certificate in the IIS Bindings to confirm that the renewed certificate was successfully installed in the web site.
Configure Certificate Stores in Keyfactor Command
Once the Universal Orchestrator is approved, one area to set up can be the certificate store page. This can be done with the Windows and Linux orchestrators.
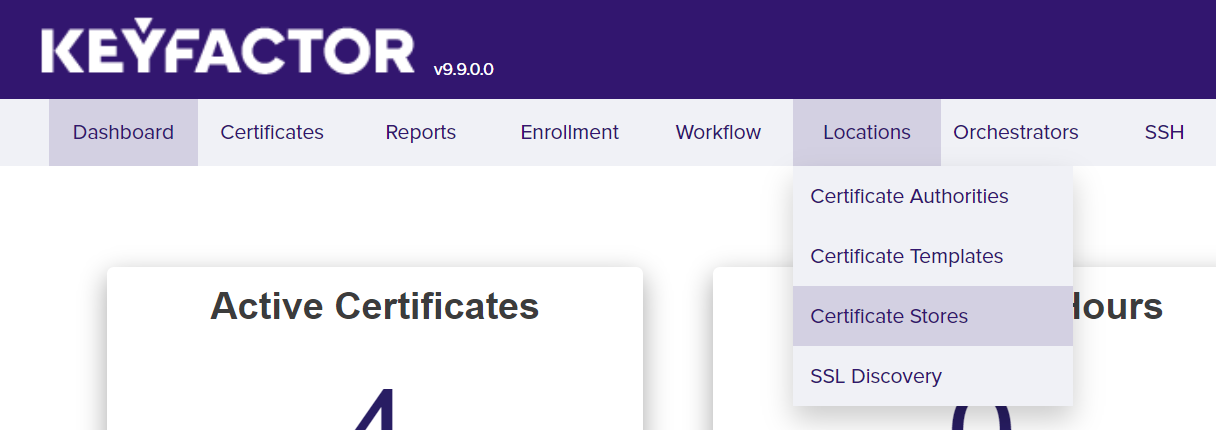
Navigate to the Locations menu and select Certificate Stores.
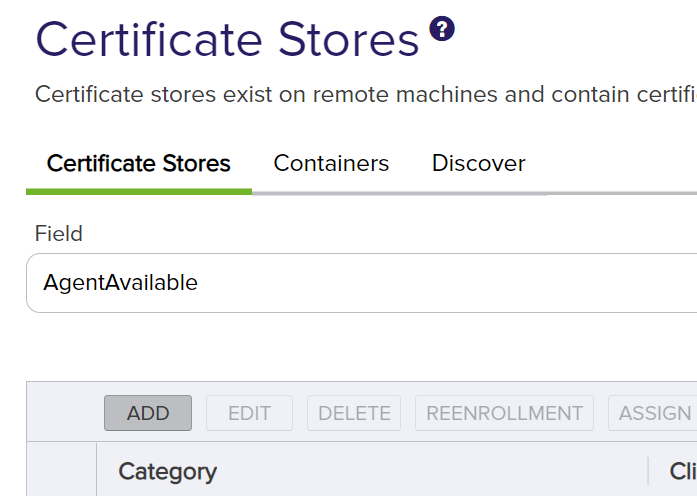
On the Certificate Store page, click Add.
A dialog will open to allow for configuring a certificate store. The Category field is the type of certificate store. By default, the installed orchestrator on Windows can use File Transfer Protocol or any of the IIS categories, and the installed orchestrator on Linux can only use File Transfer Protocol. To add another category, refer to Reference 5.
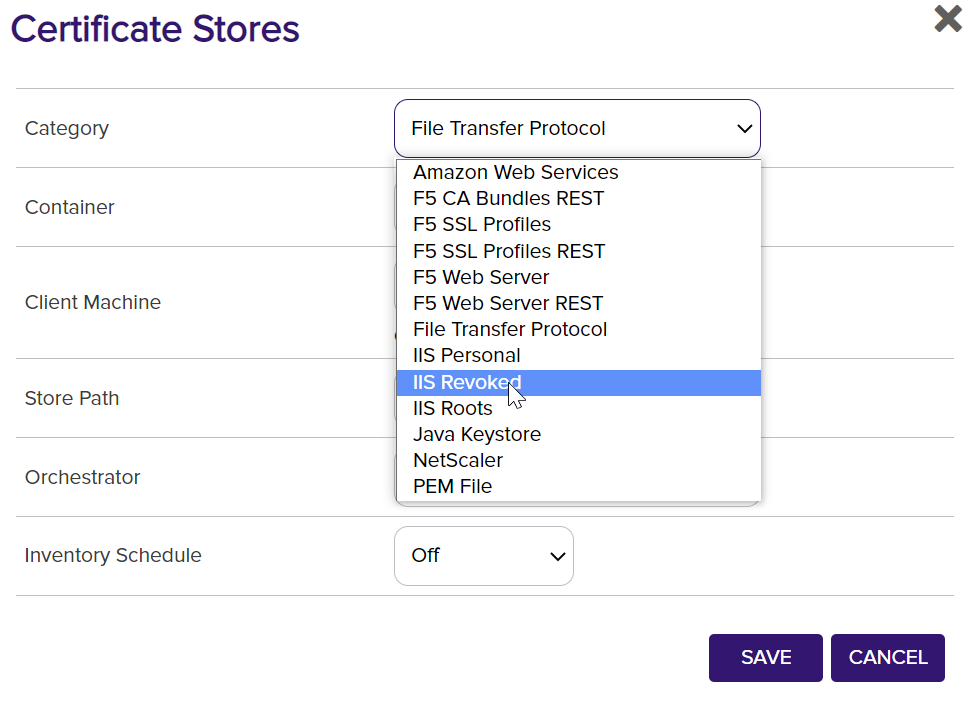
Based on the category picked, some of the fields will change to gather the correct information for the type.
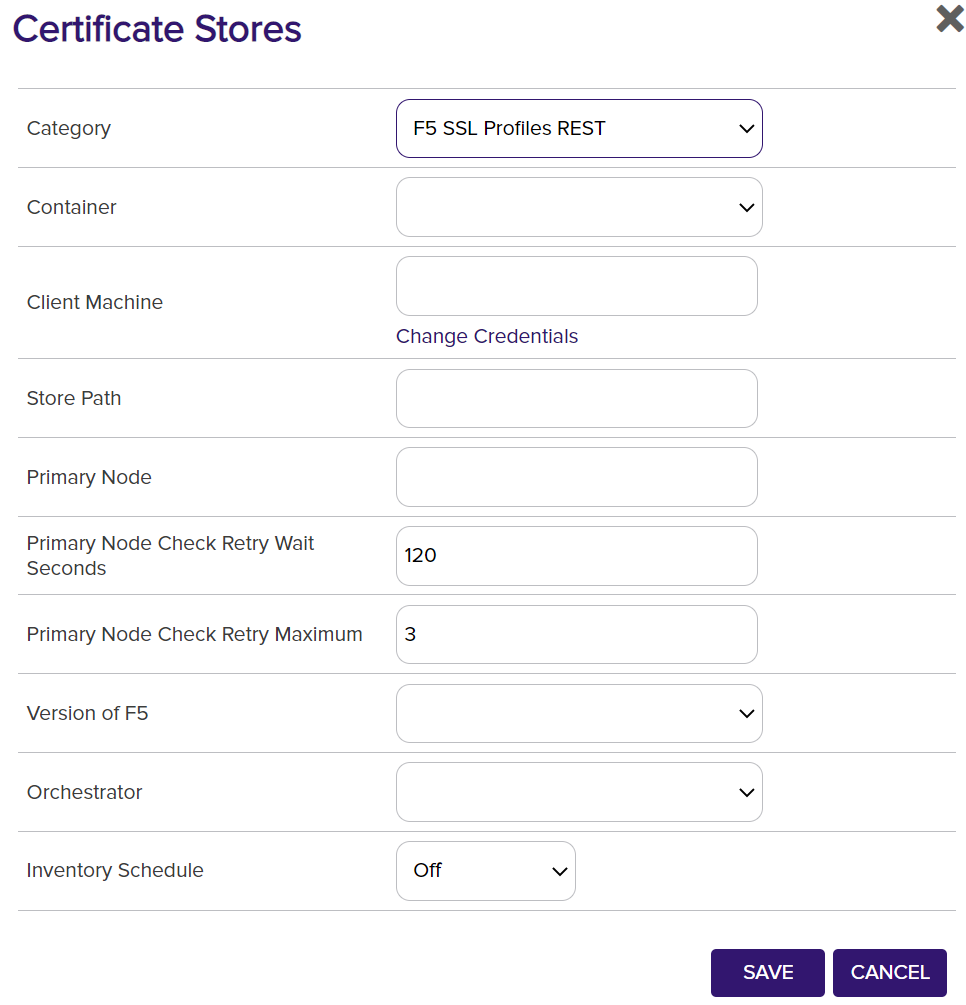
After filling out the specific fields needed for the category, the Orchestrator field will need to be selected from the dropdown. The Orchestrator field populates based on the orchestrator's capabilities. If the orchestrator field is not displayed, the client machine name will need to match the orchestrator name.

The last field is the Inventory Schedule which will start to inventory the certificates.
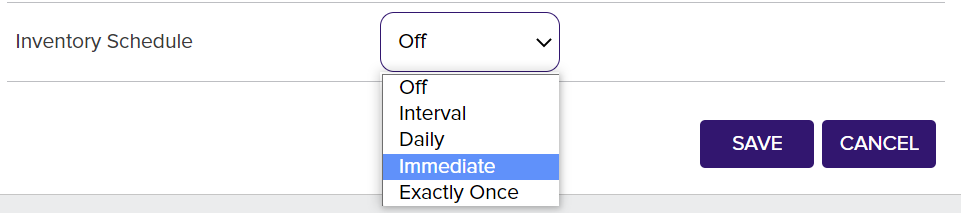
Click Save. Then navigate to the Orchestrator menu and select Jobs.
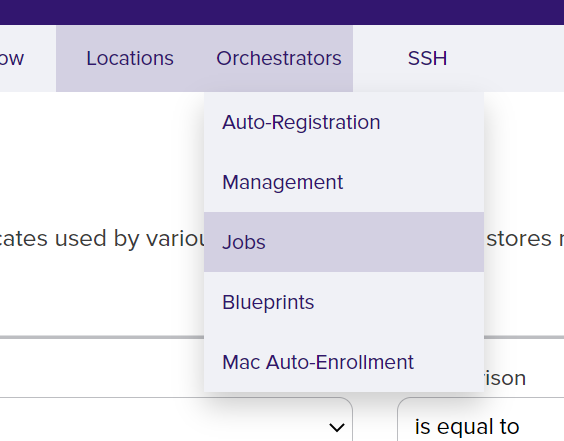
Here the jobs that are scheduled and the jobs that have run can be seen and if there are any errors with the job history.

Reference
Reference 1 - Fetch Logs using the Orchestrator in Keyfactor Command
Since the Orchestrator has the LOGS capability, it can be used to gather the logs for the Orchestrator. This can be done with the Windows and Linux orchestrator.
Navigate to the Orchestrators menu and select Management.
Within this grid, highlight the orchestrator and click Fetch Logs.
Navigate to the Orchestrator menu and select Jobs.

Here is the history of the jobs that are scheduled and the jobs that have been run. You can see if there are any errors with the jobs in the History tab.
After the job is successful, the results can be seen through the API. These can be accessed by clicking the Question Mark Icon in the top-right corner and clicking API Endpoint Utility.
This is the list of all the API endpoints supported for Keyfactor Command. The first endpoint we need to open is GET /OrchestratorJobs/JobHistory.

Adding a query and sorting field will help find the correct Id needed for the job. Put the following in the pq.queryString and pq.sortField, fields:
-
pq.queryString: “Agent -eq "Your Orchestrator Name" (usually hostname-ipaddress)
-
pq.sortField: JobType
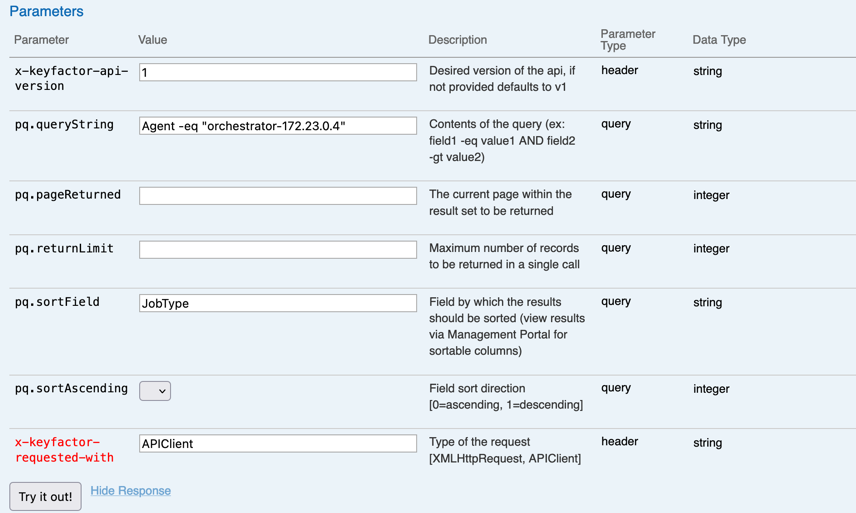
Click Try it out! and see the information displayed. After finding the fetch logs job, copy the JobHistoryId to be used in the next API call.
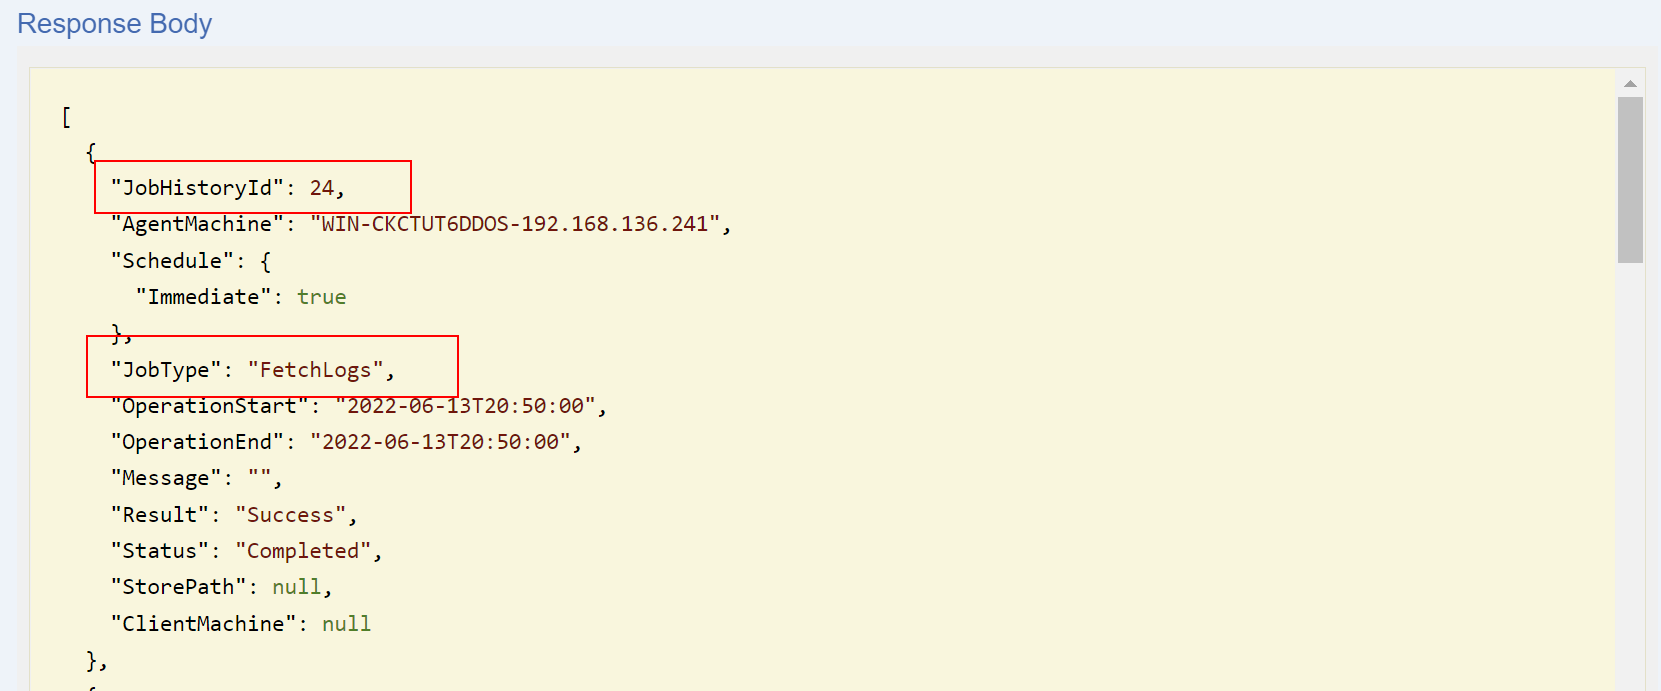
Using the JobHistoryId in the API endpoint GET /OrchestratorJobs/JobStatus/Data, then click Try it out!.
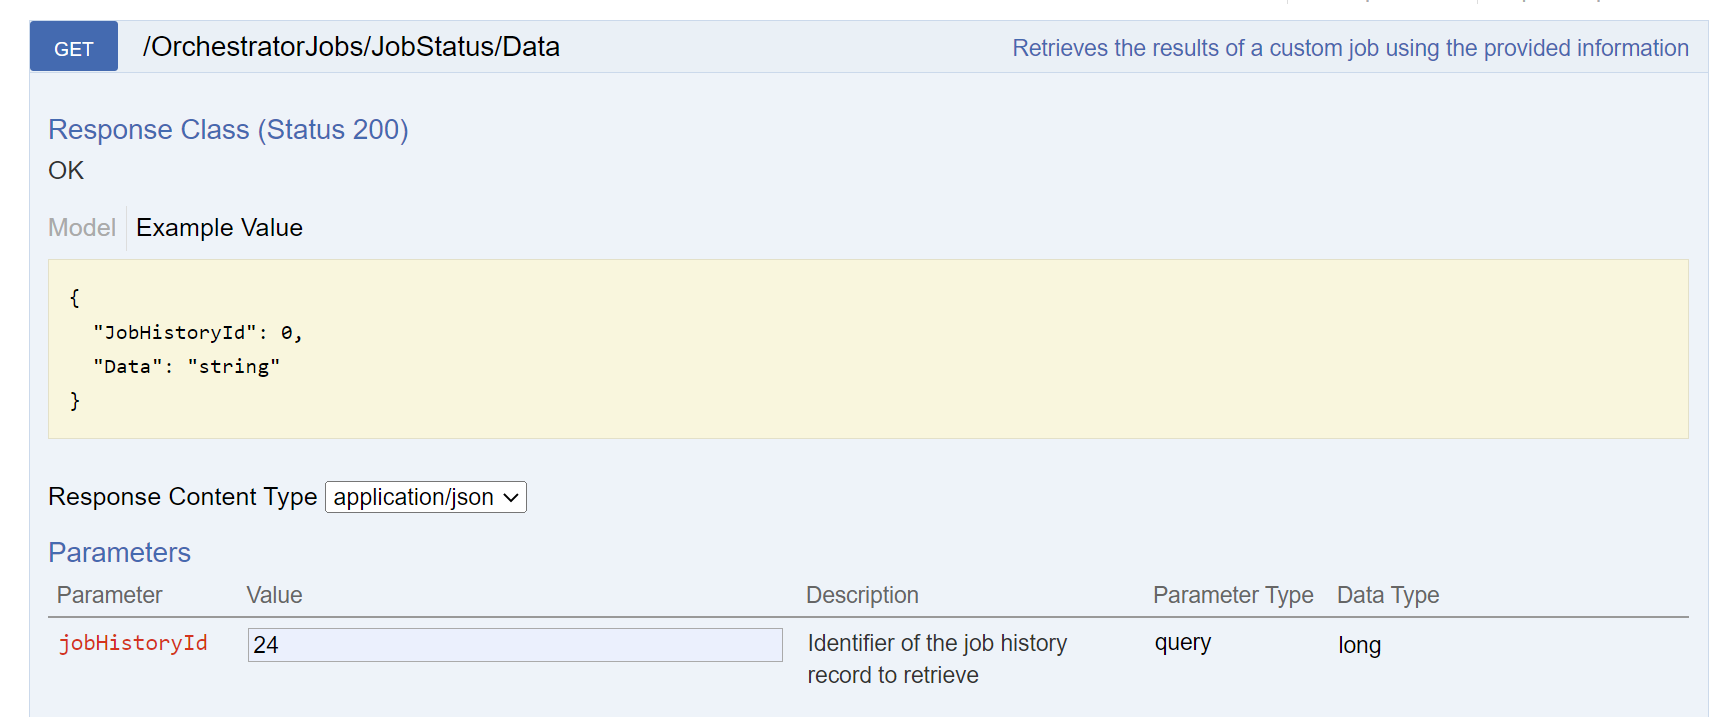
The Data returned is the Orchestrator logs.

Reference 2 – Install the Test Drive CA Certificate in your Browser
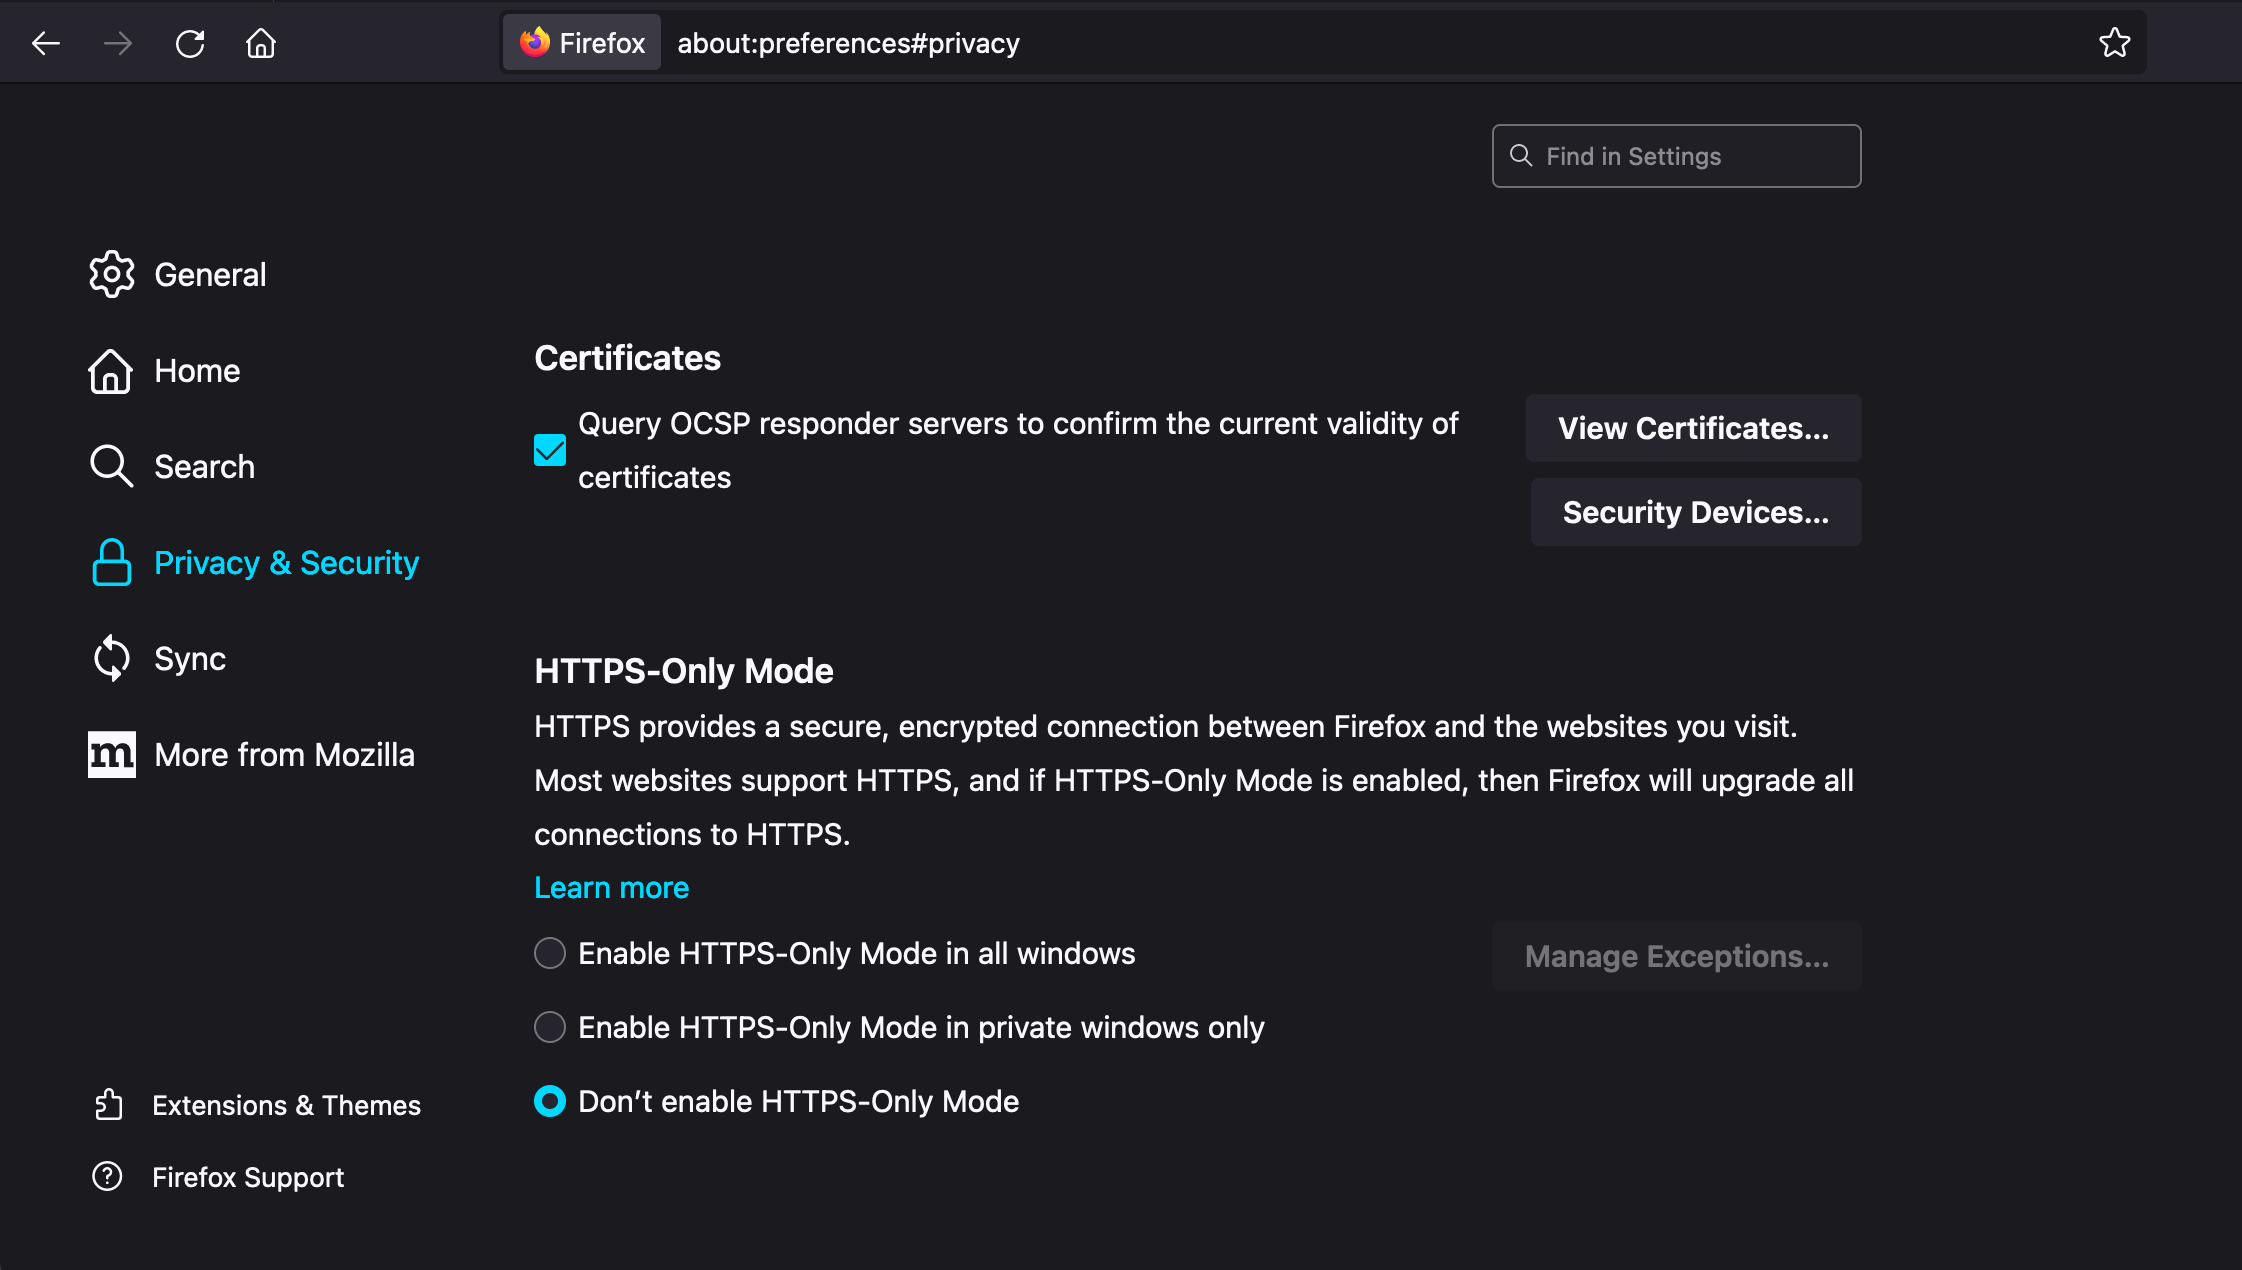
Download as PEM for the Test Drive CA certificate and save it on your computer. You can also use the cert file that came with the Universal Orchestrator bundle named kf-testdrive-cert.crt. Access the browser’s certificate store and add the ManagementCA certificate to it. In Firefox, type “about:preferences” in the address bar or select the Preferences Menu and go to settings. Click Privacy and Security and then View Certificates.
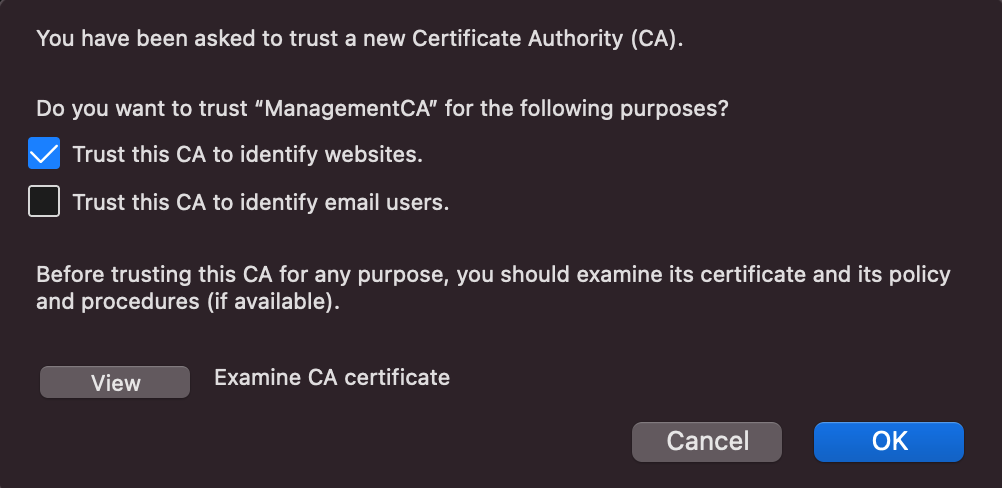
In the dialog that comes up, click the Authorities tab if not already selected and click Import.
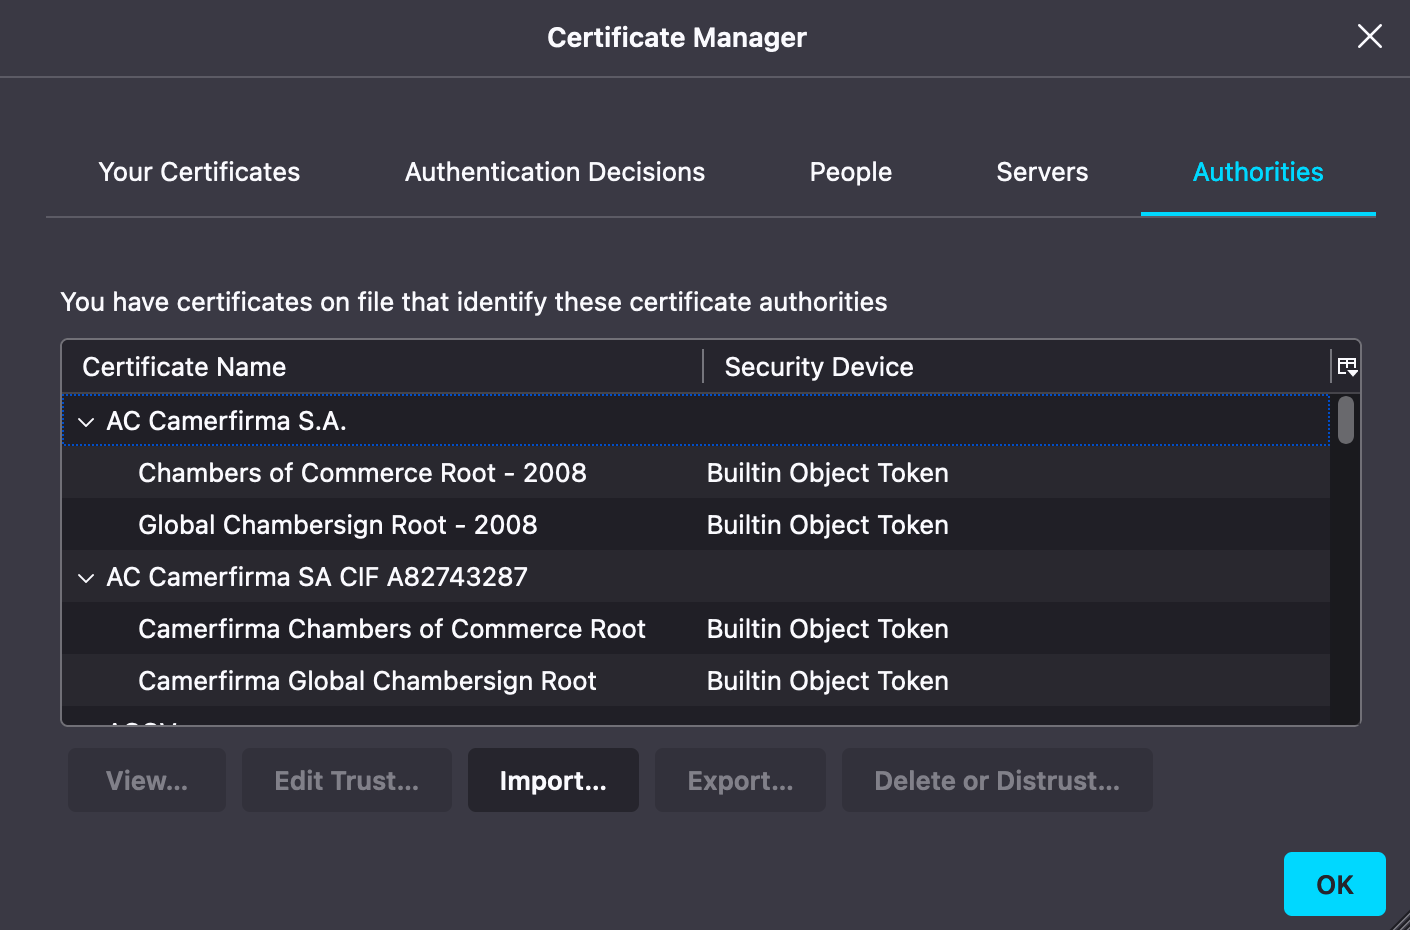
Select Trust this CA to Identify websites checkbox and click OK to import the certificate. Next navigate to the Servers tab. Look for any entries linked to the Test Drive instance.
Once you refresh the Keyfactor Command page, you should see a verified lock in your browser.
Once the Test Drive has ended, you may delete these certificates, if desired. If the locks still do not show properly after adding in the certificates, try refreshing the page. If that still does not work a browser restart may be needed.
Reference 3 - Access the Keyfactor Universal Orchestrator install log
If any problems arise, you can access the log of the orchestrator setup. In the directory the setup was run from will be a log with the name SetupOrchestrator-DATE.log (it will have the time and date in it). An example log is displayed below.

Reference 4 - Access the Universal Orchestrator runtime log
In the directory you extracted the Keyfactor Universal Orchestrator to there will be a directory called “KeyfactorUniversalOrchestrator.” In that directory is a “logs” directory with all the output from the orchestrator itself.

Reference 5 - Add new Certificate Store Types
For a list of supported integrations and instructions on how to use them, refer to the Keyfactor Integrations Catalog section Universal Orchestrator. Installation instructions for each integration appear in the associated README file.
For information on how to create a new integration, refer to the Keyfactor Integrations SDK section Universal Orchestrator Integration Quickstart.
Contact us
Schedule a live demo with one of our experts to discuss your environment, integration options, and how we can help you move from test drive to production.