Instructions for deploying the MSSQL Server Database Connector to scan for cryptographic assets and deliver findings to the AgileSec Platform for processing and analysis.
Overview
The MSSQL Server Database Connector queries MSSQL views to determine the encryption state for all databases on the target SQL Server instance. For encrypted databases, this Connector captures the encryption method and algorithm, along with Data Encryption Key (DEK) details.
When Transparent Data Encryption (TDE) is enabled and protected by a certificate, the Connector also collects associated X.509 certificate metadata and other relevant cryptographic attributes. The Connector then sends these findings to Keyfactor’s AgileSec platform.
What Gets Scanned
The Connector queries the target SQL Server instance and evaluates all databases to identify encryption posture and related cryptographic assets, including:
-
Database Encryption State: Whether each database is encrypted and its current encryption status.
-
Encryption Method & Algorithm: Encryption type and configured algorithm (for example, TDE with AES-256).
-
Data Encryption Key (DEK) Metadata: DEK creation details, including key/protector attributes and related fingerprints where available.
-
Certificate & X.509 Metadata (TDE): When TDE is certificate-protected, captures associated X.509 certificate metadata (subject/issuer, validity dates, and certificate fingerprints).
-
Database Context: Key instance/database attributes used to contextualize findings
Prerequisites
Ensure you meet the following requirements to enable scanning.
SQL Server Database Requirements
Ensure the following requirements are met prior to configuring the MSSQL Server Database Connector:
|
Requirement |
Details |
|---|---|
|
SQL Server Version |
|
Network Access
|
Requirement |
Details |
|---|---|
|
Network Connectivity |
Ensure HTTPS network connectivity from AgileSec platform or remote execution machine to the SQL Server. |
Remote Execution System Requirements
If running the Connector remotely using CLI, the remote execution machine must meet these requirements:
|
Component |
Requirement |
|---|---|
|
Operating System |
Windows (x64): Windows Server 2016+, Windows 10+ |
|
RAM |
Minimum 1-2 GB to enable API calls and data streaming. |
|
Disk Space |
Minimal; scans are API-driven and findings are streamed to the AgileSec platform. No data is stored on disk. |
|
Permissions |
Read/write access to remote sensor working directory (remote sensor install location) |
Remote Execution Access Requirements
|
Requirement |
Details |
|---|---|
|
Connector Deployment (CrowdStrike Workflows) |
For CrowdStrike-based deployments, the Connector must be installed on the same server where the SQL Server instance is running. |
|
Group Managed Service Account (gMSA) |
A gMSA must be created in Active Directory and configured with the necessary permissions to access the target SQL Server instance. |
|
SQL Server Permissions |
The gMSA account must be granted the following server-level permissions:
|
|
Active Directory Domain |
The SQL Server must be joined to or have a trust relationship with the same Active Directory domain where the gMSA is configured. |
|
gMSA Retrieval Rights |
The Connector Remote Host machine account must be authorized to retrieve the gMSA password from Active Directory (configured via the gMSA |
|
AgileSec Platform TLS Trust (if using self-signed certificates) Note: Default AgileSec installer-generated certificates are self-signed. |
If the AgileSec Platform external URL uses a self-signed certificate (or a private CA), import the issuing root CA certificate into the Windows Local Computer trusted root certificate store on the host where the Connector runs. This ensures the Connector can establish TLS connections to the AgileSec Platform external endpoint. |
Supported Authentication Methods
The MSSQL Server Database Connector supports Basic Auth and gMSA.
Basic Auth
When executing Platform Scans through the AgileSec Web UI or Remote Scan Executions, the MSSQL Connector can utilize SQL database username and password authentication.
gMSA (Remote Execution Only)
When executing Remote Scans, the MSSQL Server Database Connector supports Windows integrated authentication via a group Managed Service Account (gMSA). The Remote Connector must run under the gMSA security context.
Running the Connector
AgileSec MSSQL Server Database Connector scans can be executed using the following methods:
-
Platform Scan Execution: Configure and execute scans directly through the Keyfactor AgileSec web UI with on-demand or scheduled execution options.
-
Remote Scan Execution: CrowdStrike Workflow. Deploy the Connector remotely and execute the Connector through a CrowdStrike workflow.
-
Remote Scan Execution: Windows. Deploy the Connector to a remote machine, configure the Connector, and execute using CLI. This approach is intended for environments where you manage execution directly on the Windows host. Remote Scan Execution enables running via Windows Task Scheduler (or an equivalent mechanism) instead of deploying and executing through a CrowdStrike workflow.
Platform Scan Parameters
|
Field Name |
Display Name |
Type |
Required |
Description |
|---|---|---|---|---|
|
|
MSSQL Database |
Single-line text |
✅ Yes |
The hostname or IP address of the MSSQL server used to connect to the database instance. |
|
|
Username |
Single-line text |
❌ No |
Username used to authenticate with the MSSQL database. |
|
|
Password |
Password field |
❌ No |
Password used to securely authenticate with the MSSQL database. |
Platform Scan Execution
Running scans through the user interface is the simplest and fastest way to get started. The platform enables running on-demand or scheduled scans in a dedicated environment.
Platform Scan Configuration
-
Open your browser and navigate to the Keyfactor AgileSec Platform Web URL
-
Log in with your credentials
-
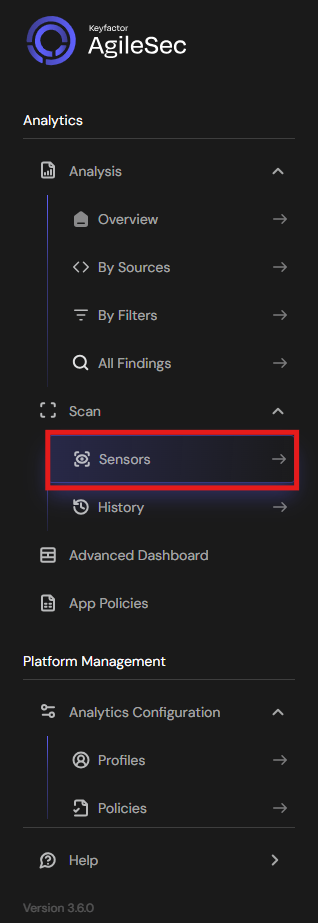
Click on "Sensors" in the left navigation menu under Scan
-
Click "+ New Sensor".
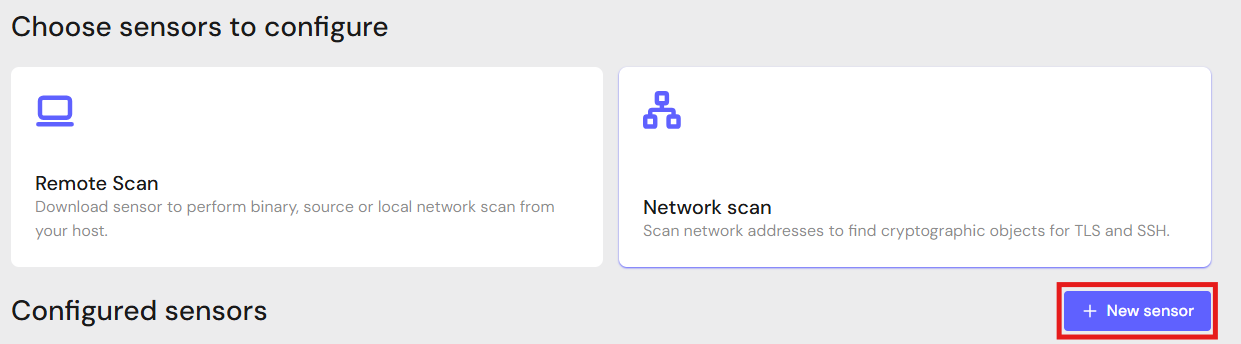
-
Click on the correct card to open the configuration interface.
Configure Parameters and Start Scan
-
Fill in the required configuration parameters.
-
Click Save.
-
Click Action then Scan to begin a scan.
Note: Click Edit to reconfigure parameters.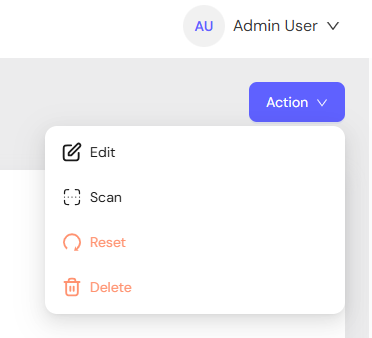
Remote Scan Execution: CrowdStrike Workflow
See MSSQL Connector CrowdStrike Workflow Execution for CrowdStrike Workflow Execution instructions.
Note for CrowdStrike-based Deployments: The Connector must be installed on the same server where the SQL Server instance is running.
Remote Execution Parameters
|
Config attribute |
Required |
Description |
|
|
❌ No |
Application name used by the plugin. Leave as default. Default: |
|
|
❌ No |
Server hostname or IP address of SQL Server instance to scan. Note: If the Connector runs on the same host as the SQL Server, Default: |
|
|
❌ No |
Server port of SQL Server instance to scan. Note: If the Connector runs on the same host as SQL Server, Default: |
|
|
✅ Yes |
External-facing AgileSec platform URL. Example: |
|
|
❌ No |
Enables trusting TLS certificates (including self-signed), where applicable. Default: |
|
|
✅ Yes |
Display name for the Connector. Appears in Scan History. |
|
|
❌ No |
Run-as identity displayed in Scan History. |
|
|
✅ Yes |
Token used to authenticate to the AgileSec Platform. Set to |
|
|
❌ No |
Optional log verbosity for Connector logs ("trace", "debug", "info", "warn", "error") Default: |
Remote Scan Execution: Windows
This approach is intended for environments where you manage execution directly on the Windows host. Use this method to configure and run the MSSQL Server Database Connector via Windows Task Scheduler (or an equivalent mechanism).
Note: The Connector must be installed on the same server where the SQL Server instance is running.
Scans may be run on remote host machines with the AgileSec Remote Sensor Package.
Download Remote Sensor Package
Generate Platform Token
-
In the Download Remote UI, click "Generate Token"
-
Copy the generated token
-
Store securely in an environment variable such as
SENSOR_TOKEN:export SENSOR_TOKEN="your-generated-token"
Create Configuration File
Create a file named mssql.yml and populate it with the following example (update values to match your environment):
scan_config: plugins: - mssql - export
config:
  mssql:
    name: mssql
    plugin_config:
      app: "AgileSecSensor"
      log_level: "info"
      server: "127.0.0.1"
      port: 1433
      spn: ""          # Not currently supported. Leave empty
      trust: true      # Trust SQL Server TLS certificate (if applicable).
  export:
    name: export
    plugin_config:
      sensor_name: "SQL Server Database Sensor (admin)"
      sensor_type: "SQL Server Database Sensor"
      ran_by: "admin"
      url: "https://agilesec.kf-agilesec.com:8443"
      token: "${env:SENSOR_TOKEN}"
  settings:
    log_level: "info"
    allow_push: true
    async_send: true
Step 4: Run the Connector
Execute the Connector with your configuration file:
-
Windows (PowerShell)
PowerShell# Set environment variables $env:SENSOR_TOKEN = "your-sensor-token" # Run Connector .\\unified_sensor_windows.exe -c .\\mssql.yml
Remote Execution Options:
-
Recommended for Production: Run the Connector as a Scheduled Task configured to run as the gMSA.
-
Interactive shell (only if permitted): If your SQL Server configuration allows the Connector’s remote host machine to authenticate locally using the currently logged-in Windows identity, you may run the CLI from a shell as a user identity with the required SQL Server permissions.
Getting Support
Collect diagnostic information:
-
Connector version
-
Configuration file (redact tokens)
-
Log output
-
MSSQL details (versions, etc.)
Contact Support:
Contact Support
-
Portal: https://support.keyfactor.com