Create Certificate Authorities
The following describes how to create a Root CA and an Issuing CA.
Create Root CA
To create a Root CA:
Click Certification Authorities under CA Functions.
In the Add CA field, enter the CA name Corporate Root CA – G1 and click Create.
On the Create CA page, select Corporate Root CA Crypto Token in the Crypto Token list.
Ensure all keys are used appropriately.
The keys previously created and named defaultKey, certSignKey, and testKey (in section Create Crypto Tokens) should be populated automatically with the rest as "- Default key".In the CA Certificate Data section, specify the following:
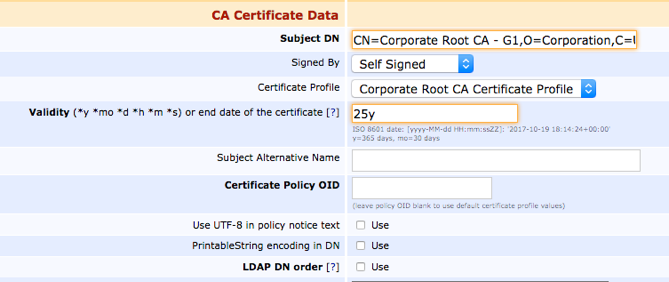
Subject DN: Enter CN=Corporate Root CA - G1,O=Corporation,C=US.
Signed by: Select Self Signed since this is the Root CA.
Certificate Profile: Select Corporate Root CA Certificate Profile.
Validity: Specify 25y.
LDAP DN order: Clear Use.

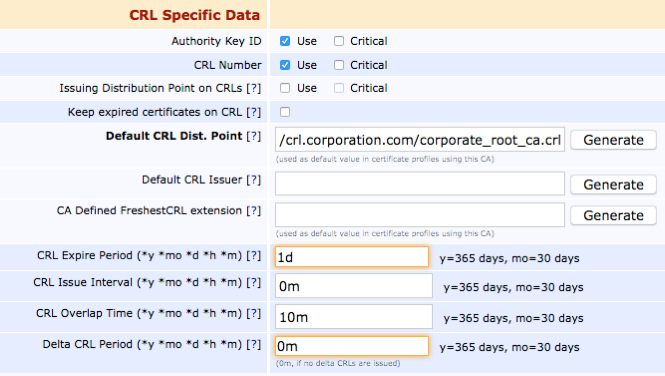
In the CRL Specific Data section, specify the following:
Default CRL Dist. Point: Change the URL to your desired CRL URL.
CRL Expire Period: Specify the interval for the CRL file to expire and no longer be valid. The default value 1 day (1d) can be changed to for example 3 days (3d).

Click Create to create the Root CA.
Create Issuing CA
To create an Issuing CA:
Under CA Functions, click Certification Authorities.
In the Add CA field, enter the CA name Corporate Issuing CA – G1 and click Create.
On the Create CA page, select Corporate Issuing CA Crypto Token in the Crypto Token list.
Ensure that all keys are used appropriately. The keys created (in section Create Crypto Tokens) and named defaultKey, certSignKey, and testKey should be populated automatically with the rest as "- Default key".
In the CA Certificate Data section, specify the following:
Subject DN: Enter CN=Corporate Issuing CA - G1,O=Corporation,C=US.
Signed by: Select Corporate Root CA – G1 since this is the Issuing CA and can automatically be signed by the Root CA we previously created (see Create Crypto Tokens).
Certificate Profile: Select Corporate Issuing CA Certificate Profile.
Validity: Specify 15y.
LDAP DN order: Clear Use.
In the CRL Specific Data section, specify the following:
Default CRL Dist. Point: Change the URL to your desired CRL URL.
CRL Expire Period: Specify the interval for the CRL file to expire and no longer be valid. The default value 1 day (1d) can be changed to for example 3 days (3d).
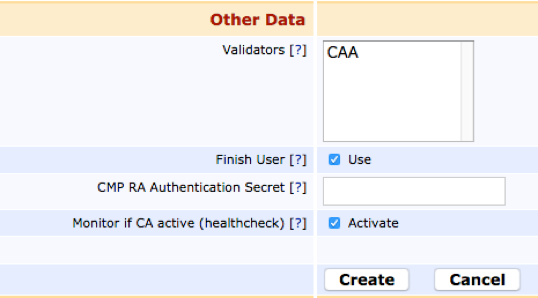
In the Other Data section, Monitor if CA active (healthcheck): Select Activate as this CA should be up all the time issuing certificates and should therefore be monitored by health checks.

Click Create to create the Issuing CA.
.png)