EJBCA Upgrade
EJBCA upgrades follow the EJBCA Enterprise release schedule. For a list of EJBCA releases and release notes, please see the EJBCA Release Notes page in the EJBCA Documentation. Within 30 days of an EJBCA version being released, EJBCA SaaS will make that version available to customers.
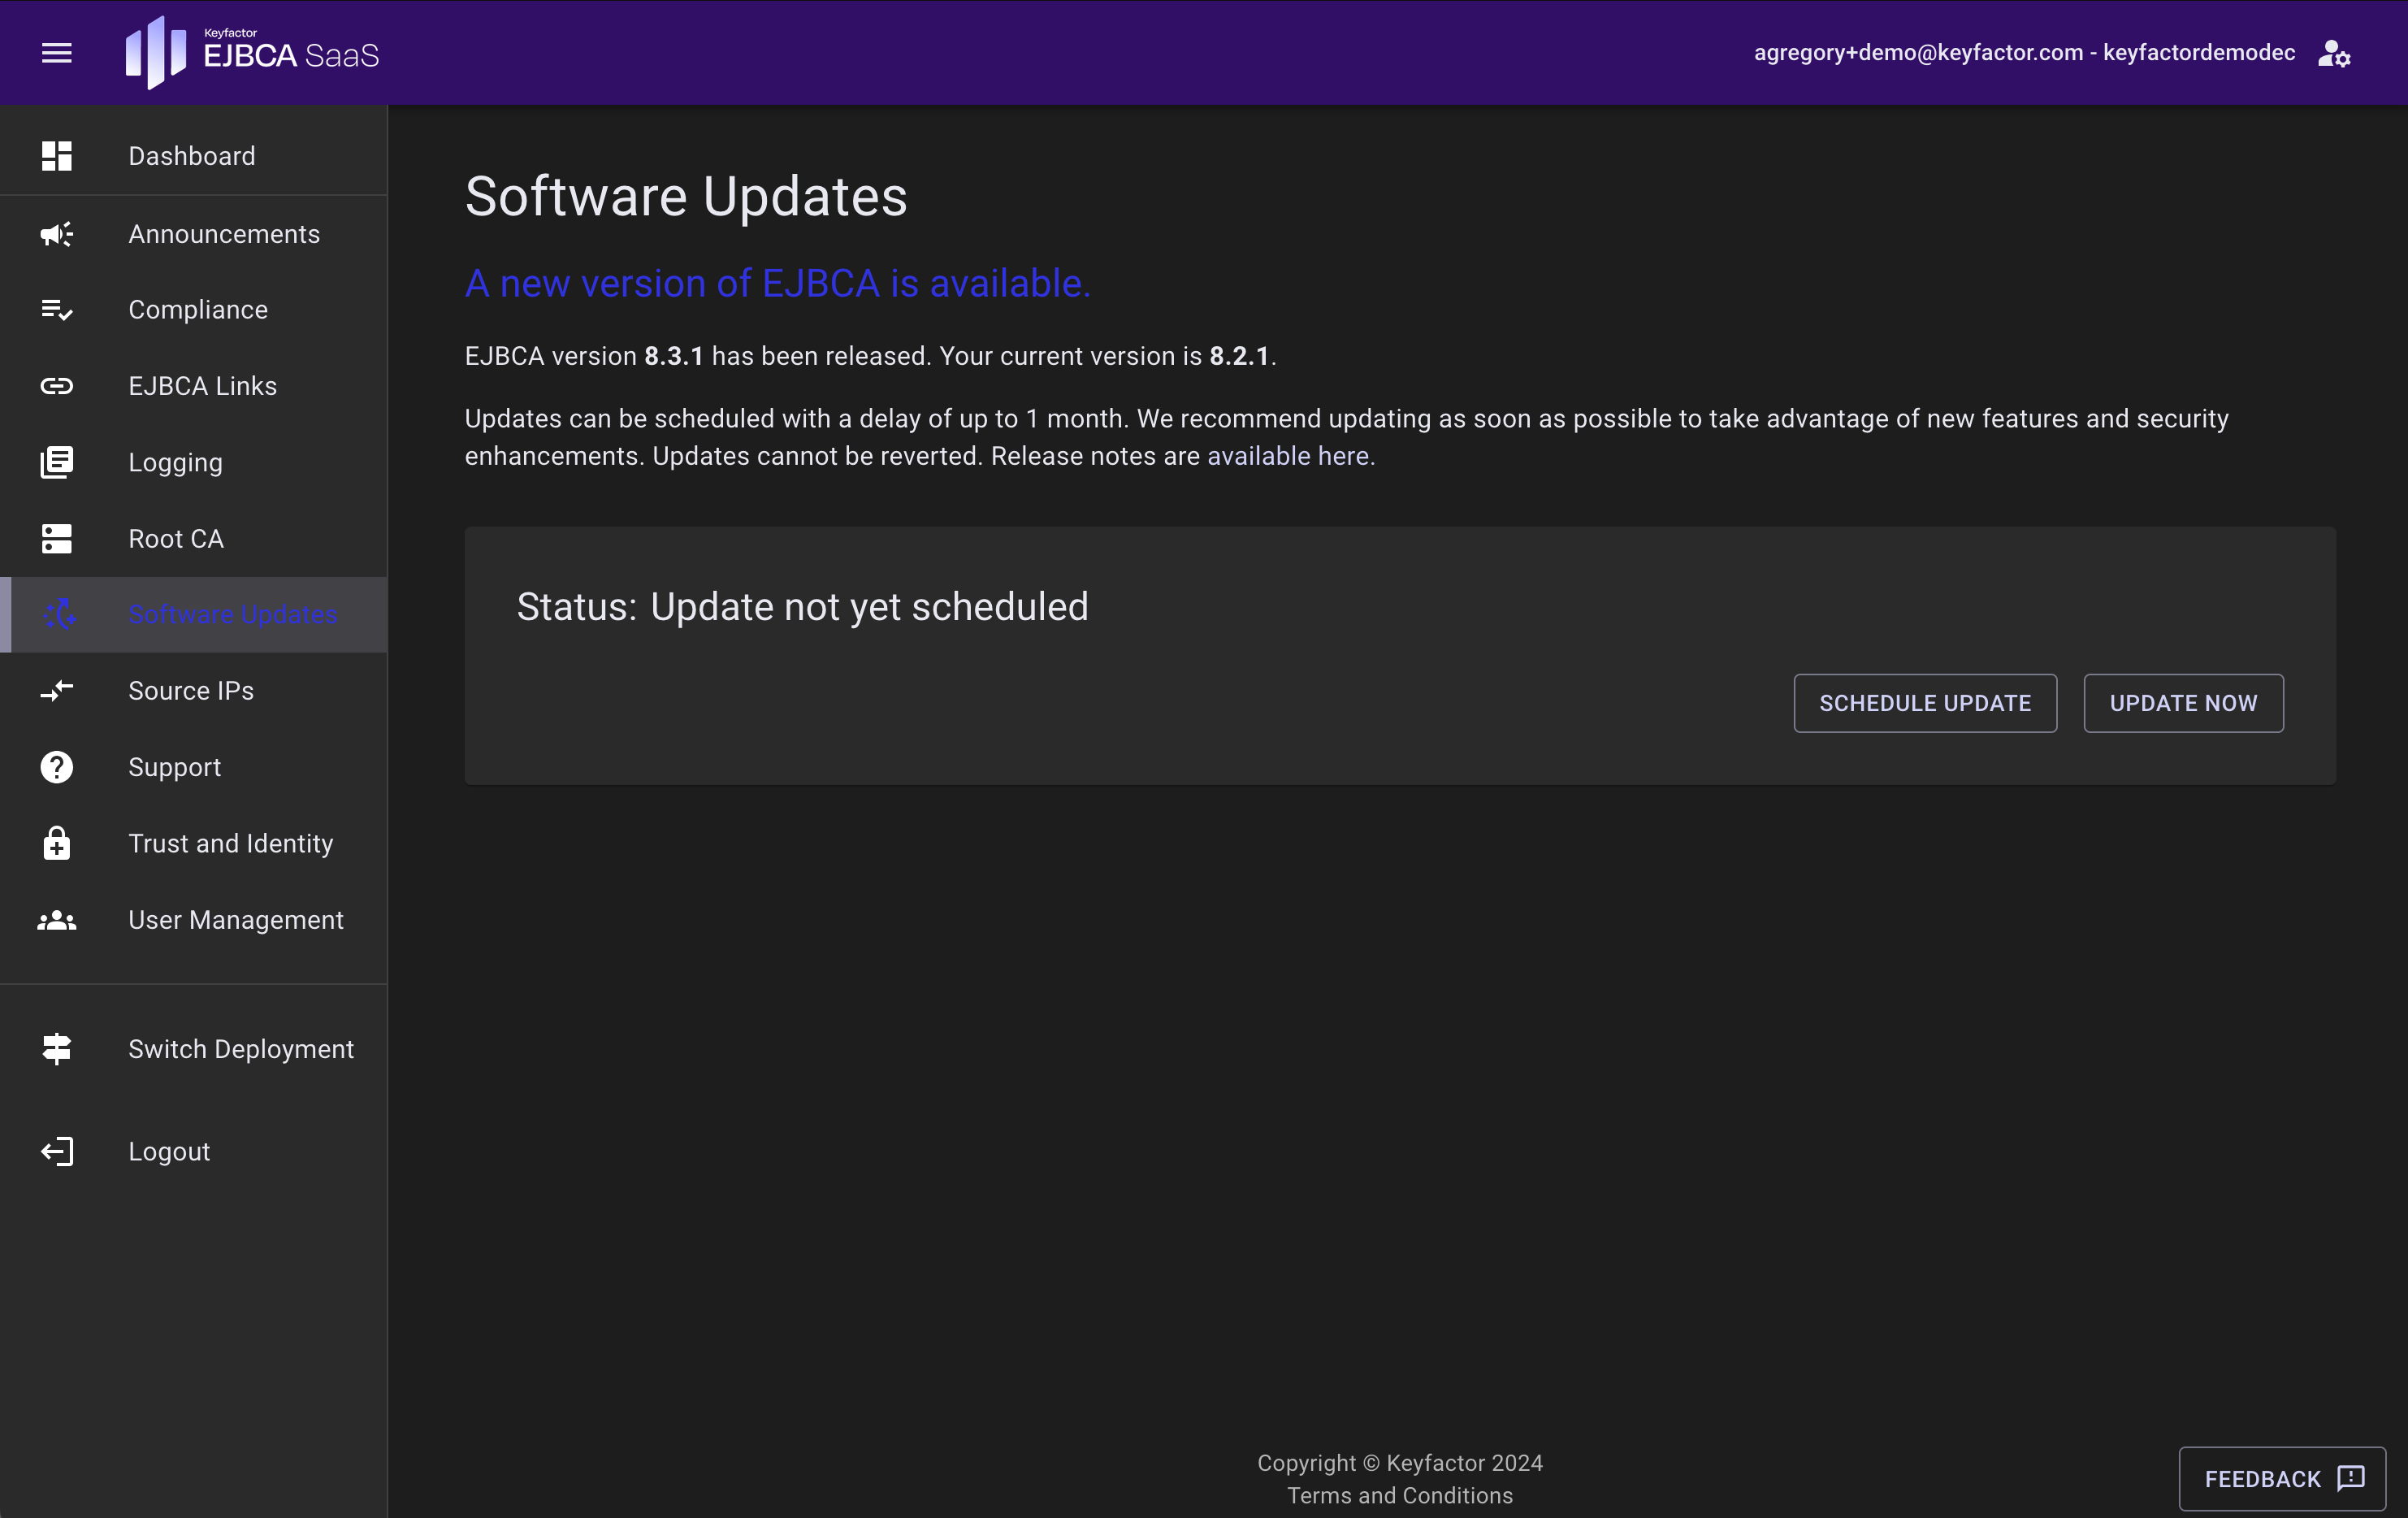
To access the Software Updates page, click Software Updates in the navigation sidebar. A blue navigation link indicates that an update is available.
The software updates page will display the latest update if it is available and allow the option to update now or schedule and update. A blue navigation link will tell you that an update is available. If there is no update available, the page will show you the software version you are currently running.

If you do not see the Software Updates option, you do not have the Software Updates permission. Contact your EJBCA SaaS administrator to request access.
The following sections cover how to utilize the software updates page.
Schedule an update
When a new update is available, you can schedule the update to run automatically at a scheduled date and time up to a month ahead of time.
- On the Software Updates page, click Schedule Update.
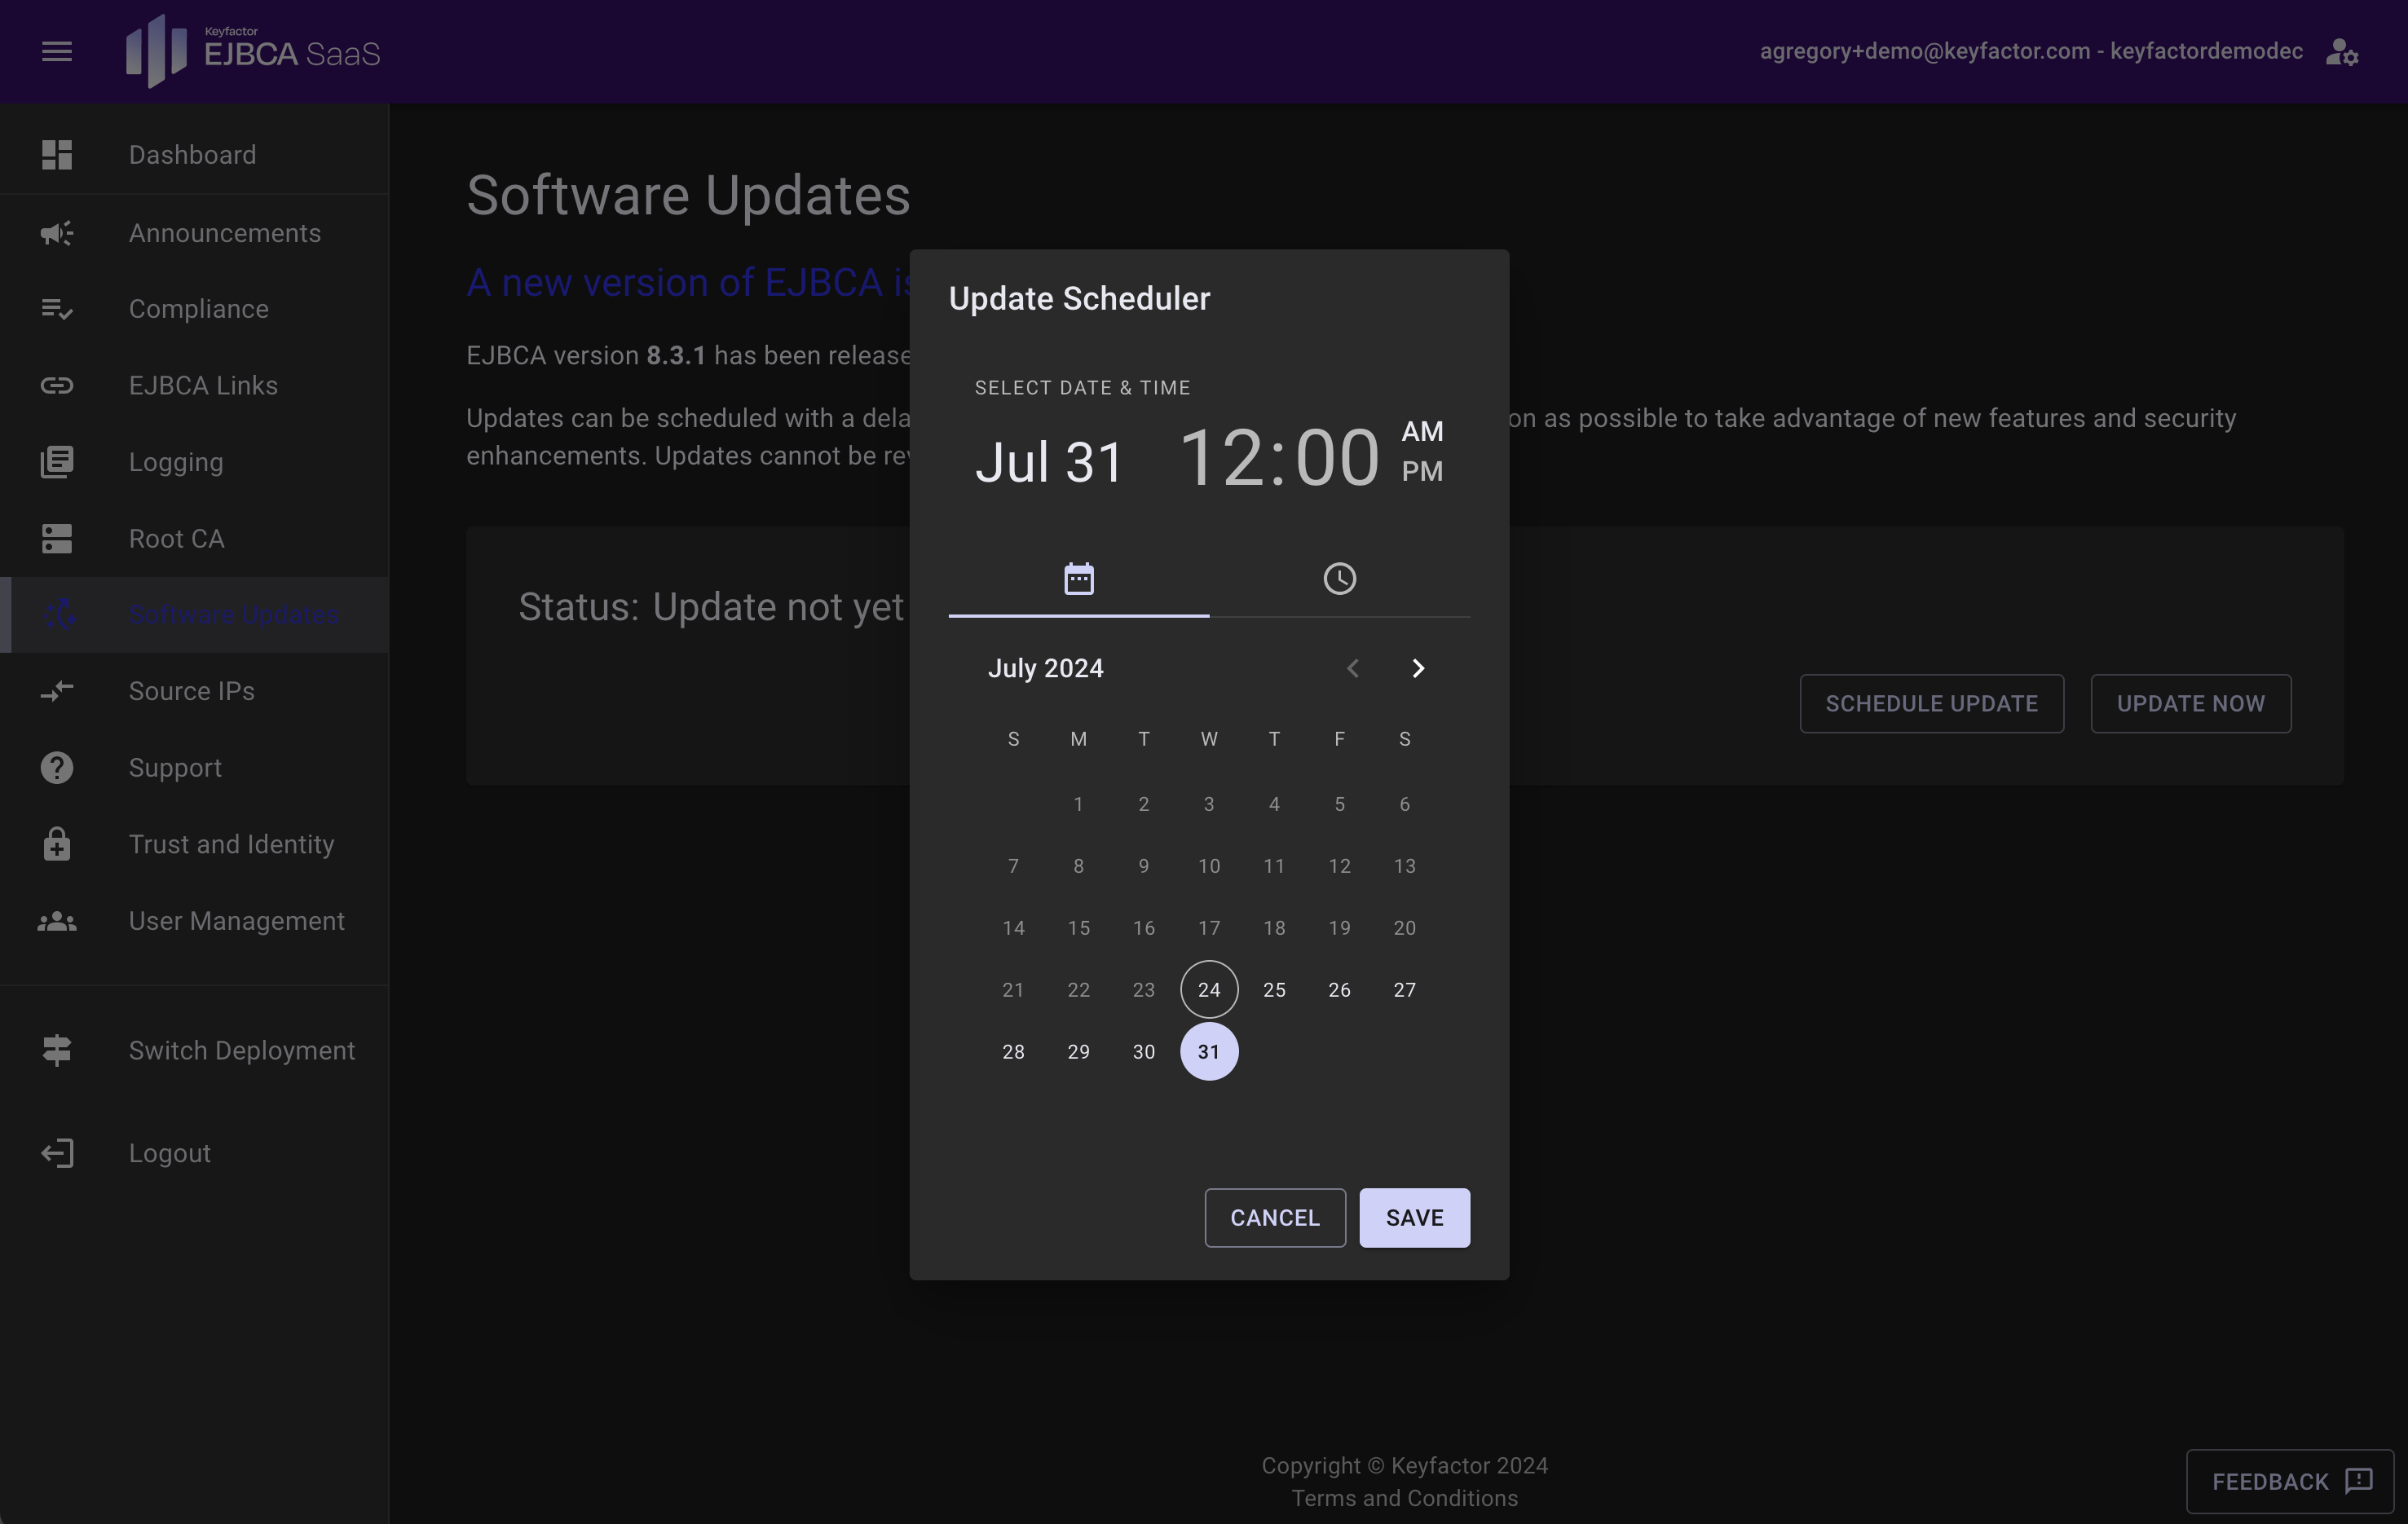
- On the update scheduler dialog, select a date and time and click Save. NOTE: Times displayed are based on the local browser time and will be scheduled as such.
 Updates can only be scheduled up to a month ahead of time.
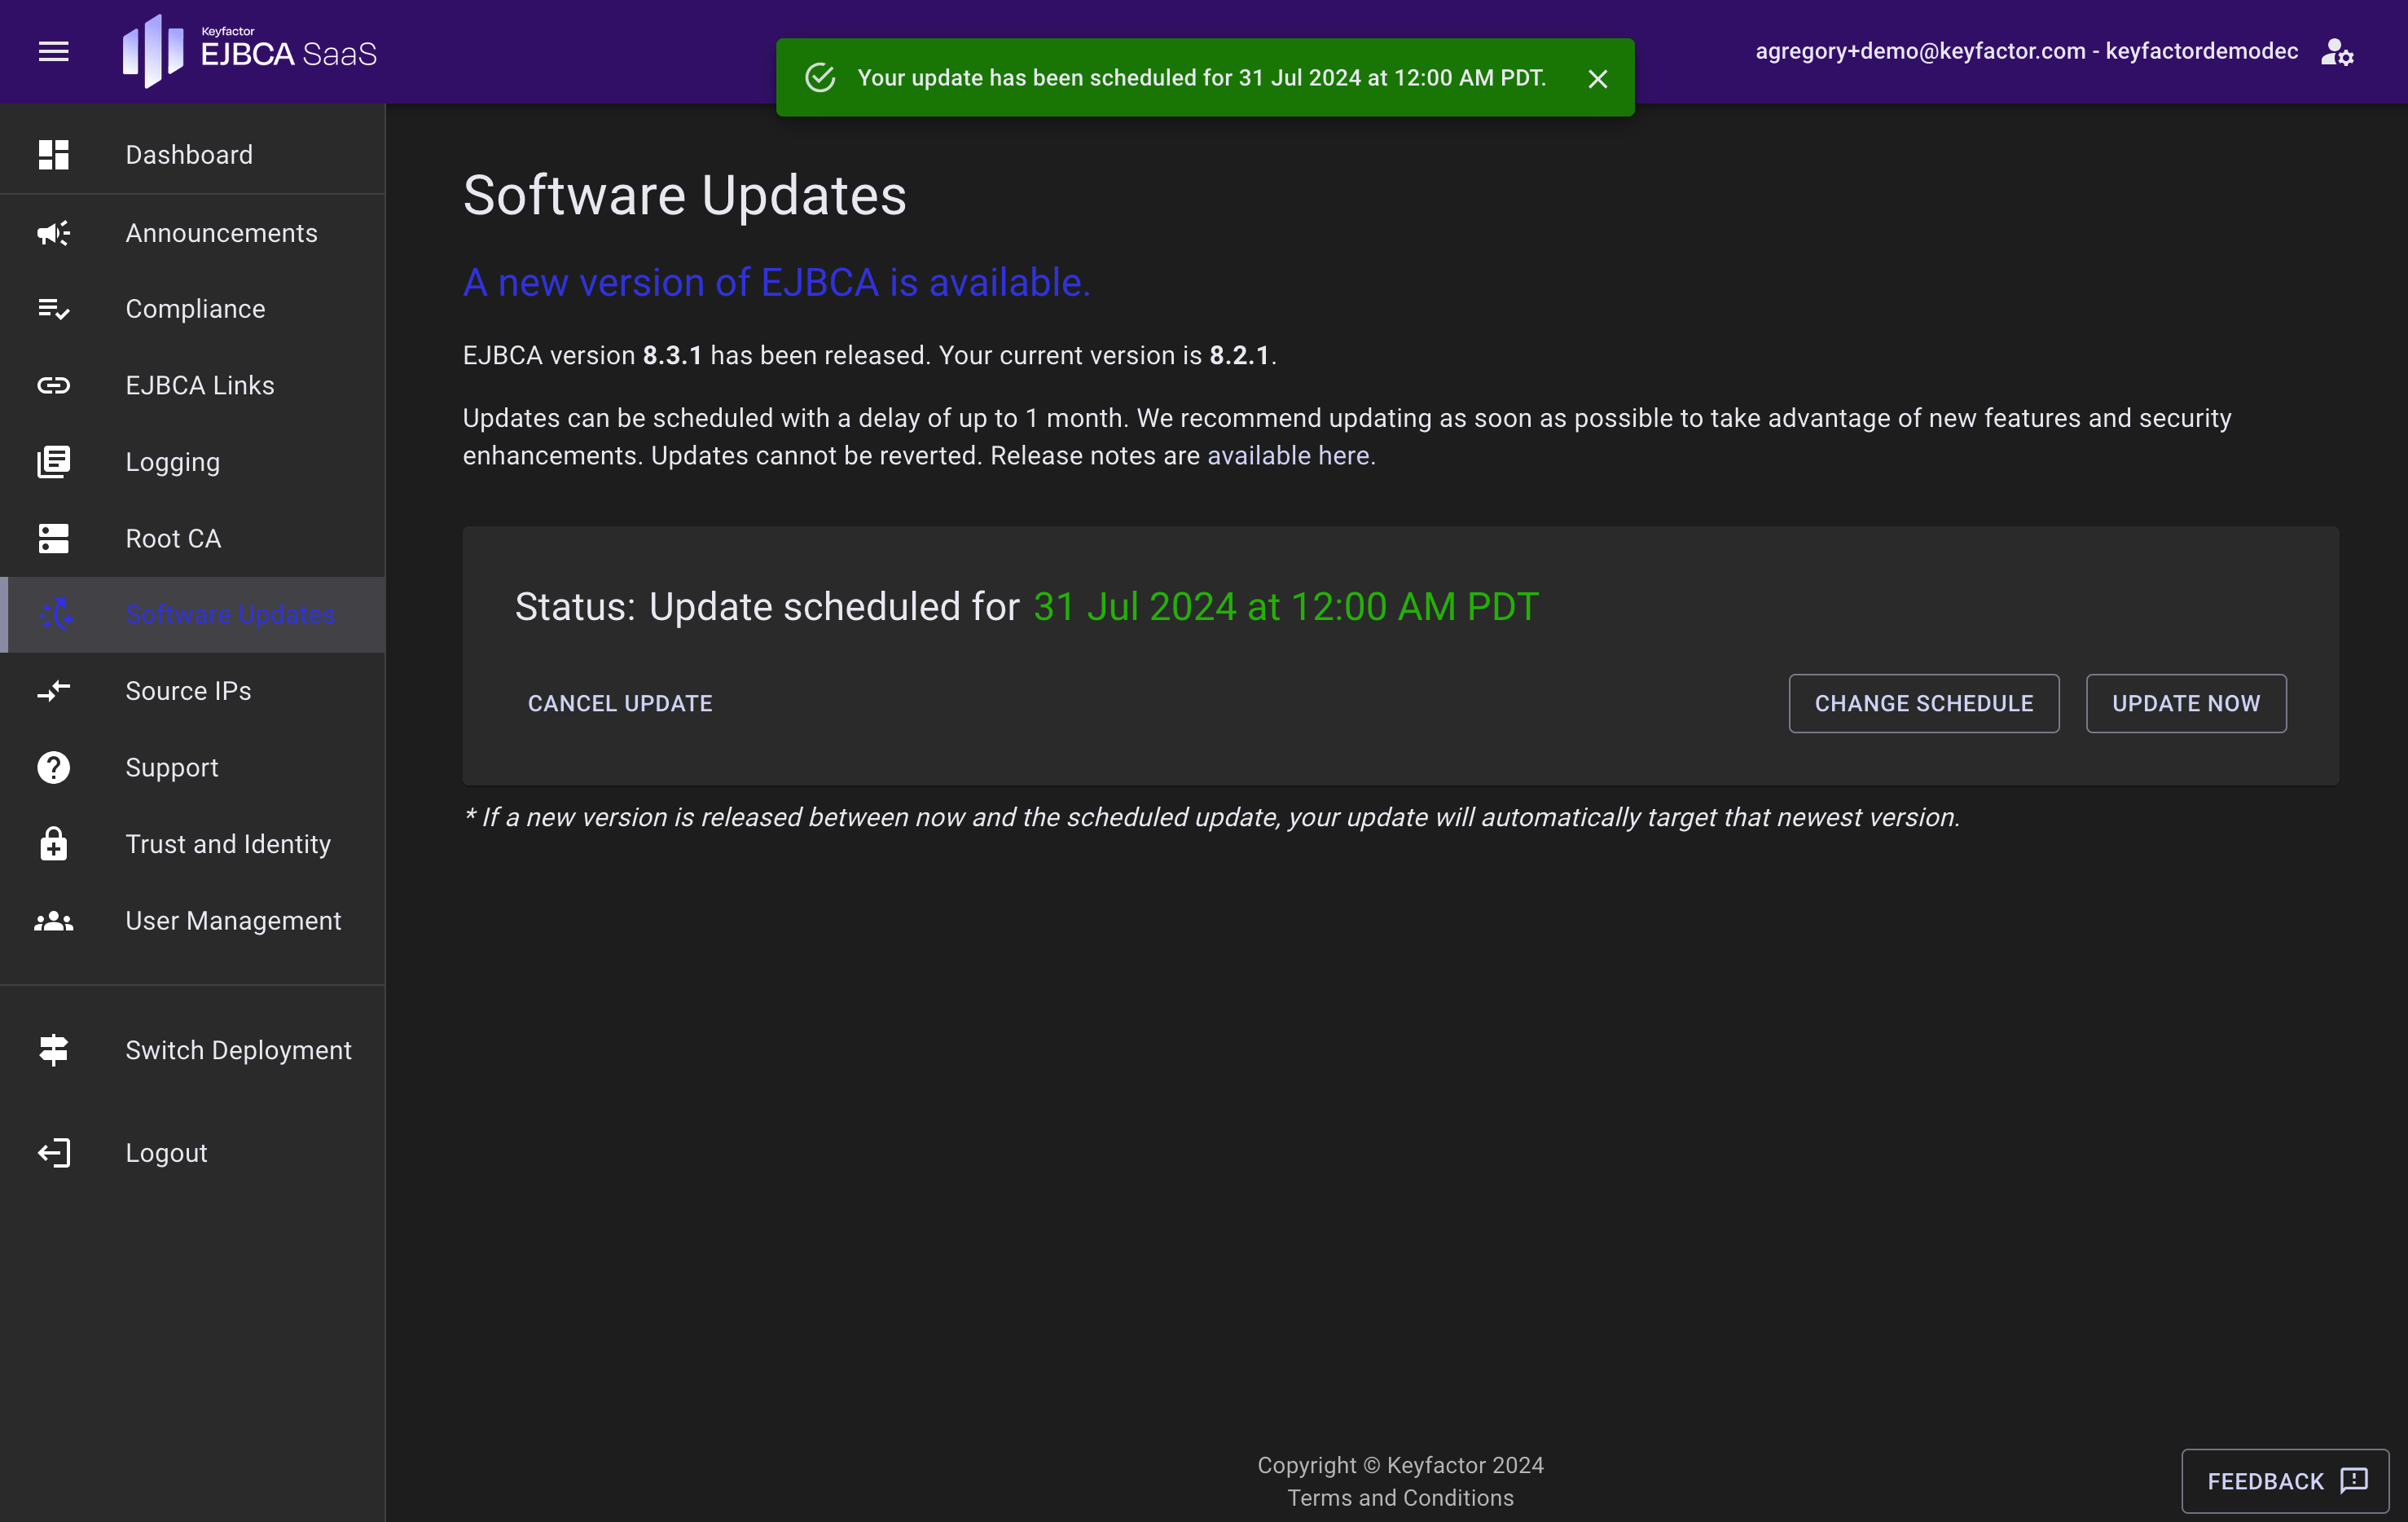
- Once scheduled, the status will display your update date and time scheduled based on the local browser time. No further action is needed, your update will run automatically at the scheduled date and time displayed.
 If a new version is released prior to your scheduled update time, you will be updated to the latest version. For example, if you schedule the upgrade to EJBCA 8.0 three weeks out and during that time Keyfactor makes EJBCA 8.1 available, you will receive EJBCA 8.1.
- To cancel the update, click Cancel Update and your scheduled update will be canceled.
- To reschedule an update, click Schedule Update and select a new date and time. Click Save to remove the previous scheduled date and update it with the newly chosen date and time.
Verify CA versions
Once the update is complete, verify the Root CA and Issuing CA versions. Note that if the Root CA has not been restarted since the update was performed, you will need to stop and start the Root CA to see the updated version.
To verify Root CA, start the Root CA in the portal and connect to the Root CA Admin web to confirm the Root CA version number.
To verify Issuing CA, connect to the Issuing CA Admin web and confirm the version number.
Update Now
The update is performed as a "rolling upgrade" and the downtime is typically less than one minute.
To start the update process of your EJBCA SaaS deployment to the latest EJBCA release, follow these steps:
- While logged in as a user with the Software Update privilege, click the Update Now to begin your update.

- Click Yes, Update to begin your update.
- Once completed, you will receive an update finished notification.
- Finally, verify the Root CA and Issuing CA versions.
 If the Root CA has not been restarted since the update was performed, you will need to stop and start the Root CA to see the updated version.
- To verify Root CA, start the Root CA in the portal and connect to the Root CA Adminweb to confirm the Root CA version number.
- To verify Issuing CA, connect to the Issuing CA Adminweb and confirm the version number.
Your EJBCA deployment is now updated.
Post Upgrade Steps
The following provides steps for performing post-upgrades. The EJBCA System Configuration option System Upgrade is only available if an EJBCA post-upgrade is pending. If the option is not available, no post-upgrade is needed.
To perform a post-upgrade:
Click System Upgrade in the System Configuration menu of the EJBCA Admin UI.
 The System Upgrade option is only available if an EJBCA post-upgrade is pending. If the option is not available, no EJBCA post-upgrade is not needed.
 Click Start post-upgrade to perform an EJBCA post-upgrade.
Post upgrade via Admin UI
Visit the Admin Web of your EJBCA SaaS deployment in your web browser and log in as SuperAdmin.
Click System Upgrade in the System Configuration menu of the EJBCA Admin UI.
 The System Upgrade option is only available if an EJBCA post-upgrade is pending. If the option is not available, no EJBCA post-upgrade is not needed.
- Click Start post-upgrade to perform an EJBCA post-upgrade.
.png)