The following steps provide instructions for how to choose options fo the PKI deployment and access EJBCA.
Step 1 - Choose Options for PKI Deployment
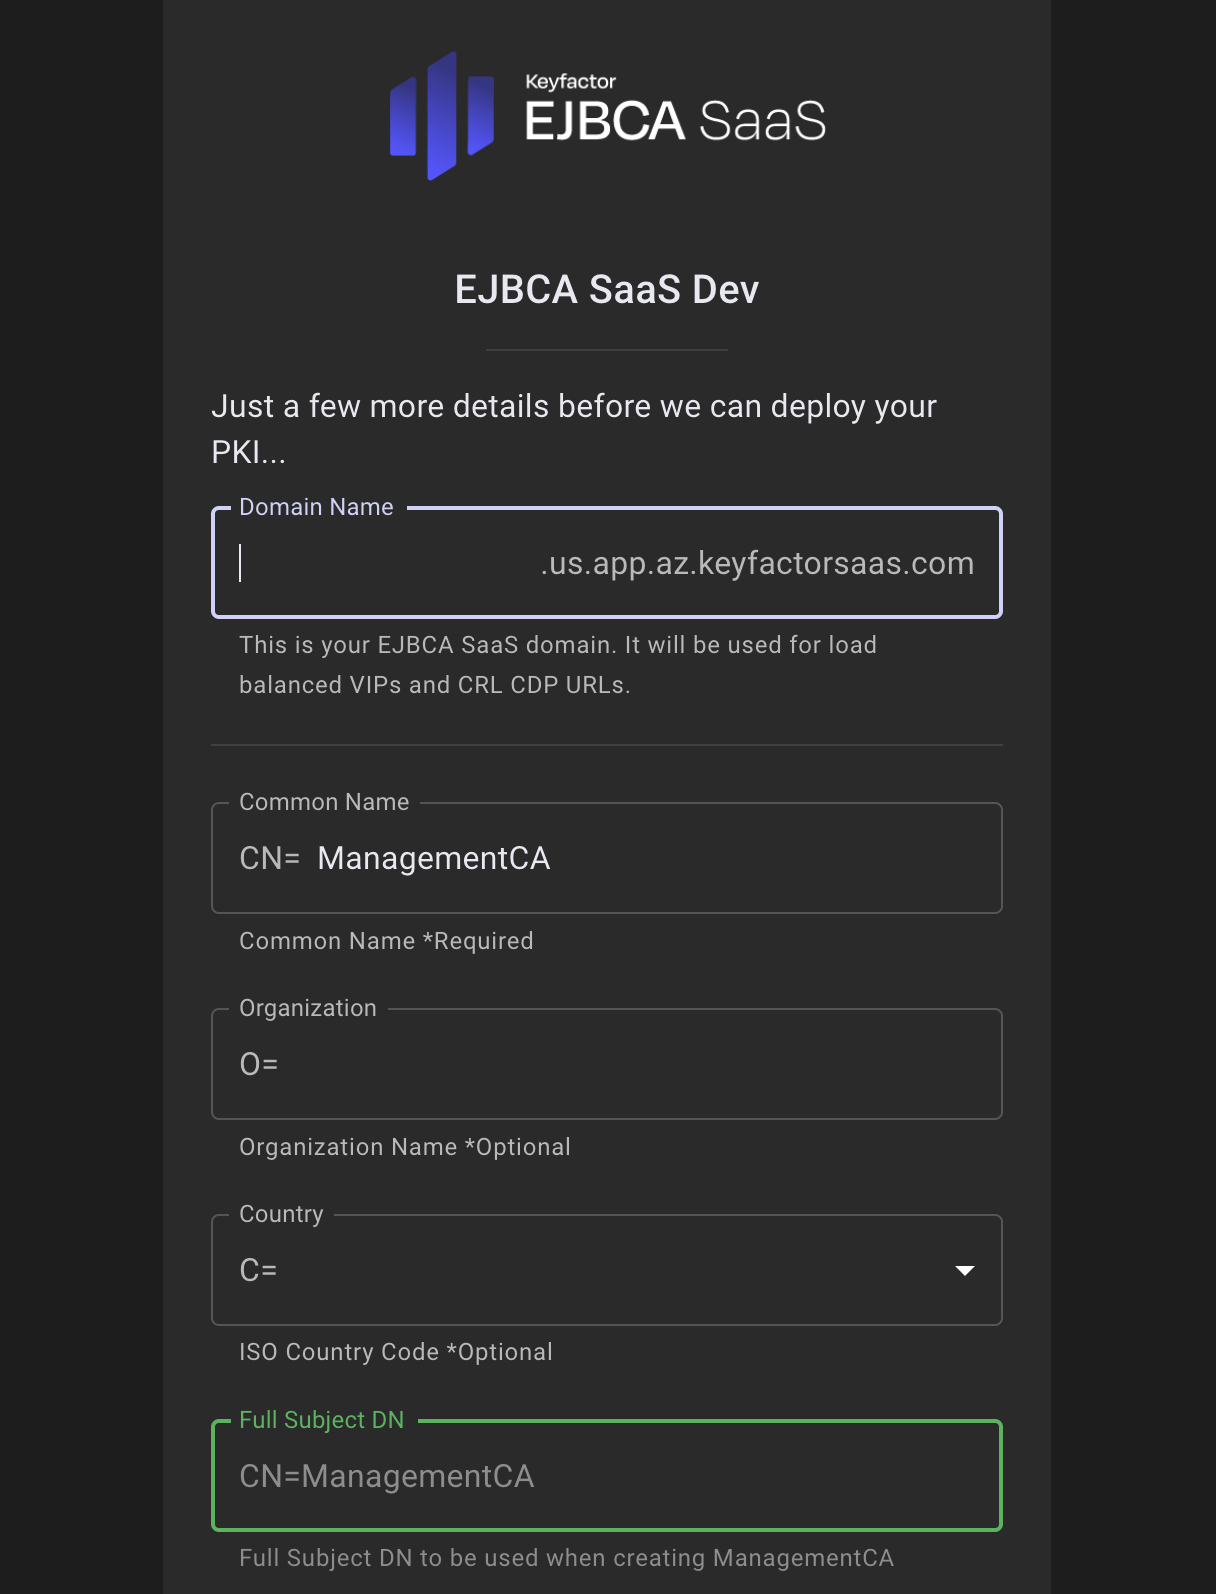
Specify additional information required for the PKI deployment.
-
Specify the following additional details required to provision your PKI:
-
Domain Name: This domain name will be added to public DNS. All URLs end with “app.az.keyfactorsaas.com” and will be used for load balanced VIPS and CRL CDP URLs. These URLs can then be later used to configure URLs in your certificates.
-
ManagementCA Common Name: The name of the Management CA that will be generated upon installation. The Management CA is used to create the credentials that are used to access the EJBCA system. For more information on the Management CA, refer to the EJBCA Documentation on Managing CAs.
-
Organization: Optionally, specify the organization name to be added to the Full Subject DN of the ManagmentCA.
-
Country: Optionally, specify the ISO Country Code to be added to the Full Subject DN of the ManagmentCA.
-
Full Subject DN: Informational field that displays what the Full Subject DN of the ManagementCA will be created with. For more information, refer to the EJBCA Documentation on Subject Distinguished Names.
-
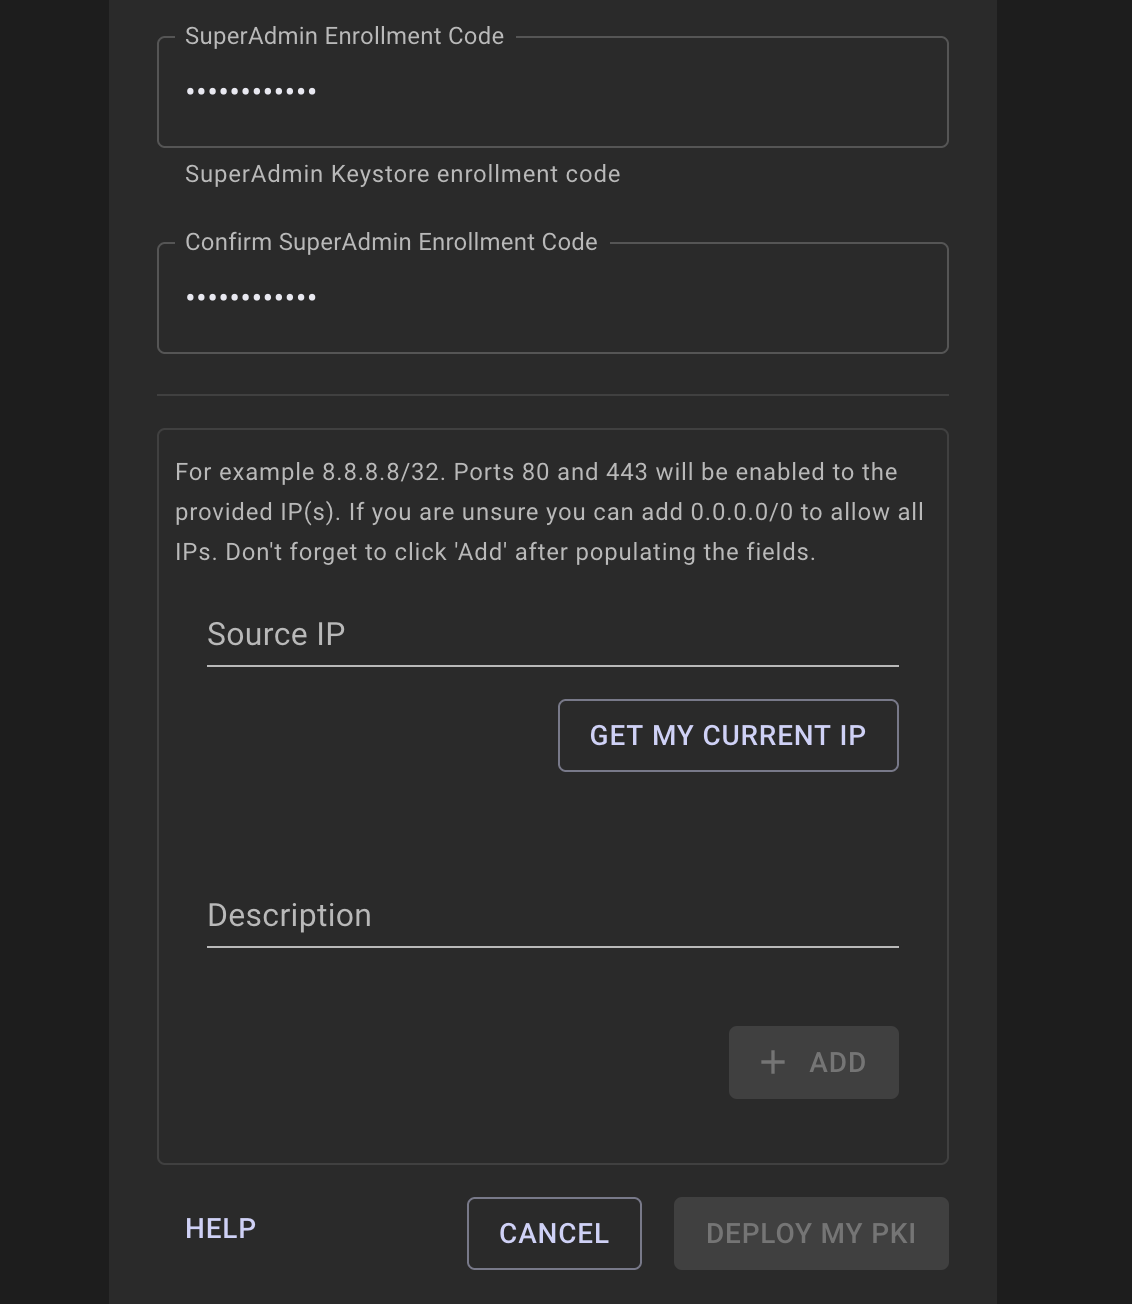
SuperAdmin Enrollment Code: User defined password that will be used to retrieve and password and protect the superadmin.p12 keystore that is used to access the EJBCA Administration interface.
-
Add Source IP: This IP range is allowed access to the EJBCA system. Simply google "What is my IP" or add the CIDR based address block to that will be allowed to access the EJBCA installation. This should be the external IP address you are using to access the internet and not an internal NAT'd IP. If unsure, enter "0.0.0.0/0" to change this later. This will allow all IPs access to the web pages of the EJBCA PKI, but not access to the admin portion of the system (this requires the SuperAdmin certificate).
-
-
Click Deploy my PKI.
-
You are redirected to the EJBCA SaaS portal. You will see the provisioning progress bar start.

Depending on the options selected, this process can take approximately 30 minutes to process. In the background, the environment is being prepared from scratch based on the provided information.
-
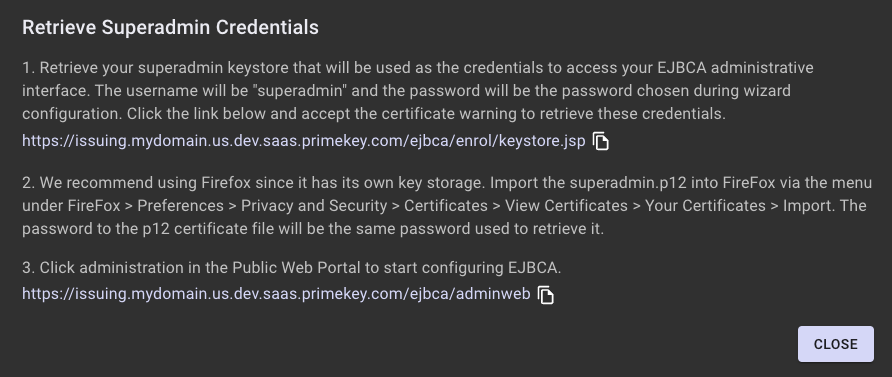
Once complete, the progress bar will show 100% and a panel will show allowing you to access the newly created EJBCA installation. Clicking these links will open a new tab in the browser. The following Retrieve Superadmin Credentials panel will show only once, click X or Close to proceed. If this dialog is closed, the links and directions are available under the Support tab in the EJBCA SaaS Portal. The Retrieve Superadmin Credentials panel links can later be accessed from the EJBCA SaaS portal EJBCA Links page, see Navigating EJBCA SaaS Portal.
Step 2 - Retrieve Credentials and Access EJBCA
To access the deployed EJBCA SaaS, the SuperAdmin credentials need to be retrieved from the server and installed on a system and/or browser. We recommend using Mozilla Firefox since it has self-enrollment capabilities and its own keystore separate from the operating system.
The Retrieve Superadmin Credentials panel provides links to retrieve and import the SuperAdmin certificate:
-
Click the first link to go to the EJBCA Registration Authority Web interface. A browser warning about a potential security risk will be displayed since the browser is unaware of the certificate authority that was just created during the installation. Accept the browser warning shown.
-
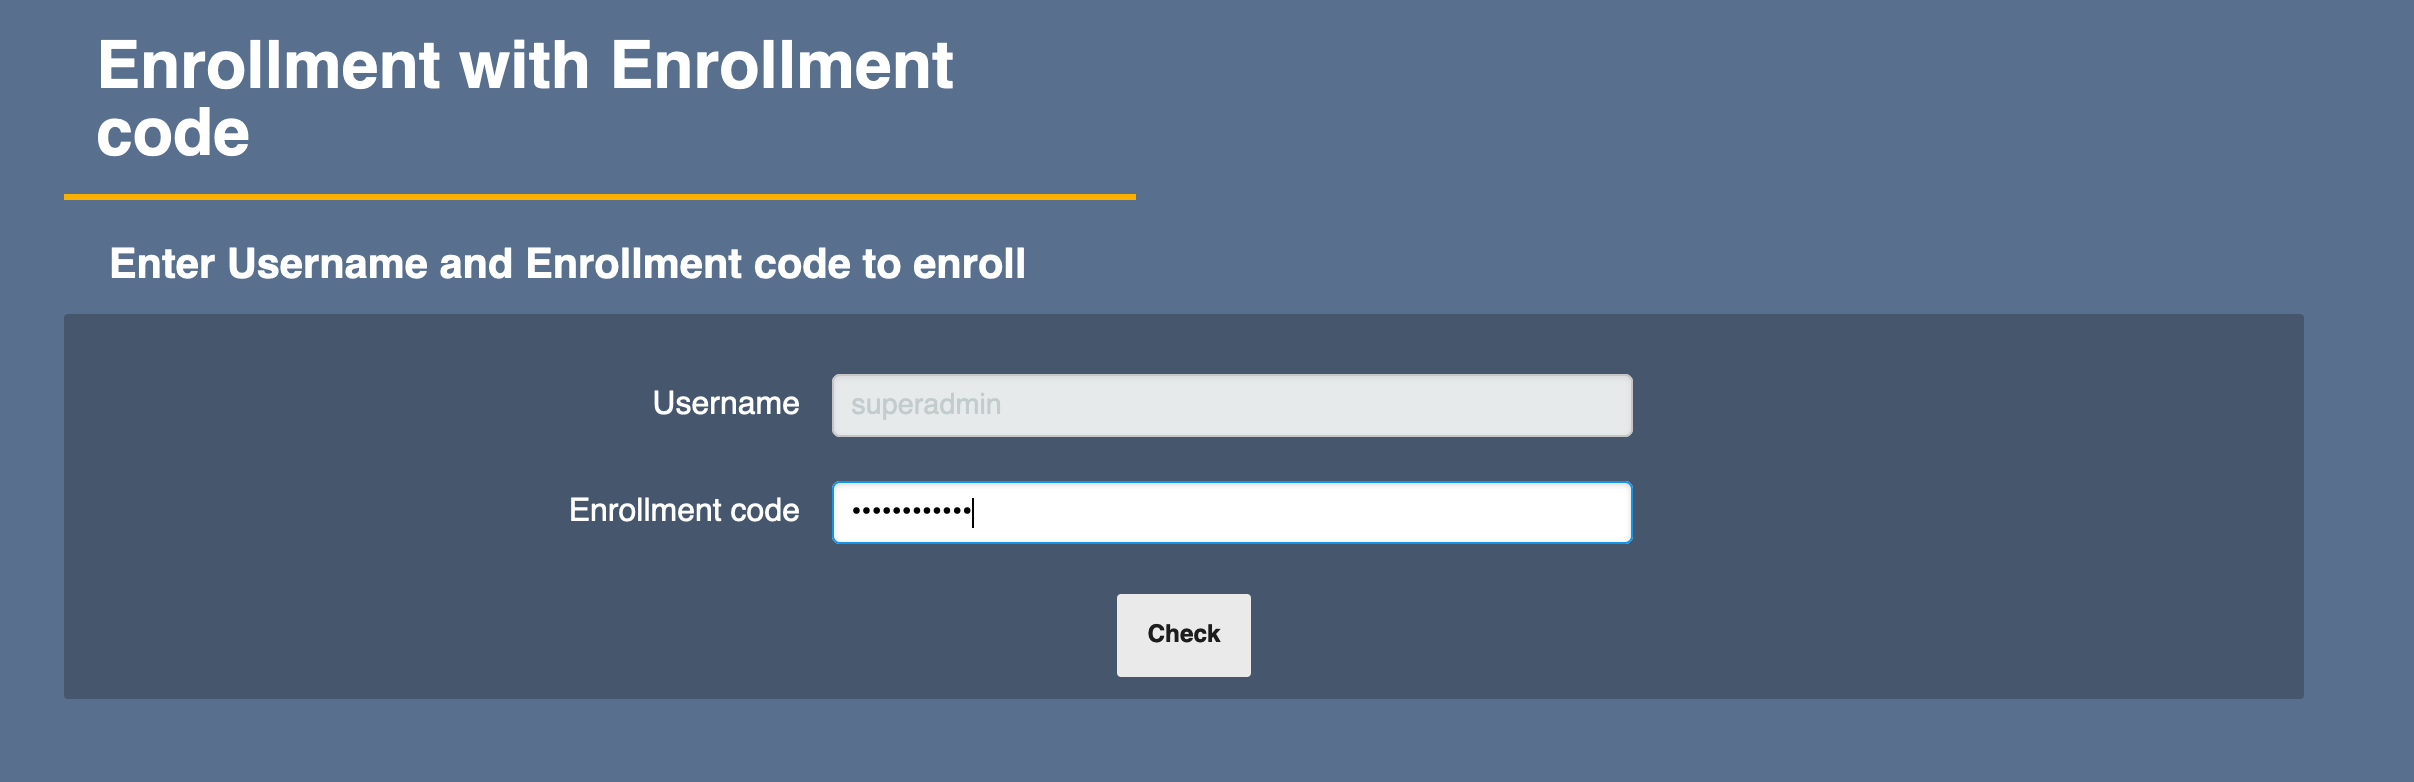
On the EJBCA Public Web Keystore Enrollment page, enter the username "superadmin" (case sensitive), if not already populated and the previously specified SuperAdmin password and click CHECK to download the SuperAdmin credentials.
-
On the EJBCA Token Certificate Enrollment page, select a Key Algorithm to generate the SuperAdmin credential with and click Downloald PKCS#12 to download the p12 file certificate.
Install Certificate in Browser
With the p12 file certificate downloaded, do the following to import the certificate in Mozilla Firefox:
-
On the Firefox menu, select Preferences > Privacy & Security, scroll down to the Security section and click View Certificates.
-
On the tab Your Certificates, select Import.
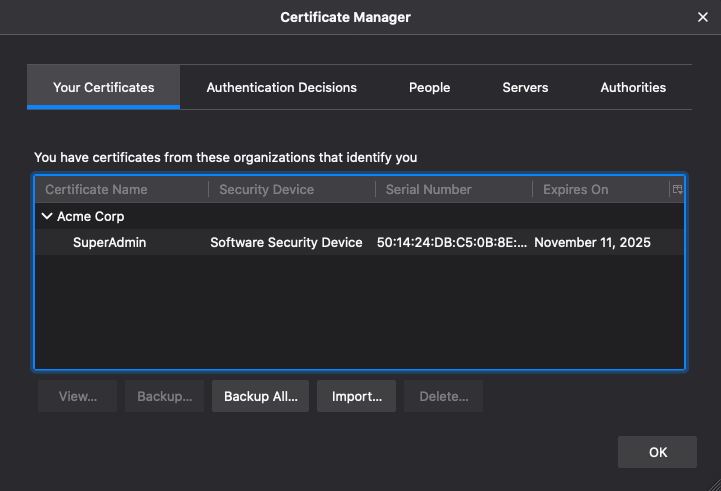
-
Browse to the p12 file to import and enter your SuperAdmin password.
-
A certificate will then be added to the local certificate store with the organization name if one was chosen during the configuration options.

-
Now that the certificate has been added to the browsers certificate store, back on the EJBCA RA Web Interface, refresh your browser. A certificate prompt will be presented. Click OK.
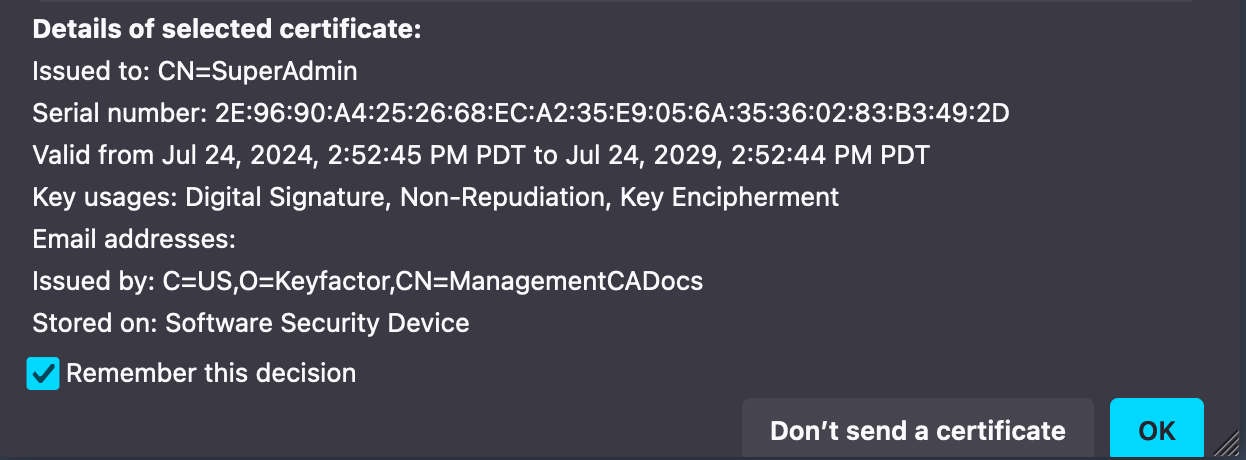
If needed, you may need to hold down shift+reload button in your browser to bypass any cached content.
-
Once the RA Web Interface reloads, additional navigation options will be presented at the top of the window granting access to features that are only accessible with authentication.
-
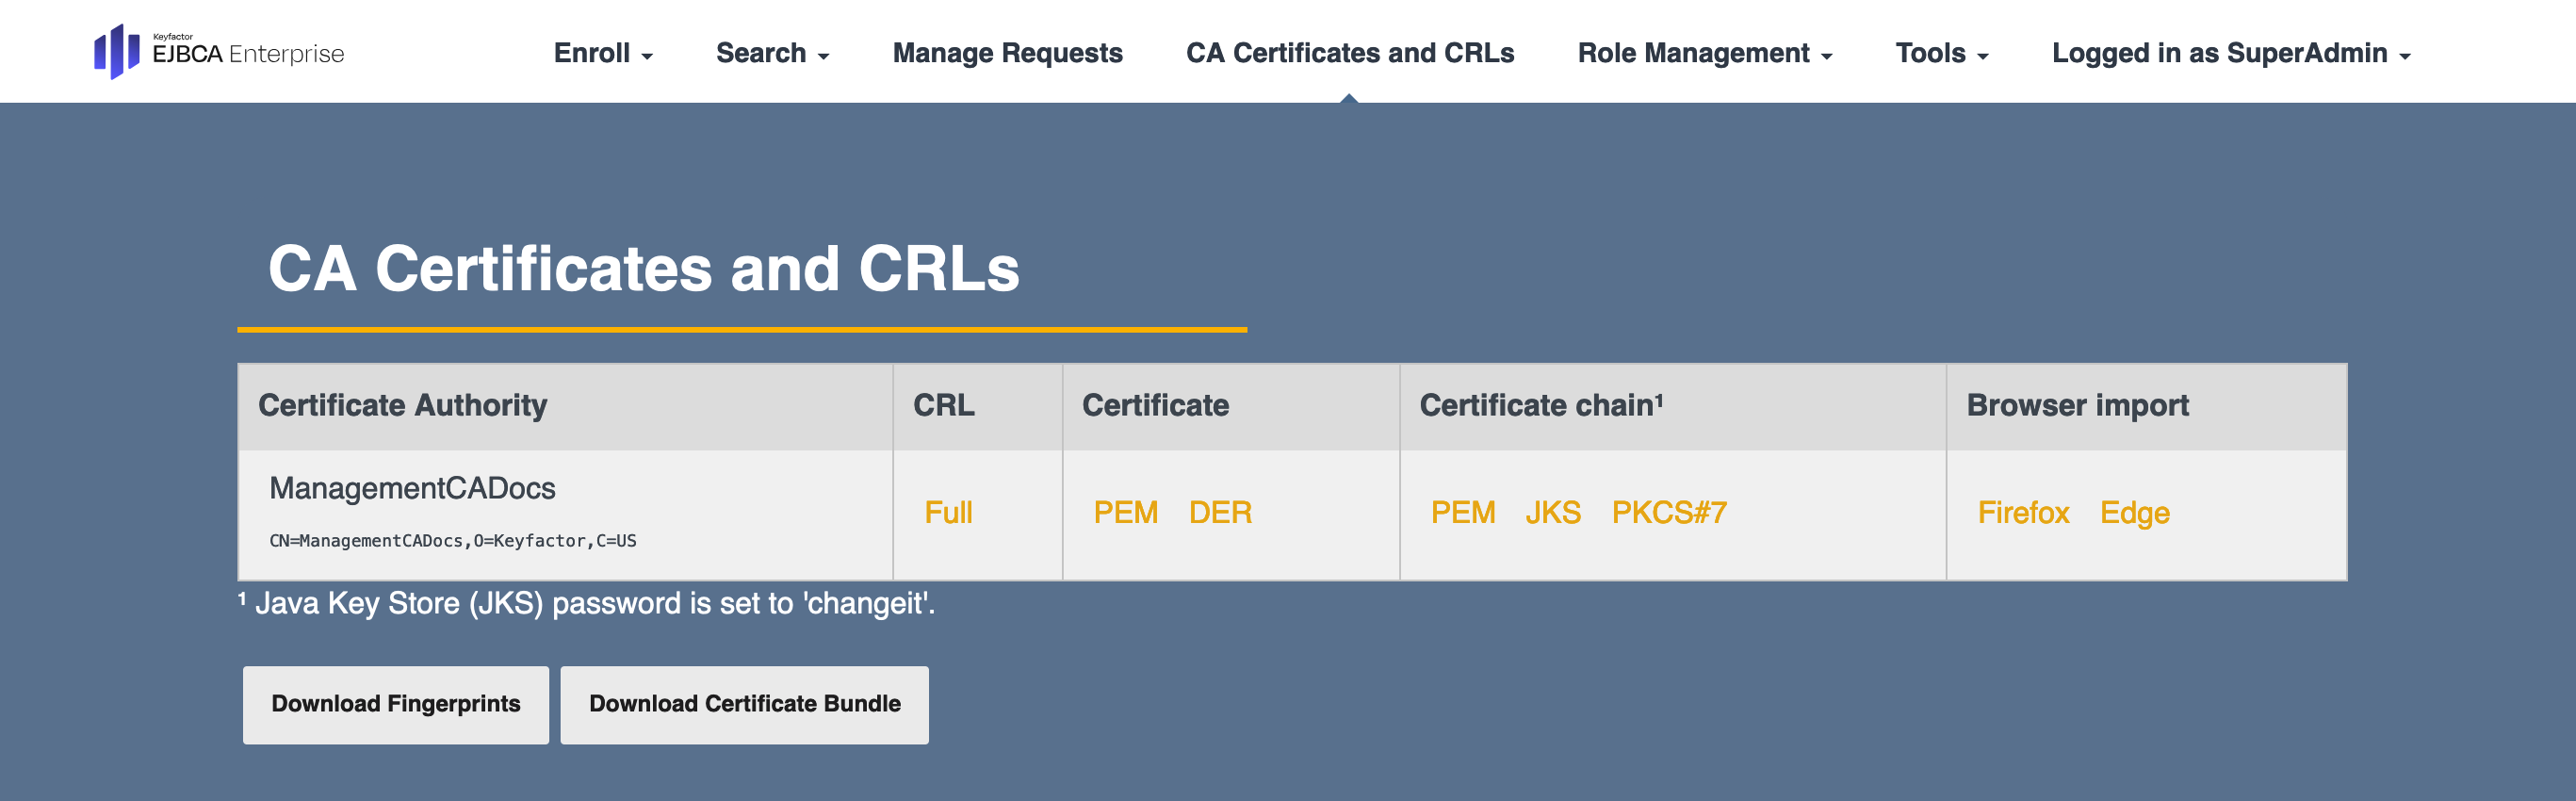
Select CA Certificates and CRLs in the top navigation menu and download the ManagementCA certificate that issued the superadmin credentials in PEM format.
-
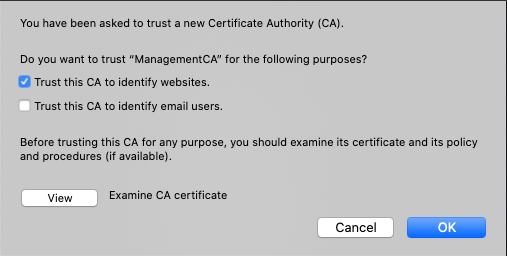
Back in Firefox, change to the Authorities tab and click Import. Browse to the certificate that was downloaded from the CA Certificates and CRLs above. It may be needed to switch to view "All file formats" to allow the certificate downloaded to be selected. Select the certificate and click open.
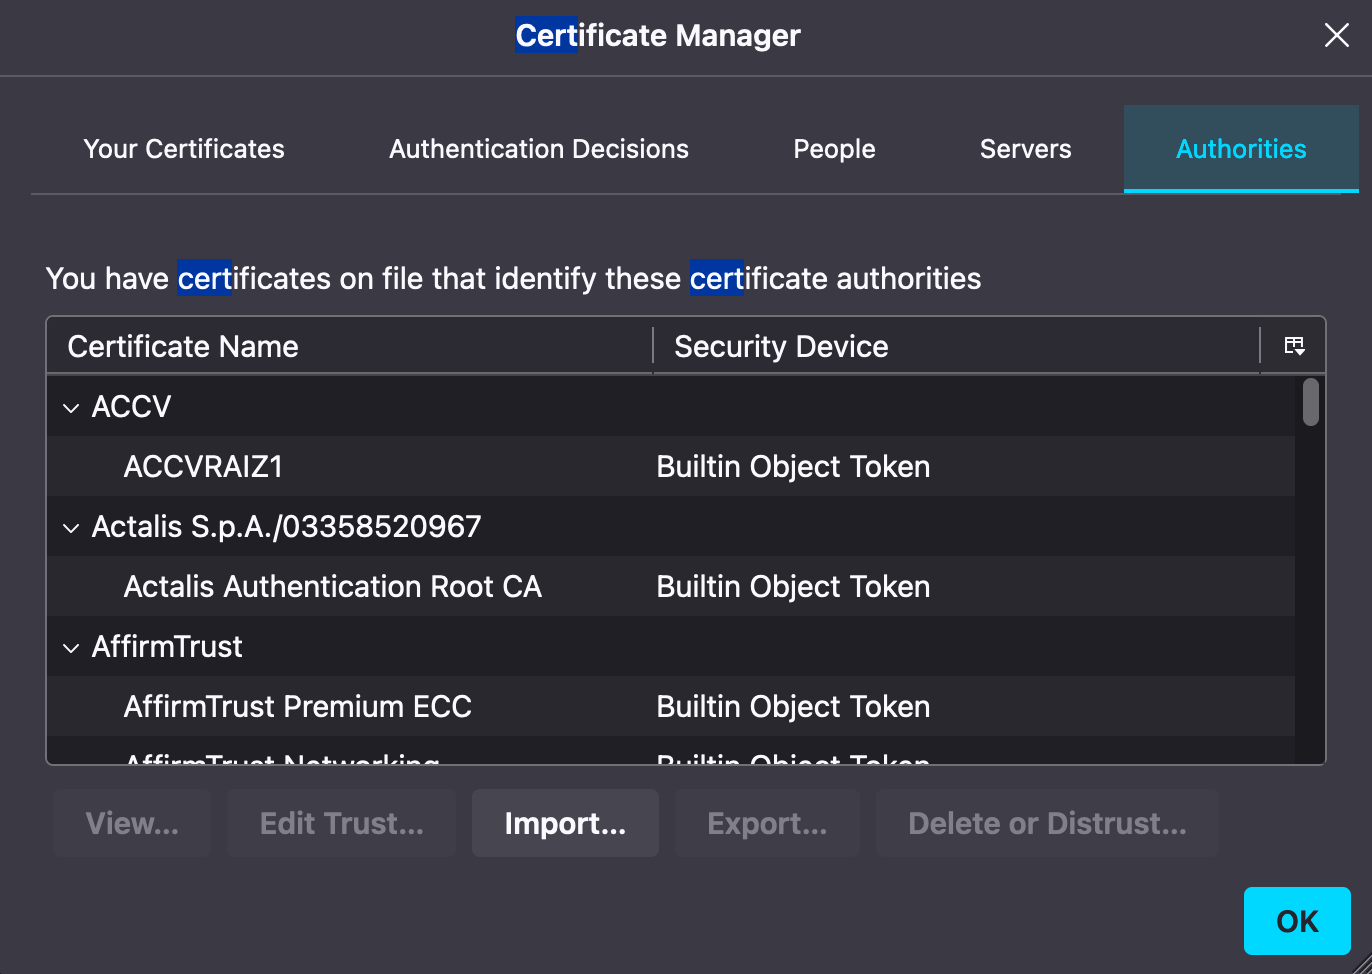
-
Select the option Trust this CA to identify websites to ensure that the browser will trust the CA that issued the superadmin certificate and not display a browser warning going forward.
-
Click OK and then OK again to go back to the browser and return to the EJBCA SaaS portal.
Access EJBCA
Access EJBCA using your previously specified domain name according to the following example:
https://<Domain Name>.<region>.app.az.keyfactorsaas.com/ejbca/adminweb
Your browser should now recognize your new certificate and open EJBCA displaying the Administration page.
Next - Visit the EJBCA SaaS Portal
Next, visit the EJBCA SaaS portal to navigate EJBCA SaaS and display information regarding the EJBCA SaaS installation, see Navigating EJBCA SaaS Portal.