Enterprise
The following describes how to set up Okta and configure a Generic OAuth Provider in EJBCA to test OAuth functionality in EJBCA.
Setting up OAuth using Okta has successfully been tested with EJBCA Enterprise version 8.2.0.3 using the Generic OAuth Provider Type in EJBCA.
Configure Okta
To configure a EJBCA application integration in the Okta administration portal, perform these steps:
-
Log in to the Okta administration portal, navigate to Security > API.
-
Click Add Authorization Server and specify the following:
-
Name: Specify EJBCA.
-
Audience: Specify EJBCA.
-
Click Save.
The EJBCA Authorization configuration screen appears.
-
-
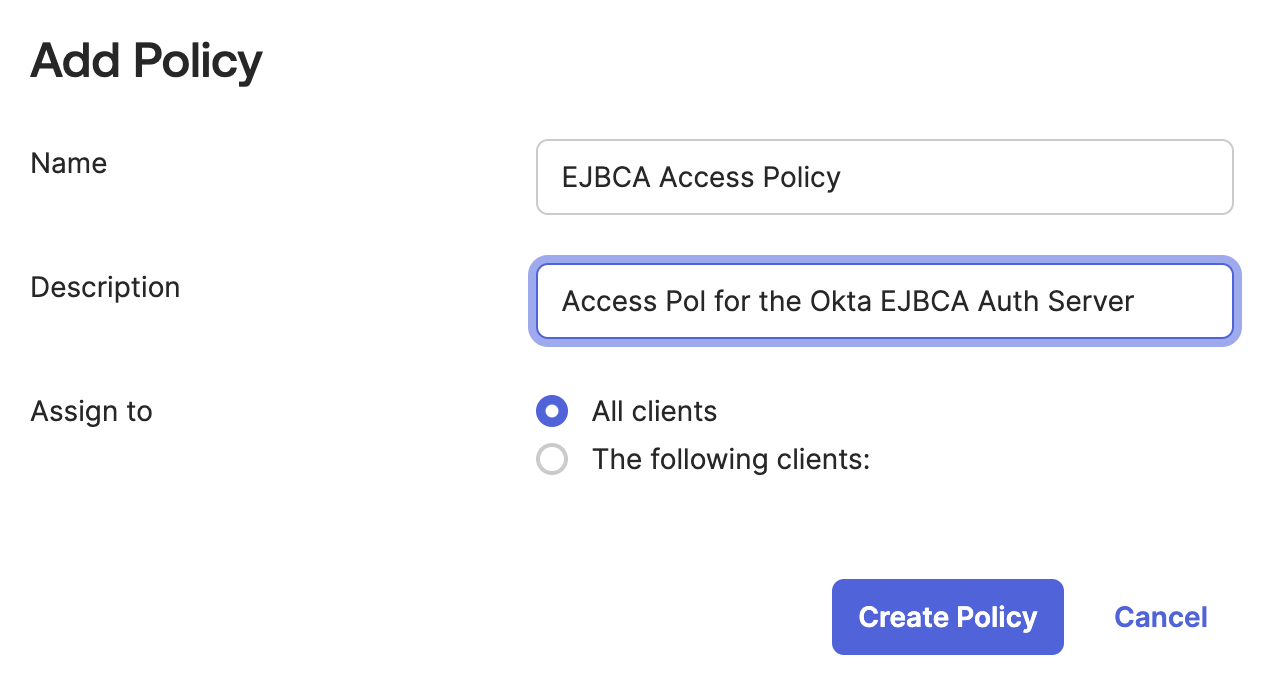
Select the Access Policies tab, click Add New Access Policy and specify the following:
-
Name: Specify a name for the access policy.
-
Description: Specify a description for the access policy.
-
Click Create Policy.
-
-
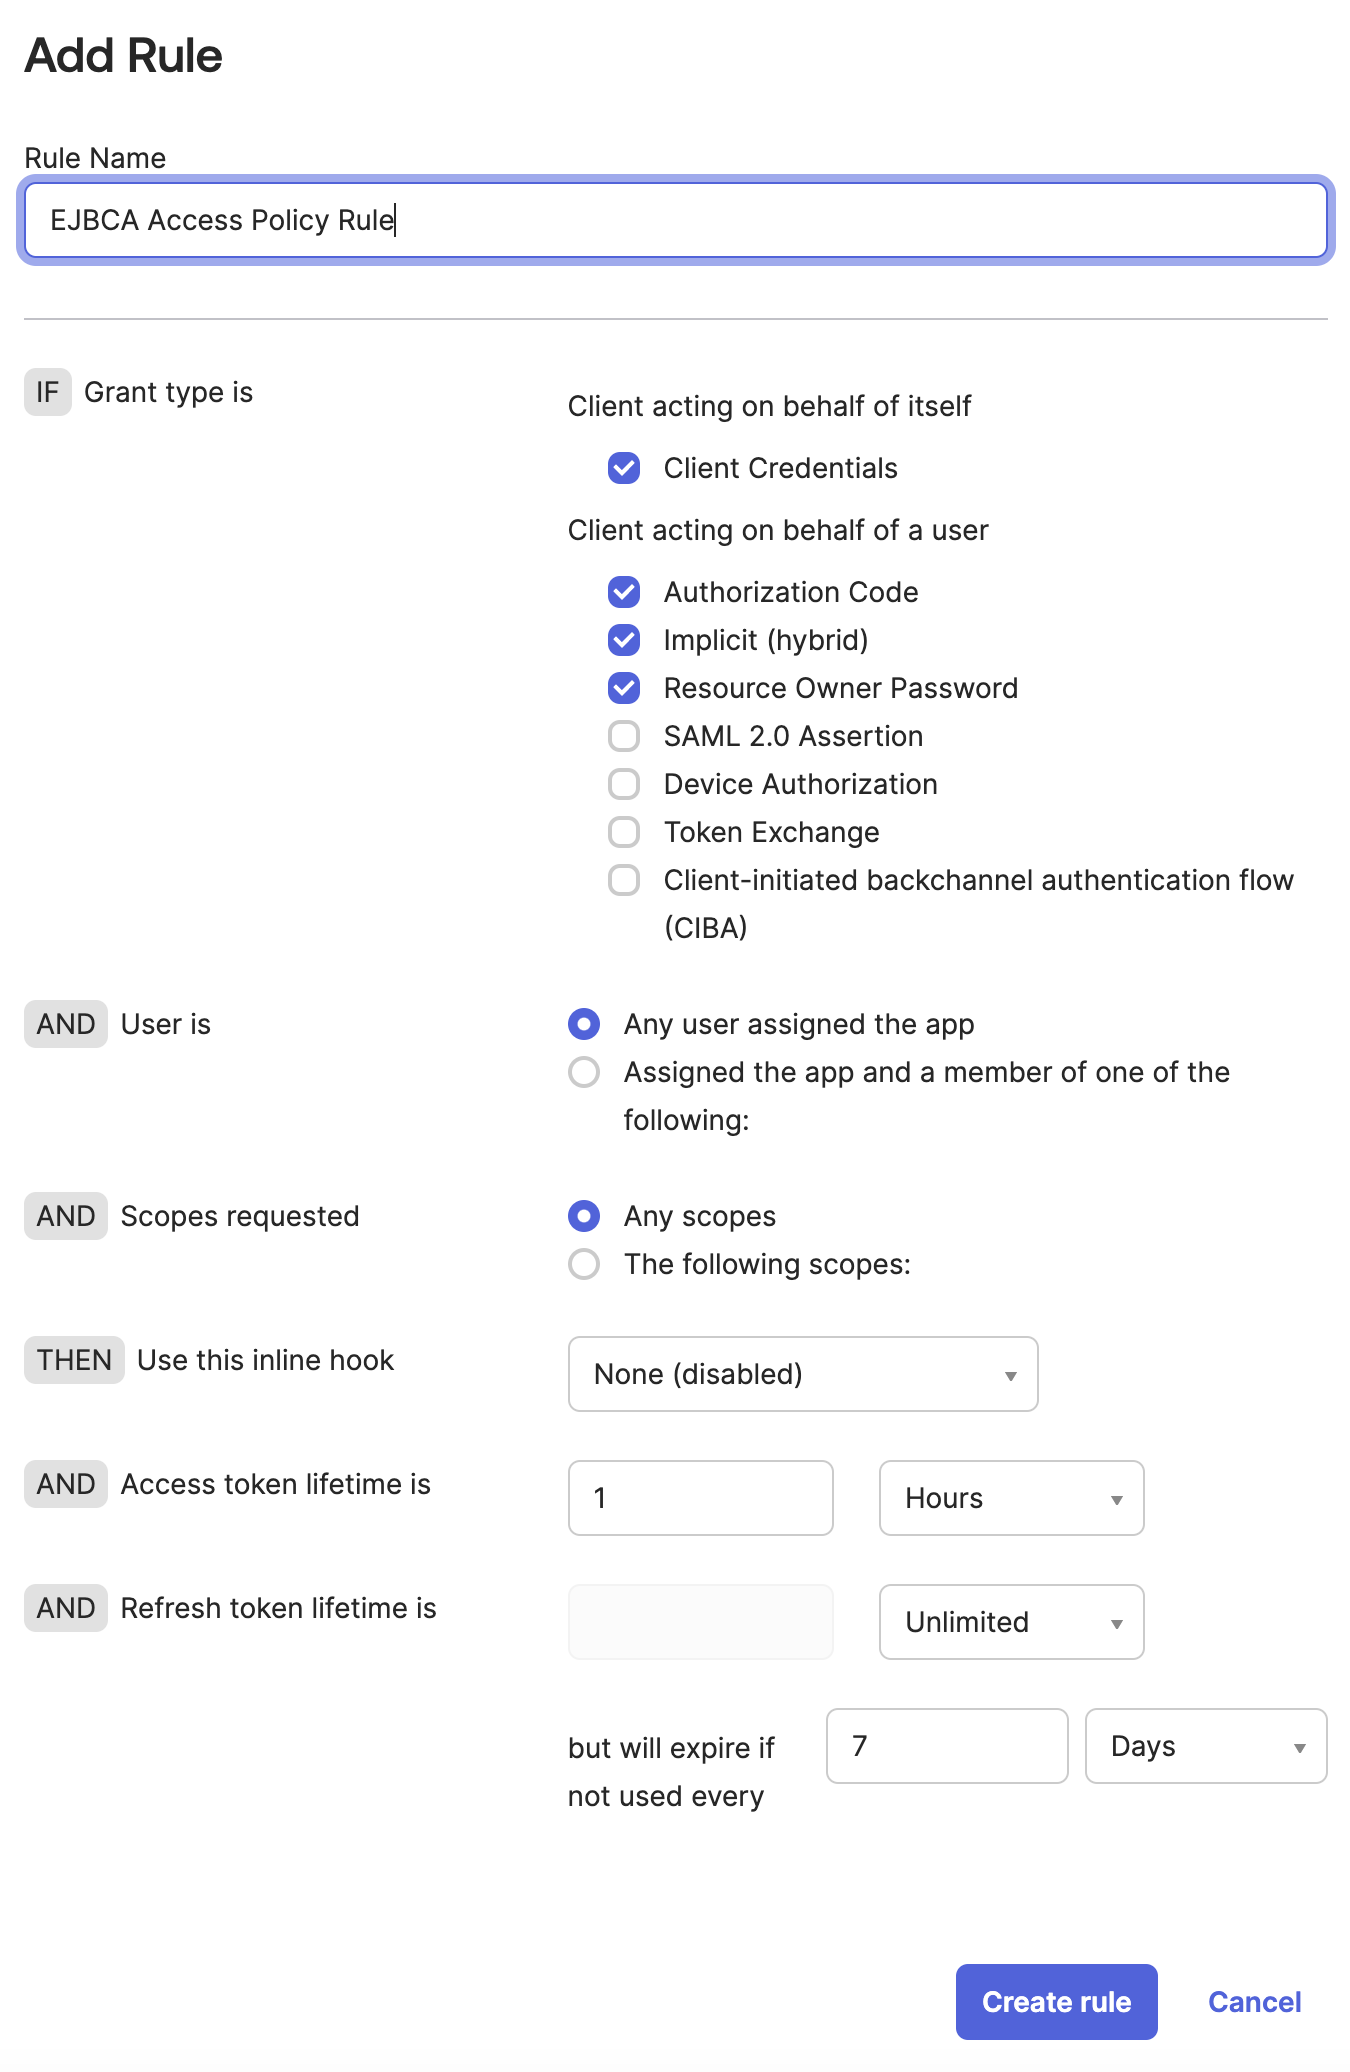
Click Add rule to create an EJBCA Access Policy Rule.
-
Specify the following and then click Create rule.
-
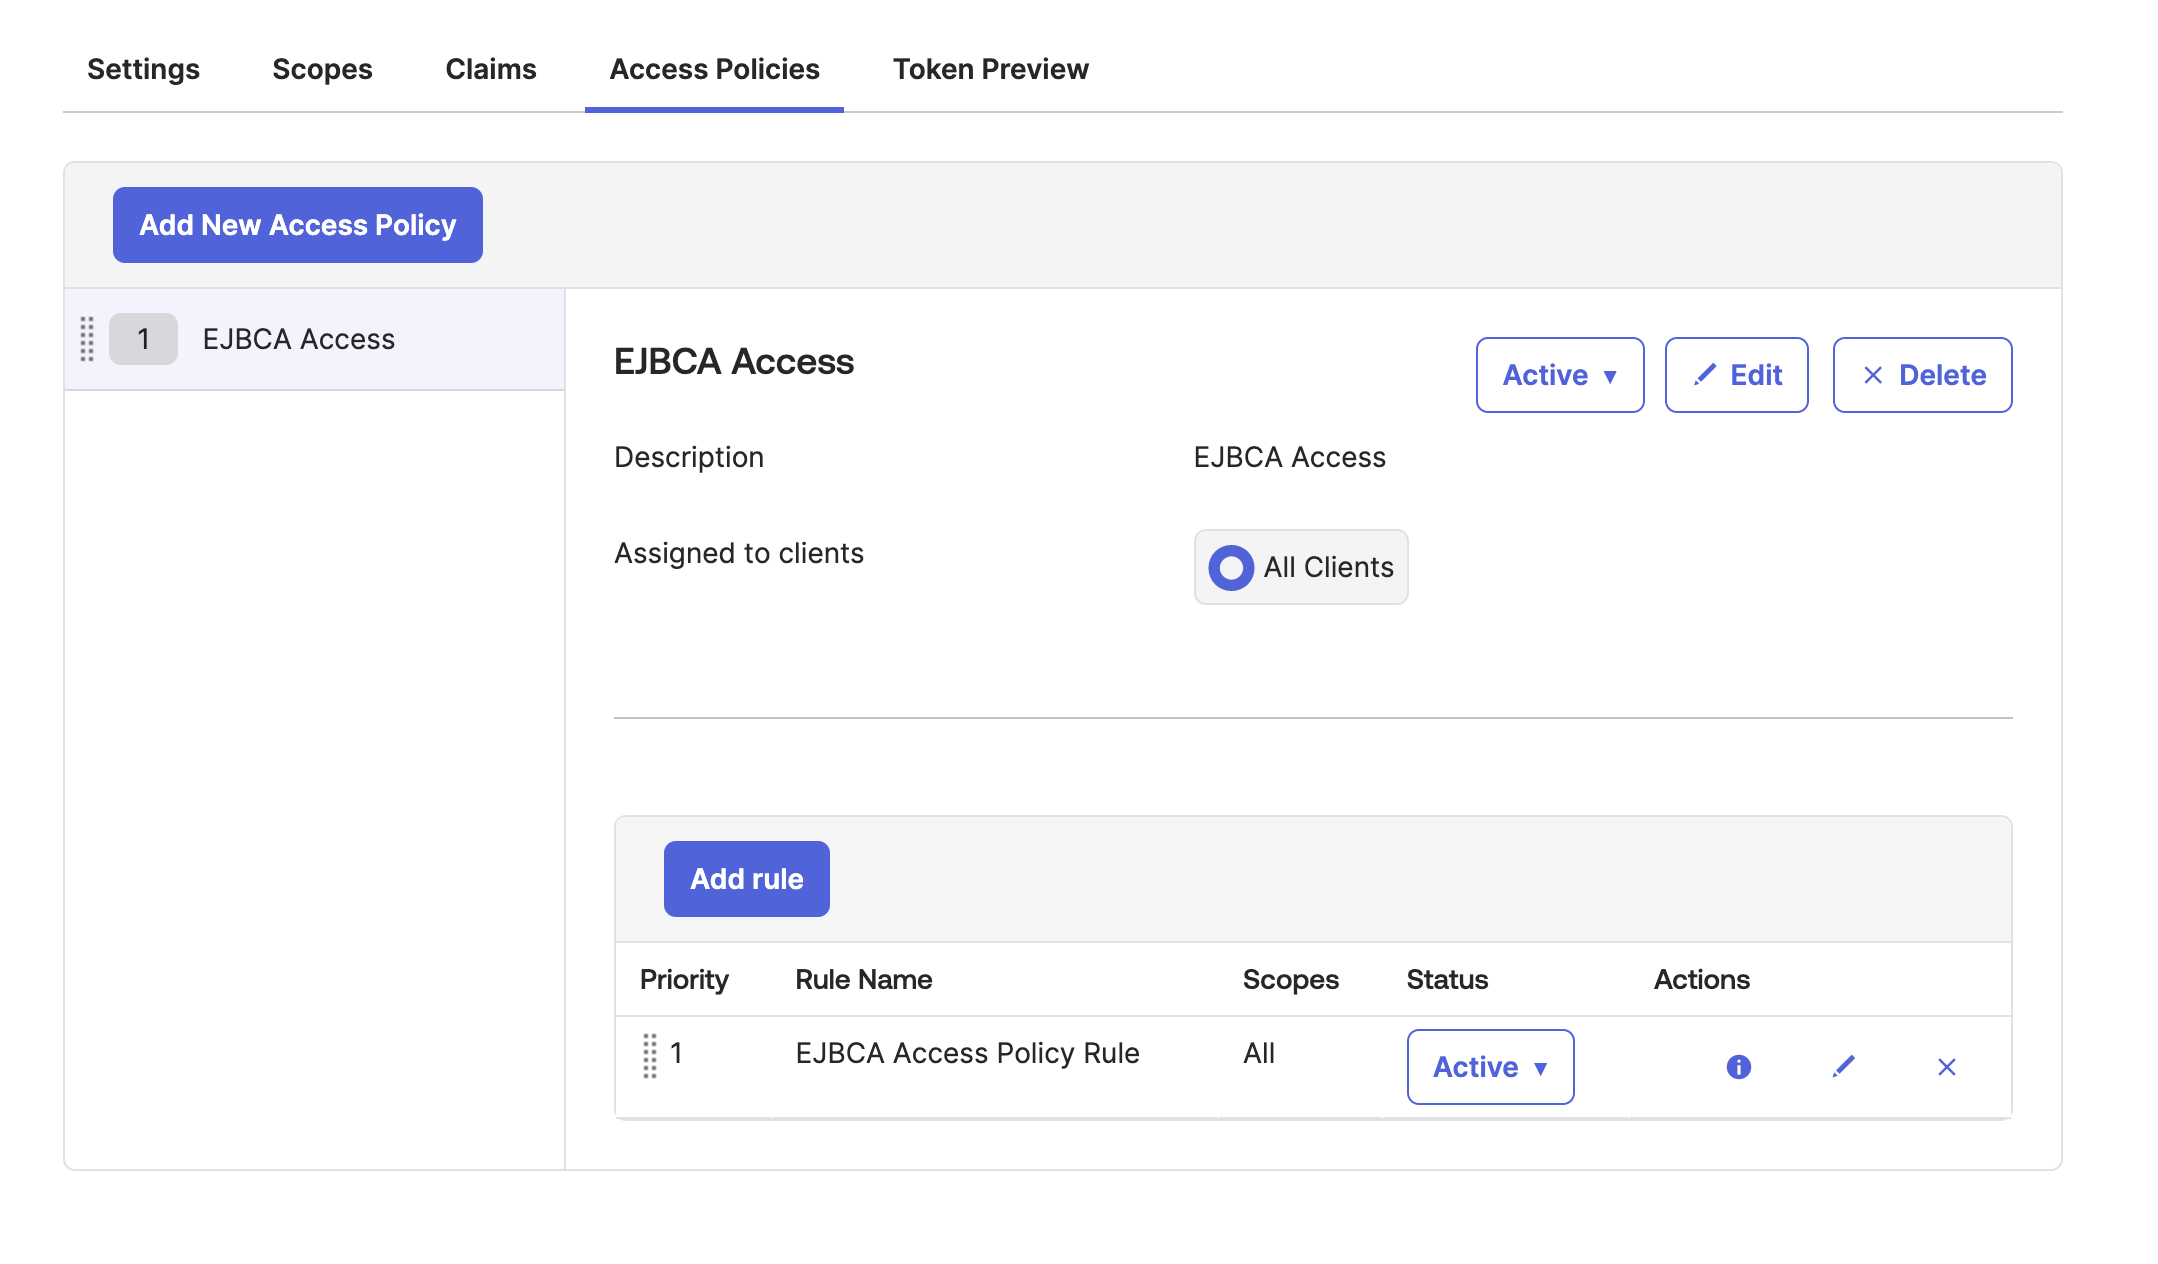
Your Authorization Server configuration should now look similar to the following.
-
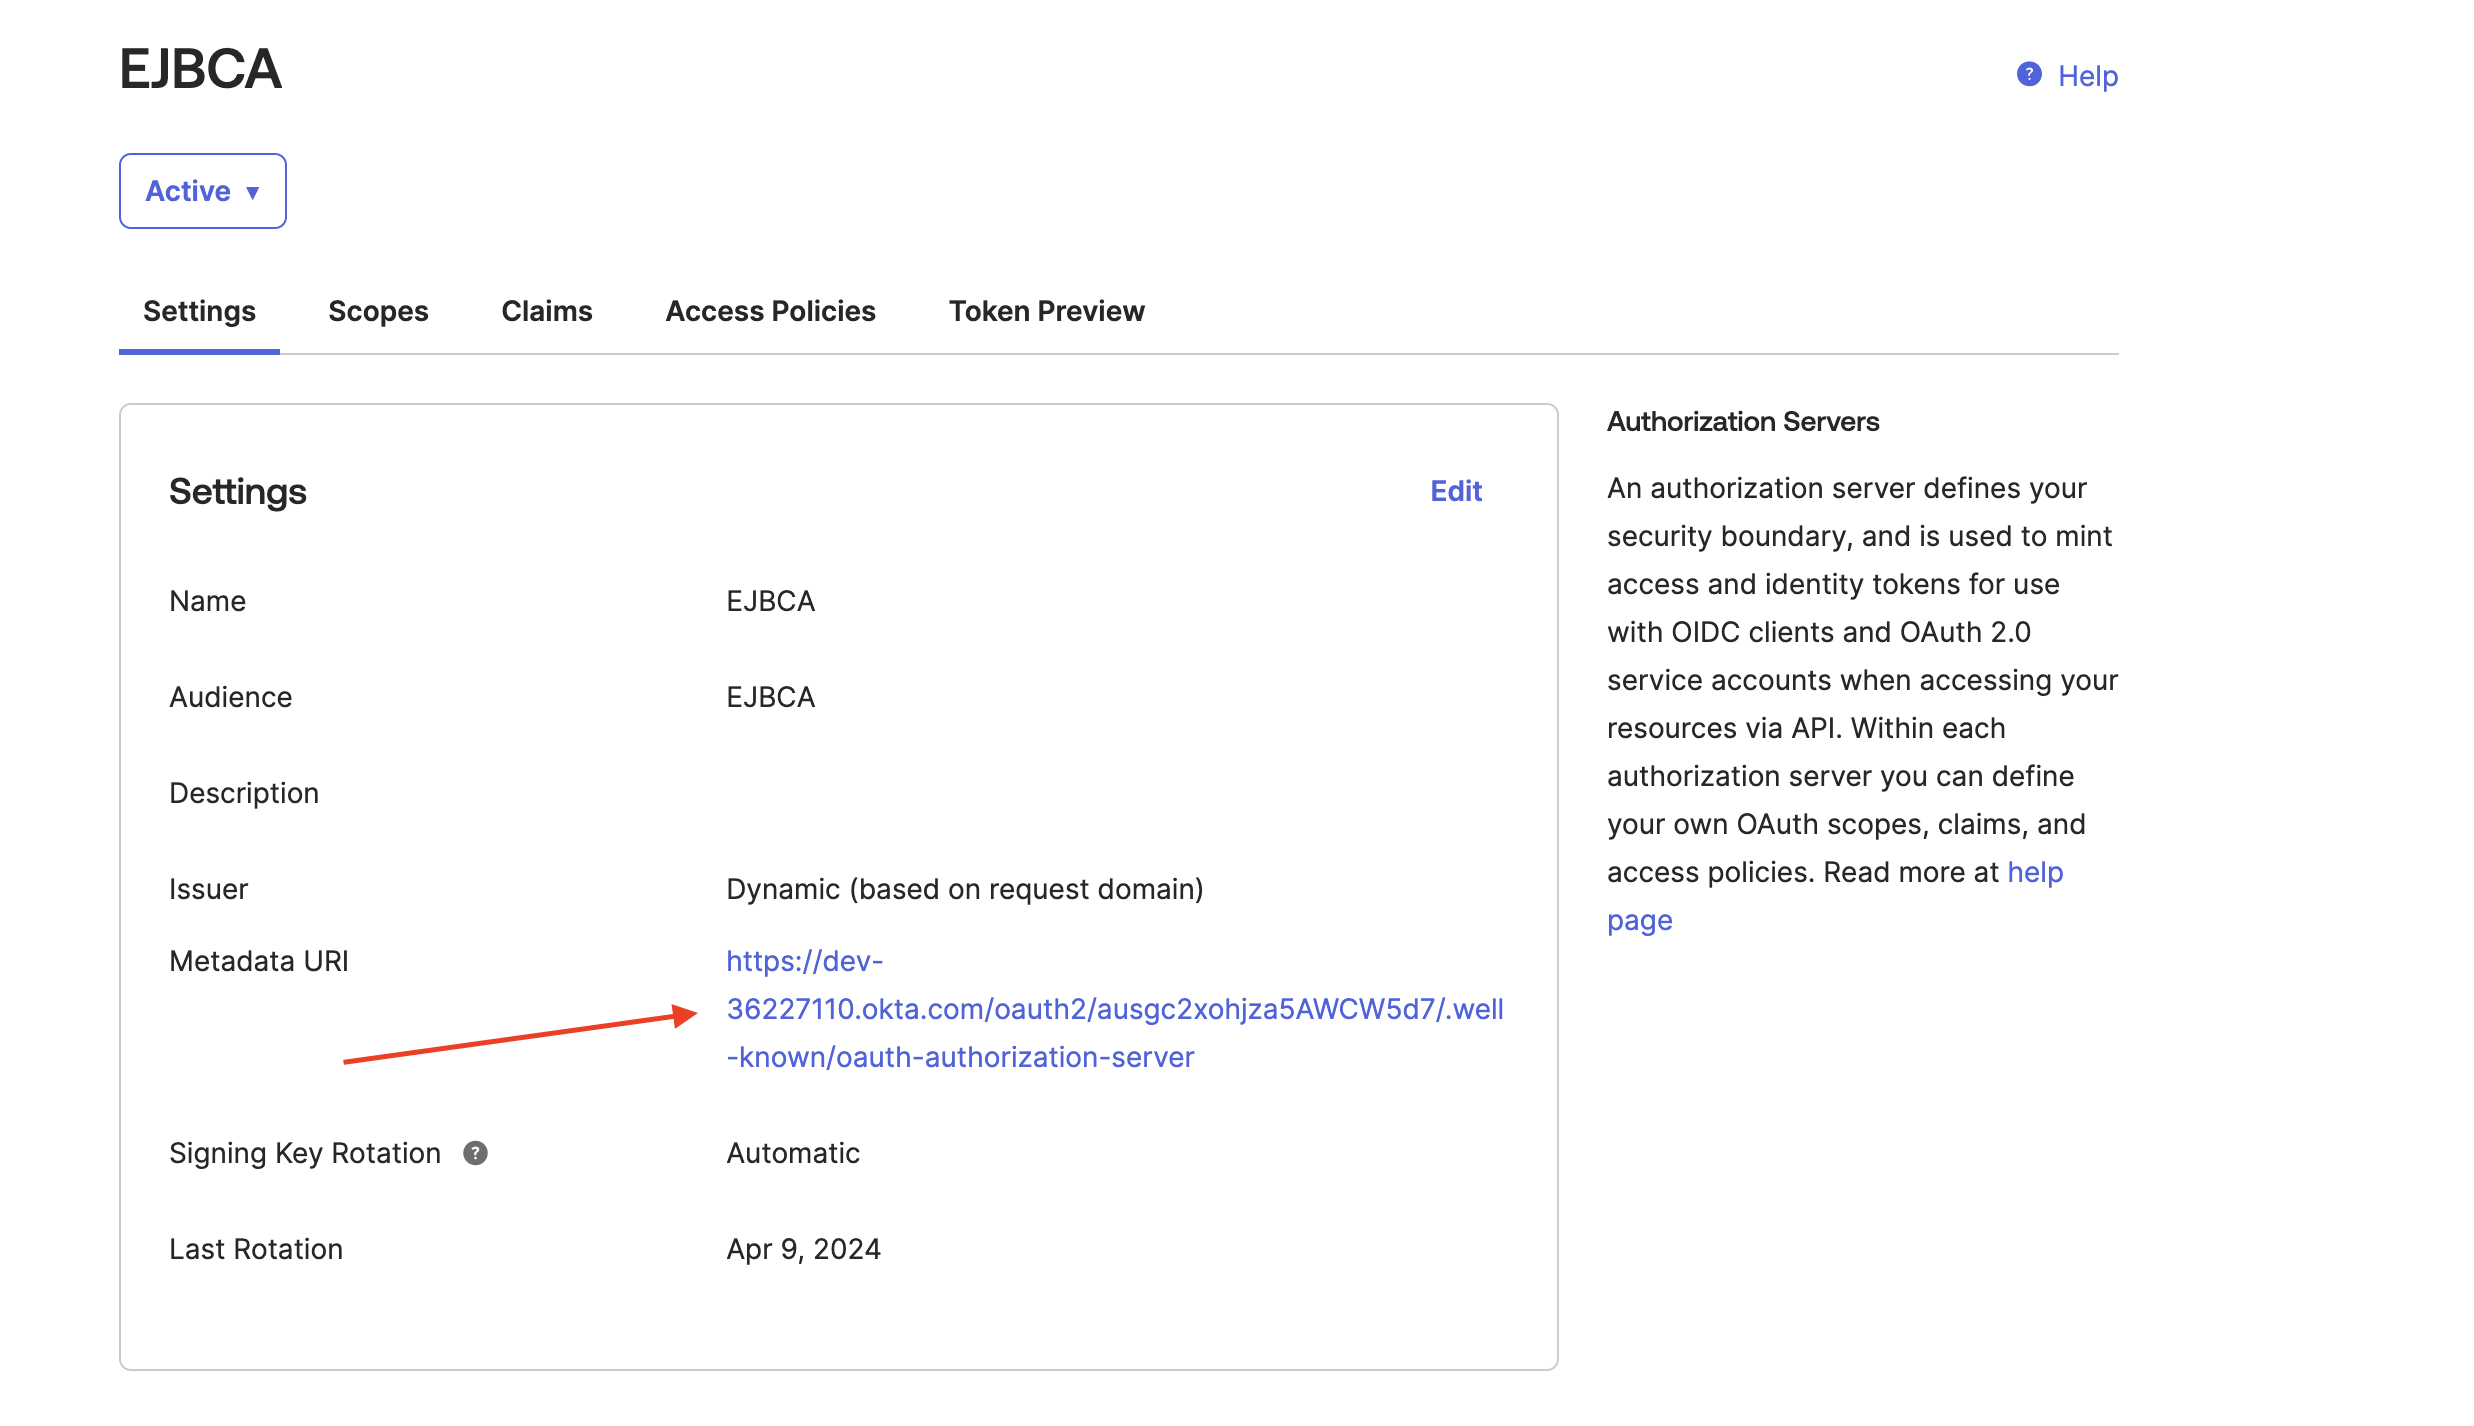
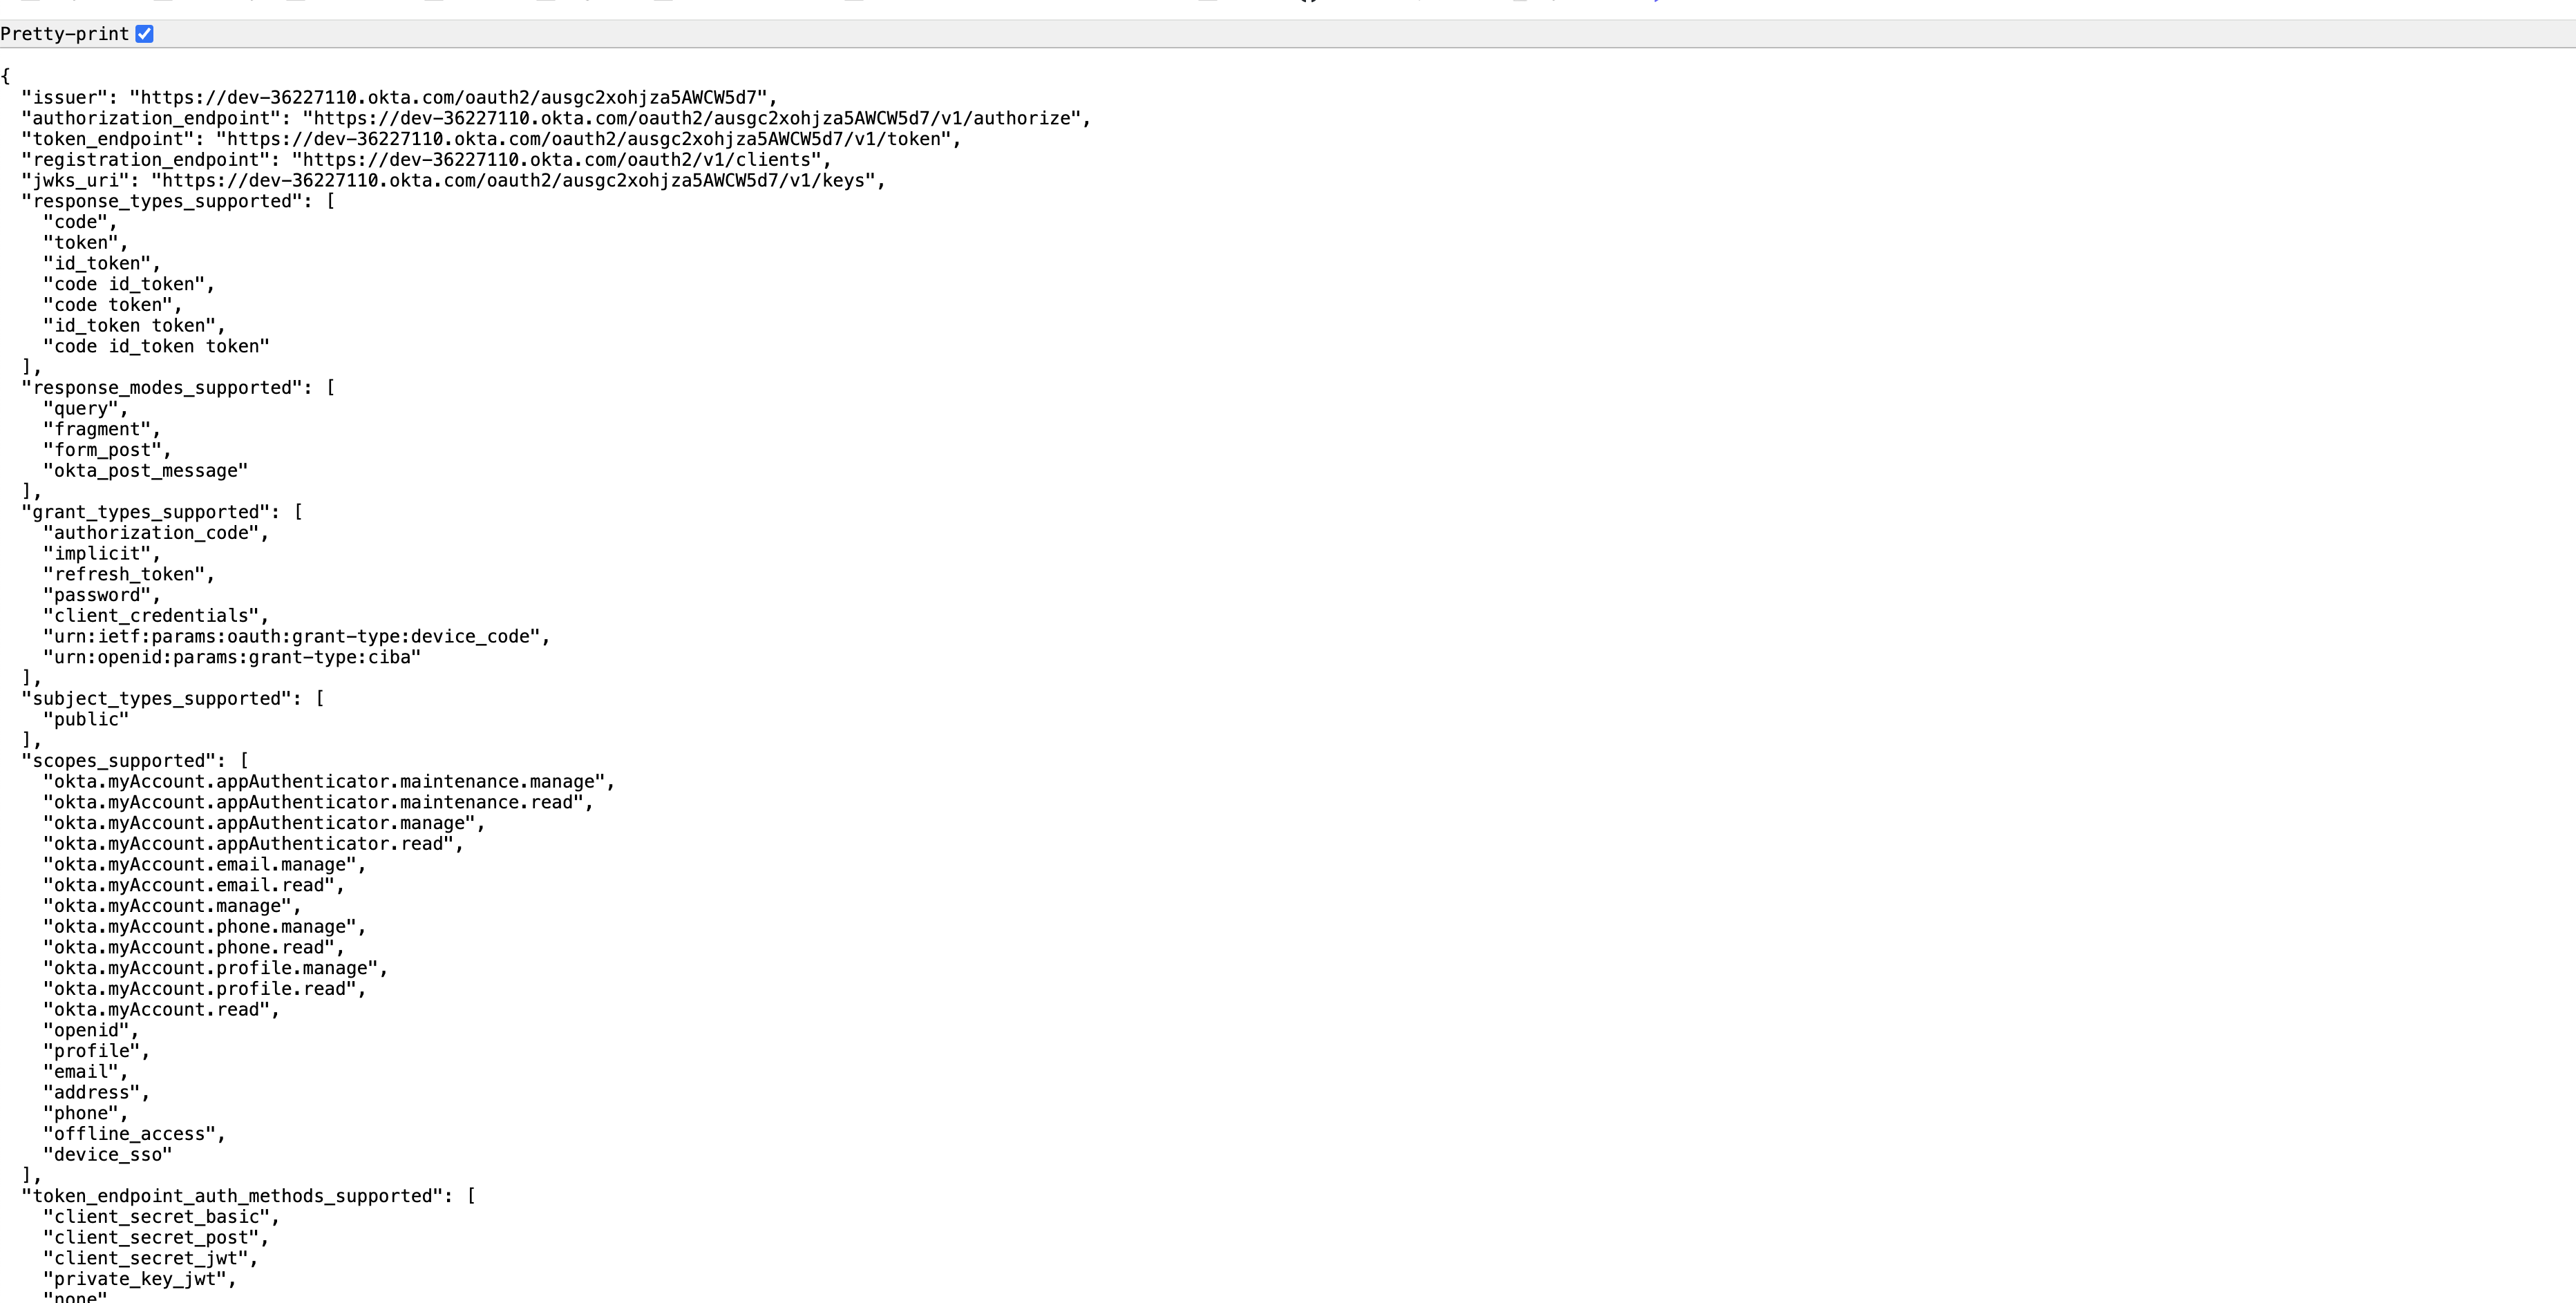
Select the Settings tab and click the Metadata URI link to get the URLs needed to configure a Generic OAuth Provider in EJBCA.
-
Once you have clicked the Metadata URI link, it opens in a new window.

-
Select the Pretty-print option to clean up the JSON formatted content and then copy the entire JSON syntax to a text file for use later in this guide.
-
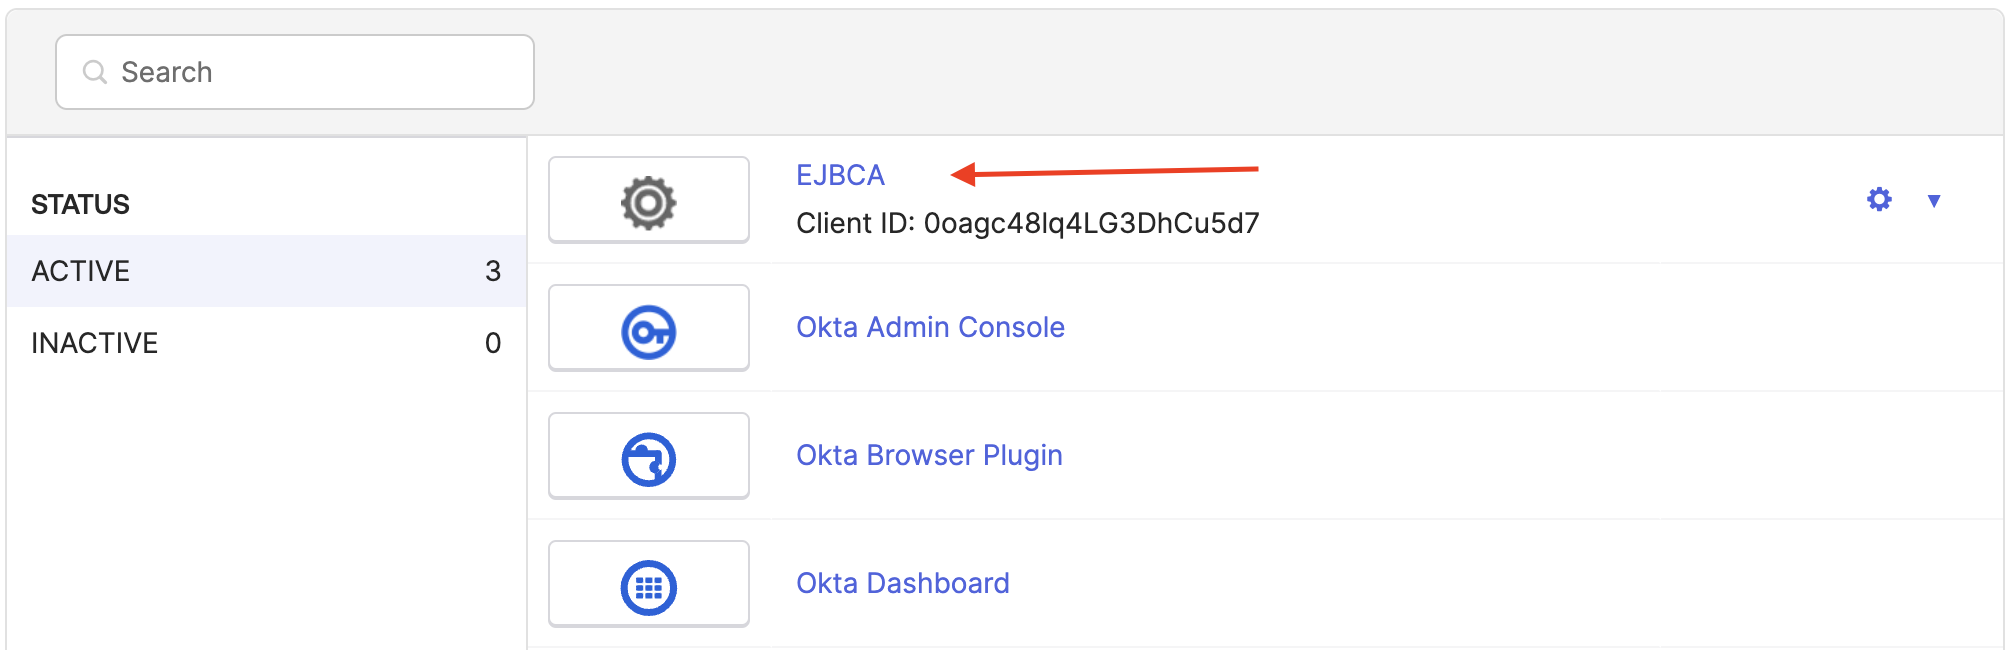
In the Okta admin browser tab, select Applications > Applications and click Create App Integration.
-
Select the following, and then click Next:
-
Sign-in method: Select OIDC - Open ID Connect.
-
Application type: Select Web Application.
-
-
On the New Web Application page, update the following:
-
In the General Settings section, specify the following:
-
App integration name: Specify EJBCA.
-
Grant Type: Select Client acting on behalf of itself - Client Credentials.
-
-
In the Sign-in redirect URIs section, set the URL to
https://<fqdn>:443/ejbca/adminweb.
Ensure to set the port number to the port number used to access the EJBCA Web UI in a browser window. Additionally, there is no trailing backslash needed at the end of the URL.
-
In the Assignments section, for Controlled access, select Skip group assignment for now.
-
Click Save to save the EJBCA Application integration.
-
-
Once the App integration is saved, you will redirected back to the applications page. Click the EJBCA link to open the EJBCA App integration.
-
Select the Assignments tab, and then click Assign > Assign to People.
-
In the Assign users window, click Assign next to a user that will need access to EJBCA via the EJBCA Okta Generic OAuth provider.
-
In the User information window, scroll to the bottom and click Save.
Repeat this step for any other users that will need access to EJBCA.
Alternatively, you may assign any groups you have created instead of individual users. -
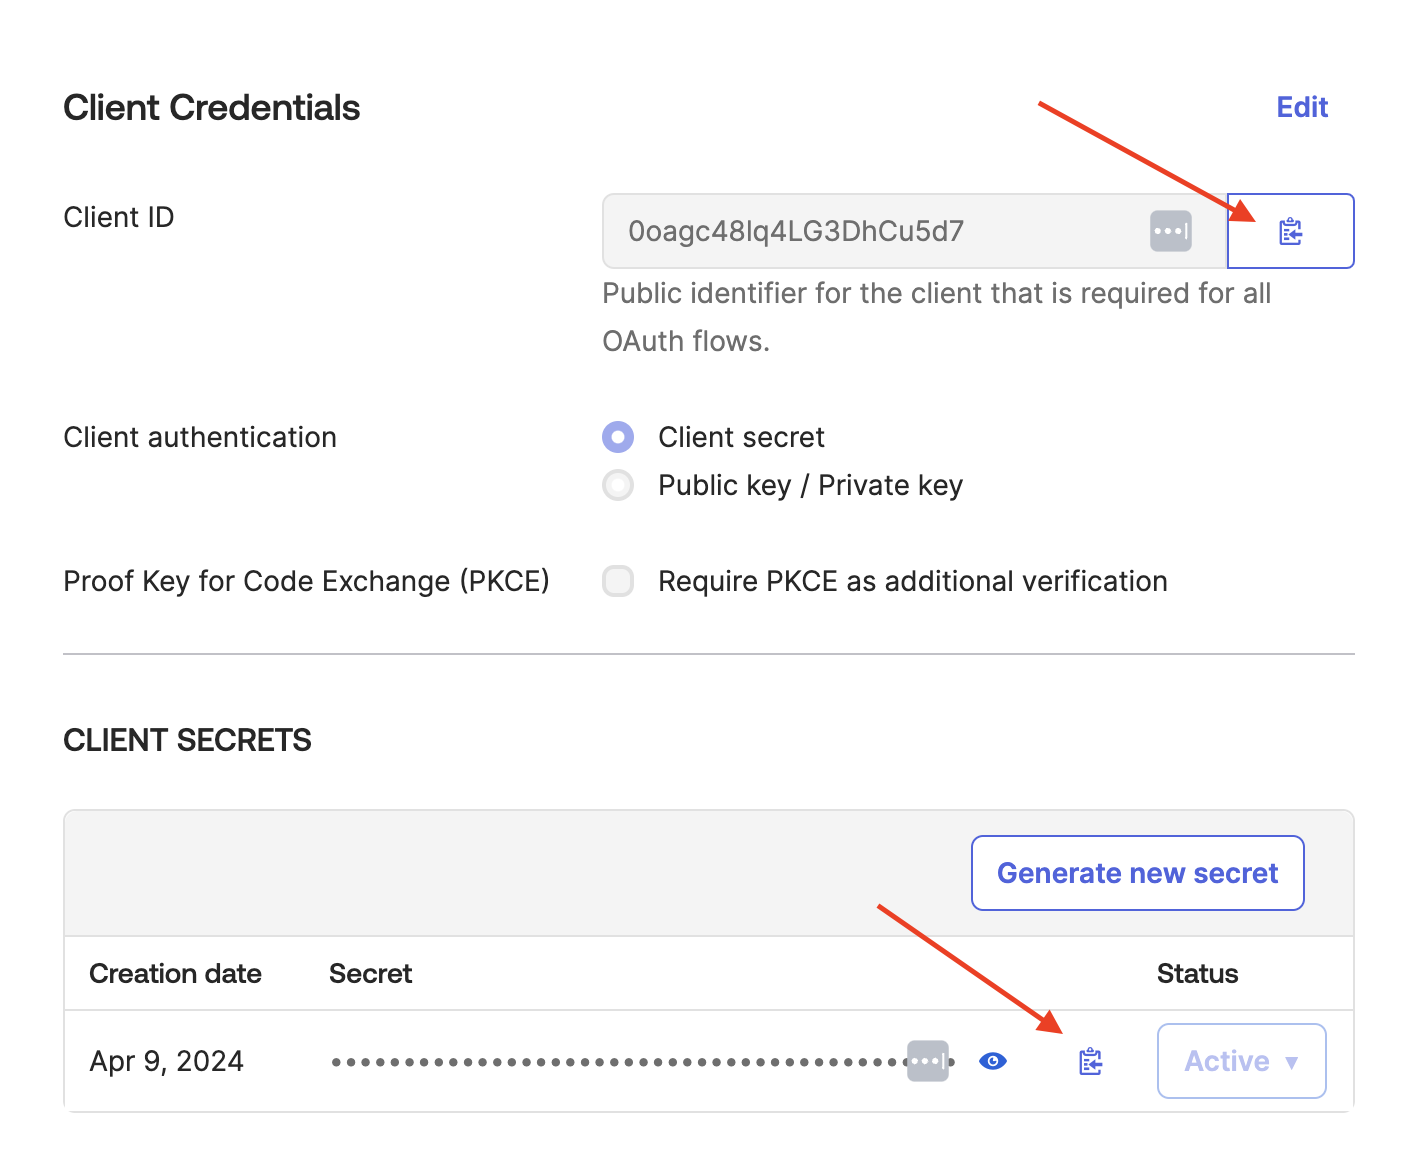
Once you have added the users, select the General tab on the EJBCA App Integration page.
-
In Client Credentials section, do the following:
-
Click Copy next to the Client ID and save the ID to a notepad.
-
Click Copy next to the Client Secret and save the secret to a notepad.
-
You have now completed the steps for the Okta configuration and can continue with configuring EJBCA.
Configure EJBCA
To configure EJBCA, perform these steps:
-
Open a web browser and navigate to the EJBCA Admin Web page and authenticate with your Super Admin Client certificate.
-
On the EJBCA Administration page, click System Configuration.
-
On the System Configuration page, select the Trusted OAuth Providers tab.
-
Under Add or remove Trusted OAuth Providers, click Add.
-
On the Add Trusted OAuth Provider page, update the following:
-
For OAuth Provider Type, select Generic.
-
For OAuth Provider Name: Specify a name, in this example, Okta.
-
The Authorization URL, Token URL, and Logout URL are provided by the JSON syntax from the previous Okta configurations steps:
-
For Authorization URL: Use the
authorization_endpointvalue. for the Authorization URL in EJBCA. -
For Token URL: Use the
token_endpointvalue. -
For the Logout URL: Use the
end_session_endpointvalue.
-
-
For Audience: Set the value specified for the Authorization Server Name in the Okta Configuration steps above.
-
For Scope: Specify “openid”.
-
For Client Name: Specify the Client ID value copied in the Okta configuration step above.
-
For Client Secret: Specify the Client Secret value copied in the Okta configuration step above.
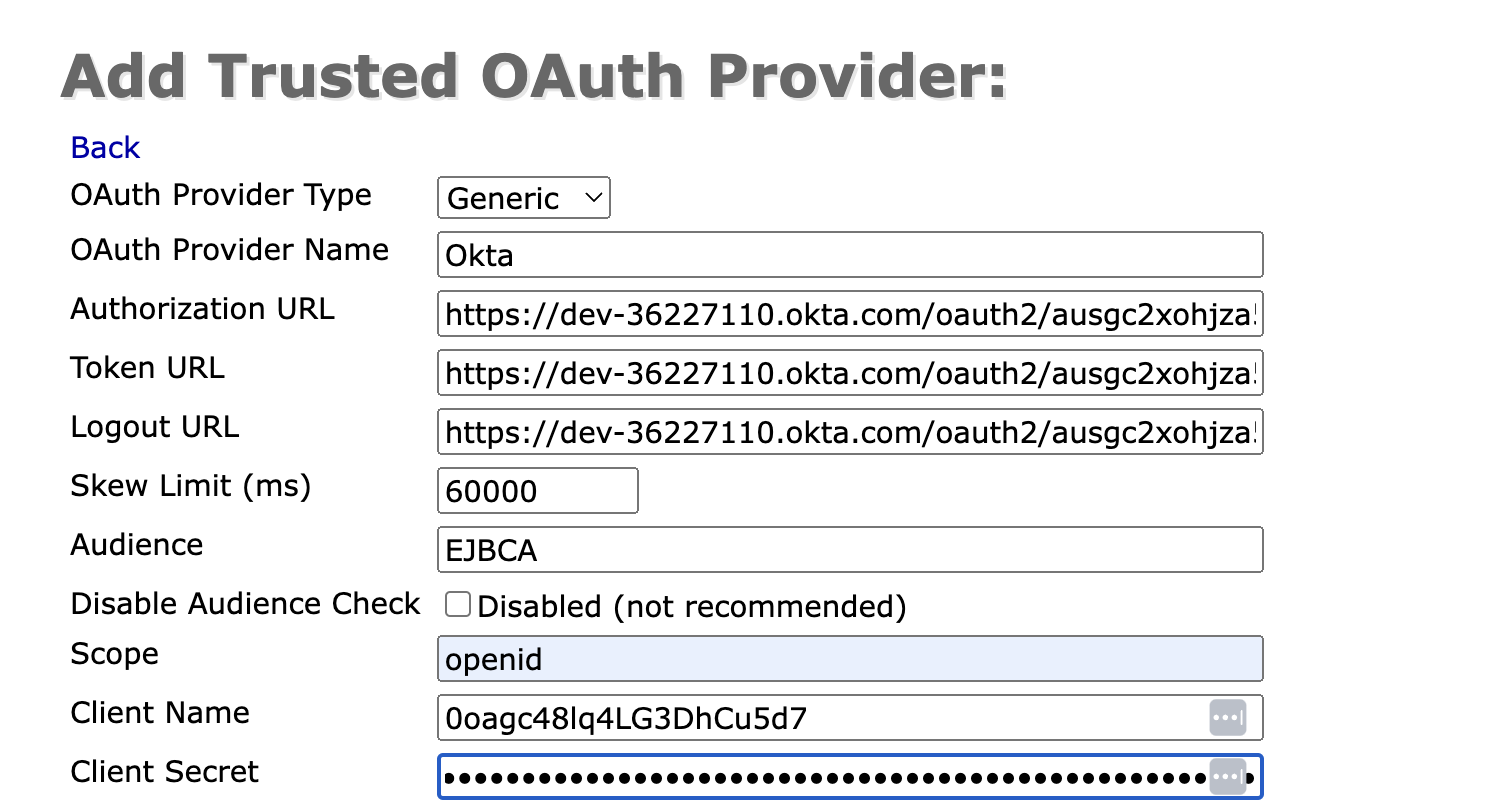
-
-
In the Add Public Key section, select Provide key config url and enter the
jwks_urivalue from the JSON syntax copied in the Okta Configuration steps above and click Upload Public Key, and then click Save to save the configuration.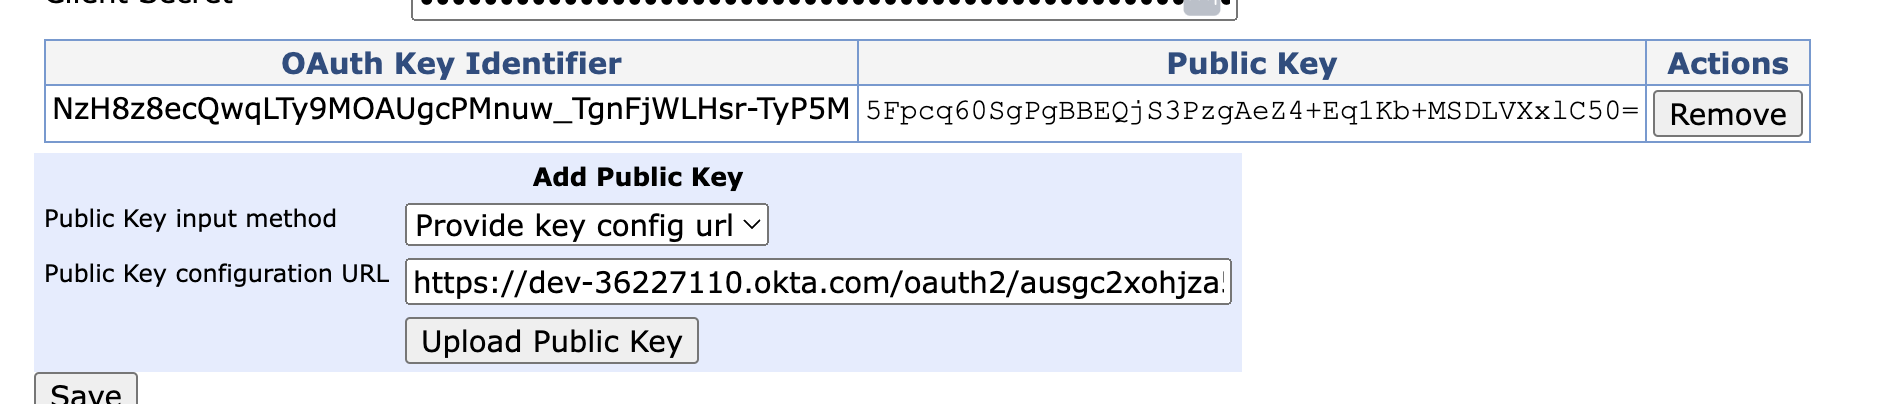
-
Next, in the EJBCA menu, click System Functions > Roles and Access Rules.
-
On the Roles Management page, click Members next to the Super Administrator Role.
-
On the Members page, in the Match With list:
-
Select OAuth 2 JWT: Subject ("sub") claim, and select the name of the Okta OAuth Provider.
-
Set the Match value with the email address used in Okta for the user that will need access.
-
You have now completed the steps for the EJBCA configuration.
Test OAuth Integration
To test the Okta OAuth integration:
-
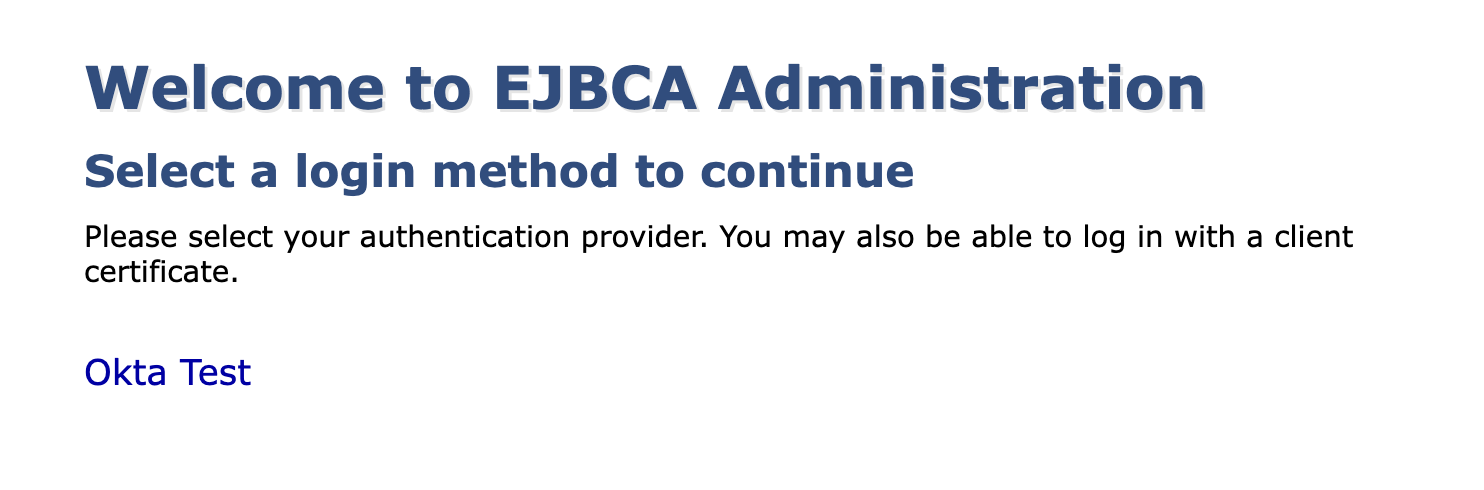
Open an incognito window and navigate to the EJBCA Admin Page.
-
When prompted to select your Super Admin Credential, cancel to be redirected to the OAuth login provider page and select the Okta OAuth provider.
-
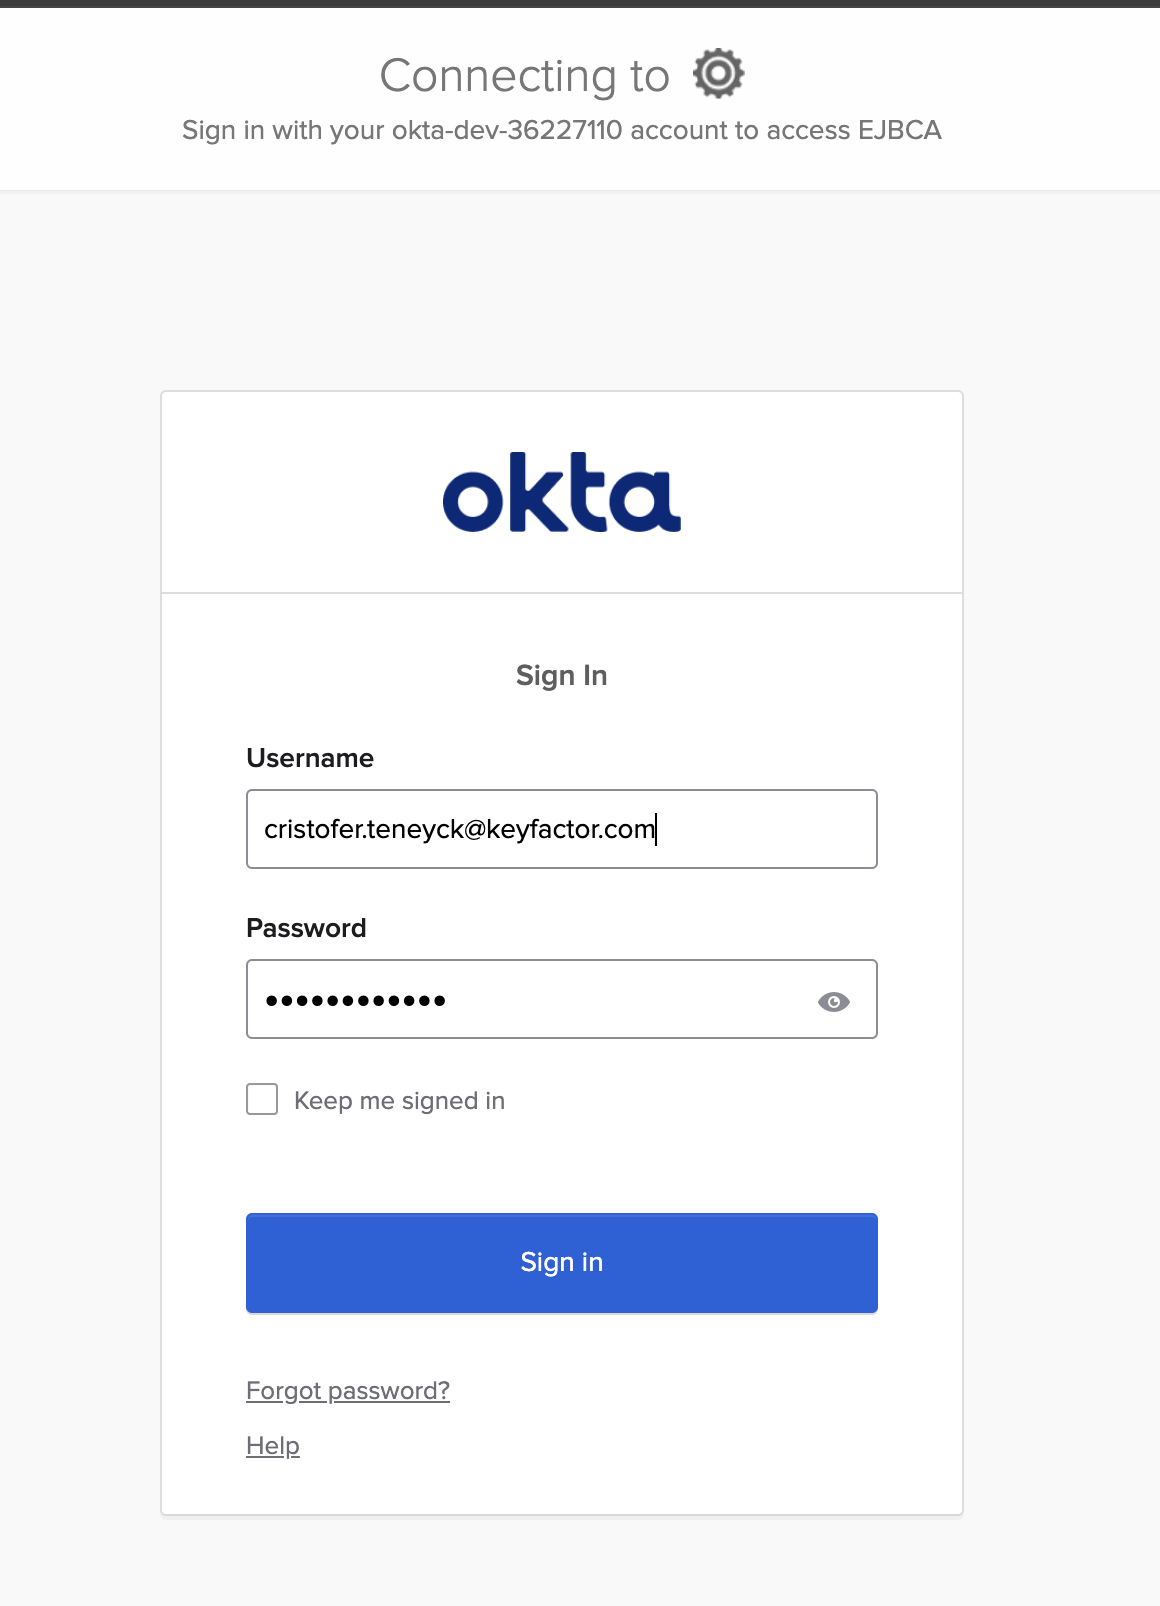
You will be redirected to the Okta login page.
-
Enter your credentials and click Sign in to be redirected to the EJBCA Administration page.
After completing these steps, the Okta OAuth provider is configured and integrated with EJBCA, and users can authenticate to the EJBCA Administration using OAuth.
For general instructions on setting up OAuth providers in EJBCA, see OAuth Provider Management.