Tutorial - Build a Post-Quantum Ready PKI with Hybrid CAs
In this tutorial, you will learn how to configure hybrid post-quantum certificate authorities (CAs) using EJBCA Enterprise and issue certificates with ML-DSA and ML-KEM, two cryptographic algorithms designed to resist quantum attacks and standardized by NIST. The tutorial covers the complete setup of hybrid Root and Subordinate CAs, configuration of crypto tokens and certificate profiles, and issuance of PQC-enabled server certificates using the EJBCA Client CLI and the Certificate Management Protocol (CMP).
This hands-on guide is based on the Keyfactor PQC Lab Test Drive - a pre-configured demo environment deployed through the Azure Marketplace. The environment runs EJBCA Enterprise 9.2 with support for ML-DSA and hybrid key configurations, enabling you to explore post-quantum readiness without needing to set up your own infrastructure.
By following this tutorial, you will gain practical experience with hybrid certificate issuance and understand how EJBCA can support crypto agility.
The tutorial covers these steps:
Launch the Keyfactor PQC Lab on Azure
Configure crypto tokens and hybrid certificate profiles
Set up Root and Sub CAs using ML-DSA and traditional ECDSA
Issue PQC hybrid TLS certificates using the CLI and CMP
Prerequisites
For this tutorial, the PQC Lab Test Drive with EJBCA Enterprise 9.2 was used.
The PQC Lab Test Drive is designed as a demonstration instance and is not a production-grade server.
Before you begin, you need:
A valid Microsoft Account to launch the PQC Lab Test Drive on the Azure Marketplace.
In addition, to use the EJBCA Client CLI, you need Java installed.
This 30-day trial includes the components EJBCA Enterprise, MariaDB, and WildFly version 26.1.3. Azure automatically terminates the instance after 30 days so do not put any data on this host that you want to retain. You can export your configurations before the 30-day period using the EJBCA user interface.
Step 1 - Launch the Keyfactor Test Drive Instance
To launch the Test Drive instance, follow these steps:
Navigate to Keyfactor PQC Lab on the Azure Marketplace and click Get it now.
Enter your Azure login name, accept the permission request, and click Continue.
If prompted, request approval.
Once Azure processes the request you will be on a landing page with information about the Test Drive. To start deploying the Test Drive, click Deploy PQC Lab.
During the Test Drive launch, you are provided with the location and credentials to access all the Keyfactor resources on the instance. The values are generated specifically for your instance and will expire in 30 days. Make a secure note of the credentials as you will use the username and password to retrieve the EJBCA administrator certificate.
The instance will take approximately 30 minutes to complete. Once completed, you will be brought to the complete Test Drive start page with some useful links.
Once ready, use the provided Test Drive instance URL and the username and password to access the EJBCA RA user interface and retrieve the administrator (superadmin) certificate.
Step 2 - Access EJBCA
To access EJBCA, the credentials need to be retrieved from the server and installed in your browser. We recommend using Mozilla Firefox as it has self-enrollment capabilities and its own keystore separate from the operating system.
1 - Download the EJBCA administrator certificate
Access the EJBCA RA interface to retrieve the administrator (Superadmin) certificate, using the username and password provided by the test drive in the Azure Marketplace.
To download the certificate:
On the Test Drive start page, select EJBCA RA Web Superadmin Enrolment.
A browser warning is shown if you have not added the Management CA to the list of trusted roots in your certificate store. Click through the security warning, and accept the risk and continue.
To enroll, specify the following:
Username: Enter the Administrator username that was provided to you in the Azure marketplace when you launched the instance.
Enrollment code: Enter the Administrator password that was provided to you in the Azure marketplace when you launched the instance.
Click Check.
For Key algorithm, select RSA 2048 bits to limit the type of keys to be used.
Click Download PKCS#12 to download and save the keystore.
The P12 file is now downloaded to your download directory.
2 - Import certificate into browser
Next, add the downloaded P12 keystore to your browser's certificate store.
The procedure for importing a certificate may vary depending on the web browser you are using. This example describes how to import a certificate to Mozilla Firefox.
To import the certificate in your browser:
Open the Firefox application menu and click Settings.
Go to Privacy & Security and in the Security section, click View Certificates.
On the Your Certificates tab, select Import.
Browse to the downloaded P12 file, select the file, and click OK.
Enter the password you specified as the enrollment code in the previous step, and click Sign in.
Click OK to close the Firefox Certificate Manager.
The administrator certificate is now imported and installed in your browser.
3 - Access EJBCA
To access EJBCA using the certificate you just installed:
On the Test Drive start page, click the EJBCA Registration Authority Web or point your browser to https://<localhost>/ejbca/adminweb/ to access EJBCA using the imported certificate.
When prompted with a request for your browser to use the imported certificate, click OK to access EJBCA with the certificate.
EJBCA opens displaying the administration page.
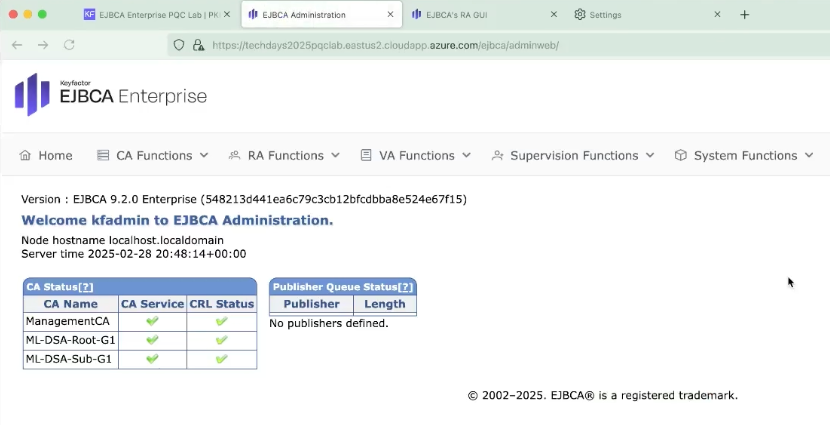
Along with the Management CA, a ML-DSA Root CA (trust anchor) and a ML-DSA Subordinate CA are listed among the certificate authorities.
Step 3 - Create crypto tokens for the PQC Hybrid Root and Sub CA
Crypto tokens are how you manage keys in EJBCA used by CAs, remote authentication for peering, OCSP signers, and a few other integrations. Before creating a PQC hybrid CA, keys must be generated for the CA to use.
To create crypto tokens for the PQC hybrid CAs, follow these steps:
Go to the EJBCA Administration and click CA Functions > Crypto Tokens.
Click Create new and specify the following on the New Crypto Token page:
Name: Specify a name for the crypto token, in this example, hybridRoot.
Type: Select Soft.
Authentication Code: Enter a password to be used to activate the crypto token if the container is restarted. In this example, foo123.
Click Save to create the crypto token.
Generate the following keys:
In the Name field that says signKey, specify signKeyEc001, select ECDSA P-521 / secp521r1 for the key size, and then click Generate new key pair to create the keys.
Repeat to create a test key: name the key testKeyEC, select ECDSA P-256 for the key size, and then click Generate new key pair.
Repeat to create the default encryption key: name the key defaultKey001, select RSA 4096 for the key size, and then click Generate new key pair.
Last, to create a ML-DSA key: name the key signKeyMlDsa001, select ML-DSA-87 for the key size, and then click Generate new key pair.
Click Back to Crypto Token overview.
Next, to create a crypto token for the Sub CA, click Create new and specify the following on the New Crypto Token page:
Name: Specify a name for the crypto token, in this example, hybridSub.
Type: Select Soft.
Auto-activation: Select Use to allow EJBCA to save the password and reapply it after a restart.
Authentication Code: Enter a password to be used to activate the crypto token if the container is restarted. In this example, foo123.
Click Save to create the crypto token.
Generate the following keys using the same naming as for the Root CA crypto token:
In the Name field that says signKey, specify signKeyEc001, select ECDSA P-384 for the key size, and then click Generate new key pair to create the keys.
Repeat to create a test key: name the key testKeyEC, select ECDSA P-256 for the key size, and then click Generate new key pair.
Repeat to create the default encryption key: name the key defaultKey001, select RSA 4096 for the key size, and then click Generate new key pair.
Last, to create a ML-DSA key: name the key signKeyMlDsa001, select ML-DSA-65 for the key size, and then click Generate new key pair.
Click Back to Crypto Token overview.
You have now created two crypto tokens for the PQC Root and Sub CAs and can continue with creating certificate profiles for the Root and Sub hybrid CAs in the next step.
Step 4 - Create certificate profiles for the PQC Hybrid CAs
To configure two certificate profiles to support a PQC hybrid certificate, follow these steps:
Continuing from the EJBCA Administration, click CA Functions > Certificate Profiles.
Click Clone next to the ml-dsa-RootCA-10y certificate profile.
Name the new certificate profile hybrid-ec-ml-dsa-RootCA-10y, and click Create from template.
Click Clone next to the ml-dsa-SubCA-5y certificate profile.
Name the new certificate profile hybrid-ec-ml-dsa-SubCA-5y, and click Create from template.
To edit the profile values to fit your needs, find the newly created hybrid-ec-ml-dsa-RootCA-10y displayed in the list and click Edit.
On the Edit page, update the following:
For Available Key Algorithms, select ECDSA.
For Available ECDSA curves, select P-521.
For Signature Algorithm, select SHA512withECDSA.
Enable Alternative Signature by clicking Use.
For Available Alternative Key Algorithms, select ML-DSA-87.
For Alternative Signature Algorithm, select ML-DSA-87.
Click Save to store the Root CA certificate profile.
Next, to configure a Sub CA certificate profile, find the newly created hybrid-ec-ml-dsa-SubCA-5y displayed in the list and click Edit.
On the Edit page, update the following:
For Available Key Algorithms, select ECDSA.
For Available ECDSA curves, select P-384.
For Signature Algorithm, select Inherit from issuing CA.
Enable Alternative Signature by clicking Use.
For Available Alternative Key Algorithms, select ML-DSA-65.
Click Save to store the Sub CA certificate profile.
You have now created two new certificate profiles for the PQC hybrid Root and Sub CA. Continue to the next steps to create the PQC hybrid CAs.
Step 5 - Create the PQC Hybrid Root CA
Now that you have created the crypto tokens and certificate profiles, you can create the PQC hybrid Root CA.
To create a PQC hybrid Root CA, follow these steps:
Continuing from the EJBCA Administration, click CA Functions > Certificate Authorities.
In the Add CA field, enter the name Hybrid-Root-G1 and click Create.
On the Create CA page, update the following:
For Crypto Token, select the crypto token HybridRoot (created earlier in Step 2).
For Signature Algorithm, select SHA512withECDSA.
For Alternative Signing Algorithm, select an algorithm to enable hybrid certificates. In this example, ML-DSA-87.
For Subject DN, enter a string for the Subject DN.
For Signed By, select Self Signed.
For Certificate Profile, select hybrid-ec-ml-dsa-RootCA-10y.
For Validity, enter 10y.
Clear LDAP DN order.
For CRL Expire Period, enter 1y.
Click Create to create the Root CA.
Next, to configure Default CA defined validation data values to be used:
Configure the Default CRL Distribution Point:
Open a second tab in the browser and go to https://<instanceURL>/ejbca/publicweb/crls.
Right-click the sKIDHash Download link for the
CN=Hybrid Root CA - G1, O=Keyfactor Community, C=SE, and select Copy Link.
Return to the first tab with the EJBCA Administration, select Hybrid-Root-G1, (Active) and click Edit CA.
Scroll down to Default CRL Distribution Point, and paste the URL copied from the second tab.
Edit the URL by changing
httpstohttpto ensure the CRL is downloaded via HTTP.
Configure the CA Issuer Default URI:
Open a third tab in the browser and go to https://<instanceURL>/ejbca/publicweb/certificates.
Right-click the sKIDHash Download link for the CN=Hybrid Root CA - G1, and select Copy Link.
Return to the first tab with the EJBCA Administration, and paste the URL in the CA Issuer Default URI field.
As before, change
httpstohttpin the URL to ensure the CA certificate is downloaded via HTTP.
Click Save at the bottom of the page.
You have now created a PQC Root CA. Continue to the next step to create a PQC Sub CA.
Step 6 - Create the PQC Hybrid Sub CA
After the Root CA is created the CA chain extends by creating a PQC hybrid Sub CA signed by the PQC hybrid Root CA. The PQC hybrid Sub CA is used to issue end entity certificates.
To create the PQC hybrid Sub CA, follow these steps:
Continuing from the EJBCA Administration, click CA Functions > Certificate Authorities.
In the Add CA field, enter the name Hybrid-Sub-G1 and click Create.
On the Create CA page, update the following:
For Crypto Token, select the crypto token hybridSub (created earlier).
For Signature Algorithm, select SHA384withECDSA.
For Alternative Signing Algorithm, select ML-DSA-65.
For Subject DN, enter a string for the Subject DN.
For Signed By, select Hybrid-Root-G1.
For Certificate Profile, select hybrid-ec-ml-dsa-SubCA-5y.
For Validity, enter 5y.
Clear LDAP DN order.
For CRL Expire Period, enter 3d.
For CRL Issue Interval, enter 1d.
Click Create to create the Root CA.
Next, to configure Default CA defined validation data values to be used:
Configure the Default CRL Distribution Point:
Go to the second browser tab that is browsing the https://<instanceURL>/ejbca/publicweb/crls URL, and refresh the page.
Right-click the sKIDHash Download link for the CN=Hybrid Sub CA - G1, and select Copy Link.
Return to the first tab with the EJBCA Administration, select Hybrid-Sub-G1, (Active) and click Edit CA.
Scroll down to Default CRL Distribution Point text field, and paste the URL copied from the second tab.
Edit the URL by changing
httpstohttpto ensure the CRL is downloaded via HTTP.
Configure the CA Issuer Default URI:
Go to the third browser tab that is browsing the https://<instanceURL>/ejbca/publicweb/certificates URL, and refresh the page.
Right-click the sKIDHash Download link for the CN=Hybrid Sub CA - G1, and select Copy Link.
Return to the first tab with the EJBCA Administration, and paste the URL in the CA Issuer Default URI field.
As before, change
httpstohttpin the URL to ensure the CA certificate is downloaded via HTTP.
For the OCSP service Default URI, click Generate and edit the URL and remove the port.
Click Save at the bottom of the page.
You have now created the PQC hybrid Sub CA and configured the CDP URL, CA certificate and OCSP URL in the AIA extension. Proceed to the next step to configure a certificate profile to issue an end entity.
Step 7 - Create certificate profile and end entity profile to issue TLS Server PQC Hybrid signed certificate
The CAs are now built and the next step is to create a certificate profile and end entity profile to use to issue an end entity PQC hybrid certificate.
Create certificate profiles
To configure the certificate profiles, follow these steps:
Continuing from the EJBCA Administration, click CA Functions > Certificate Profiles.
Click Clone next to the ml-dsa-TlsServer-1y.
Name the new certificate profile hybrid-TlsServer-47d, and click Create from template.
To edit the profile values to fit your needs, find the newly created hybrid-TlsServer-47d displayed in the list and click Edit.
On the Edit page, update the following:
For Available Key Algorithms, select ECDSA.
For Available ECDSA curves, select P-256.
For Signature Algorithm, select Inherit from issuing CA.
Select Use for Alternative Signature.
For Available Alternative Key Algorithms, select ML-DSA-44.
For Alternative Signature Algorithm, select Inherit from issuing CA.
For Validity or end date of the certificate, enter 47d.
Click Save to store the certificate profile.
Click Clone next to the ml-dsa-Authentication-1y.
Name the new certificate profile hybrid-Smime-Enc-1y, and click Create from template.
To edit the profile values to fit your needs, find the newly created hybrid-Smime-Enc-1y, displayed in the list and click Edit.
On the Edit page, update the following:
For Available Key Algorithms, select ML-KEM-768.
For Signature Algorithm, select Inherit from issuing CA.
Under Key Usage:
Clear Digital Signature.
Select Key encipherment.
For Extended Key Usage, select Email Protection.
Click Save to store the certificate profile.
Create end entity profile
To configure the end entity profile, follow these steps:
Click RA Functions > End Entity Profiles.
Select the profile pqcTlsServer, enter hybridTlsServer for the Add End Entity Profile, and click Clone selected.
Select the profile pqcUserAuth, enter hybridSmimeEnc for the Add End Entity Profile, and click Clone selected.
Select the created hybridSmimeEnc, and click Edit End Entity Profile to update the following:
Enable Batch generation and select Default and Enforce default.
For OU, Organizational Unit, enter People.
For O, Organization, enter relevant organization.
Under Other Subject Attributes:
Click Select for Removal for MS UPN, and click Remove.
In the Subject Alternative Name list, select RFC 822 Name (e-mail address) and click Add to add another email, then select Use entity e-mail field and Required.
Scroll up and select Required for End Entity E-mail.
For Default Certificate Profile and Available Certificate Profiles, select hybrid-Smime-Enc-1y.
For Default CA and Available CAs, select Hybrid-Sub-G1.
For Available Tokens, select User Generated.
Click Save to store the end entity profile.
Select the created hybridTlsServer, and click Edit End Entity Profile to update the following:
For O, Organization, enter relevant organization.
For Default Certificate Profile and Available Certificate Profiles, select hybrid-TlsServer-47d.
For Default CA and Available CAs, select Hybrid-Sub-G1.
Click Save to store the end entity profile.
You have now created the certificate profiles and end entity profile to issue a PQC hybrid end entity certificate.
Step 8 - Create a CMP Alias
A CMP endpoint also needs to be configured. In EJBCA, this is done by creating a CMP Alias.
To create a CMP Alias, follow these steps:
In EJBCA, under System Configuration, click CMP Configuration.
Under List of CMP Aliases, click Add.
In the Name field, enter a name, in this example smime.
In CMP Authentication Module, clear RegTokenPwd.
In Certificate renewal with same keys, clear Allow.
For Default CA, select Hybrid-Sub-G1.
Click Save.
You have now created a CMP endpoint and can now go on to issue an end entity certificate.
Step 9 - Download EJBCA Client CLI
Download the EJBCA Enterprise Client CLI that will allow you to generate PQC Certificate Signing Requests (CSRs).
Navigate to the Test Drive instance start page.
Click EJBCA Client CLI to download the EJBCA CLI file.
In your terminal, in the downloads directory, unzip the EJBCA Client CLI ZIP file.
CODE$ unzip -q ejbca-cli.zip
The EJBCA Enterprise Client CLI is now downloaded to be used in the next step.
Step 10 - Issue PQC certificates
The following provides steps to enroll for a certificate using the Certificate Management Protocol (CMP).
Open a terminal window and change to the unzipped EJBCA Client CLI directory.
Create a new directory for the CMP enrollment:
CODE$ mkdir tls-hybrid && tls-hybridGenerate a CSR, according to the following example:
CODEejbca.sh gencsr --subjectdn "CN=hostname,O=TechDays 2025,C=SE" --subjectaltname "dnsName=hostname" --keyalg EC --keyspec P-256 --sigalg SHA256WithECDSA --altkeyalg ML-DSA-44 --altkeyspec ML-DSA-44 --altsigalg ML-DSA-44Copy the certificate request and go to the EJBCA RA Web.
In EJBCA RA Web, select Enroll>Make New Request.
For Certificate Type, select your hybridTlsServer.
For Key-pair generation, select Provided by user to allow you to upload a certificate signing request (CSR).
Paste the copied CSR and click Upload CSR to upload it to EJBCA.
In the Provide request info section, you can verify that EJBCA picked up the common name from the CSR and that the optional DNS Name fields added to the profile are shown.
For Username, copy and paste the CN, Common Name to register the user under the username identical to the common name.
Click Download PEM full chain to download the generated certificate together with the CA certificates in a PEM chain.
Review the certificate with OpenSSL:
CODE$ openssl x509 -noout -text -in <name>-cert.pem
You can now view the certificate in the output.
Step 11 - Create an End Entity
To create an end entity, follow these steps:
In EJBCA, under RA Functions, click Add End Entity.
In the End Entity Profile list, select hybridSmimeEnc.
In the Username field, add a name for the new end entity.
In the Password field, enter a one-time enrollment code. Repeat the code in Confirm Password.
In the E-mail address field, enter an email for the user.
In the Common Name field, enter a name, in this example the same as the Username.
Click Add to create the end entity.
You have now created an end entity and can continue to the next step to issue a certificate.
Step 12 - Create a CRMF Request and Issue a Certificate using CMP
When issuing an end entity certificate from a hybrid CA, the certificate will also be hybrid, meaning that it is signed by both CA keys. The certificate request will include indirect Proof-of-Possession, meaning that the certificate is sent back encrypted to the client. For more information, see RFC 4211.
In this example, the EJBCA cmpclient is used.
To create a Certificate Request Message Format (CRMF) and issue a certificate using the EJBCA cmpclient, follow these steps:
In your terminal, navigate to the cmpclient tool, in this example to
/Dev/git/ejbca/dist/cmpclient.Create a CRMF, using the CMP Alias URL, the End Entity Common Name and Password, the requested key pair for the key encapsulation mechanism to
ML-KEM-512, and theincludedpopoflag to include proof of possession:CODEejbca-cli/cmpclient/cmpclient.sh crmf --url http://<hostname>/ejbca/publicweb/cmp/smime --dn "CN=<endentitycn>" --authparam foo234 --reqnewkeyspec ML-KEM-512 --includepopo --vYou have now issued an end entity certificate and can view it using OpenSSL.
CODEopenssl x509 -in dest/<name>.pem -text
You can now view the certificate in the output.
Next steps
In this tutorial, you learned how to set up hybrid Root and Subordinate CAs, configure crypto tokens and certificate profiles, and issue PQC-enabled server certificates using the EJBCA Client CLI and CMP.
Here are some next steps we recommend:
For information on current post-quantum cryptography (PQC) capabilities and interoperability between Keyfactor solutions, see Interoperability and Future-Ready Cryptography.
To get an introduction to Post-Quantum Cryptography (PQC) keys and signatures, see Post-Quantum Cryptography Keys and Signatures.
Learn more about PKI and post-quantum readiness in Keyfactor's free PQC Lab, see Keyfactor PQC Lab.
If you are interested in EJBCA Enterprise, read more on Keyfactor EJBCA Enterprise.
If you are interested in EJBCA Community, check out EJBCA Community vs Enterprise or read more on ejbca.org.
If you are an EJBCA Enterprise customer and need support, visit the Keyfactor Support Portal.
Discuss with the EJBCA Community on GitHub Discussions.