Learn how to use Docker with Docker Compose to run the EJBCA Community container with a MariaDB database container. Once the container is up and running, follow the steps described to create the SuperAdmin credential and restrict access only to the SuperAdmin administrator.
Docker Compose is a tool for defining and running multi-container Docker applications. With Compose, you use a Compose file to define services and dependencies which allows you to create and start all services from your configuration using a single command.
In this tutorial, you will learn how to:
-
Start the EJBCA and MariaDB container with Docker Compose
-
View logs for the containers
-
Access EJBCA
-
Issue a certificate for the Super Admin
Prerequisites
Before you begin, you need to have Docker Engine and Docker Compose on your machine. You can either:
-
Install Docker Engine and Docker Compose as standalone binaries
-
Install Docker Desktop which includes both Docker Engine and Docker Compose
Step 1 - Create directory
Compose uses a project name to isolate environments from each other. The default project name is the basename of the project directory and you can set a custom project name by using the -p command line option. The default project directory is the base directory of the Compose file.
-
Create a directory for running the container and storing the database:
$ mkdir -p containers/datadbdir
$ cd containers
Step 2 - Create Docker Compose file
Next, define services by creating a Docker Compose file in your directory. The Docker Compose file is a YAML file that defines service dependencies and you can use the text editor of your choice to create the file.
-
Create a docker-compose.yml file:
$ vim docker-compose.yml
-
In the editor, add the following contents to the docker-compose.yml and then save and close the file. This is instructing the Docker to pull the latest database container MariaDB and the latest EJBCA Community container (keyfactor/ejbca-ce:latest).
networks:
  access-bridge:
    driver: bridge
  application-bridge:
    driver: bridge
services:
  ejbca-database:
    container_name: ejbca-database
    image: "library/mariadb:latest"
    networks:
      - application-bridge
    environment:
      - MYSQL_ROOT_PASSWORD=foo123
      - MYSQL_DATABASE=ejbca
      - MYSQL_USER=ejbca
      - MYSQL_PASSWORD=ejbca
    volumes:
      - ./datadbdir:/var/lib/mysql:rw
  ejbca-node1:
    hostname: ejbca-node1
    container_name: ejbca
    image: keyfactor/ejbca-ce:latest
    depends_on:
      - ejbca-database
    networks:
      - access-bridge
      - application-bridge
    environment:
      - DATABASE_JDBC_URL=jdbc:mariadb://ejbca-database:3306/ejbca?characterEncoding=UTF-8
      - LOG_LEVEL_APP=INFO
      - LOG_LEVEL_SERVER=INFO
      - TLS_SETUP_ENABLED=simple
    ports:
      - "80:8080"
      - "443:8443"
Note that when starting the container with
TLS_SETUP_ENABLED="simple",no client TLS certificate will be used initially, and anyone with HTTPS access will be able to manage the instance.
Step 3 - Start EJBCA Community container
Start the containers using Compose which will pull and build the images and start the services you defined in the Compose file.
The compose up command deploys the services and creates fresh new containers from the docker image along with setting up networks and every configuration specified in the Compose file. Specify -d to run it in detached mode so that it runs in the background, giving you control of the terminal.
-
Build the containers with Compose and run your services in the background by adding the
-dflag (detached mode):$ docker compose up -dThis will pull the containers ejbca-node1 and ejbca-database. Wait for the containers to be pulled and started.
-
To view and follow the log output of the containers starting up:
$ docker compose logs -f
-
The end of the output provides the URL for accessing EJBCA:
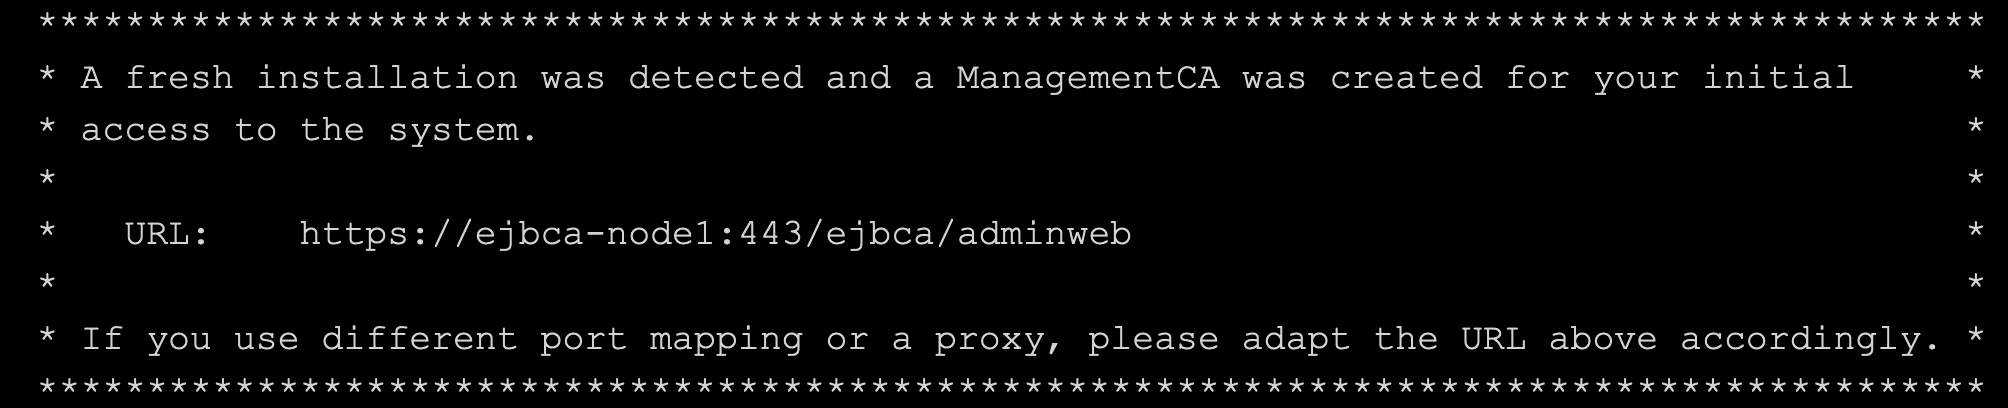
Copy the URL to use it for accessing EJBCA in the next step.
Step 4 - Access EJBCA CA UI
To access EJBCA, do the following:
-
Copy the URL from the console output and paste it into your browser.
-
To accept the security risk, click Advanced and then Accept the risk and continue.
-
EJBCA CA UI opens displaying the administration page.
Step 5 - Issue SuperAdmin certificate
To issue a new certificate for the SuperAdmin using the EJBCA RA UI:
-
In EJBCA, click RA Web to access the EJBCA RA UI.
-
Under Request new certificate, select Make New Request.
-
Update the following information:
-
For Select Request Template Certificate subtype, select ENDUSER (default).
-
For Key-pair generation, select By the CA.
-
For Key algorithm, select RSA 2048 bits.
-
For the Required Subject DN Attributes Common Name, specify SuperAdmin.
-
Under Other Data, clear Key Recoverable.
-
For Provide User Credentials, specify Username "superadmin" and password "foo123" to save this in the EJBCA database under the user name superadmin.
-
-
Last, click Download the PKCS#12 to download the certificate.
Your certificate is saved as a SuperAdmin.p12 file.
Step 6 - Import certificate into browser
With the SuperAdmin certificate downloaded, import the certificate into your web browser.
The procedure for importing a certificate may vary. This example describes how to import a certificate to Mozilla Firefox.
To import the certificate in Mozilla Firefox:
-
On the Firefox menu, select Preferences.
-
Click Privacy & Security.
-
In the Security section, click View Certificates.
-
On the Your Certificates tab, select Import.
-
Browse to the downloaded SuperAdmin.p12 and select the file.
-
For the password enter "foo123" that you specified in the previous step Add End Entity, and click Sign in.
-
On the Mozilla Firefox tab Your Certificates, verify that the certificate was imported, and then click OK.
Step 7 - Access EJBCA as Administrator
To create an administrator account and lock down access to EJBCA to only the SuperAdmin adminitrator, perform the following steps.
Create Administrator Account
To add the administrator user to the Super Administrator Role.
-
In the EJBCA menu, click Roles and Access Rules.
-
In the list of available roles, next to Public Access Role, click Delete and verify the deletion of the role.
The Roles Management page now lists the Super Administrator Role. -
Next to the Super Administrator Role, click Members.
-
Specify the following for the admin role:
-
Match with: Select X509:CN, Common name.
-
CA: Select Management CA for the CA to match on.
-
Match Value: The CN value from the created certificate: "SuperAdmin". Note that this is a case-sensitive matching.
-
-
Click Add to add the user to the Super Administrator Role.
Access EJBCA as Administrator
-
From your project directory, restart the containers:
$ docker compose restart -d
-
To view and follow the log output of the containers starting up:
$ docker compose logs -f
-
Once the containers are restarted, point your browser to https://ejbca-node1/ejbca/adminweb.
-
When prompted for the SuperAdmin certificate, ensure the correct certificate is selected, and click Ok.
Restrict Access to EJBCA
To lock down access to EJBCA to only the Super Admininistrator, do the following:
-
In the EJBCA menu, click Roles and Access Rules.
-
In the list of available roles, next to Public Access Role, click Delete and verify the deletion of the role.
The Roles Management page now lists the Super Administrator Role. -
Next to the Super Administrator Role, click Members.
-
In the list of available members, for the PublicAccessAuthenticationToken, click Delete and verify the deletion of the role member.
Optional - Stop and remove containers
You can optionally stop all services associated with the Compose file configuration using the compose down command that also removes any containers and internal networks associated with the services.
-
To bring down and remove the containers:
$ docker compose down
Next steps
In this tutorial, you learned how to configure and start the EJBCA Community container and MariaDB container with Docker Compose, create the SuperAdmin credential and restrict access only to the SuperAdmin administrator.
Here are some next steps we recommend:
-
To learn how to set up your first Root CA in EJBCA, you can follow the tutorial Create your first CA.
-
If you are interested in EJBCA Enterprise, read more on Keyfactor EJBCA Enterprise.
-
If you are interested in EJBCA Community, check out EJBCA Community vs Enterprise or read more on ejbca.org.
-
If you are an EJBCA Enterprise customer and need support, visit the Keyfactor Support Portal.
-
Discuss with the EJBCA Community on GitHub Discussions.