Configure NTP Servers
The Terminal UI provides the possibility to configure NTP (Network Time Protocol) Servers according to your needs. NTP is used to synchronize the time on a computer with an external time source.
When using NTP, time synchronization is instantaneous. In case of larger time intervals, a restart is advisable.
-
Open the Terminal UI. The Status overview will be displayed.
-
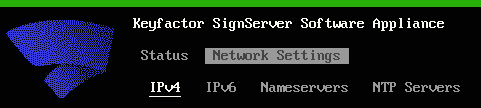
Use the arrow or TAB keys and ENTER to navigate to Network Settings.
-
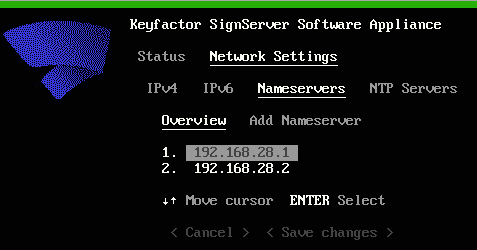
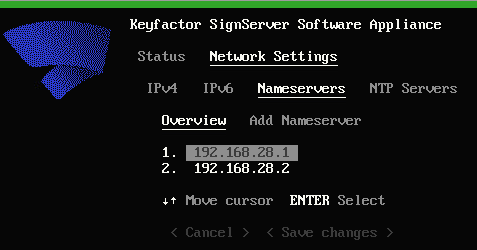
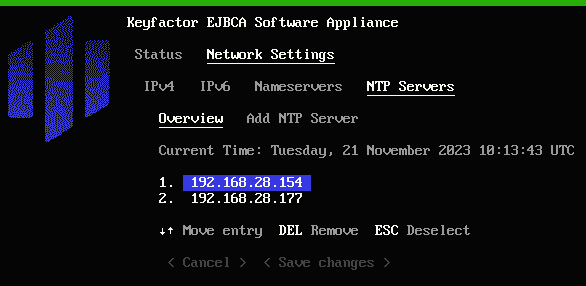
Navigate to NTP Servers.
-
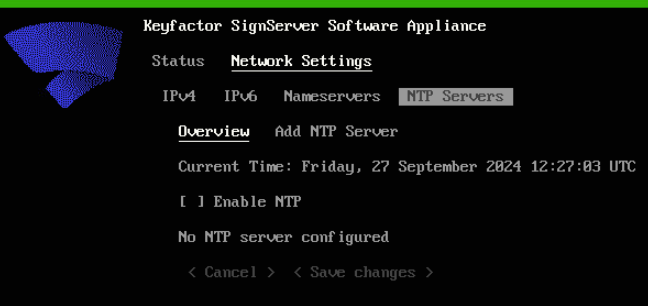
In the Overview
-
first line the Current Time is displayed
-
next line: Enable NTP can be check marked
-
if the Enable NTP is check marked the Save changes is highlighted
-
-
To confirm your settings chose <Save changes> in the last row.
-
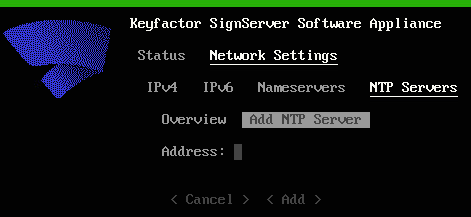
Click Add NTP Servers
-
Enter the Address of the server(s) that you want to synchronize with your computer‘s time. The Address can be either an IP address or a hostname.
-
Navigate to <Add> to confirm your entry.
For ESXi
As soon as an NTP server is added to the configuration, the Software Appliance attempts to disable "Host-to-Guest time synchronization". It automatically turns back on when the last NTP server is removed.
For Hyper-V
To use the NTP feature of the Software Appliance under Hyper-V, we recommend disabling the time synchronization service in the "Integration Services" section of the VM settings in Hyper-V.
Now the Software Appliance is reconfigured and synchronized with the configured NTP servers.
Remove NTP Servers
-
Open the Terminal UI. The Status overview is displayed.
-
Use the arrow or TAB keys and ENTER to navigate to Network Settings.

-
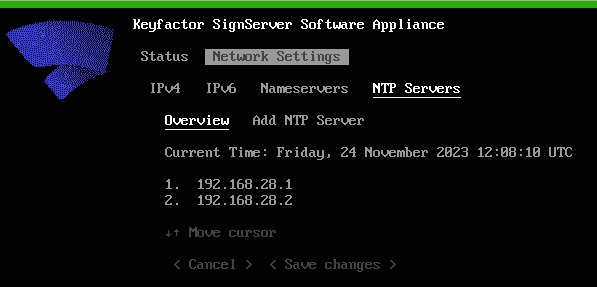
Navigate to NTP Servers and than to Overview.
All configured NTP servers are listed here.
-
Navigate to the server you want to select.
-
Press ENTER on your keyboard to confirm your selection. A new line will be added for the next step.
-
DEL Remove the selected NTP server or ESC Deselect it by pressing the corresponding key on your keyboard.
Press ENTER on your keyboard to confirm your selection. A new line will be added for the next step.
-
DEL Remove the selected NTP server or ESC Deselect it by pressing the corresponding key on your keyboard.
-
Click DEL on your keyboard to Remove the entry and navigate to <Save changes> to confirm your changes.