Instructions for deploying the Artifactory Sensor within the Keyfactor AgileSec Platform to scan for cryptographic assets and deliver findings to the AgileSec Platform for processing and analysis.
Overview
The Artifactory Sensor integrates JFrog Artifactory with Keyfactor's AgileSec Platform to discover, inventory, and analyze cryptographic assets across Artifactory repositories.
What Gets Scanned
The Artifactory Sensor downloads local, remote*, virtual, or federated repositories from Artifactory to discover the following cryptographic asset types:
-
X.509 Certificates: SSL/TLS certificates, code signing certificates, client authentication certificates
-
Keys: RSA, DSA, EC asymmetric public keys in PEM, DER, and PKCS8 formats as well as unencrypted private keys
-
Java Keystores: JKS, JCEKS, PKCS12 keystores
-
Tokens: JWT and JWE tokens
-
Cryptographic Libraries: OpenSSL, BouncyCastle, and other crypto implementations
-
Code Artifacts: Embedded certificates in compiled code (JAR, WAR, EAR files)
*Note: Remote repositories may not be scanned directly. To scan remote repositories, create a virtual repository which contains the remote repository.
Prerequisites
Ensure you meet the following requirements to enable scanning.
Network Access
Ensure HTTPS network connectivity from AgileSec platform or remote execution machine to Artifactory API.
Supported Authentication Methods
The Artifactory Sensor supports API token authentication.
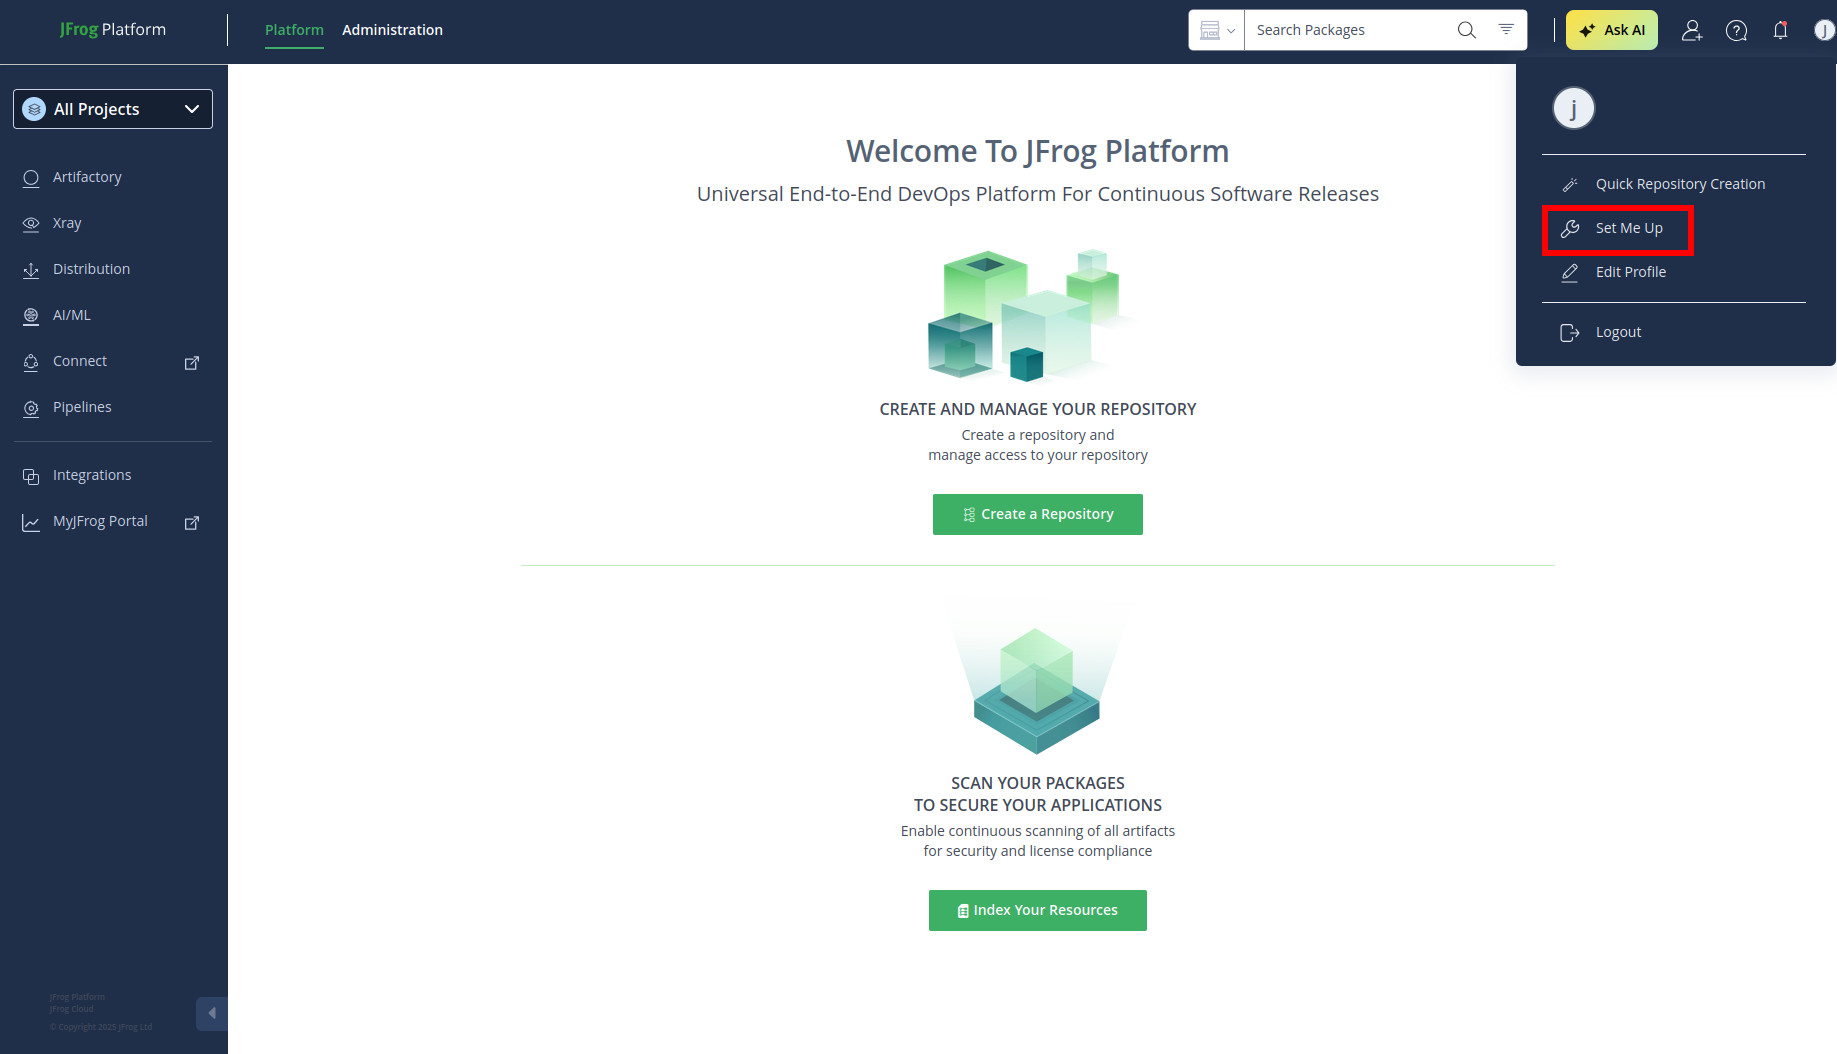
In the Artifactory UI, click on your profile in the top right corner of the screen and select Set Me Up. Select the Generic client and generate an access token for any repo.
Save the token securely for Sensor configuration (artifactory_token).
Remote Execution Requirements
If running the Sensor remotely using CLI, the remote execution machine must meet these requirements:
|
Component |
Requirement |
|---|---|
|
Operating System |
|
|
RAM |
3 GB minimum, 4 GB recommended for large repositories. |
|
Disk Space |
Minimum 2x size of your repository. |
|
Permissions |
Read/write access to remote sensor working directory (remote sensor install location) |
Running the Sensor
AgileSec Artifactory scans can be executed using the following methods:
-
Platform Scan Execution: Configure and execute scans directly through the Keyfactor AgileSec web UI with on-demand or scheduled execution options.
-
API Scan Execution: Programmatically trigger scans through REST API calls, enabling integration with CI/CD pipelines and automation workflows.
-
Remote Scan Execution: Deploy and run the sensor via CLI on customer-managed infrastructure for scenarios such as:
-
Scanning air-gapped or internal instances the platform cannot directly reach
-
Customers wanting to manage their own scheduling and execution environment.
-
Refer to Scan Execution Flows for additional scan execution information.
Configuration Fields
The following parameters are used to configure AgileSec Artifactory scans.
|
Field Name |
UI Display Name |
Type |
Required |
Description |
|---|---|---|---|---|
|
|
URL |
String |
✅ Yes |
Base URL of the Artifactory instance (e.g. |
|
|
Artifactory Token |
String |
✅ Yes |
Authentication access token generated in JFrog Artifactory. |
|
|
Include Patterns |
List of Strings |
❌ No |
Filter which Artifactory repositories to scan. Glob patterns are accepted for multiple repository selection. Uses doublestar syntax. |
|
|
Exclude Patterns |
List of Strings |
❌ No |
Artifactory repositories to exclude from scanning. Takes precedence over Glob patterns are accepted for multiple repository selection. Uses doublestar syntax. |
|
|
Repo Type |
String |
❌ No |
Restrict scanning to a specific Artifactory repository type (e.g. Remote repositories cannot be scanned directly; use a virtual repository containing the remote repository to scan. |
|
|
Package Type |
String |
❌ No |
Restrict scanning to a specific Artifactory package type (e.g. |
|
|
AQL Filter |
AQL Filter Object |
❌ No |
Optional Artifactory query language filter.
Filters what files are scanned within each repo. |
|
|
Incremental Scan |
Boolean |
✅ Yes Note: for Platform Scan Executions via UI, incremental scan defaults to Yes. |
Enable to scan only updates since last run. See Incremental Scanning. |
|
|
Auto-Resolution Interval |
Number |
✅ Yes
|
Only used when |
Advanced Configuration
Advanced users may configure the following options to log levels, adjust concurrent processing, batch sizes, and TLS verification. These are not available in the UI for Platform Scans.
|
Field Name |
Type |
Required |
Description |
|---|---|---|---|
|
|
String |
❌ No |
Adjust log level to Default log level is |
|
|
Boolean |
❌ No |
If |
|
|
Number |
❌ No |
Number of download threads. Defaults to |
|
|
Number |
❌ No |
Limits cumulative disk usage per scan batch. If non-positive or unset, defaults to 50 GB. Content is scanned in batches not exceeding this limit and are deleted before proceeding. Does not account for archive decompression size; large single files exceeding the limit are skipped. |
|
|
Boolean |
❌ No |
If set to Defaults to |
Platform Scan Execution
Running scans through the user interface is the simplest and fastest way to get started. The platform enables running on-demand or scheduled scans in a dedicated environment.
Platform Scan Configuration
-
Open your browser and navigate to the Keyfactor AgileSec Platform Web URL
-
Log in with your credentials
-
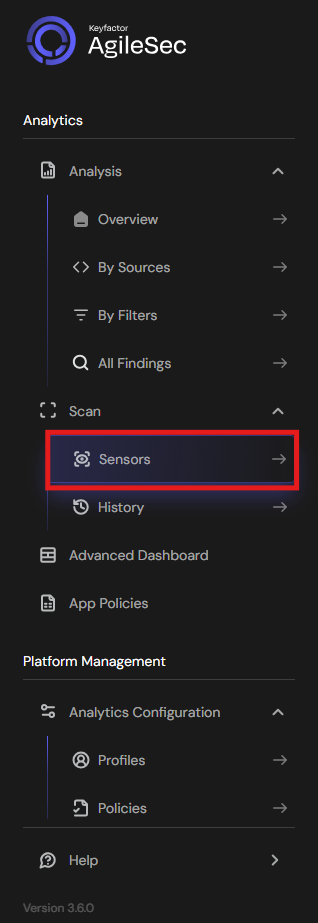
Click on "Sensors" in the left navigation menu under Scan
-
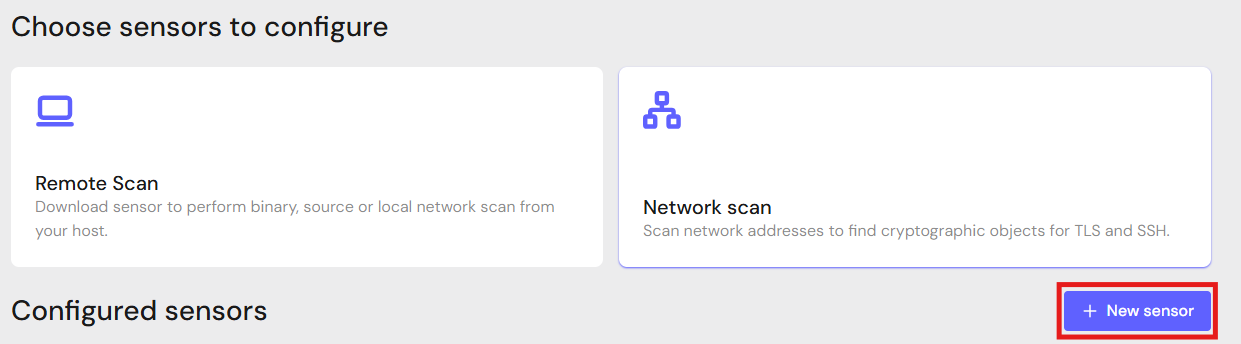
Click "+ New Sensor".
-
Click on the correct card to open the configuration interface.
Configure Parameters and Start Scan
-
Fill in the required configuration parameters.
-
Click Save.
-
Click Action then Scan to begin a scan.
Note: Click Edit to reconfigure parameters.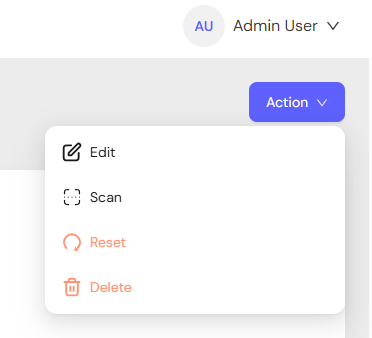
API Scan Execution
Scans may be programmatically triggered through REST API calls, enabling seamless integration with CI/CD pipelines, automation workflows, and custom applications. API execution provides flexibility for developers to incorporate cryptographic scanning into their existing development and deployment processes.
Note: For complete API reference, see API.
Generate AgileSec API Access Token
-
Open your browser and navigate to AgileSec Platform UI
-
Log in with your Keyfactor credentials
-
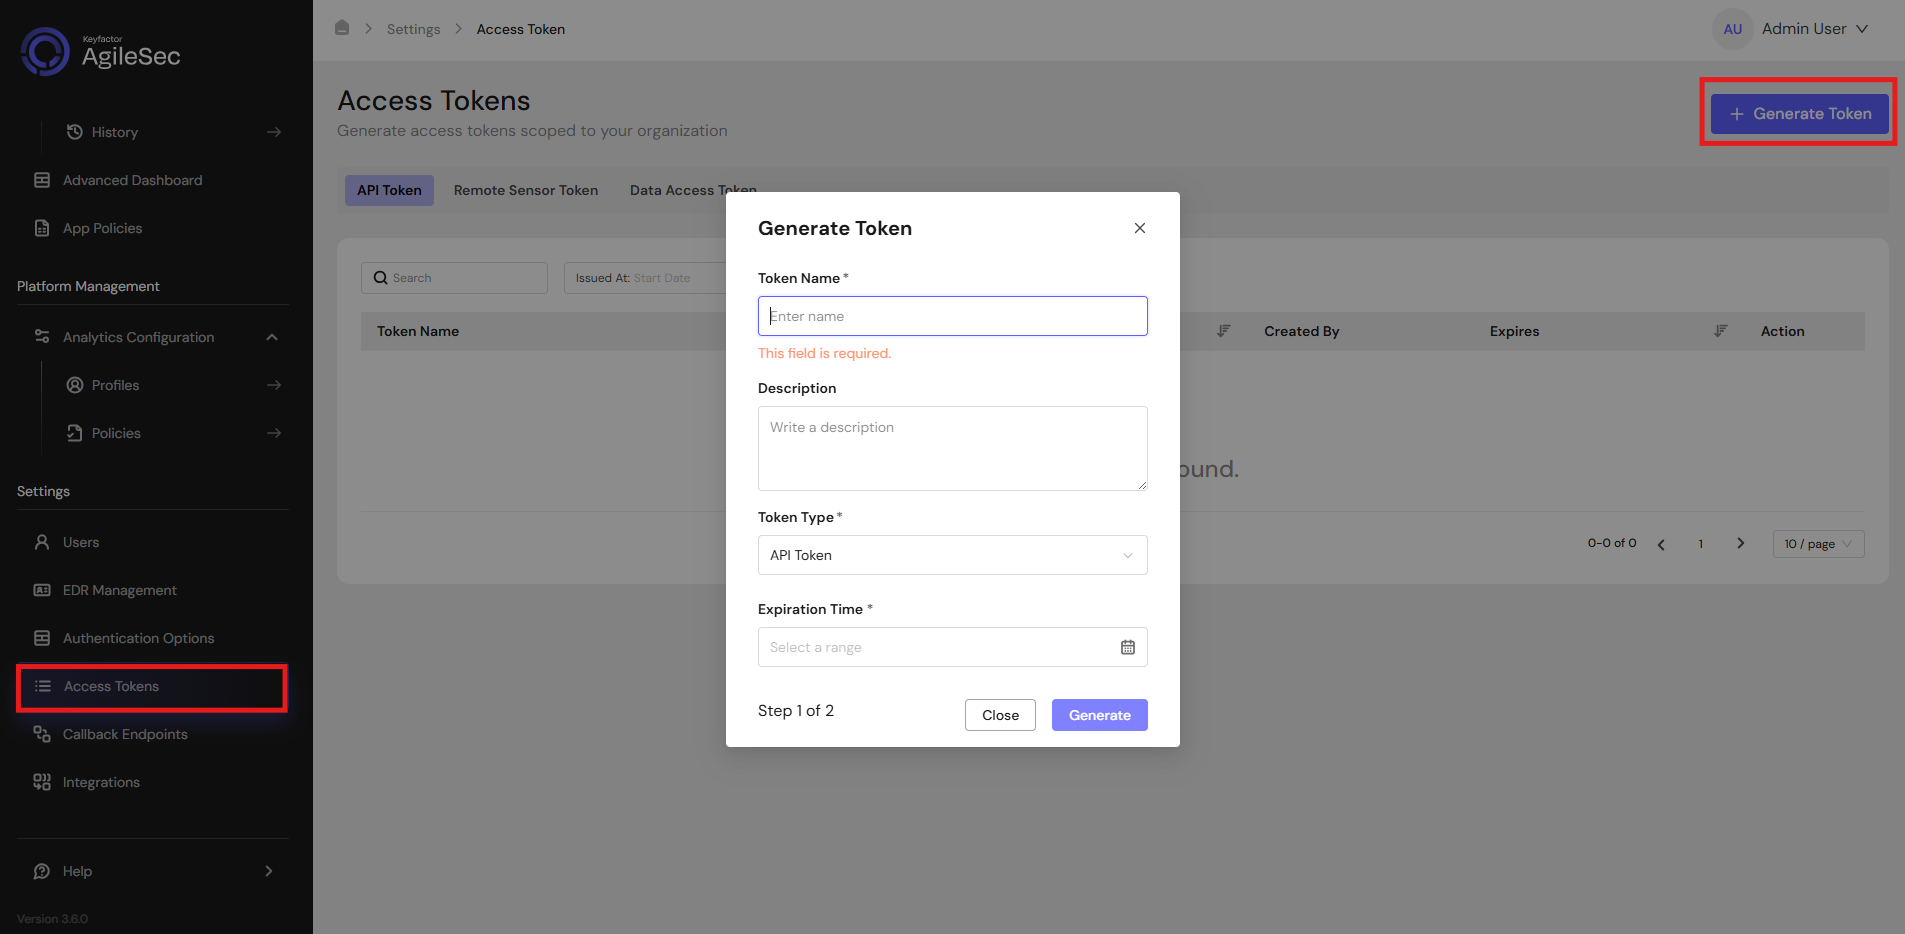
Click "Access Tokens" in the main navigation menu
-
Click "Generate Token" button
-
Set Token Type to API Token and provide the required details
-
Click "Generate" and copy the generated token
AgileSec API Endpoint
POST https://<platform-url>/v3/scan/create/
Request Format
Headers
Content-Type: application/json
isg-api-token: <your-api-token>
Request Body
  {
    "sensorName": "<sensor name>",
    "sensorType": "Artifactory Sensor",
    "sensorConfig": {
        "artifactory_url": "",
        "artifactory_token": "",
        "include_repos": [],
        "exclude_repos": [],
        "aql_extra_parameters": ""
    },
    "callbackId": "<callback id>",
    "labels": [
        {
            "<label name>": "<label value>"
        }
    ],
    "priority": "<priority>",
    "incrementalScan": true,
    "autoResolutionInterval": 5
  }
Remote Scan Execution
Scans may be run on remote host machines with the AgileSec Remote Sensor Package.
Download Remote Sensor Package
Generate Platform Token
-
In the Download Remote UI, click "Generate Token"
-
Copy the generated token
-
Store securely in an environment variable such as
SENSOR_TOKEN:export SENSOR_TOKEN="your-generated-token"
Create Configuration File
Create a YAML configuration file (e.g., artifactory-config.yml) with your scan settings. An example configuration can be found at config/sample-configs/artifactory.yml.
Step 4: Run the Sensor
Execute the Sensor with your configuration file:
-
Linux/macOS
Bash# Set environment variables export SENSOR_TOKEN="your-sensor-token" # Run Sensor ./unified_sensor_linux -c ./artifactory-config.yml -
Windows (PowerShell)
PowerShell# Set environment variables $env:SENSOR_TOKEN = "your-sensor-token" # Run Sensor .\\unified_sensor_windows.exe -c .\\artifactory-config.yml
Remote Scan Execution Configuration Examples
-
Scan single repo
internal-teamYAMLscan_config: plugins: - artifactory_import - trigger_discover - export config: artifactory_import: name: artifactory plugin_config: artifactory_token: "${env:ARTIFACTORY_TOKEN}" include_repos: ["internal-team"] exclude_repos: [] artifactory_url : "<https://mycompany.jfrog.io>"
Known Limitations
Remote Repositories
Downloading from REMOTE repo (cache) is not supported by Artifactory. Instead,
scan a virtual repo which contains the desired remote repo.
Troubleshooting
-
Forbidden Error(403)-
Cause: Targets are inaccessible via provided API token.
-
Fix:
-
Verify Read permissions on target repositories.
-
Check permission target configuration.
-
List accessible repos:
Bashcurl -H "Authorization: Bearer ${ARTIFACTORY_TOKEN}" \ https://company.jfrog.io/artifactory/api/repositories\ | jq '.[].key'
-
-
-
Empty Scan Target-
Cause: Target does not exist or is empty.
-
Fix: Make sure to specify an
include_patternmatching one of the repositories in the Artifactory instance.
-
-
Slow Scanning
-
Cause: This Sensor is specialized for very large workloads, where the total size of the
repo exceeds the total disk space on the runner. The Sensor handles this by batching the
content into smaller chunks which are scanned individually. -
Fix: Configure
threadsandbatch_size_bytesto adjust large file processing behavior.
-
Getting Support
Collect diagnostic information:
-
Sensor version
-
Configuration file (redact tokens)
-
Log output
-
Artifactory version
Contact Support
-
Portal: https://support.keyfactor.com