This Keyfactor Command Sensor User Guide provides instructions for configuring, executing, and integrating the sensor to collect X.509 certificate metadata and send findings to the AgileSec platform for centralized analysis and reporting.
Refer to Sensors Architecture and Overview for additional details on sensor architecture, data flows, incremental scanning, and auto-resolution.
Overview
The Keyfactor Command Sensor collects X.509 certificate metadata and other relevant cryptographic attributes. The sensor then sends these findings to Keyfactor’s AgileSec platform.
Key Features
-
Unified Sensor Integration: Runs as a Unified Sensor plugin and exports findings to Keyfactor’s AgileSec platform for centralized analysis and reporting.
-
Read-Only Operation: Performs all scans and data collection without making any changes to the target systems or certificates.
-
Incremental Scanning: Efficiently scans for only new or modified certificates in subsequent runs.
-
Intelligent Filtering: Supports Keyfactor query syntax (e.g., IssuedDate -gt '2025-01-01') to define a base set of certificates for collection.
Supported Authentication Methods
Basic Auth
-
Available for both remote and platform scan execution
-
Uses username and password to access Command API
-
In the configuration file, set only the username and password
Kerberos
-
Only available for remote scan execution
-
Authenticate using AD/Windows Integrated Auth
-
Either path/to/keytab or password for UPN (User Principle Name) must be set.
-
State the SPN (Service Principle Name) and Realm
-
SPN (Service Principle Name) will default to HTTP/ if left empty
-
path/to/krb5.conf, will default to /etc/krb5.conf
OAuth2
-
Available for both remote and platform scan execution
-
State the OAuth Client ID, Client Secret, and Scope
Running the Sensor
The Keyfactor Command Sensor can be executed using the following methods:
-
Platform Scan Execution: Configure and execute scans directly though the Keyfactor AgileSec web UI with on-demand or scheduled execution options.
-
Using API: Programmatically trigger scans through REST API calls, enabling integration with CI/CD pipelines and automation workflows.
-
Remote Scan Execution: Deploy and run the sensor via CLI on customer-managed infrastructure for scenarios such as:
-
Scanning air-gapped or internal instances the platform cannot directly reach
-
Customers wanting to manage their own scheduling and execution environment.
-
Refer to Sensors Architecture and Overview: Running the Sensor for additional execution and flow details.
Platform Scan Execution
Running the sensor through the user interface is the simplest and fastest way to get started. It enables on-demand or scheduled scans that run in a dedicated environment.
-
Runs on Keyfactor AgileSec Platform
-
For on-premise deployments, scans run on scan nodes, or backend nodes.
-
For Kubernetes environments:
-
Leverages automatic resource provisioning and auto-scaling
-
Creates ephemeral sandbox pods for performing each scan.
-
Platform Scan Configuration
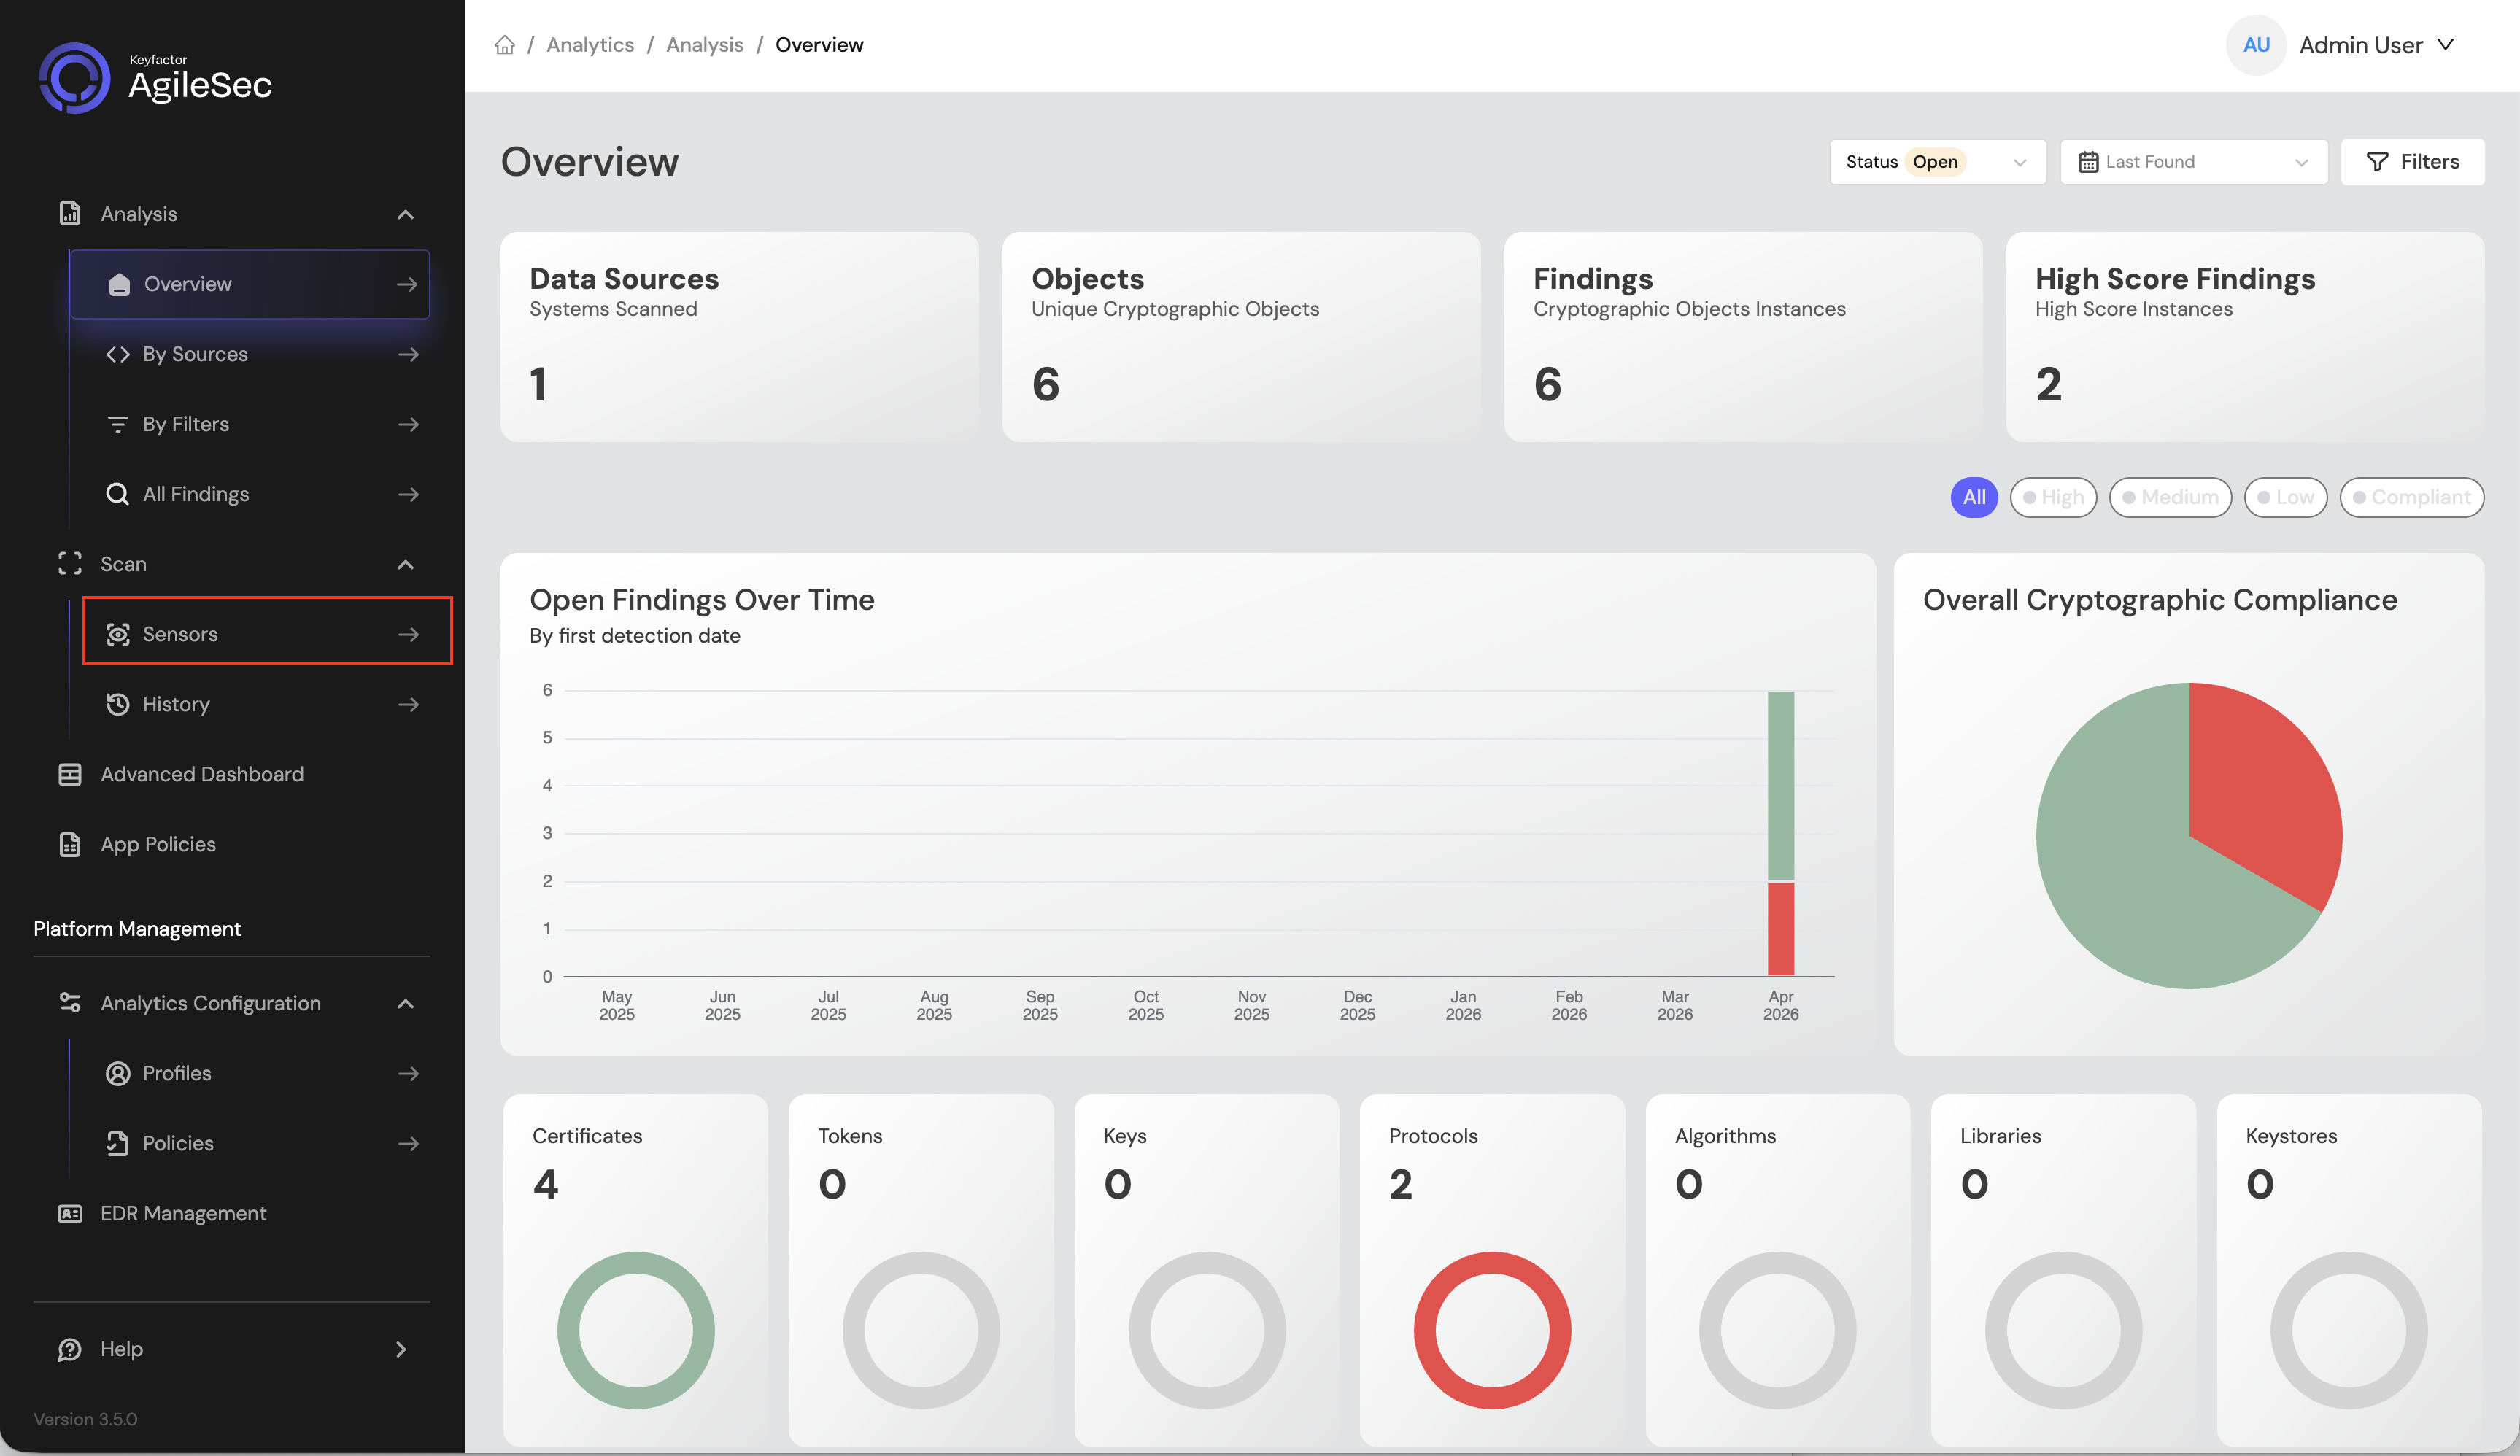
Step 1: Navigate to Sensors Setup Page
1.1 Open your browser and navigate to the Keyfactor AgileSec Platform Web URL
1.2 Log in with your credentials
1.3 Click on "Sensors" in the left navigation menu under Scan
Step 2: Select Keyfactor Command Sensor
2.1 Click the "Choose a Sensor" button

2.2 Browse or search for "Keyfactor"
2.3 Click on the Keyfactor Command sensor card
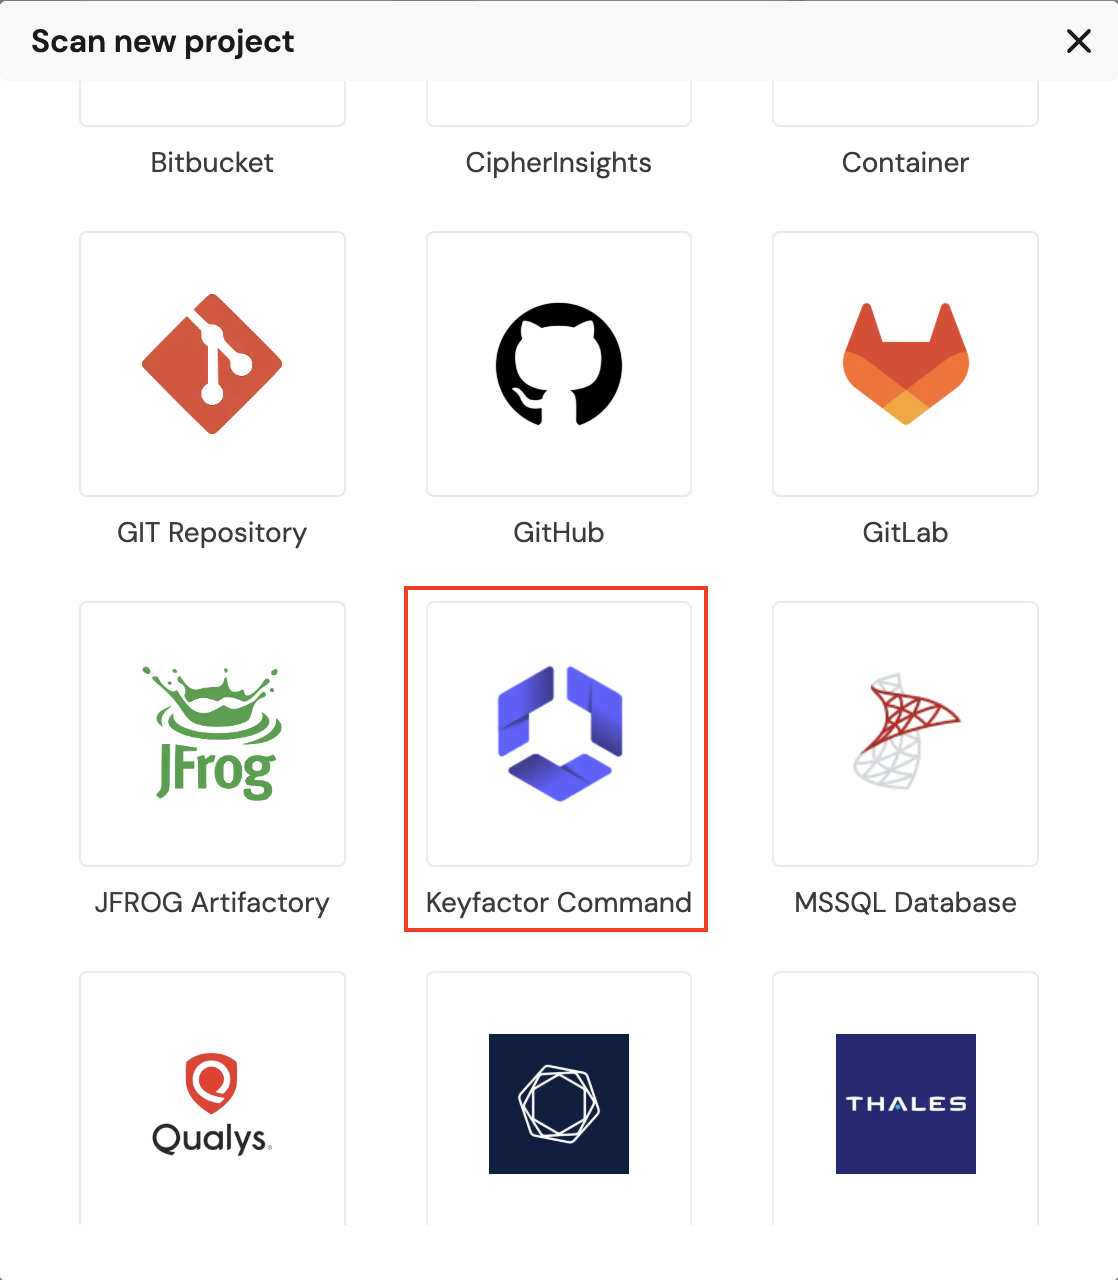
This will open the sensor configuration interface.
Step 3: Configure Sensor Parameters
3.1 Fill in the required configuration parameters:
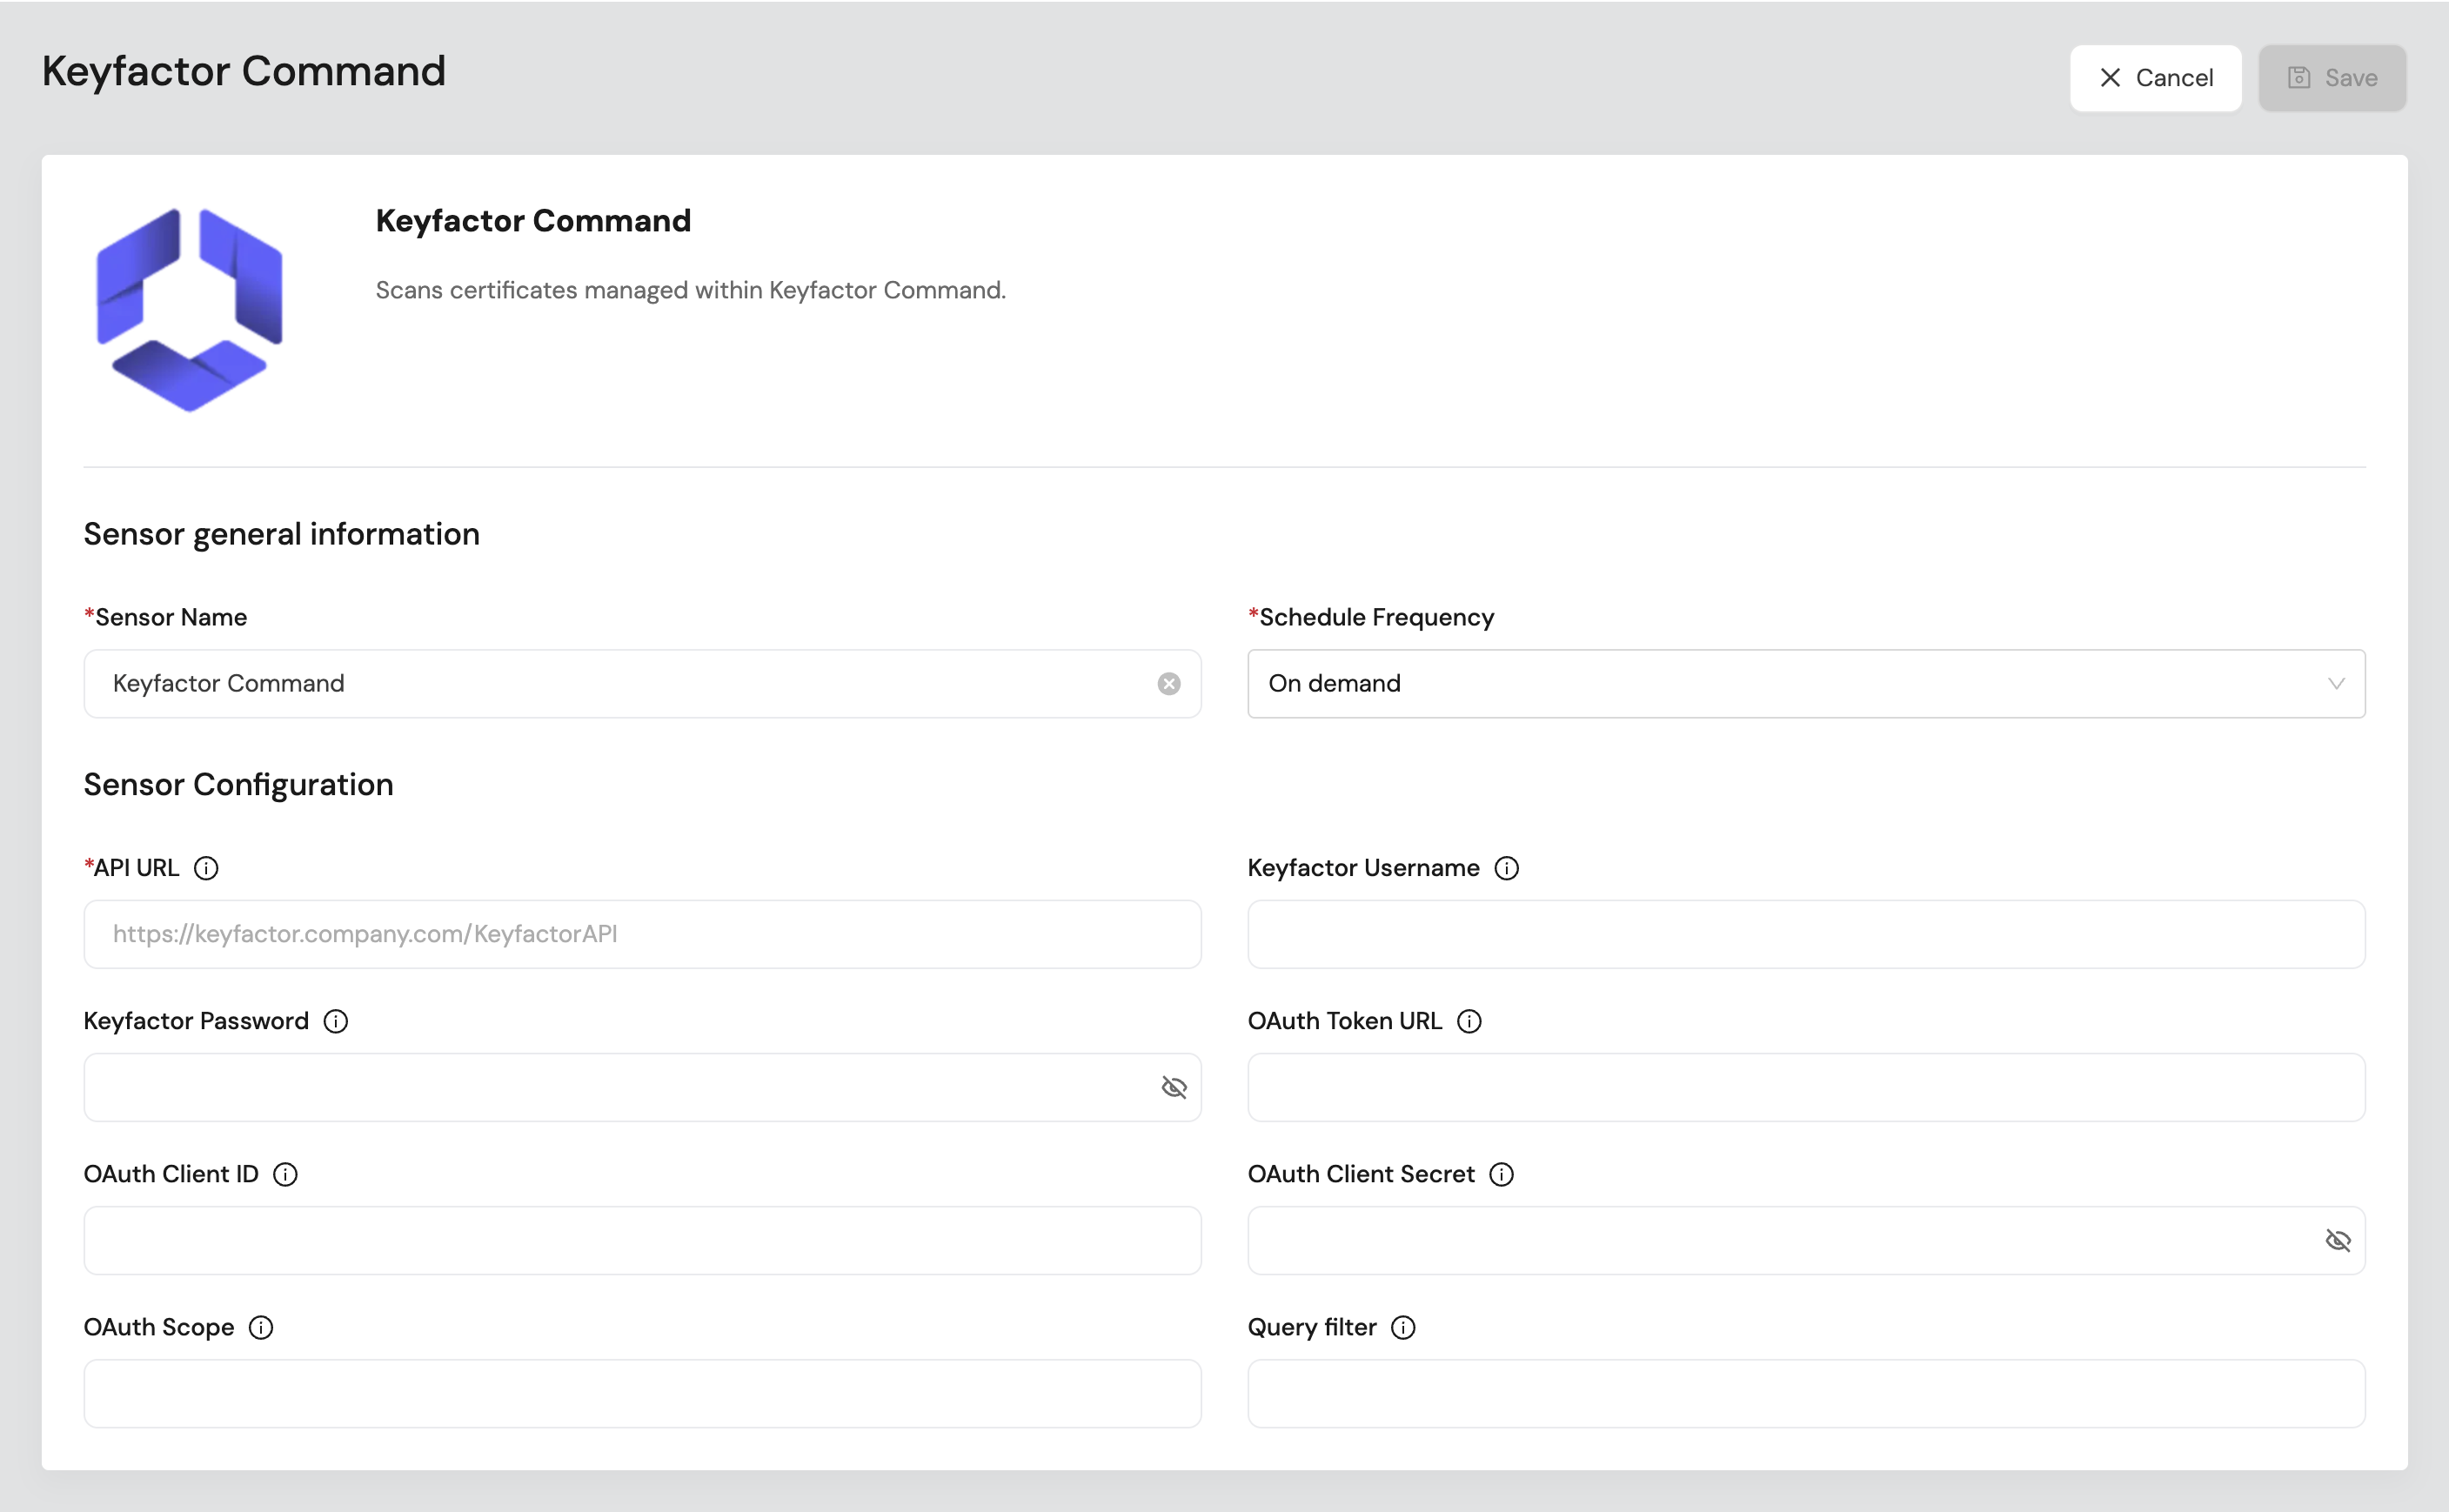
Platform Scan Configuration Fields
|
Field Name |
Display Name |
Type |
Required |
Description |
|---|---|---|---|---|
|
|
API URL |
Single-line text |
✅ Yes |
The API URL of the Keyfactor Command instance to connect to (e.g., |
|
|
Basic Auth Username |
Single-line text |
❌ No |
Required for basic auth |
|
|
Basic Auth Password |
Password field |
❌ No |
Required for basic auth |
|
|
OAuth2 token url |
Single-line text |
❌ No |
The OAuth token endpoint URL used to obtain an access token (e.g. Required for OAuth2. |
|
|
OAuth2 client id |
Single-line text |
❌ No |
The client ID issued by the authorization server for OAuth authentication. Required for OAuth2 |
|
|
OAuth2 client secret |
Password field |
❌ No |
The client secret used to securely authenticate the application with the authorization server. Required for OAuth2 |
|
|
OAuth2 token scope |
Single-line text |
❌ No |
The OAuth scopes that define the level of access requested. For example, Required for OAuth2. |
|
|
Query filter |
Single-line text |
❌ No |
Optional filter used to limit which certificates are scanned (e.g., by name, status, expiration, or metadata attributes). |
Scan Execution Using API
Scans may be programmatically triggered through REST API calls, enabling seamless integration with CI/CD pipelines, automation workflows, and custom applications. API execution provides flexibility for developers to incorporate cryptographic scanning into their existing development and deployment processes.
Note: For complete API reference, see the API document.
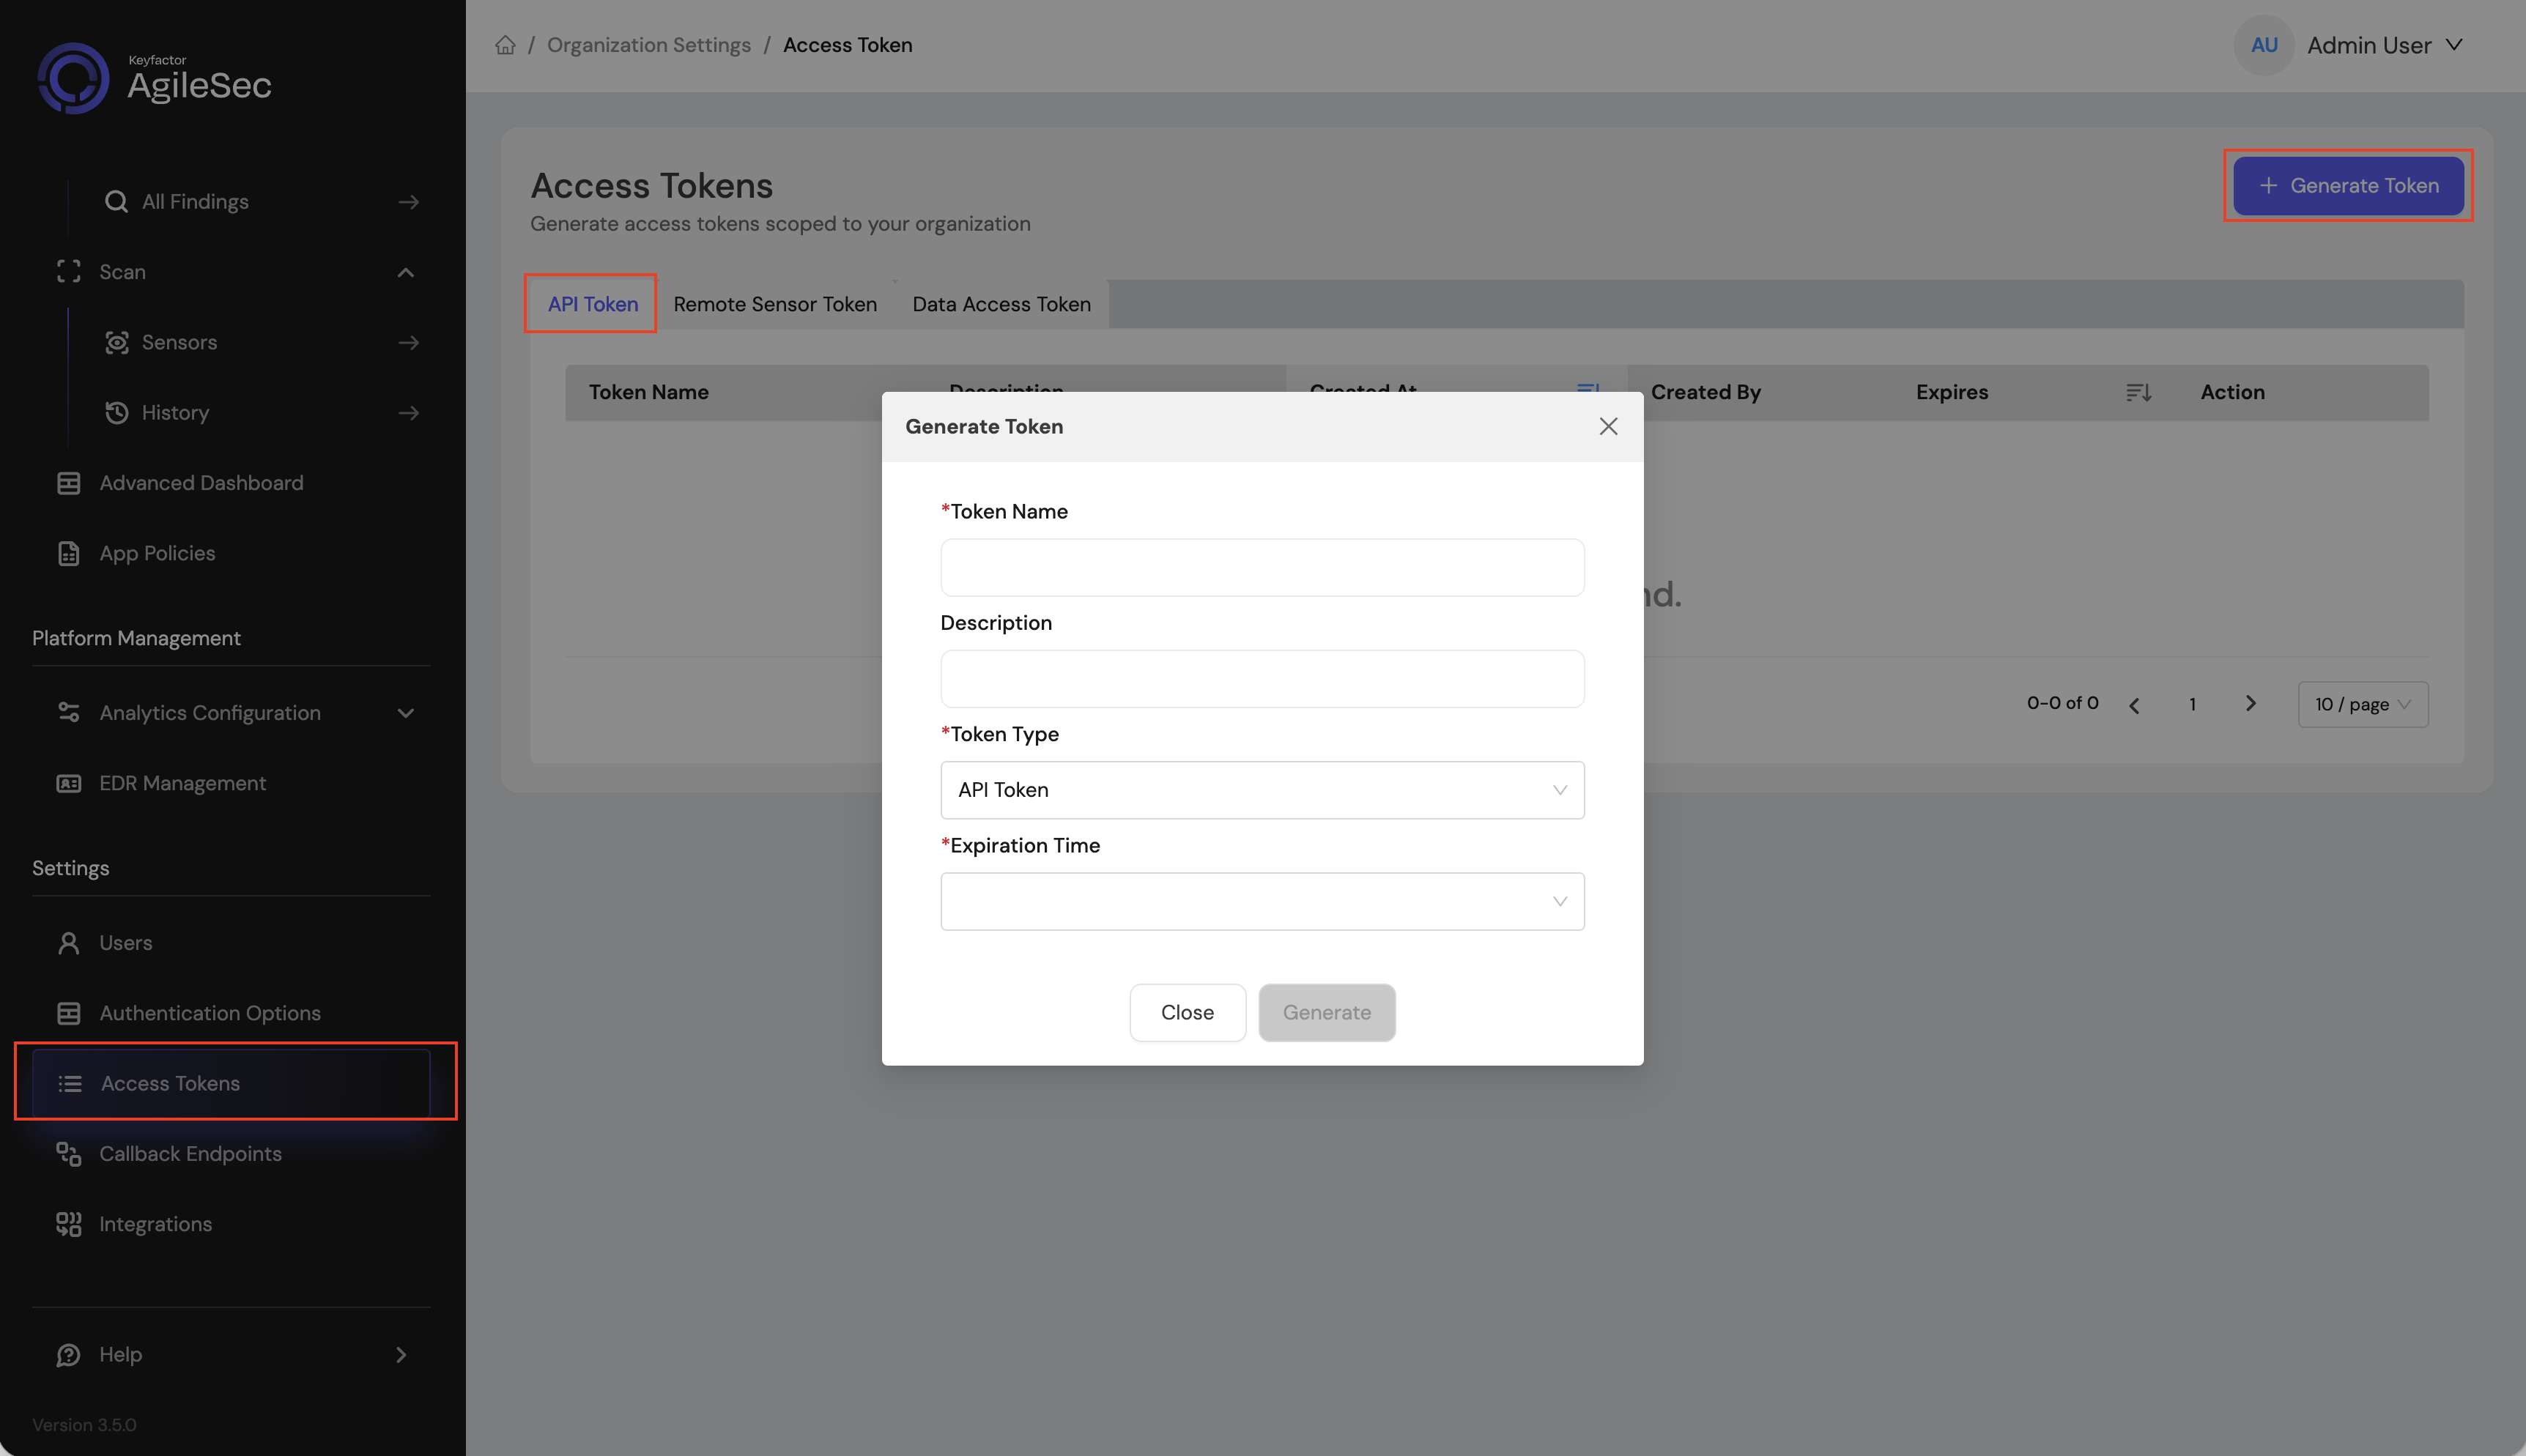
API Access Token
-
Open your browser and navigate to the AgileSec Platform UI.
-
Log in with your Keyfactor credentials.
-
Click "Access Tokens" in the main navigation menu.
-
Click "Generate Token".
-
Set Token Type to API Token and provide the required details.
-
Click "Generate" and copy the generated token.
API Endpoint
POST https://<platform-url>/v3/scan/create
Request Format
Headers
Content-Type: application/json
isg-api-token: <your-api-token>
Request Body
The complete request body contains sensor configuration in the sensorConfig field, i.e:
  {
    "sensorName": "<sensor name>",
    "sensorType": "Keyfactor Command",
    "sensorConfig": {
       "url": "<keyfactor command api url>",
       "token_url": "<oauth2 token url>",
       "client_id": "<oauth2 client id>",
       "client_secret": "<oauth 2 client secret>"
       "scope": "<oauth 2 scope"
       "query_filter": "<keyfactor command query filter string>"
    },
    "callbackId": "<callback id>",
    "labels": [
        {
            "<label name>": "<label value>"
        }
    ],
    "priority": "<priority>"
  }
API Field Descriptions
See Platform Scan Configuration Fields for details.
Remote Scan Execution
Remote Execution Flow allows you to run the sensor on a host using the Unified Sensor binary.
Remote Scan Execution Configuration
Step 1: Download Unified Sensor
1.1 Navigate to AgileSec Platform UI → Sensors → Remote Scan.

1.2 Download the sensor binary for your operating system.
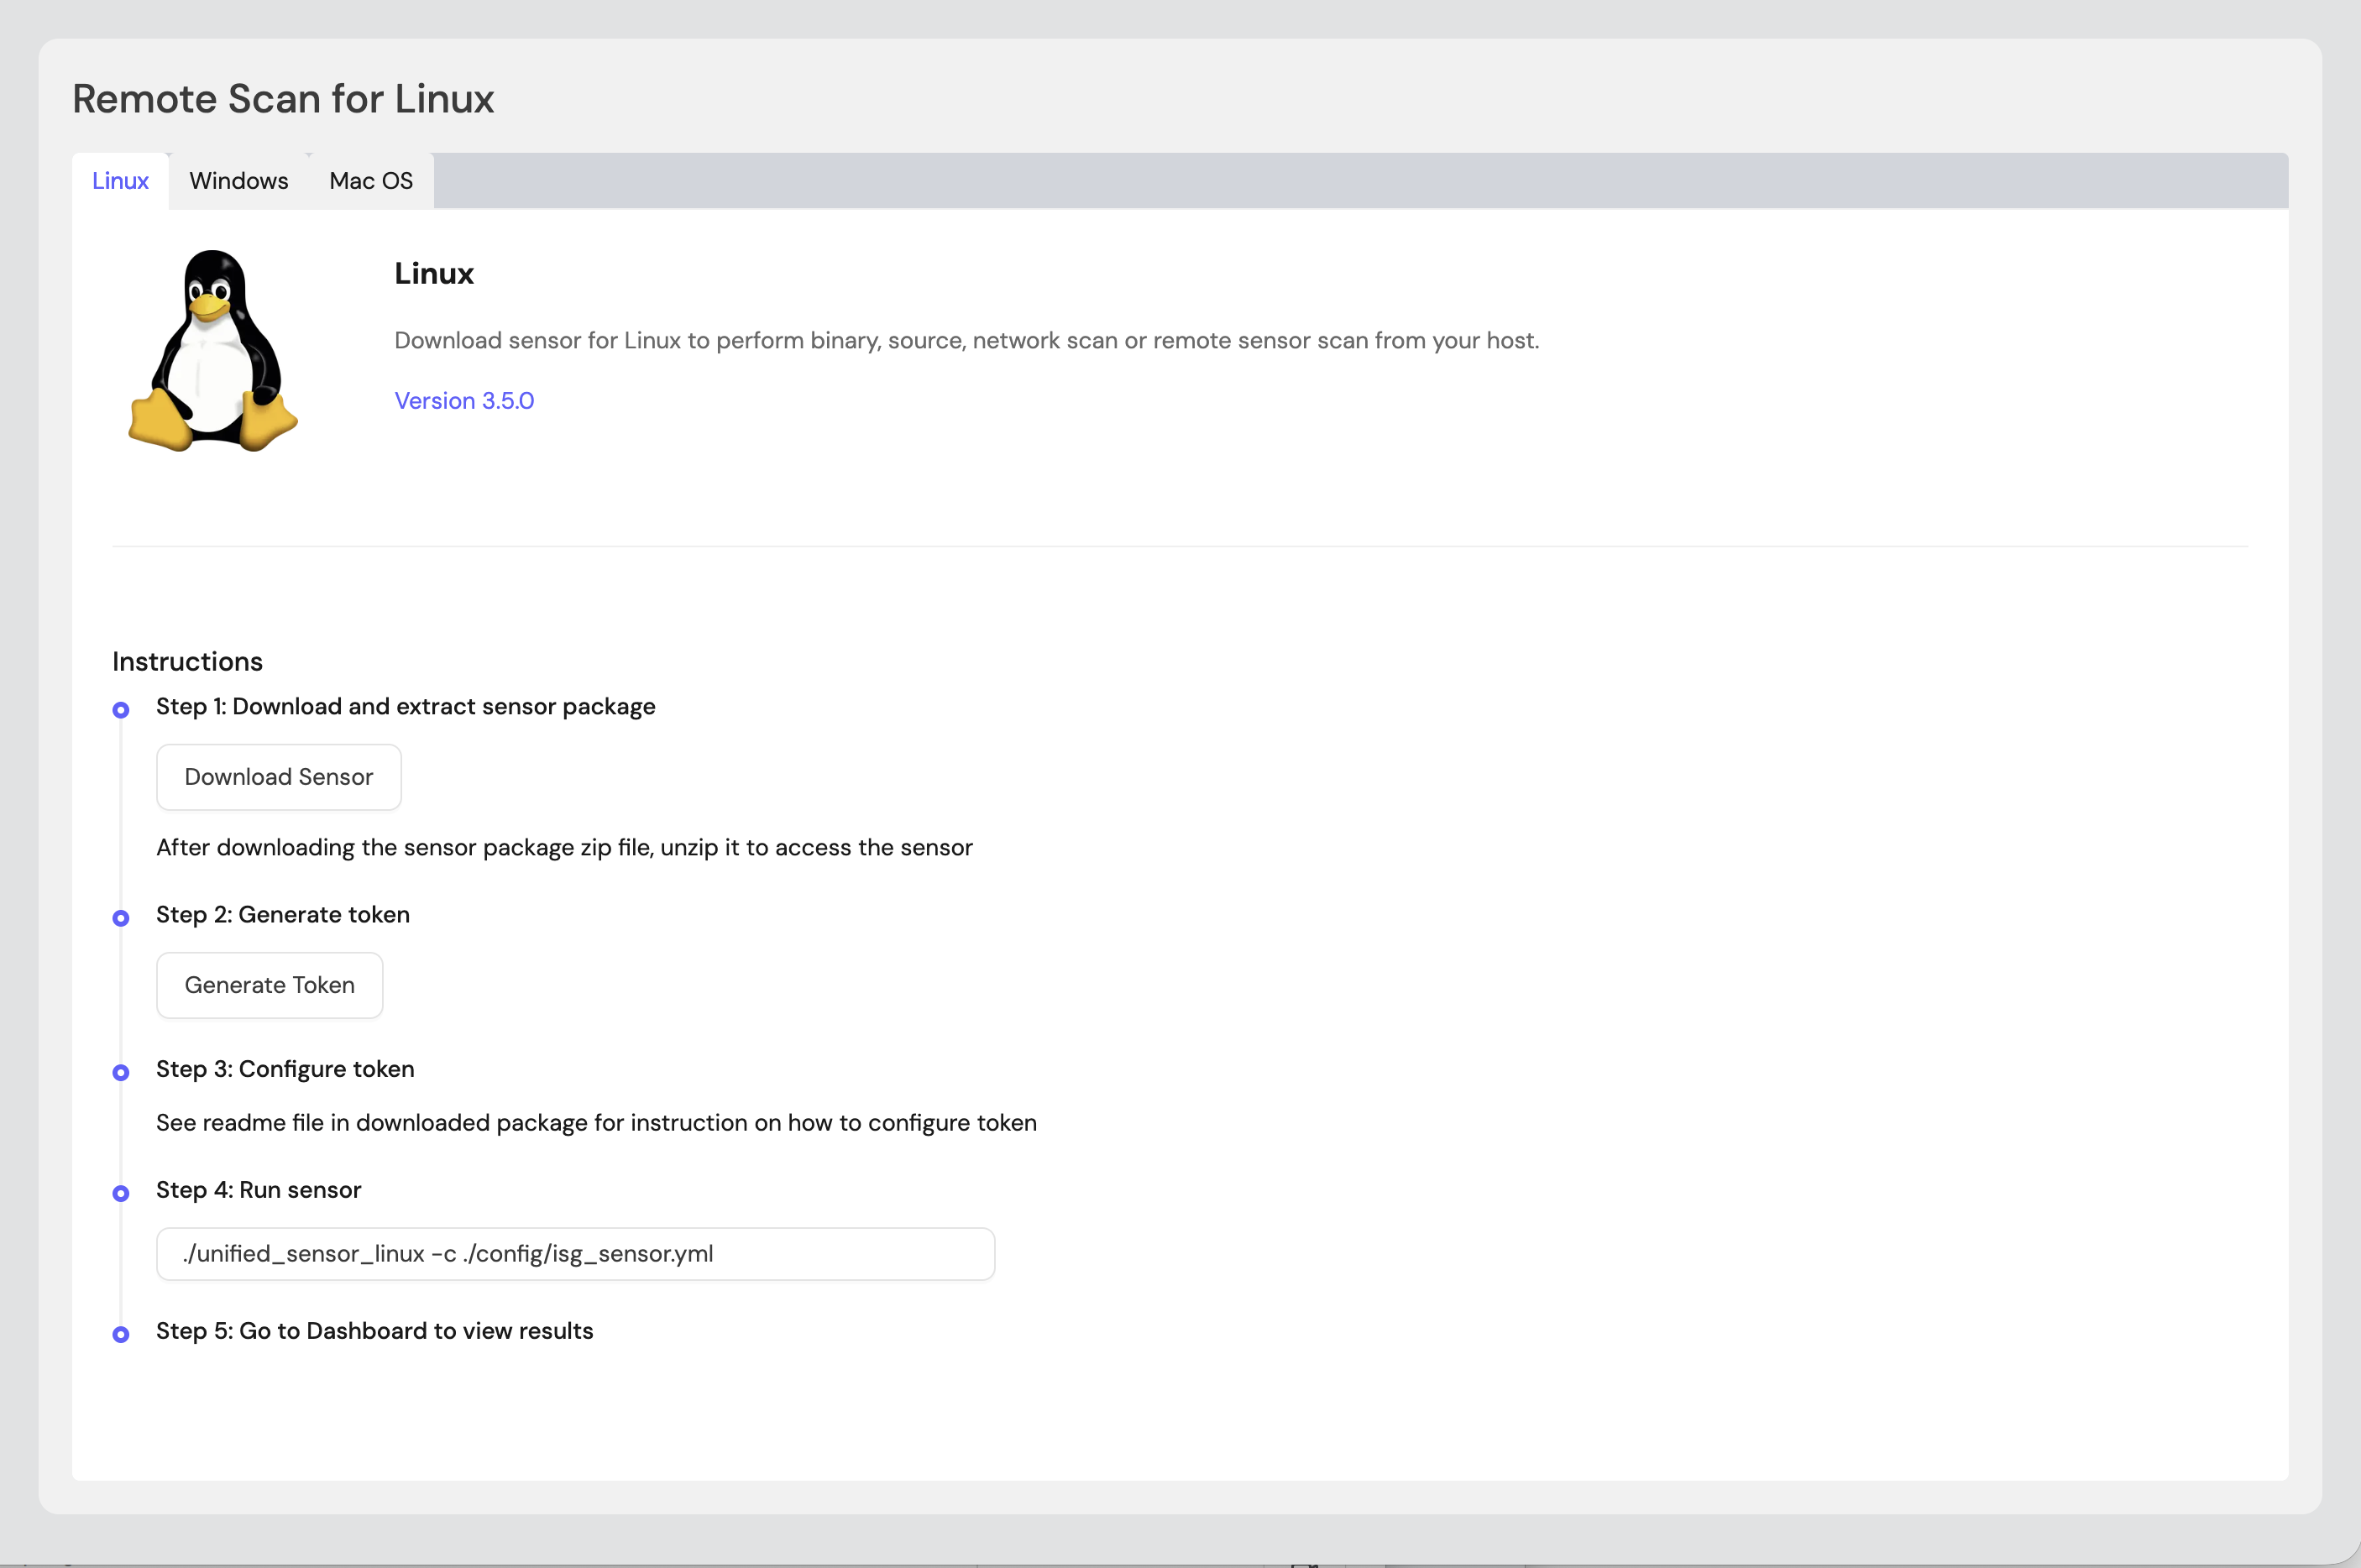
Step 2: Generate Remote Sensor Token
2.1 In the Remote Scan UI, click "Generate Token".
2.2 Copy the generated token.
2.3 Store the token securely in an environment variable or set it in the sensor config:
export SENSOR_TOKEN="your-generated-token"
Step 3: Create Configuration File
3.1 Create a YAML configuration file (e.g., keyfactor-command-config.yml) with your scan settings. An example configuration can be found in config/sample-configs/keyfactor.yml.
Step 4: Run the Sensor
4.1 Execute the sensor with your configuration file:
-
Linux/macOS
# Set environment variables export SENSOR_TOKEN="your-sensor-token" # Run sensor ./unified_sensor_linux -c keyfactor-command-config.yml -
Windows (PowerShell)
# Set environment variables
$env:SENSOR_TOKEN = "your-sensor-token"
# Run sensor
.\unified_sensor_windows.exe -c .\keyfactor-command-config.yml
Remote Scan Execution Configuration Example
-
OAuth 2 authentication:
scan_config:
  plugins:
    - keyfactor
    - export
  config:
    keyfactor:
      name: keyfactor
      plugin_config:
        url: "https://command.example.com/KeyfactorAPI"
        token_url: "https://login.microsoftonline.com/xxxxxxxxxxx/oauth2/v2.0/token"
        client_id: "xxxxxxxxxxxxxx"
        client_secret: "xxxxxxxxxxxx"
        scope: "api://xxxxxxxxxx/.default"
    local_export:
      name: local_export
      plugin_config:
        <<: *local_export_config
    export:
      name: export
      plugin_config:
        <<: *export_config
        sensor_name: "Remote Keyfactor Scan"
        sensor_type: "Keyfactor Command" # Do not edit this value.
        ran_by: "${env:USER}"
        url: "${env:INGESTION_URL}"
        token: "${env:SENSOR_TOKEN}"
Getting Support
Collect diagnostic information:
-
Sensor version
-
Configuration file (redact tokens)
-
Log output
-
Keyfactor Command configuration details (URL, auth type, version)
Contact Support:
-
Portal: https://support.keyfactor.com