The Tenable Sensor User Guide provides instructions for deploying and operating the Tenable Sensor within the Keyfactor AgileSec Platform. This guide covers supported authentication methods, execution methods, configuration options, and troubleshooting.
Refer to Sensors Architecture and Overview for additional details on sensor architecture, data flows, incremental scanning, and auto-resolution.
Overview
The Tenable Sensor integrates Tenable Security Center with Keyfactor's AgileSec Platform. This sensor retrieves vulnerability analysis results from Tenable and extracts cryptographic protocol findings, bringing TLS/SSL visibility into the AgileSec ecosystem.
Key Features
-
Automated Vulnerability Analysis Retrieval: Fetches cryptographic vulnerability analysis data from the Tenable Security Center API.
-
Protocol Analysis: Extracts TLS/SSL protocol versions, cipher suites, and related security information.
-
Dual Authentication: Supports both API key authentication and session-based authentication (username/password).
-
Custom Filters: Supports configurable filters to narrow the scope of vulnerability analysis results.
What Gets Scanned
The sensor retrieves and parses Tenable vulnerability analysis data to discover:
-
TLS/SSL Protocol Versions: Protocol versions detected on scanned network endpoints
-
Cipher Suites: Cipher suite information from vulnerability findings
-
Host Information: IP addresses, DNS names, and port numbers of scanned targets
Prerequisites
Tenable Requirements
|
Requirement |
Details |
|---|---|
|
Protocol |
HTTPS required for API access. |
|
Access |
Network connectivity from the sensor machine to the Tenable Security Center. |
|
Credentials |
Tenable API keys (access_key + secret_key) or user credentials. |
|
Tenable Plugin |
Tenable instance must have the SSL Cipher Suites Supported plugin (id 21643) |
Remote Execution Requirements
If running the unified sensor remotely using CLI:
|
Component |
Requirement |
|---|---|
|
Operating System |
|
|
RAM |
3 GB minimum, 4 GB recommended for large repositories |
|
Disk Space |
Minimum 2x Size of your repository. |
|
Permissions |
Read/Write access to working directory |
Supported Authentication Methods
The Tenable sensor supports two authentication methods:
-
API Key Authentication (recommended): Use an
access_keyandsecret_keypair generated in Tenable Security Center. -
Session Authentication: Use a
usernameandpasswordfor session-based login.
Note: If both methods are configured, session authentication (username/password) takes precedence.
Required Access Rights
The Tenable account must have the following permissions:
|
Permission |
Purpose |
Required |
|---|---|---|
|
Vulnerability Analysis |
Required to query vulnerability analysis data |
✅ Yes |
|
API Access |
Required for API key or session authentication |
✅ Yes |
Running the Sensor
The Tenable sensor can be executed using the following methods:
-
Platform Scan Execution: Configure and execute scans directly though the Keyfactor AgileSec web UI with on-demand or scheduled execution options.
-
Using API: Programmatically trigger scans through REST API calls, enabling integration with CI/CD pipelines and automation workflows.
-
Remote Scan Execution: Deploy and run the sensor via CLI on customer-managed infrastructure for scenarios such as:
-
Scanning air-gapped or internal instances the platform cannot directly reach
-
Customers wanting to manage their own scheduling and execution environment.
-
Refer to Sensors Architecture and Overview: Running the Sensor for additional execution and flow details.
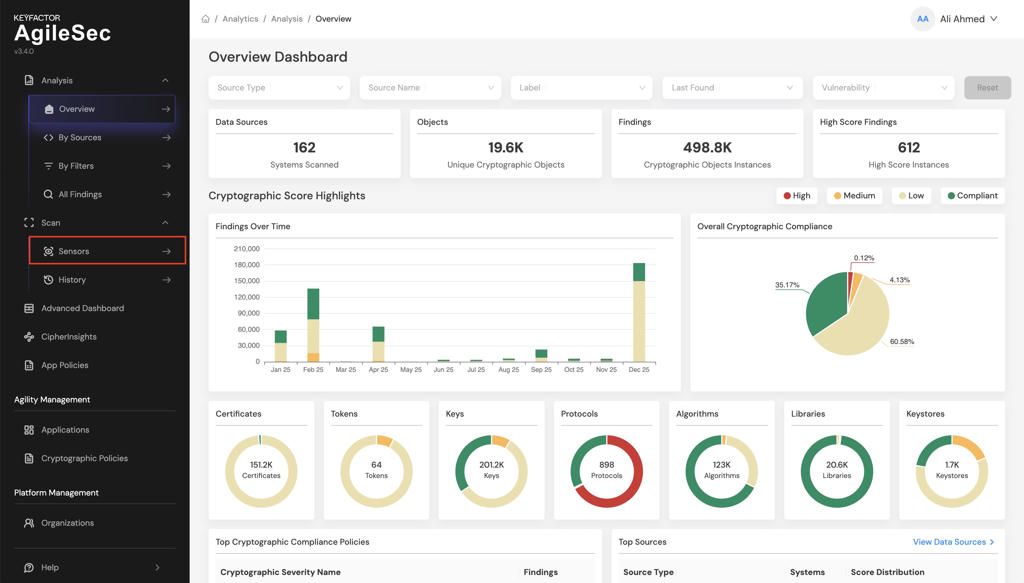
Platform Scan Execution
Running the sensor through the user interface is the simplest and fastest way to get started. The platform enables running on-demand or scheduled scans in a dedicated environment.
Platform Scan Configuration
Step 1: Navigate to Sensors Setup Page
1.1 Open your browser and navigate to the Keyfactor AgileSec Platform Web URL
1.2 Log in with your credentials
1.3 Click on "Sensors" in the navigation bar.
Step 2: Select Tenable Sensor
2.1 Click the "Choose a Sensor" button.

2.2 Browse or search for "Tenable"
2.3 Click on the Tenable Network sensor card
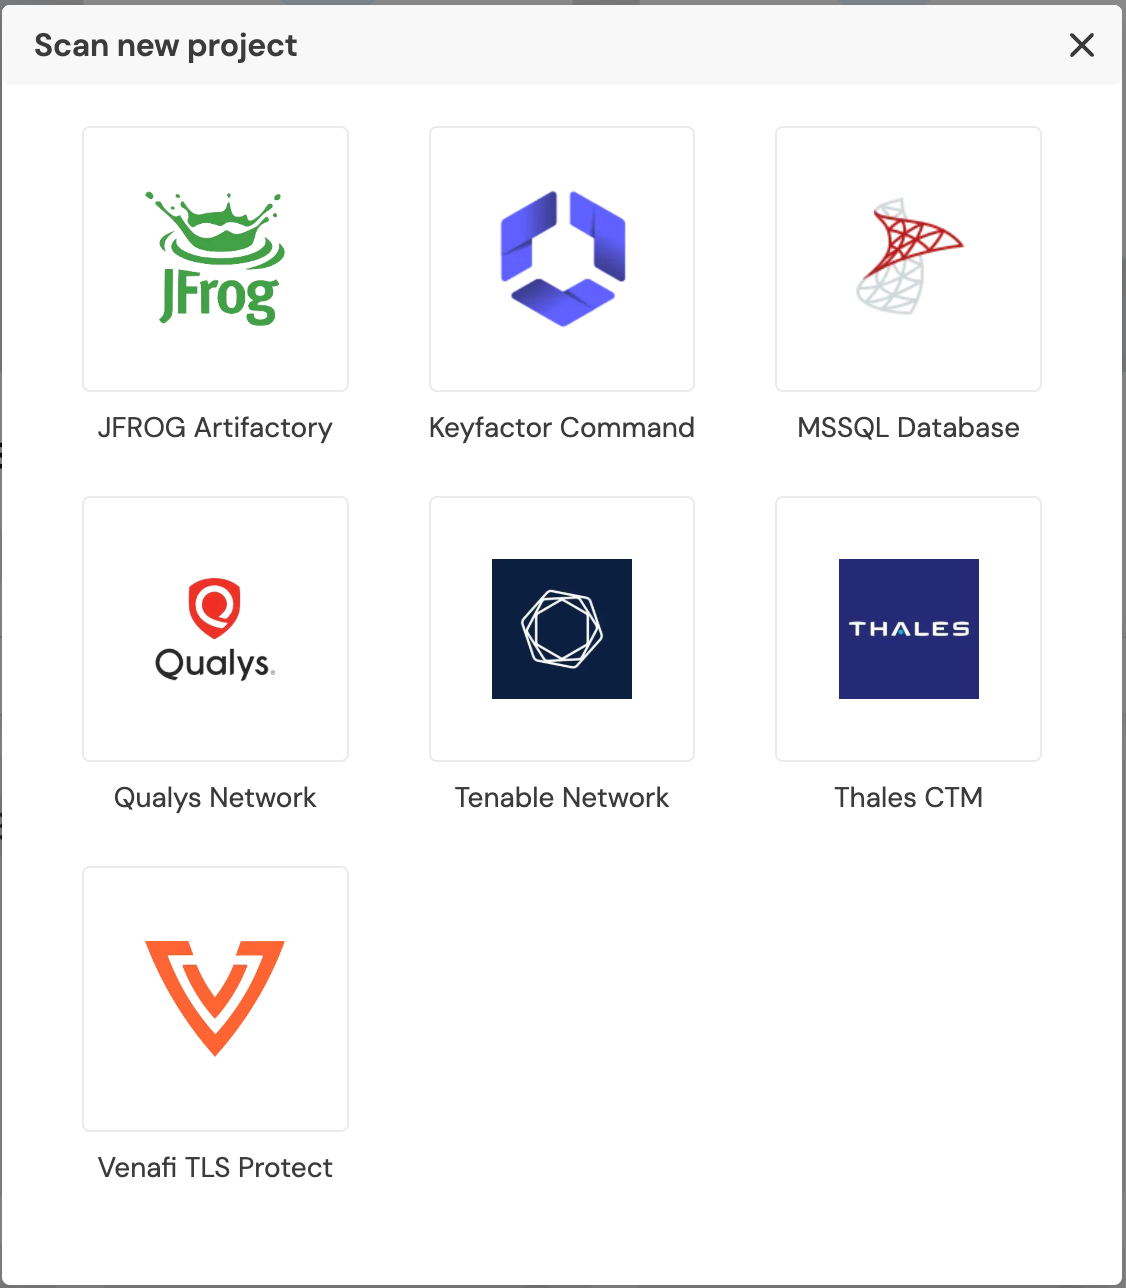
This will open the sensor configuration interface.
Step 3: Configure Sensor Parameters
3.1 Fill in the required configuration parameters

Platform Scan Configuration Fields
|
Field Name |
Display Name |
Type |
Required |
Description |
|---|---|---|---|---|
|
|
Tenable URL |
Single-line text |
✅ Yes |
Tenable Security Center REST API URL. Default: |
|
|
API Access Key |
Password field |
✅ Yes if using API auth |
Tenable API access key. Required if using API key authentication |
|
|
API Secret Key |
Password field |
✅ Yes if using API auth |
Tenable API secret key. Required if using API key authentication |
|
|
Username |
Single-line text |
✅ Yes if using pass auth |
Tenable username. Required if using session authentication |
|
|
Password |
Password field |
✅ Yes if using pass auth |
Tenable password. Required if using session authentication |
|
|
Filters |
Filter Object array |
❌ No |
List of filters to narrow the scope of vulnerability analysis results. Each filter has |
Note: Either
access_key/secret_keyorusername/passwordmust be provided.
Filter Object Fields (within filters array):
|
Field Name |
Type |
Required |
Description |
|---|---|---|---|
|
|
Single-line text |
✅ Yes |
Tenable filter name (e.g., |
|
|
Single-line text |
✅ Yes |
Filter operator (e.g., |
|
|
Single-line text |
✅ Yes |
Filter value to match |
For more, see Tenable's documentation: https://docs.tenable.com/security-center/api/Analysis.htm
Scan Execution Using API
Scans may be programmatically triggered through REST API calls, enabling seamless integration with CI/CD pipelines, automation workflows, and custom applications. API execution provides flexibility for developers to incorporate cryptographic scanning into their existing development and deployment processes.
Note: For complete API reference, see the API document.
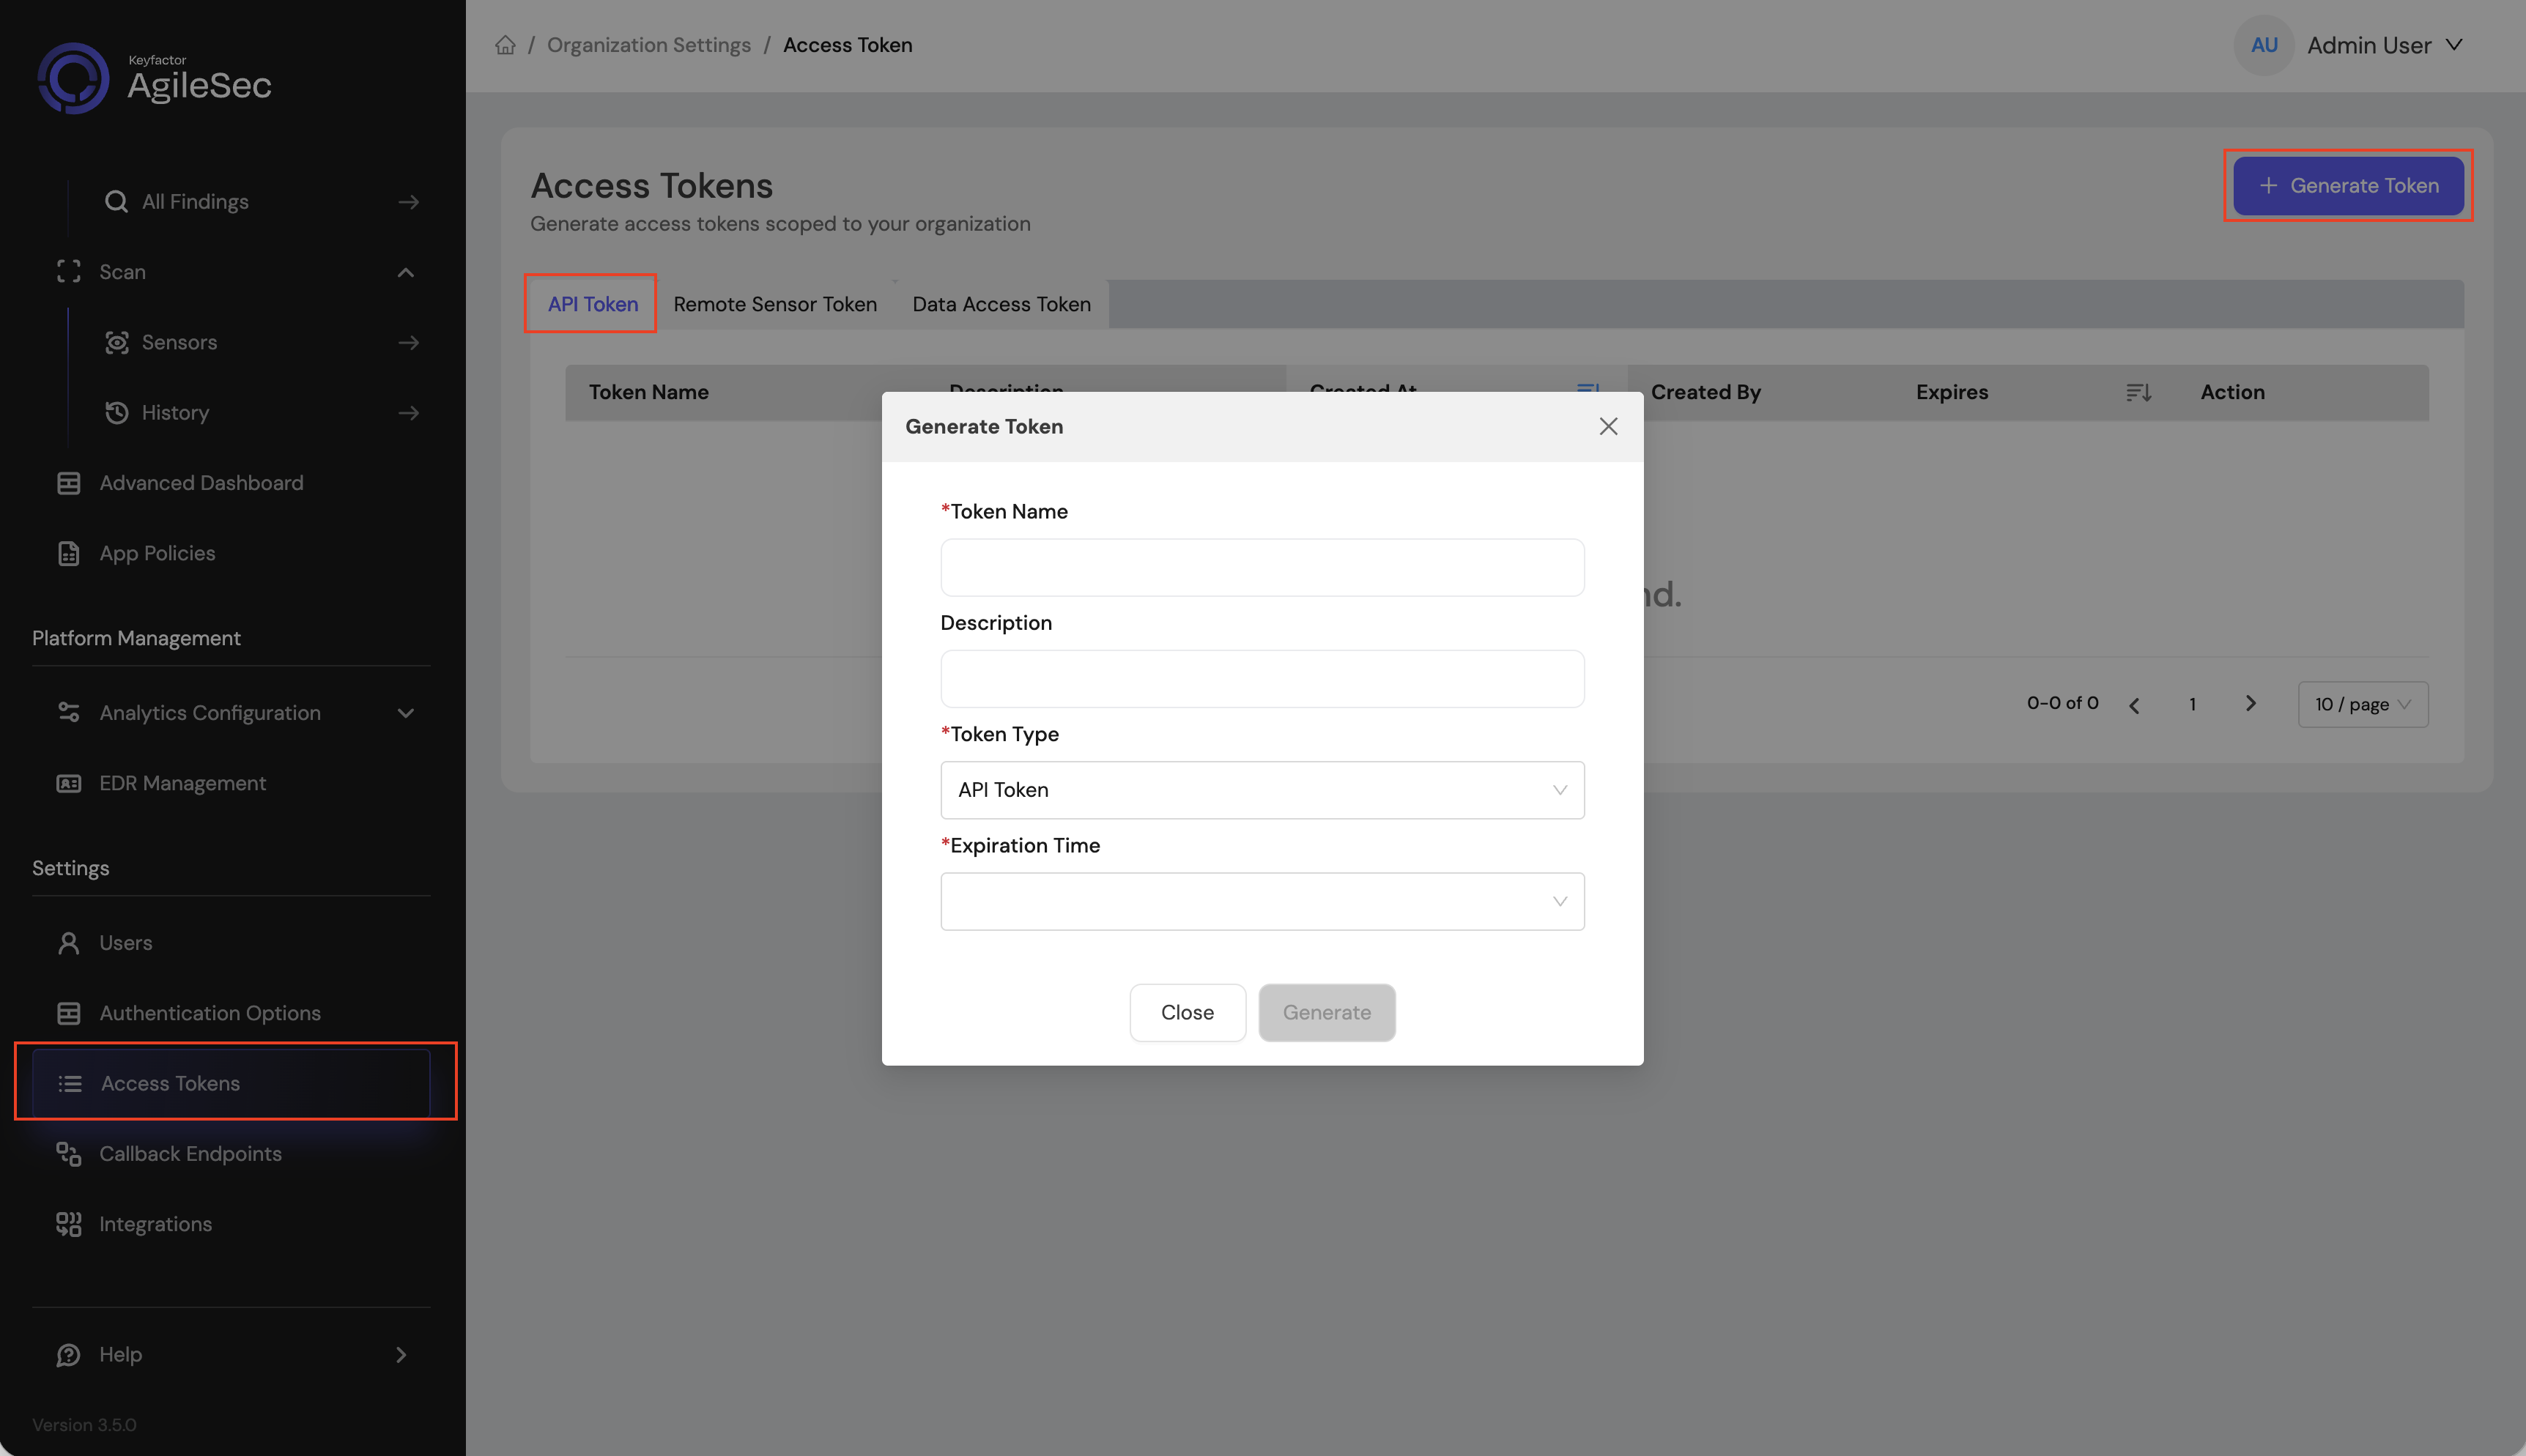
API Access Token
-
Open your browser and navigate to the AgileSec Platform UI.
-
Log in with your Keyfactor credentials.
-
Click "Access Tokens" in the main navigation menu.
-
Click "Generate Token".
-
Set Token Type to API Token and provide the required details.
-
Click "Generate" and copy the generated token.
API Endpoint
POST https://<platform-url>/v3/scan/create
Request Format
Headers
Content-Type: application/json
isg-api-token: <your-api-token>
Request Body
The complete request body contains sensor configuration in the sensorConfig field, i.e:
  {
    "sensorName": "<sensor name>",
    "sensorType": "Tenable Network",
    "sensorConfig": {
       "url": "https://tenable.internal.company.com/rest/",
       "access_key": "<tenable access key>",
       "secret_key": "<tenable secret key>",
       "filters": [
           {
               "name": "ip",
               "operator": "=",
               "value": "127.0.0.1"
           }
       ]
    },
    "callbackId": "<callback id>",
    "labels": [
        {
            "<label name>": "<label value>"
        }
    ],
    "priority": "<priority>"
  }
Request Body (Session Auth)
  {
    "sensorName": "<sensor name>",
    "sensorType": "Tenable Network",
    "sensorConfig": {
       "url": "https://tenable.internal.company.com/rest/",
       "username": "<tenable username>",
       "password": "<tenable password>"
    },
    "callbackId": "<callback id>",
    "labels": [
        {
            "<label name>": "<label value>"
        }
    ],
    "priority": "<priority>"
  }
API Field Descriptions
See Platform Scan Configuration Fields for details.
Remote Scan Execution
Remote Execution Flow allows you to run the sensor on a host using the Unified Sensor binary.
Remote Scan Execution Configuration
Step 1: Download Unified Sensor
1.1 Navigate to AgileSec Platform UI → Sensors → Remote Scan.

1.2 Download the sensor binary for your operating system.
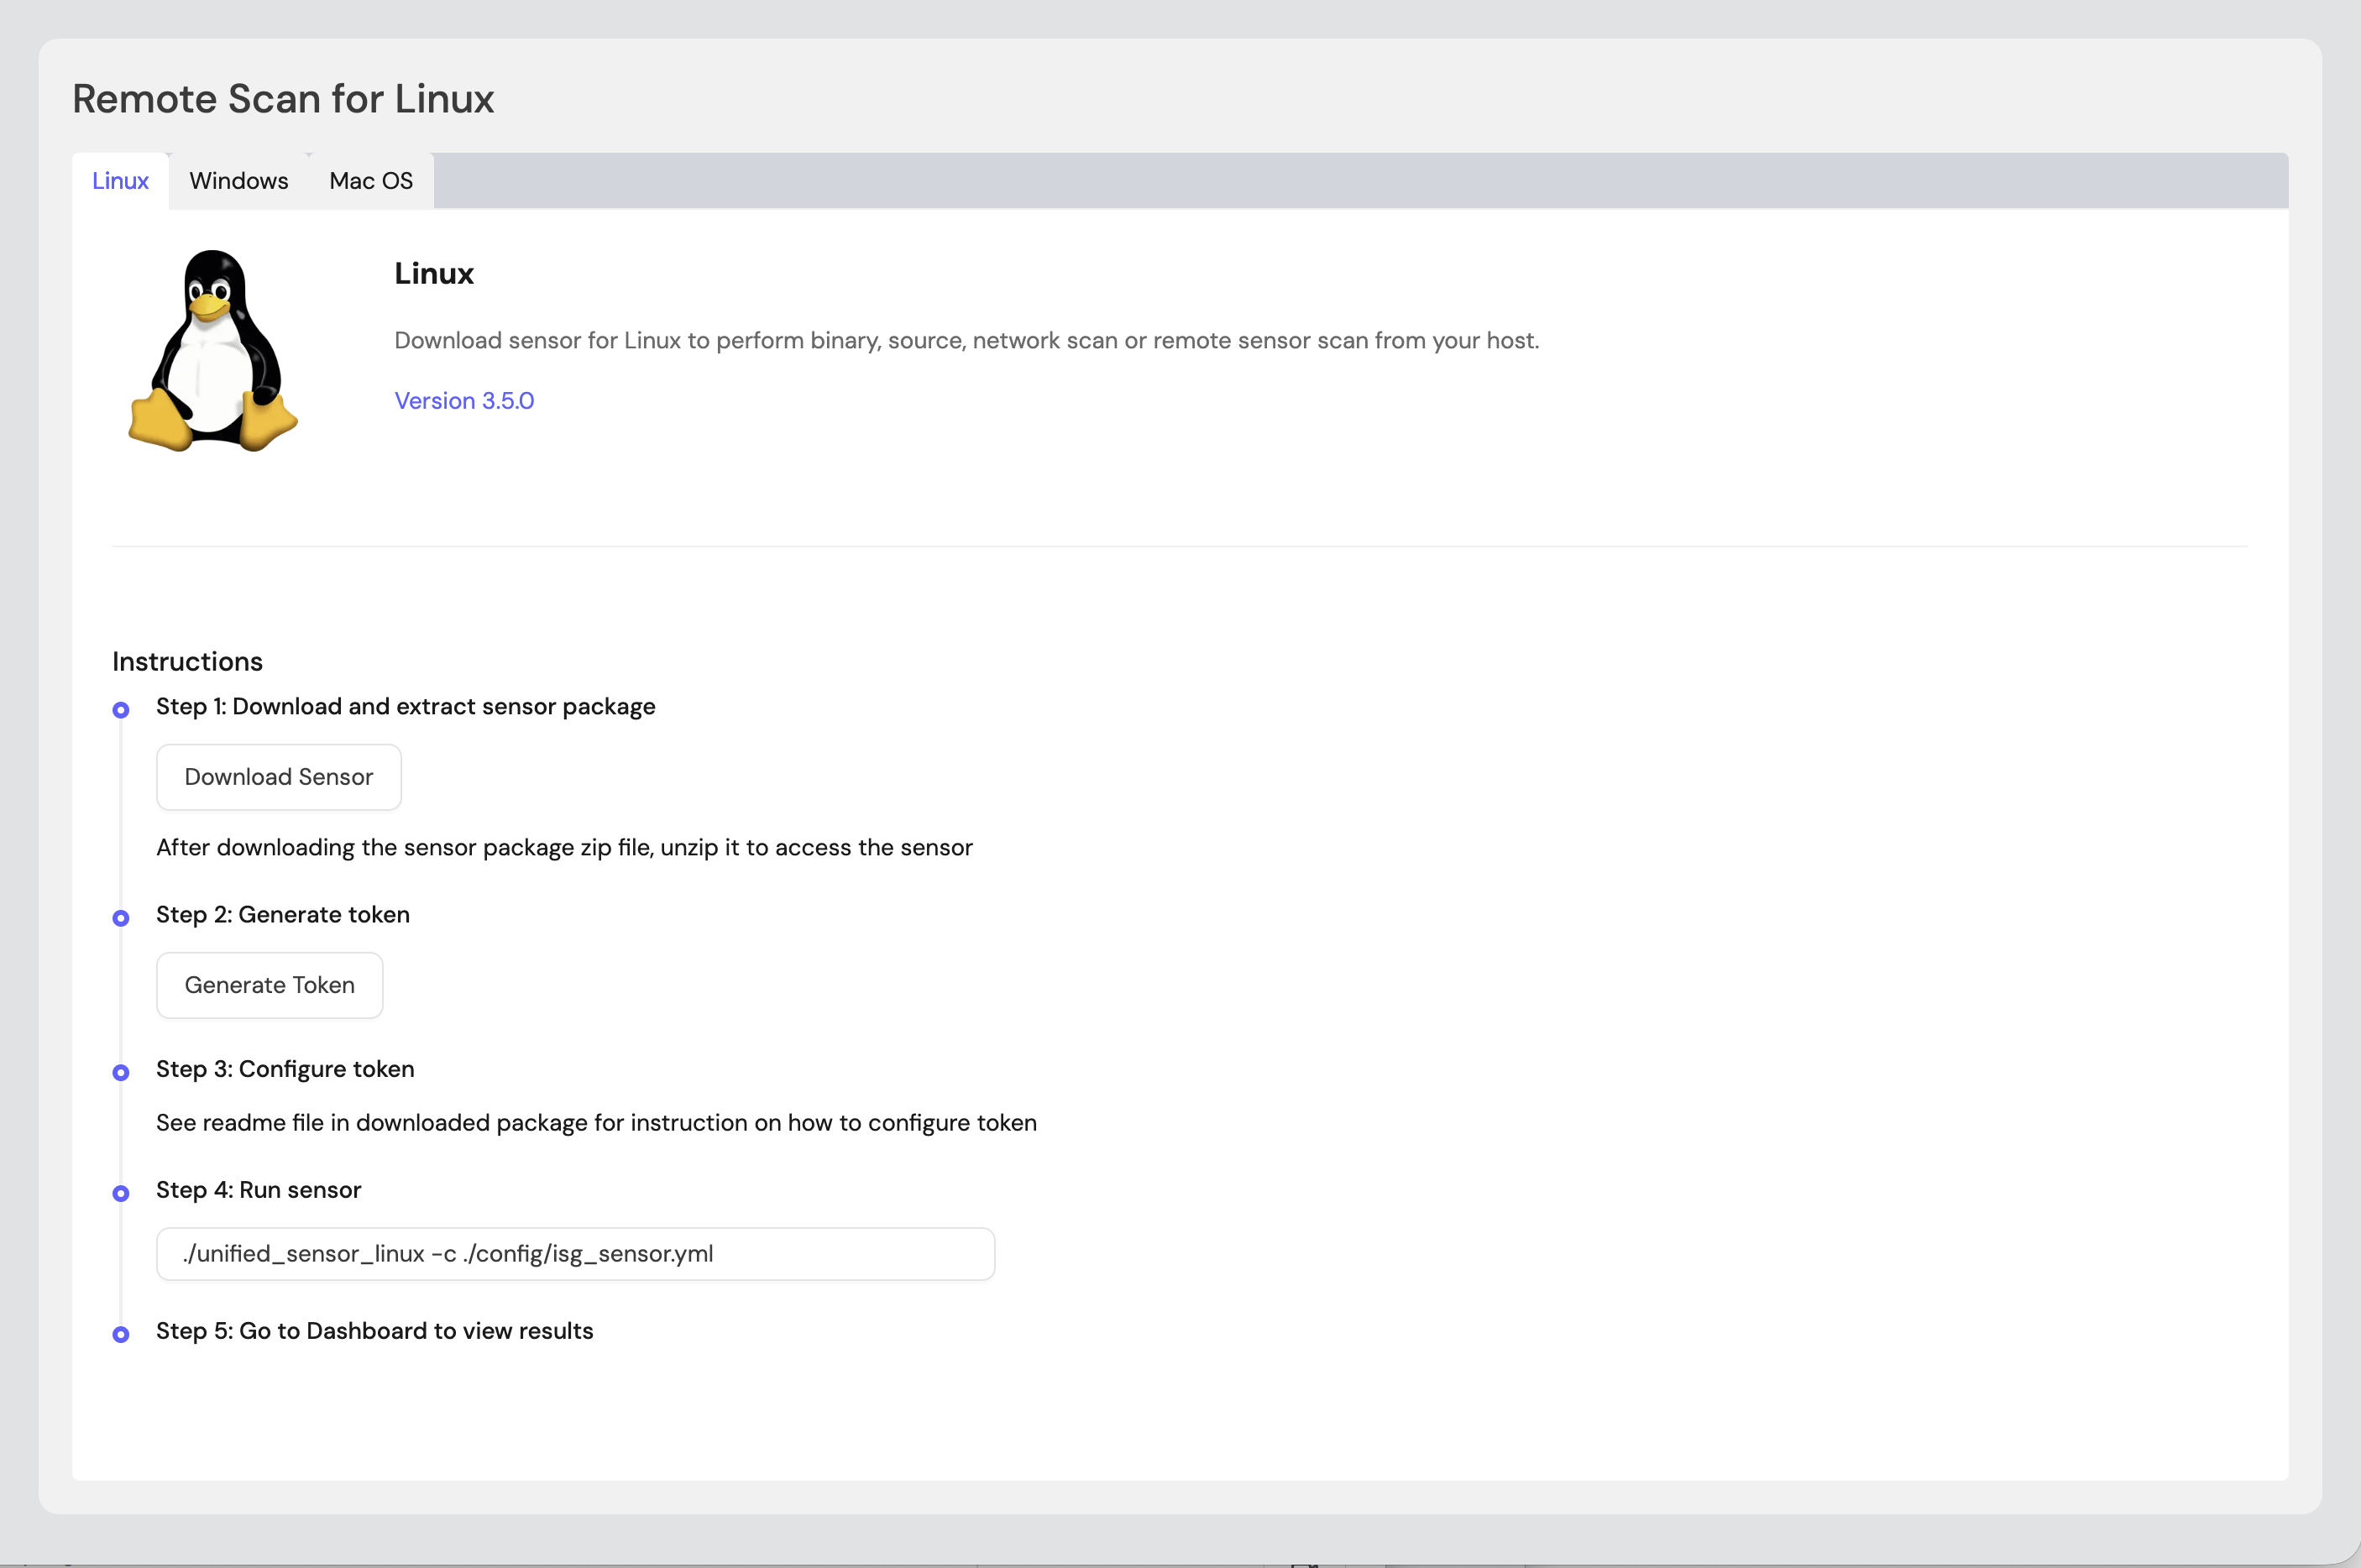
Step 2: Generate Remote Sensor Token
2.1 In the Remote Scan UI, click "Generate Token".
2.2 Copy the generated token.
2.3 Store the token securely in an environment variable or set it in the sensor config:
export SENSOR_TOKEN="your-generated-token"
Step 3: Create Configuration File
Create a YAML configuration file (e.g., tenable-config.yml) with your scan settings. An example configuration can be found in config/sample-configs/tenable.yml.
Step 4: Run the Sensor
Execute the sensor with your configuration file:
-
Linux/macOS
Bash# Set environment variables export SENSOR_TOKEN="your-sensor-token" # Run sensor ./unified_sensor_linux -c tenable-config.yml -
Windows (PowerShell)
PowerShell# Set environment variables $env:SENSOR_TOKEN = "your-sensor-token" # Run sensor .\\unified_sensor_windows.exe -c .\\tenable-config.yml
Remote Scan Execution Configuration Examples
-
API Key Authentication
YAMLscan_config: plugins: - tenable - export config: tenable: name: tenable plugin_config: url: "<https://tenable.internal.company.com/rest/>" access_key: "${env:TENABLE_ACCESS_KEY}" secret_key: "${env:TENABLE_SECRET_KEY}" -
Session Authentication
YAMLscan_config: plugins: - tenable - export config: tenable: name: tenable plugin_config: url: "<https://tenable.internal.company.com/rest/>" username: "${env:TENABLE_USER}" password: "${env:TENABLE_PASS}" -
With Custom Filters
YAMLscan_config: plugins: - tenable - export config: tenable: name: tenable plugin_config: url: "<https://tenable.internal.company.com/rest/>" access_key: "${env:TENABLE_ACCESS_KEY}" secret_key: "${env:TENABLE_SECRET_KEY}" filters: - name: "ip" operator: "=" value: "127.0.0.1"
Troubleshooting
Common Errors
-
CONFIG-404— Unable to read/parse configuration file-
Cause: The configuration file path is incorrect or the file is malformed.
-
Fix: Verify the config file path and validate JSON syntax.
-
-
CONFIG-422— Required attribute not found-
Cause: A required configuration field is missing.
-
Fix: Ensure either
access_key/secret_keyorusername/passwordare provided.
-
-
COMMON-101— Failed serialization for output-
Cause: Internal data serialization error.
-
Fix: Enable debug logging and contact support with the log output.
-
-
401 Unauthorized-
Cause: Invalid API keys or session credentials.
-
Fix: Verify credentials are correct. For API keys, regenerate them in Tenable Security Center.
-
Getting Support
Collect diagnostic information:
-
Sensor version
-
Configuration file (redact credentials)
-
Log output
-
Tenable Security Center details (URL, version)
Contact Support:
-
Portal: https://support.keyfactor.com