Enterprise
You may already be familiar with Identity Providers (IdPs) such as Keycloak or have previously configured OAuth for EJBCA using another installation method.
This page describes how to configure OAuth for EJBCA when deploying with a Helm Chart by updating the values.yaml file. It also includes steps demonstrating how to set up a Keycloak IdP for testing and configure EJBCA authentication using it.
If you have previously integrated an IdP with EJBCA, your setup may resemble the following example.
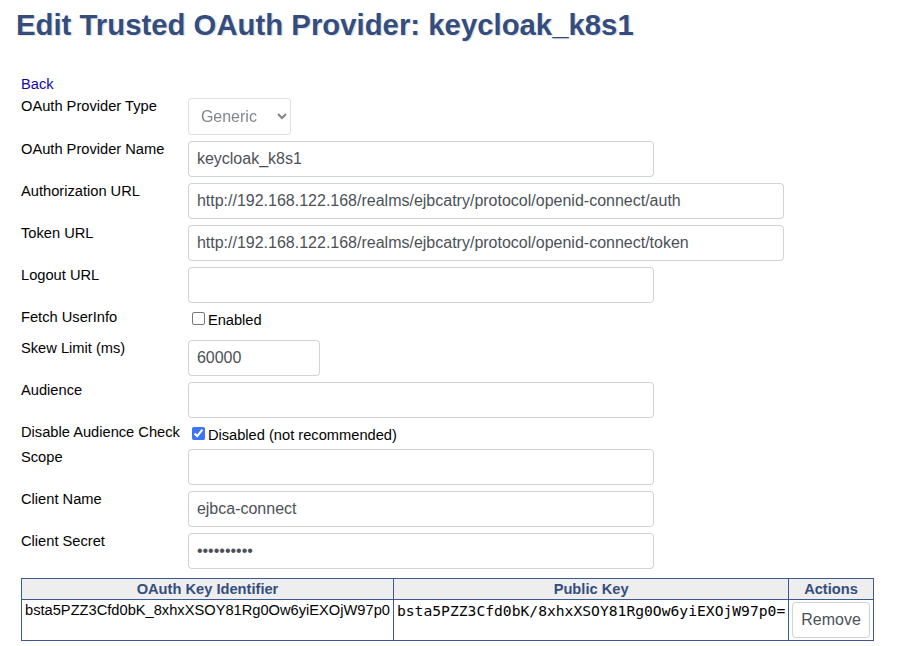
The IdP can be configured using an IP address (for example, one assigned by a LoadBalancer) or a domain name. In this example, the Generic OAuth Provider Type is used, but you may also select Azure, Keycloak, or PingID depending on your requirements. The Generic provider supports any IdP implementation.
For more information on configuring OAuth Providers in EJBCA, see OAuth Providers or OAuth Provider Management.
Integrate IdP with EJBCA Helm Chart Deployment
To integrate your IdP with an EJBCA Helm Chart deployment, the following updates are required:
-
Apply a minor modification to
values.yaml. -
Ensure HTTPS port 443 is included in the redirect URI list configured in the IdP. For example:
https://<EEJBCA_DOMAIN_OR_IP>:443/ejbca/*
Helm Chart Configuration Requirements
The primary Helm parameter relevant to OAuth authentication is ejbca.env.HTTPSERVER_HOSTNAME.
This value determines the redirect_uri used after the IdP (for example, Keycloak) has authenticated the user. Set this to the external IP address or domain name of the EJBCA instance.
When using Ingress, this value should match the hostname defined in ingress.hosts.host.
Example: Ingress with NGINX Sidecar
The following example shows a configuration using an SNI-capable Ingress with an NGINX sidecar. An Apache HTTPD sidecar may also be used.
ejbca:
  # omitted other configurations
  env:
    HTTPSERVER_HOSTNAME: "ejbca-ca.example.com"
nginx:
  enabled: true
  host: "ejbca-ca.example.com"
  mountInternalNginxCert: true
  secretInternalNginxCert: "internal-nginx-credential-secret"
ingress:
  enabled: true
  sslBackend: true
  hosts:
    - host: "ejbca-ca.example.com"
      paths:
        - path: /
          pathType: Prefix
LoadBalancer Considerations
When using a LoadBalancer service, you must determine the external IP address assigned to the service. Two approaches are possible:
-
Preferred (if supported): Configure the LoadBalancer service with a fixed IP address using
serviceAnnotationsin values.yaml. This option is not available in all environments. -
Alternative approach:
-
Deploy EJBCA using
helm installwithout settingejbca.env.HTTPSERVER_HOSTNAME. -
Retrieve the assigned LoadBalancer IP address.
-
Update values.yaml with
HTTPSERVER_HOSTNAME: <IP address>. -
Apply the change with
helm upgrade.
-
Example configuration using a LoadBalancer:
ejbca:
  # omitted other configurations
  env:
    HTTPSERVER_HOSTNAME: "192.168.122.167"
nginx:
  enabled: true
  host: "ejbca-ca.example.com"
  mountInternalNginxCert: true
  secretInternalNginxCert: "internal-nginx-credential-secret"
  service:
    type: LoadBalancer
Test OAuth with EJBCA in Kubernetes
The following demonstrates how you can test OAuth with EJBCA in Kubernetes. For full configuration details and advanced options, refer to the EJBCA documentation about OAuth Providers and OAuth Provider Management.
The following sections will walk you through:
-
A lightweight Keycloak setup in Kubernetes for testing. Production environments should use an existing IdP.
-
A demonstration of how to configure OAuth role mapping using JWT claim roles. This enables one-to-one mapping between IdP groups/roles and EJBCA roles. Although the example uses Keycloak, most IdPs follow a similar model.
Step 1 - Deploy EJBCA
Deploy EJBCA using either Ingress or a LoadBalancer as described in Deploy CA in Kubernetes.
Ensure that TLS credentials and the SuperAdmin certificate are configured.
The only change specific to OAuth is setting the environment variable HTTPSERVER_HOSTNAME in the ejbca.env section during the Helm upgrade.
Example:
ejbca:
  # omitted other configurations
  env:
    # Ingress
    HTTPSERVER_HOSTNAME: "ejbca-ca.example.com"
    # LoadBalancer
    # HTTPSERVER_HOSTNAME: "192.168.122.167"
Note that you can configure this value from the beginning when using Ingress, as the domain name is defined in ingress.hosts[0].host. For a LoadBalancer, you must configure it during helm upgrade. This is because normally LoadBalancer assigns a random IP address. You can get the IP address by running:
kubectl get svc -n <ejbca namespace>
The IP appears in the EXTERNAL_IP column. It may take several minutes to populate.
Step 2 - Deploy KeyCloak for testing
Create a namespace, in this example called keycloak1:
kubectl create namespace keycloak1
Deploy Keycloak using a Helm Chart with the following values.yaml. This example uses a LoadBalancer service to access Keycloak. To use Ingress instead, uncomment lines 4–6 and comment out lines 10–11.
auth:
  adminUser: kc_user
  adminPassword: foo123
#ingress:
#  enabled: true
#  ingressClassName: nginx
postgresql:
  auth:
    password: foo123
service:
  type: LoadBalancer
Deploy Keycloak:
helm install keycloak-release oci://registry-1.docker.io/bitnamicharts/keycloak \
                    -f values.yaml -n keycloak1
Wait until all Keycloak pods are READY, then retrieve the external IP:
kubectl get all -n keycloak1
To remove the test environment:
kubectl delete namespace keycloak1
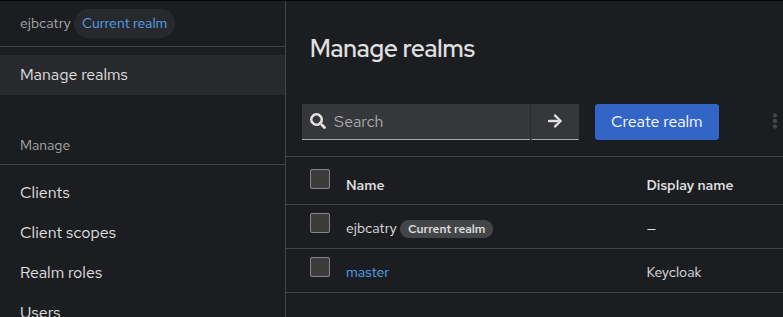
Step 3 - Create a Realm
Access Keycloak using the LoadBalancer’s external IP (the EXTERNAL_IP address retrieved with kubectl get all -n keycloak1 above).
Log in with:
-
Username:
kc_user -
Password:
foo123
You will set up a new realm to isolate EJBCA or any application specific configuration in Keycloak.
To create a new realm:
-
Open the Keycloak Admin Console.
-
Click Create Realm.
-
In Realm name, enter ejbcatry1.
-
Click Create.
-
Select ejbcatry1 to set it as the current realm.
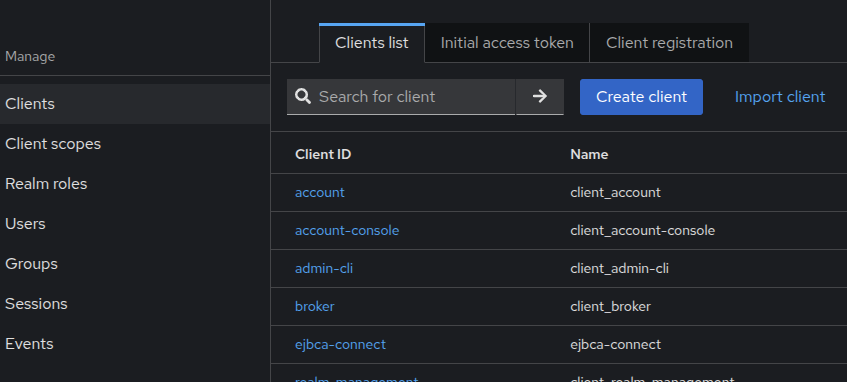
Step 4 - Create a Client
A Keycloak client defines the authorization workflow, including credentials.
In a standard authorization workflow, the user logs in to Keycloak to get a token. EJBCA then uses the client credentials to obtain a JWT token containing user details.
To create a client named ejbca-connect in the ejbcatry realm:
-
Select Clients.
-
Click Create Client.
Configure the Redirect URIs
Redirect URIs must be configured precisely:
https://<EJBCA Domain or IP>:443/*
Examples:
-
https://192.168.122.167:443/* -
https://ejbca-ca.example.com:443/*
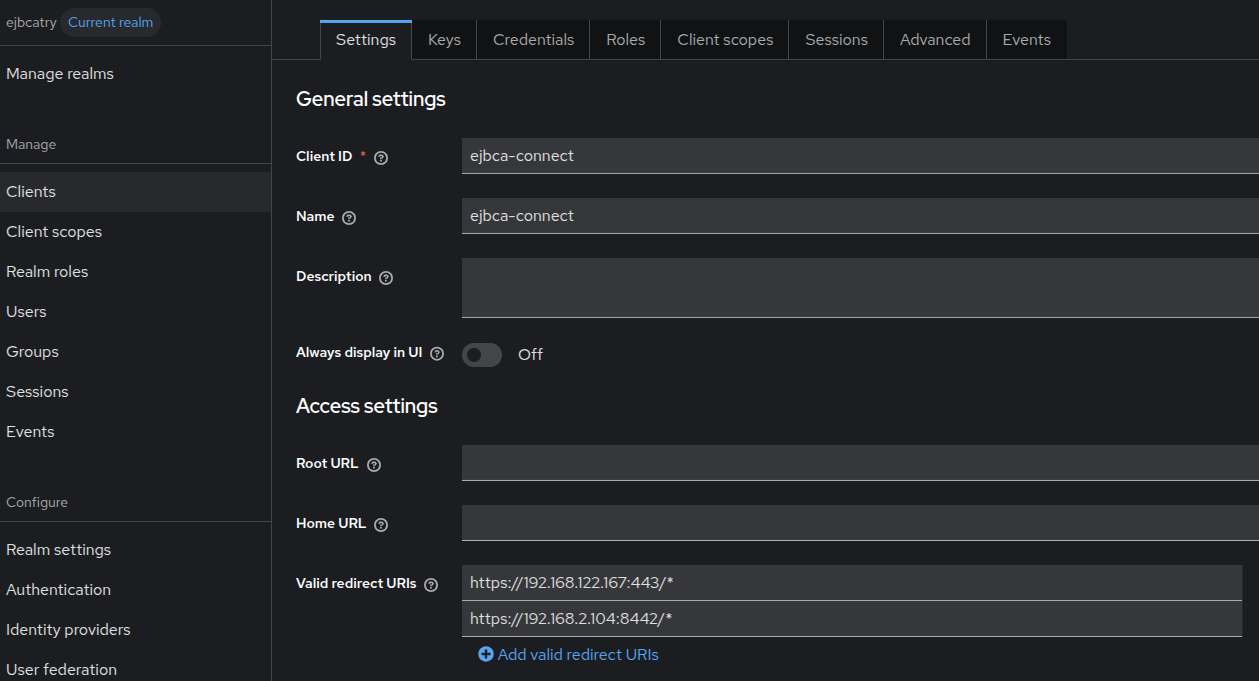
Helm-based deployments must use port 443, not port 8442 (as in WildFly-based installations).
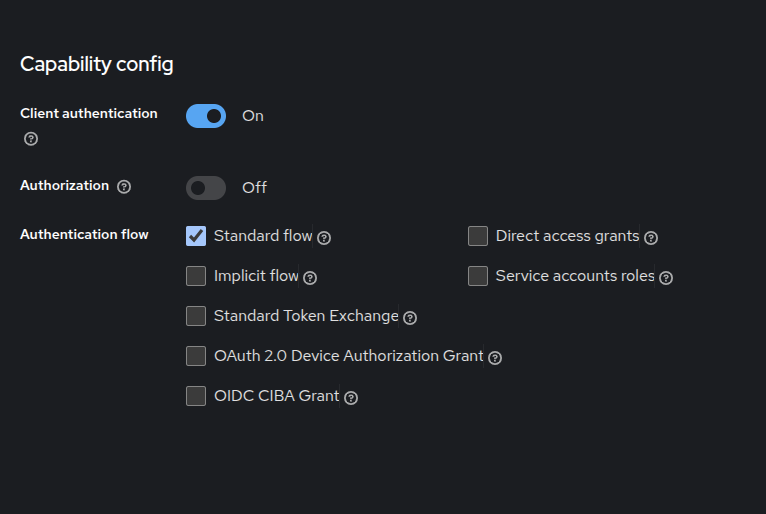
Client Capabilities
Enable the following in the Capability Config section:
-
Client authentication
-
For Authentication flow, select Standard flow
Step 5 - Create a User
Each Identity Provider user corresponds to a physical user (as in EJBCA).
To create a user in Keycloak:
-
Select Users.
-
Click Add user.
-
Enter email, first name, and last name.
-
Select the new user account, in this example
ejbcaadmin1. -
Go to Credentials and set a password.
-
Disable Temporary credentials.

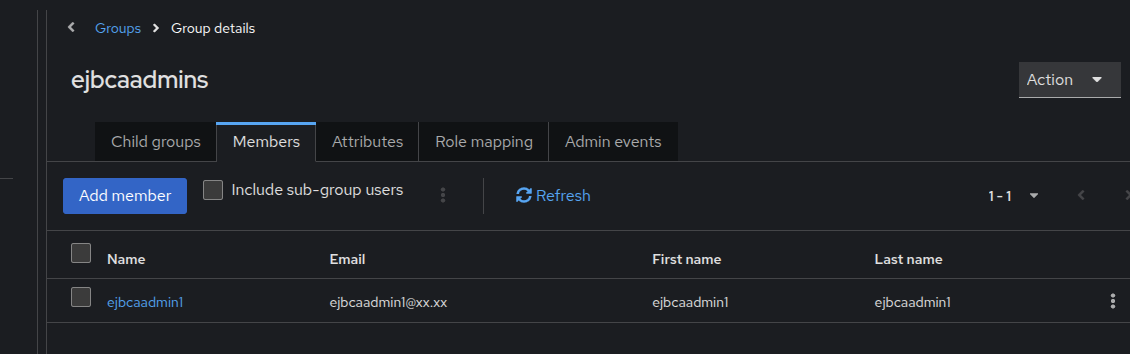
Step 6 - Create a Group
To create a group and assign the created user to this group:
-
Go to Groups.
-
Click Create group and name it
ejbcaadmin1. -
Select the group.
-
Select the Members tab and click Add member.
-
Add the user created earlier.
Step 7 - Create a Realm Role
Keycloak provides Realm roles and Client roles. For EJBCA integration, Realm roles should be used to avoid dependencies on Keycloak’s internal authorization model.
Create a Realm role:
-
Select Realm roles.
-
Click Create role.
-
Create a role named another-role.
Map the Realm Role to the Group
To map the role to the created group:
-
Go to Groups.
-
Select the
ejbcaadmin1group. -
Select the Role mapping tab.
-
Click Assign role and select another-role.

Step 8 - Configure Client Scope for Roles
To ensure the Realm role is included in the JWT created by Keycloak:
-
Select Client scopes.
-
Open the roles client scope.
-
Select realm roles (not client roles).
-
Set Token Claim Name to
roles(case-sensitive).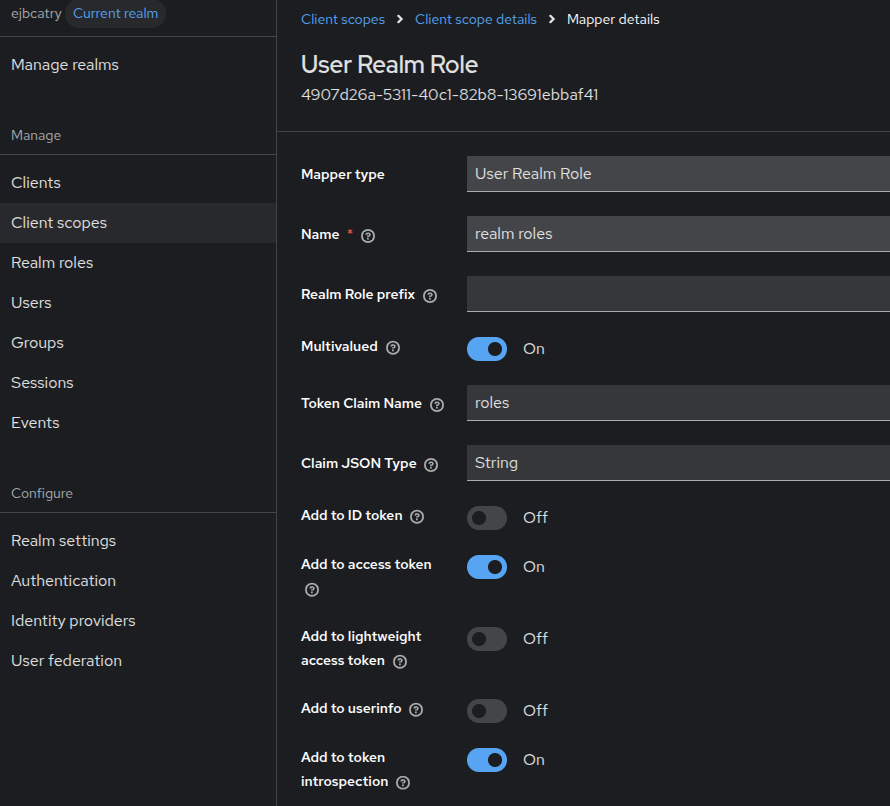
Save the configuration.
Step 9 - Retrieve Signing Keys and Client Secret
You will need the following information when configuring EJBCA:
-
The Key ID (kid) of the signing key (used to sign the JWT, thus the token with all authorization details)
-
The Public Key corresponding to that kid.
-
The Client Secret of the Keycloak client (
ejbca-connect).
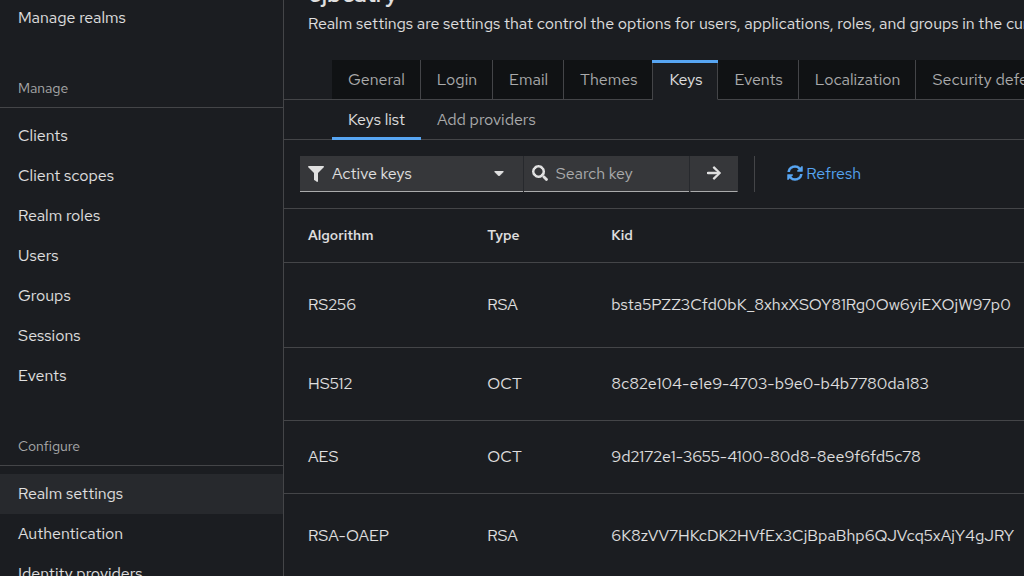
Key ID (kid)
To get the Key ID (kid) (or JWK ID):
-
Go to Realm settings.
-
Select the Keys tab.
-
Copy the kid for the RS256 key (or the algorithm you intend to use).
Public Key
Click Public Key on the same page and copy the displayed key.
Client Secret
-
Select Clients.
-
Choose the ejbca-connect client.
-
Select the Credentials tab.
-
Copy the Client Secret.
Step 10 - Create the OAuth Provider in EJBCA
To create the OAuth Provider in EJBCA:
-
In EJBCA, go to System Configuration.
-
Open the Trusted OAuth Providers tab.
-
Click Add and specify the following for the provider:
-
For OAuth Provider Type, select Keycloak or Generic.
-
Provide a name.
-
Enter URLS for Authorization URL and Token URL.
-
Set Client Name to ejbca-connect (or your chosen name).
-
For Client Secret, paste the secret previously copied.
-
-
To add the public key:
-
Set the Public Key input method to Input Text Value.
-
Paste the public key previously copied
-
Paste the kid previously copied in OAuth Key Identifier.
-
Click Upload Public Key.
-
-
Click Add to create the OAuth Provider.
Step 11 - Configure the EJBCA Role
Next, configure EJBCA to allow users with the Keycloak Realm Role another-role to be granted EJBCA SuperAdmin access.
To configure the EJBCA SuperAdmin role:
-
Go to System Functions.
-
Select Roles and Access Rules.
-
Open the Members section for the Super Administrator Role.
-
Set Match with to:
OAuth 2 JWT: Roles ("roles") claim. -
Set OAuth Provider to the created provider.
-
Set Match Value to the Realm role created in Keycloak, in this example
another-role.
Test the OAuth Login
To verify that the OAuth configuration is working as expected:
-
Open EJBCA in a private or incognito browser window.
-
When prompted for certificate authentication, skip the prompt.
-
When prompted for OAuth authentication by EJBCA, select the configured OAuth provider.
-
You will be redirected to Keycloak. Log in using the Keycloak user credentials.
After successful authentication, you will be redirected back to EJBCA and logged in with the assigned role.
If the configuration is correct, the user will be granted access according to the mapped role (for example, Super Administrator access when mapped to the corresponding role). This confirms that the OAuth provider, role mapping, and Helm configuration have been correctly set up.