A Hardware Security Module (HSM) can be configured to store and protect cryptographic keys in a centralized, high-assurance appliance, providing a root of trust for sensitive cryptographic data transactions.
Optionally, you can use the software-based SoftHSM implementation for demonstration or testing purposes.
The following describes how to configure a Luna HSM for the Software Appliance by registering the Software Appliance and connecting it to the HSM.
For more information, refer to the Thales docs on Luna Network HSM.
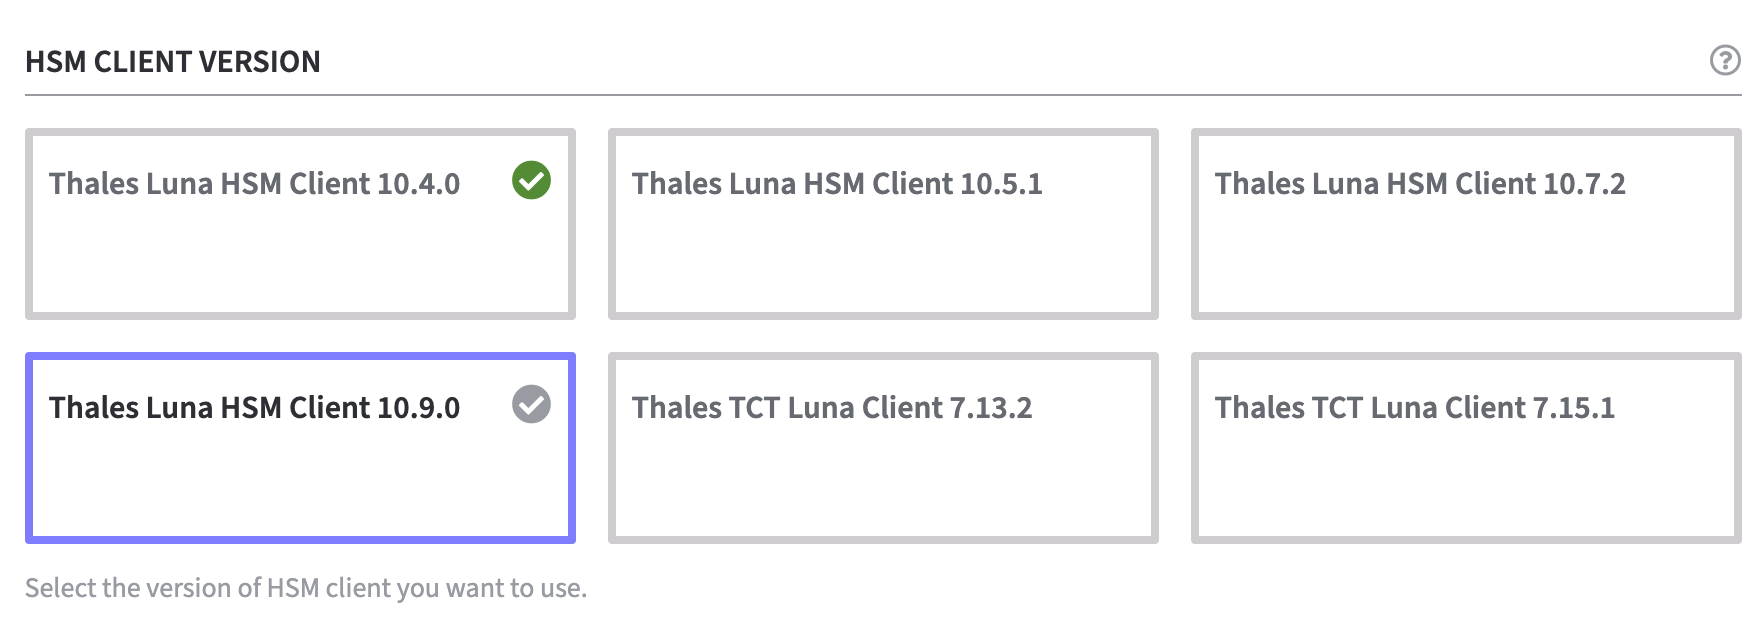
Choose between one of the following options:
-
Thales Luna HSM Client 10.4.0
-
Thales Luna HSM Client 10.5.1
-
Thales Luna HSM Client 10.7.2
-
Thales Luna HSM Client 10.9.0
-
Thales TCT Luna Client 7.13.2
-
Thales TCT Luna Client 7.15.1
Post Quantum Cryptography (PQC)
Luna HSM Client versions 10.9.0 and 7.15.1 support post-quantum cryptography.
To configure a Luna HSM for your Software Appliance, follow the steps below.
If the use of a Luna USB HSM device is intended a connection of the USB device to the VM must be configured first.
-
Luna USB HSM on ESXi is supported. Please refer to Configure a Luna USB HSM.
-
Luna USB HSM on KVM is supported.
-
Luna USB HSM on Hyper-V is not supported.
If you run into issues after the configuration, you can get HSM specific log messages from a HSM Support Package.
For further information please refer to Create an HSM Log.
Connect the Software Appliance with the Luna HSM
To connect the Software Appliance with the HSM:
-
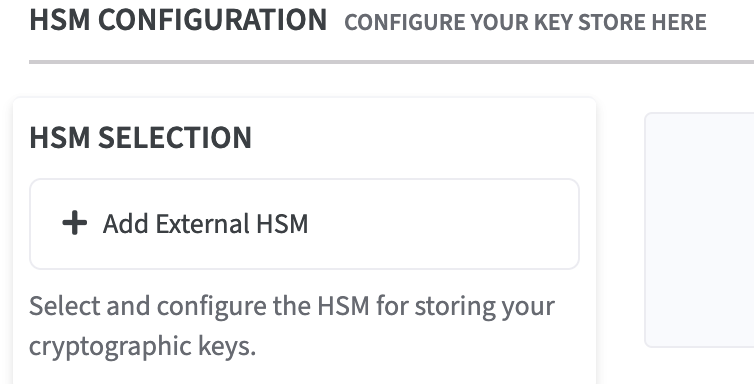
Log in to your Software Appliance and open the Security page or click Configure HSM in the Overview.
-
In the HSM Configuration section, click + Add External HSM in the HSM Selection field.
-
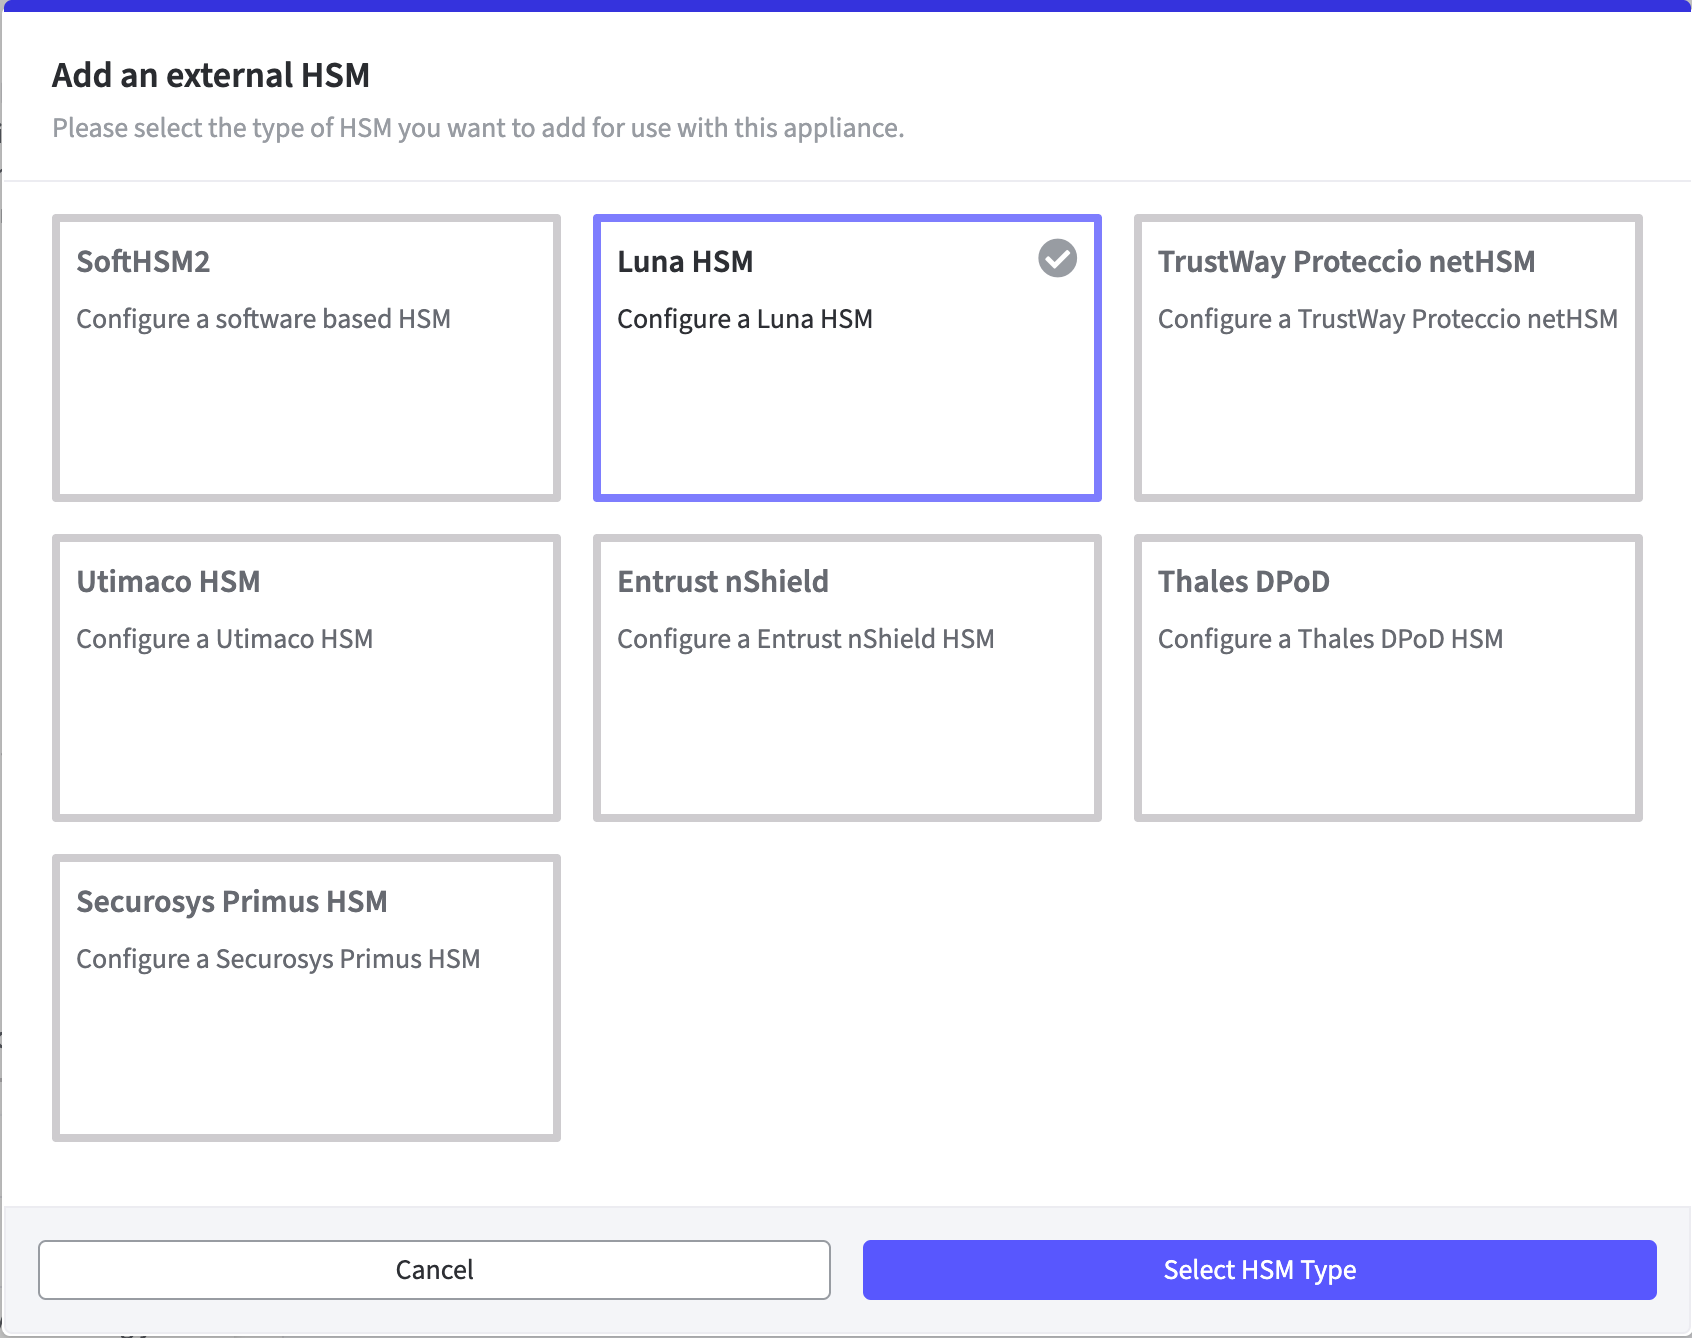
The Add an external HSM window opens.
Select Luna HSM to access the Configuration fields. -
Click Select HSM Type to continue.
-
The HSM Client Version section is displayed on the Security page.
-
Click on the HSM client version to be used.
-
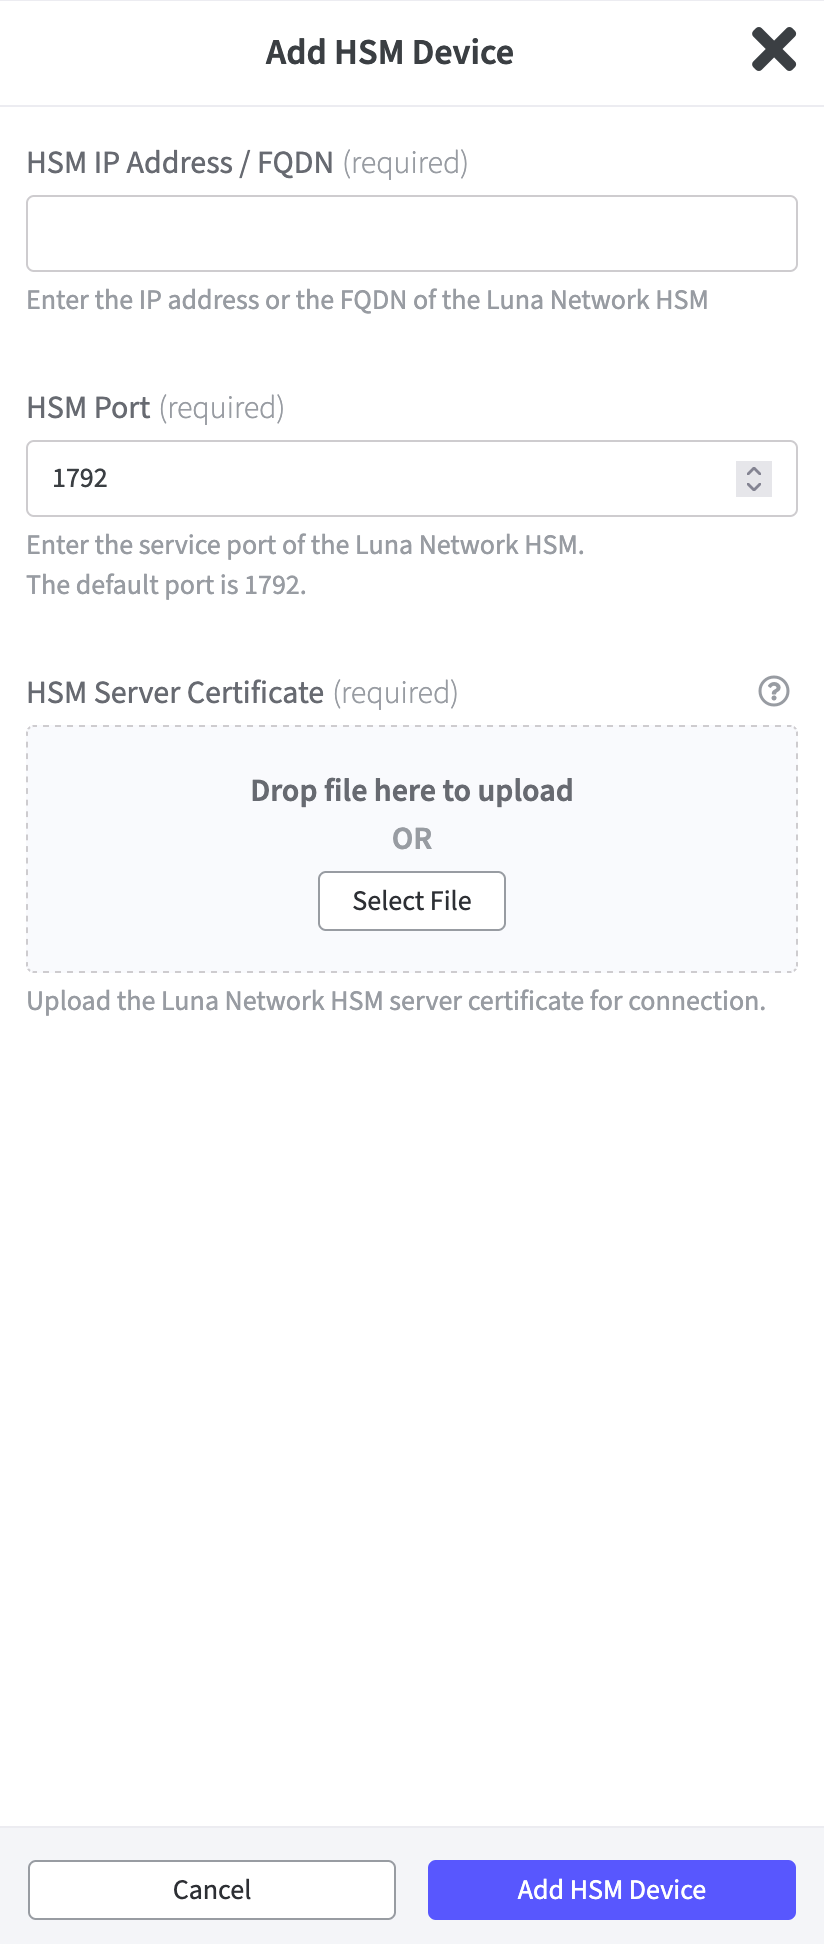
Click Add HSM Device a little bit further down in the Luna HSM Devices section.
The corresponding form for the certificate opens.-
HSM IP Address / FQDN:
Enter the IP address or the Fully Qualified Domain Name (FQDN) of your Luna HSM.
Only IPv4 addresses are supported. -
The HSM Port is already set by default.
-
Upload the HSM Server Certificate. Drag and drop or select the file.
This step is optional if trusted CAs are uploaded as described.
-
-
Confirm with Add HSM Device.
-
A modal dialog requests to confirm your configuration.
Save HSM Configuration -
Proceed with Activate.
The HSM device is now configured and displayed in a table in the Luna HSM Configuration section.
Here you can now preform actions such as Edit Device or Remove Device.
Luna HSM Configuration
Network Trust Link Service Certificate Authorities
In this section the Luna HSM is configured.
With this function, it is possible to change the server certificate on the HSM at any time without affecting the services.
The server certificate can be changed as long as the new server certificate is signed by a trusted CA that is registered in the Luna driver.
The uploaded certificates must contain the complete chain or the uploaded certificates have a path to the root certification authority. If this is not the case, an error message appears and the process cannot be continued.
Upload the root certification authority certificate first or the root certification authority certificate and the certificate to be uploaded are contained in the same pem file.
-
Log in to your Software Appliance and open the Security page.
-
In the Luna HSM Configuration section go to Network Trust Link Service Certificate Authorities.
-
Click Upload Trusted CA.
Browse to the file and upload the CA certificate.
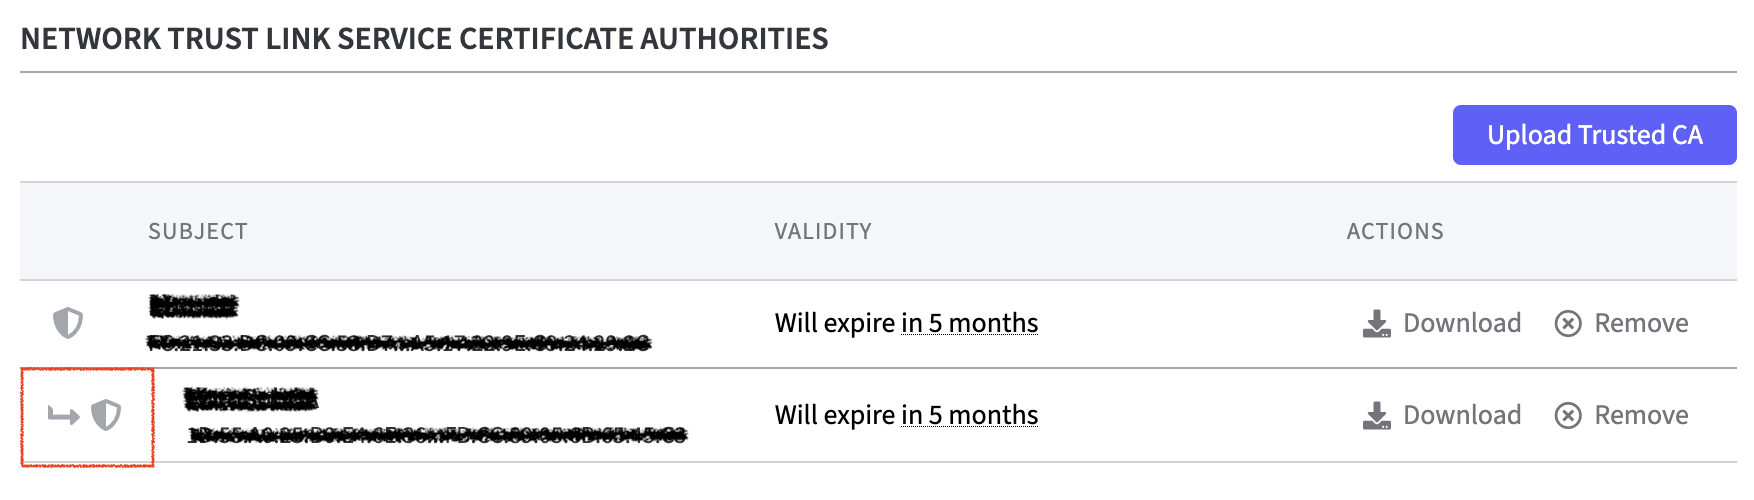
The trusted CA is now listed in the table for the Network Trust Link Service Certificate Authorities.
In the Action column you can Download or Remove the entity.
The sub CA is marked in the table and is therefore easy to identify.
Network Trust Link Service Client Certificate
In this section Luna Certificate Signing Request (CSR) are created.
If Luna TCT is configured, it is not possible to create Luna CSR!
By adding a certificate that is signed by a trusted CA, it is possible to easily replace the client certificate as long as it is signed by a trusted CA that is also registered on the Luna HSM.
There are Luna-specific limitations that depend on how the client was registered and which version it is using. Please refer to the Thales Luna documentation.
-
Log in to your Software Appliance and open the Security page.
-
In the Luna HSM Configuration section go to the Network Trust Link Client Certificate.
-
Click Create Luna CSR. The corresponding form opens.
The options are different depending on which Luna Thales client was selected!
These options are available for all driver versions.-
Enter the Common Name (CN) to be included in the CSR.
-
Enter the Validity period for the client certificate in days.
-
Key Algorithms:
These options are only available in Thales Luna Client 10.7.2.
From the drop down menu chose the Key type for the CSR.
RSA as key type, here a sub menu is available to enter the Key size. Chose from 2048, 3072 or 4096.
Elliptic Curve as key type, here a sub menu is available to enter the Elliptic Curve Name.
Chose from secp256k1, secp384r1, secp521r1 or prime256v1.
This entry selects the ECC algorithm for this CSR.
ED25519 as key type does not include a sub menu.
-
-
Click Create Luna CSR to continue.
-
The new created Luna CSR will than be listed in the Network Trust Link Service Client Certificate list.
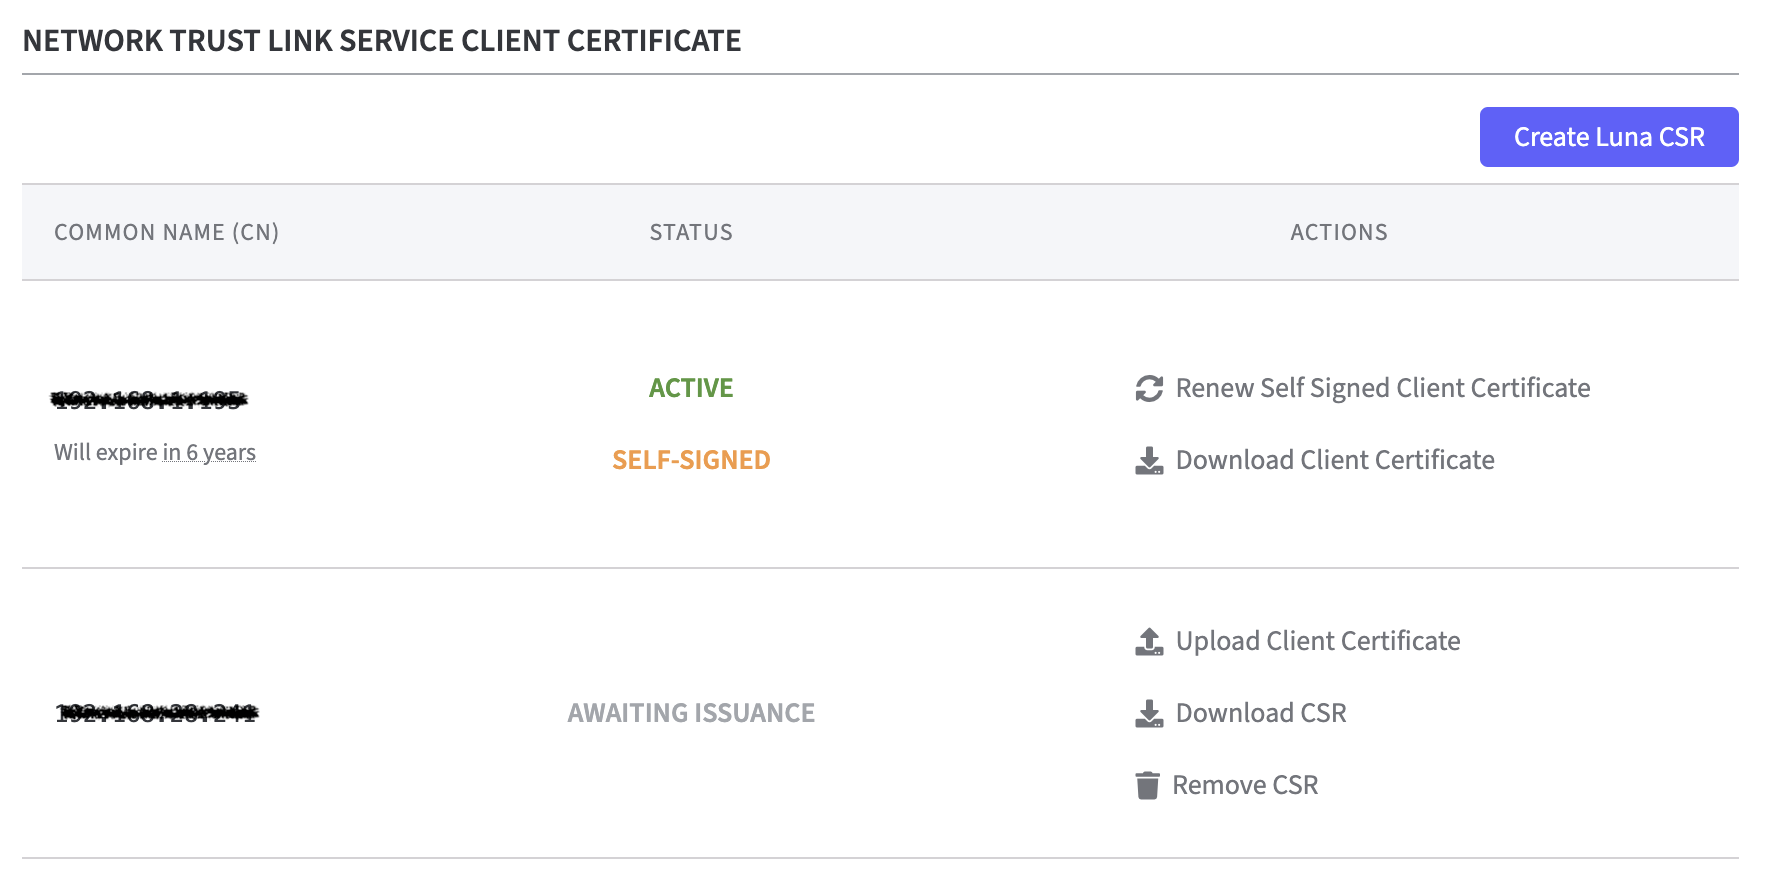
Should the certificate be Active and Self-Signed the following options appear in the Actions column:
Renew Self Signed Client Certificate or Download Client Certificate.
Should the certificate only be Active but not Self-Signed (signed by a CA) the following options appear in the Actions column:
Replace with self-signed Certificate or Download Client Certificate.
The CA-signed certificate can now be replaced by a newly generated, self-signed certificate.
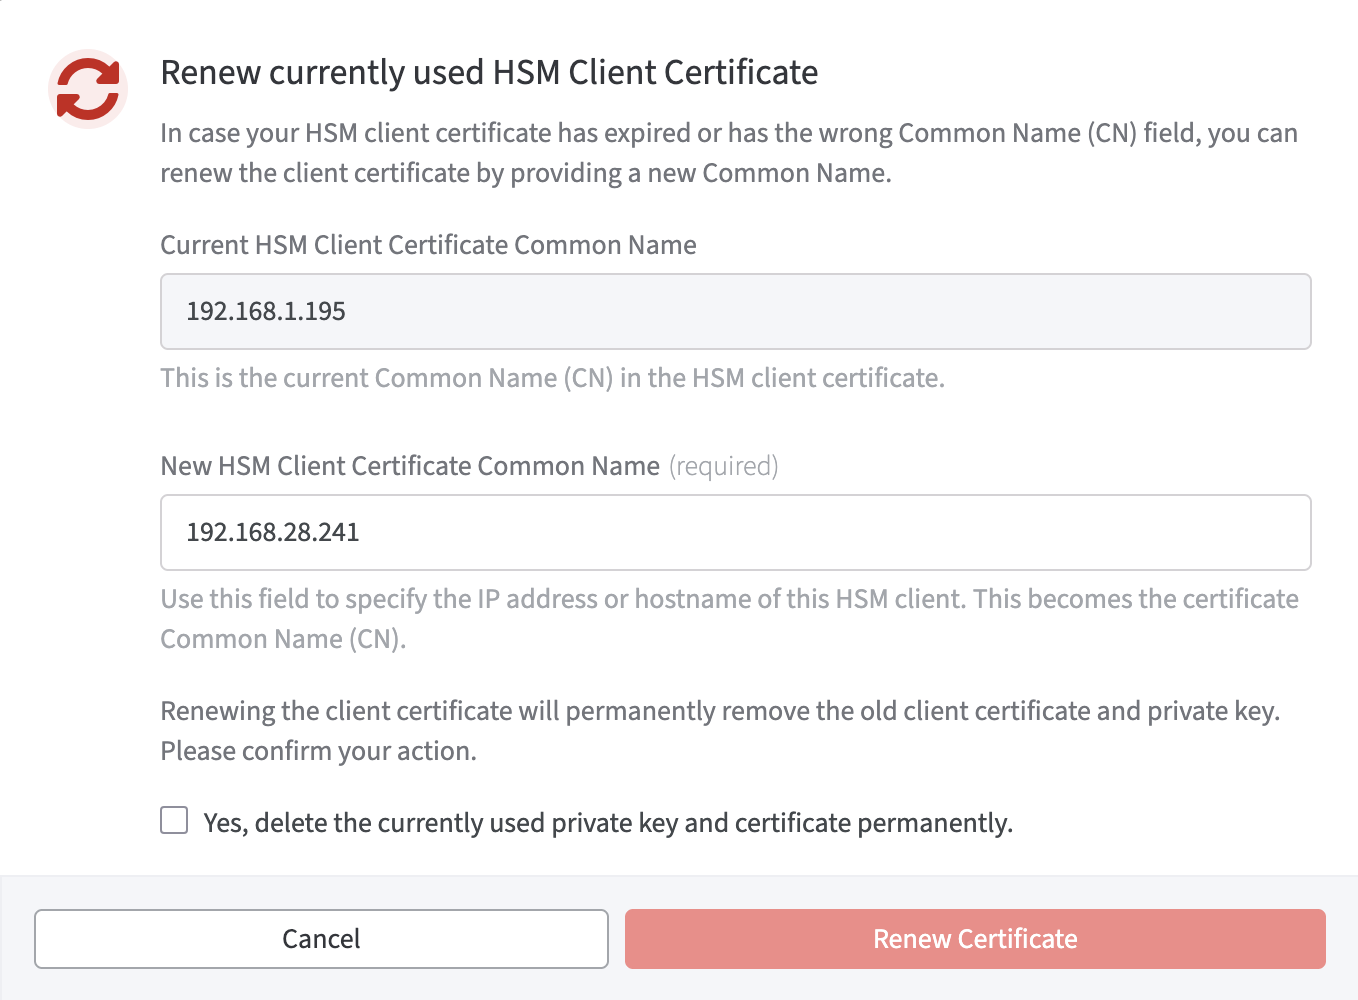
For self-signed Certificates:
If the HSM client certificate has expired or the Common Name (CN) field is incorrect
click Renew Client Certificate.
A modal dialog follows:
-
Current HSM Client Certificate Common Name is stated.
-
Enter the new HSM Client Certificate Common Name.
Note that renewing the client certificate will permanently remove the old client certificate and the private key.
This action must be confirmed.
Tick the corresponding box.
Click Renew Certificate to initiate the process.
For CA-signed certificates:
A new CSR must be created, signed and uploaded or:
if the HSM client certificate has expired or the Common Name (CN) field is incorrect
click Replace Client Certificate.
A modal dialog follows:
-
Current HSM Client Certificate Common Name is stated.
-
Enter the new HSM Client Certificate Common Name.
Note that replacing the client certificate will permanently remove the old client certificate and the private key.
This action must be confirmed.
Tick the corresponding box.
Click Replace Certificate to initiate the process.
Is the CSR Awaiting Issuance three options are available in the Actions column.
-
Upload Client Certificate
-
Download CSR
-
Remove CSR
Remove CSR will trigger a modal dialog which indicates that when the CSR is removed, the associated private key is also deleted. The corresponding CSR can then no longer be downloaded.
This action must be confirmed. Tick the corresponding box.
Click Submit to initiate the process.
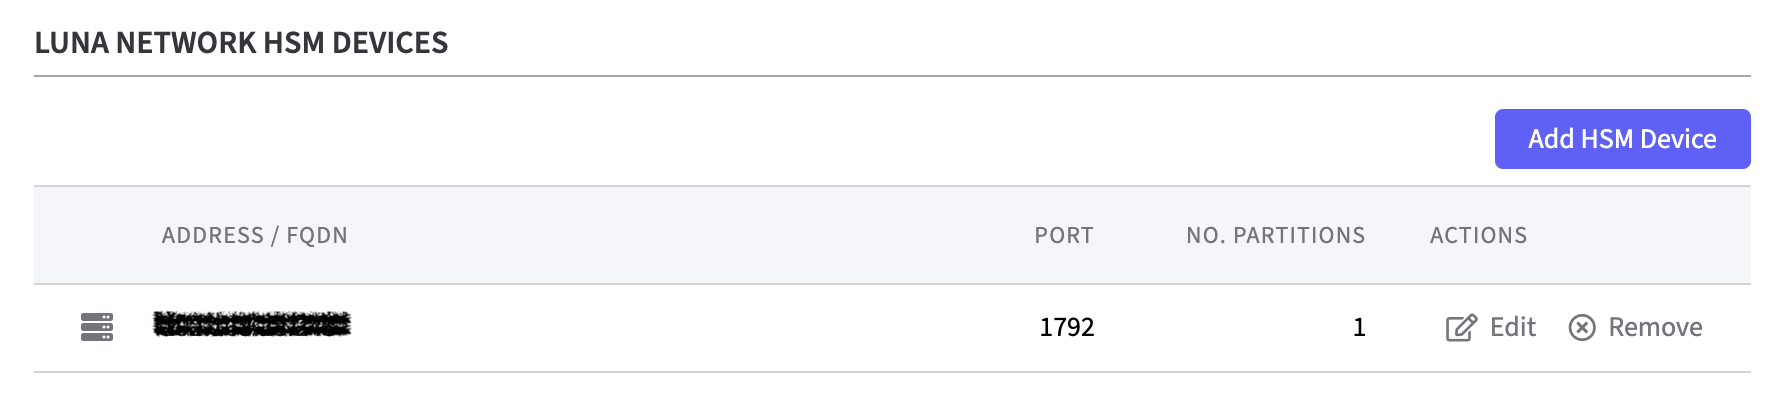
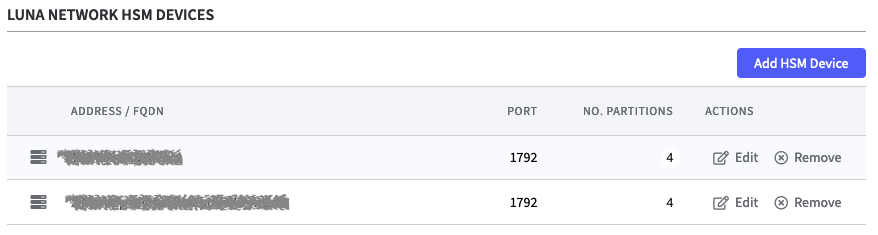
Luna HSM Devices
In the table all configured HSM Devices are displayed.
-
Address/FQDN
-
Port
-
Number Partitions
-
Action: Edit/Remove
Click Edit to edit the HSM Device. The corresponding form opens.
-
HSM IP Address/FQDN: Enter the IP address or the FQDN of the Luna HSM.
-
HSM Port: Enter the service port of the Luna HSM. The default port is 1792.
-
HSM Server Certificate: Drop the file into the field or Select File.
Click Edit HSM Device to save the settings.
Remove will trigger a modal dialog which indicates that changing the configuration of the HSM will restart all applications on the Software Appliance.
Click Remove to initiate the process.
Register the Software Appliance at the Luna HSM
Next, proceed with registering the Software Appliance at the Luna HSM.
The following provides example configuration steps on how to create a connection, by uploading the client certificate to the HSM, registering the client, and assigning a partition of the HSM to the client. For detailed information, refer to Thales docs on Creating an NTLS Connection Using Self-Signed Certificates.
To register and connect to the HSM:
On the Security page, section HSM Configuration, click Download Client Certificate to download and save the certificate.
Upload the client certificate to the Luna HSM.
scp <appliance IP>.pem <luna IP>:<appliance IP>.pem
Log into the Luna HSM.
ssh admin@<luna IP>
Register the client with the HSM:
client register -client <appliance name> -ip <appliance IP>
Assign a partition of the HSM to the client.
client assignPartition -client <appliance name> -partition <partition name>
On the Security page of the application, the status of the HSM Driver will change from Not Connected to Connected as soon as the configuration is completed.
On the Overview page of the application, the status in the HSM Overview also changes to Connected as soon as the configuration is completed. During configuration, the appliance is in the Restarting status. During this time, it is not available.
The HA Group for Luna HSM
All HA Group configurations are grayed out, until a second HSM device is configured and it is possible to create a group.
If you want to use High-Availability HA Groups, at least two HSM devices must be configured.
To add HSMs, follow the same procedure as when configuring the first HSM.
As soon as an additional HSM Device is added, a modal dialog appears to inform that:
changing the configuration of the HSM will restart all applications on the Software Appliance.
To proceed click Save.
The grayed out HA Groups area is now active because at least two HSM devices have been configured.
Create HA Group
-
Log in to your Software Appliance and open the Security page.
-
In the Luna HSM Configuration section go to HA Groups.
-
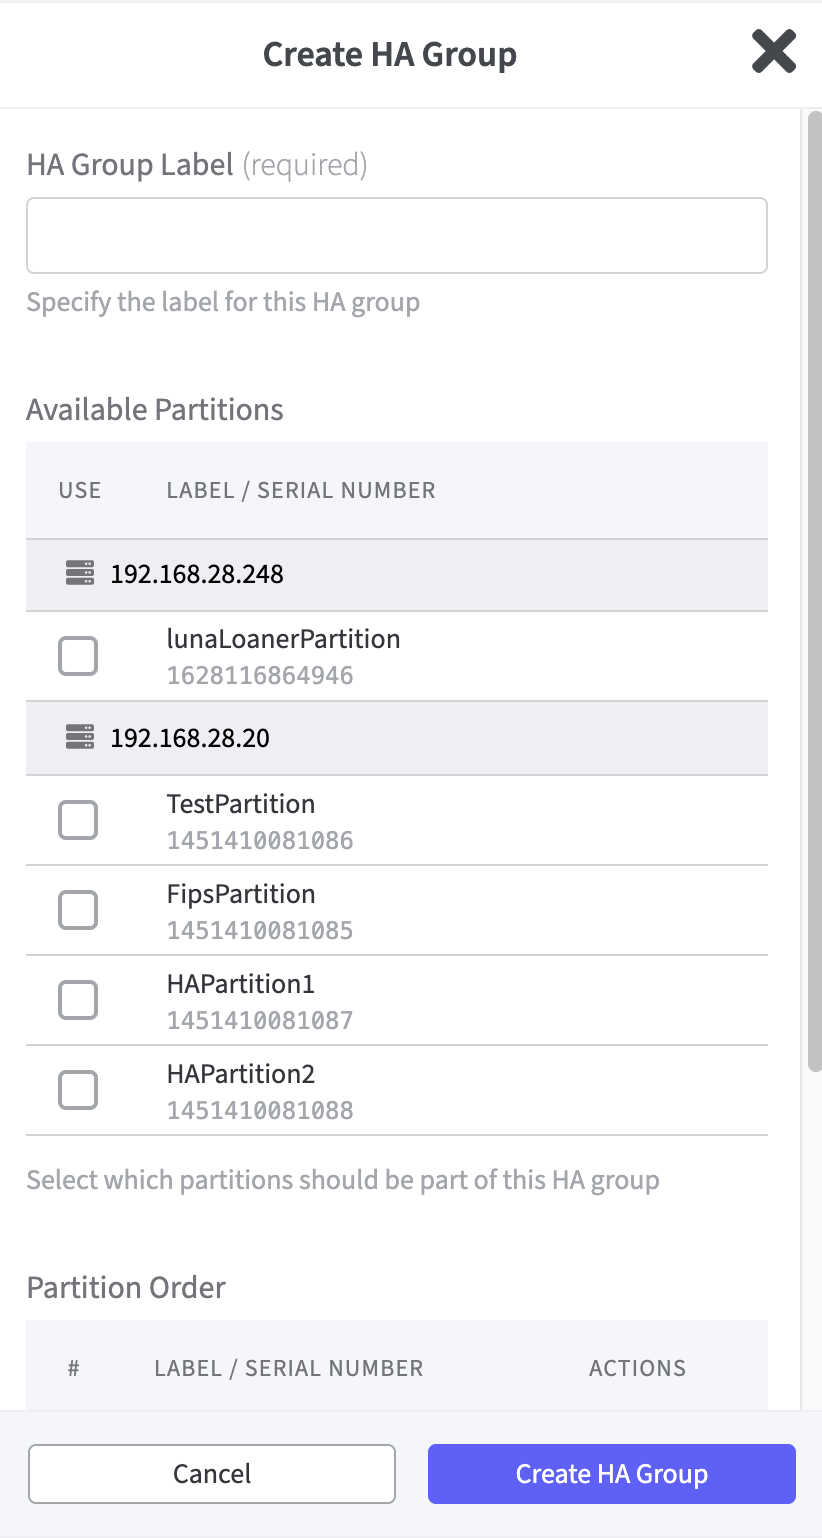
To open the corresponding form click Create HA Group.
-
In the form enter HA Group Label.
-
Select the Partitions you want to use for creating the HA Group.
-
Partition Order: the top partition is the one that creates new keys and then forwards the keys to the other partitions. If this order is to be changed, this is done here.
-
Specify the password used by all partitions in this HA group.
-
To confirm the settings and to create the HA group click Create HA Group.
Ensure that all requirements described in the Thales Luna Documentation Archive under "Setting up an HA Group" are taken into account. For more information, see Set up an HA Group.
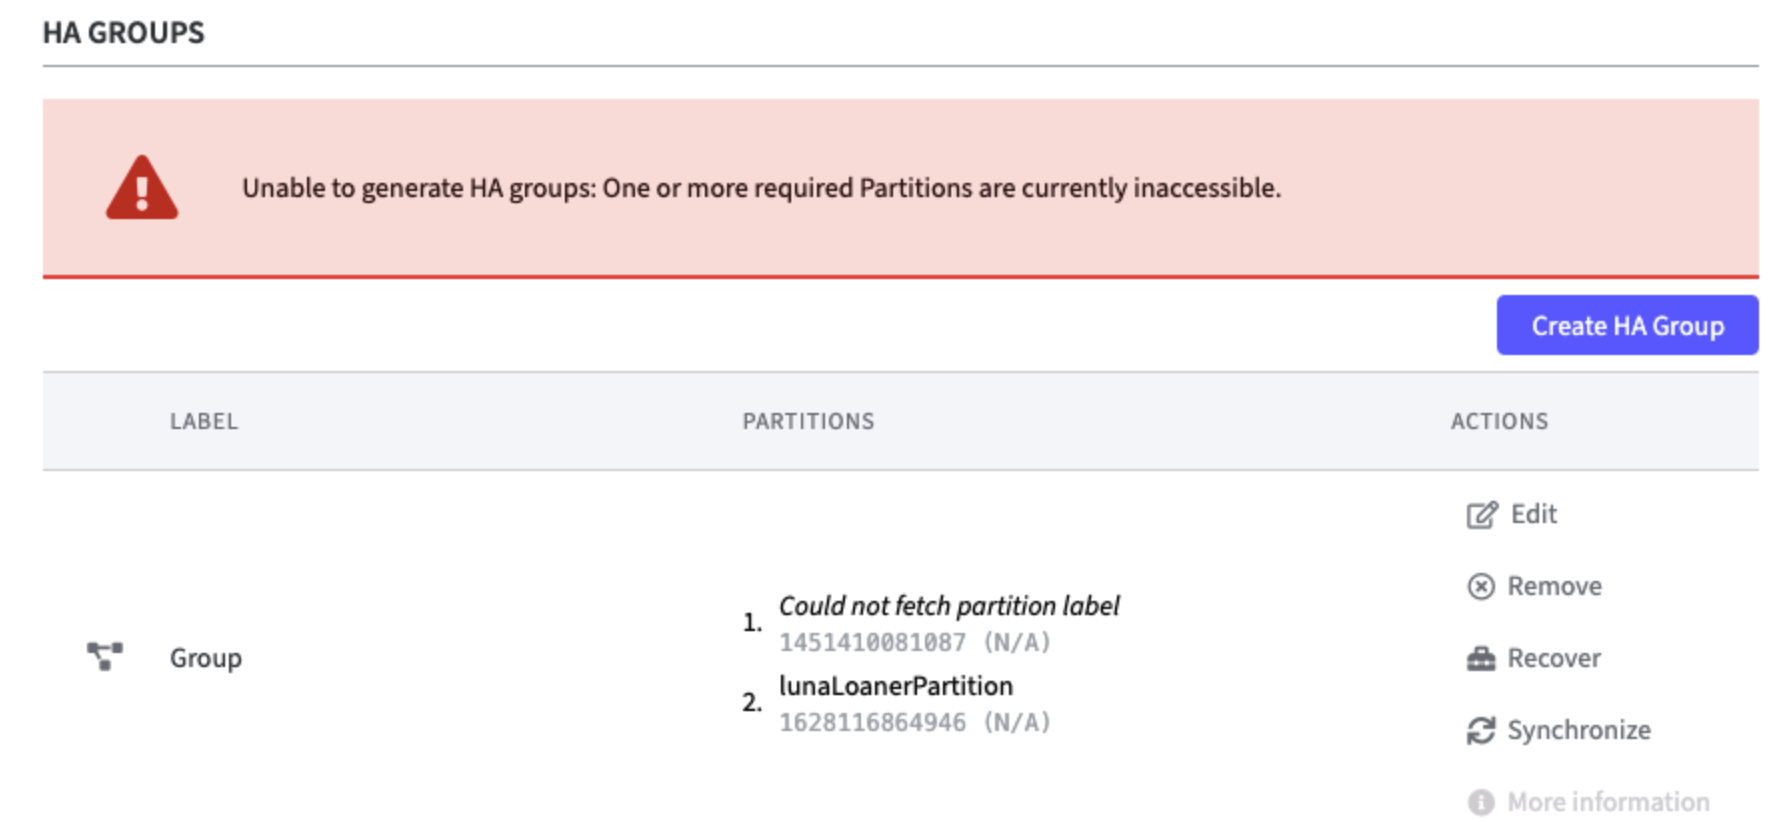
HA groups are only generated once all partitions required for generating these groups are available.
This also prevents the p11Proxy (and thus the application) from starting before all required partitions are available.
If one or more partitions cannot be accessed during the startup process, an error message is displayed in the HA Group section of Webconf.
A readiness check ensures that Webconf only displays Connected if a running p11proxy is actually present.
This means that at least one partition is accessible, as the driver would shut down if no partition were available.
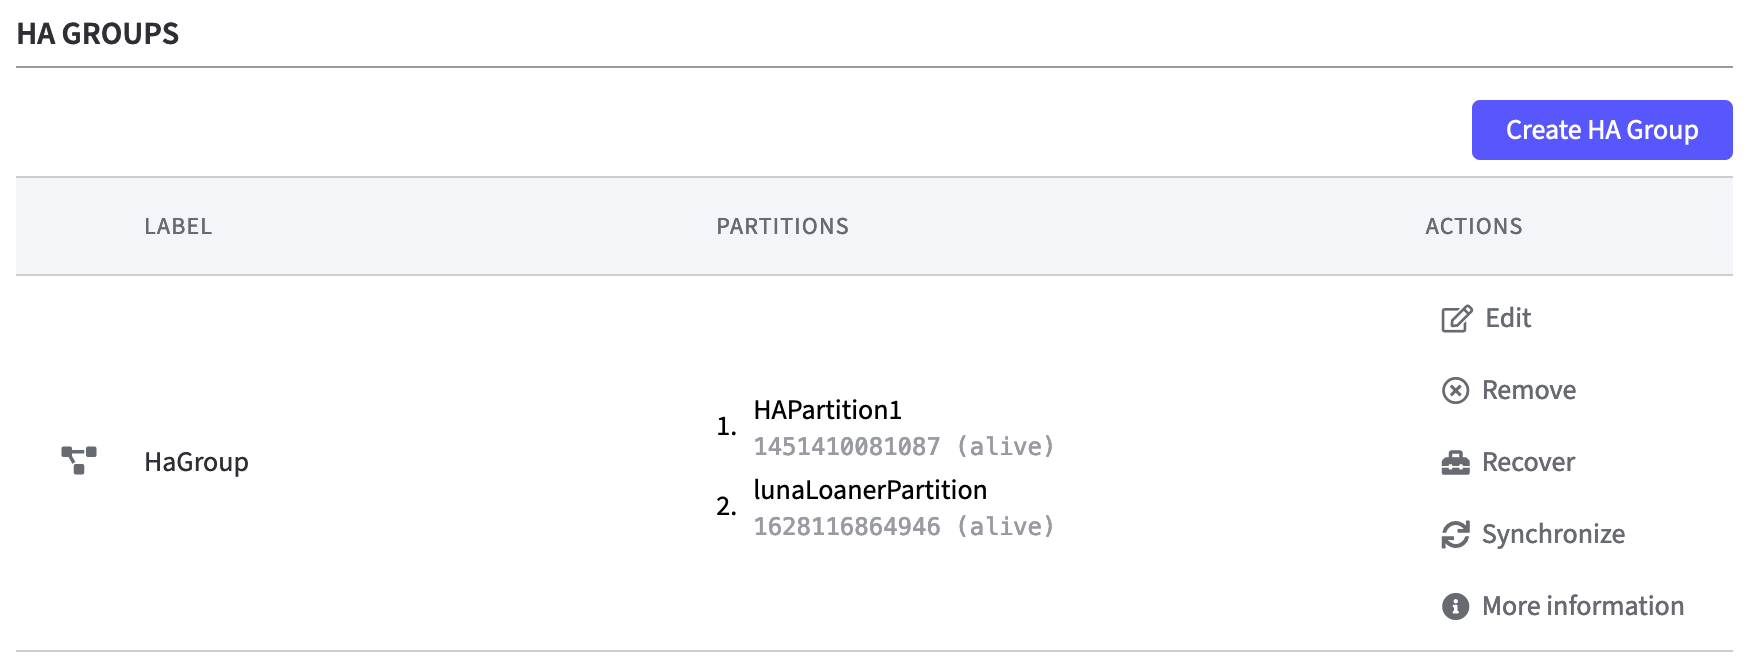
After the HA group has been created, it appears in a table with its partitions.
The last column offers various Actions to be performed.
Edit:
To modify the HA Group click Edit. The form that opens corresponds to the form from the previous step: Create HA Group.
Remove:
To clear the HA Group click Remove. A modal dialog is waiting for confirmation, as changing the configuration of the HSM will cause the applications to restart.
Recover:
If a partition had lost the connection or was temporarily inaccessible, trigger Recover manually. A pop up window indicates the recovery result.
Synchronize:
Click Synchronize to synchronize the key material of all partitions again. A modal dialog indicates the synchronization result.
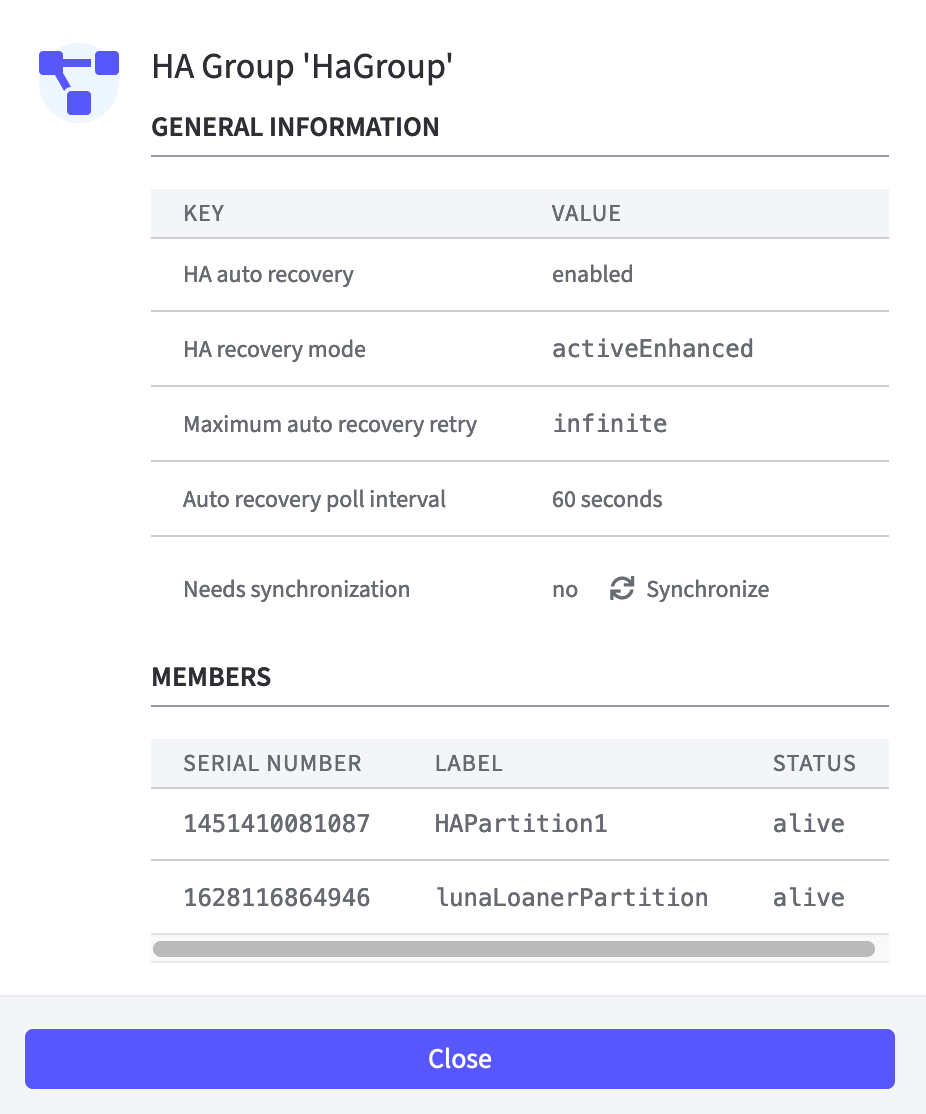
More information:
To display a pop-up window with all important data of the HA group click More information. This is an inactive overview. Only synchronization can be triggered manually in this window. If one of the members is not alive, the line is highlighted in red and the Status is set to down.
HA Groups Settings
-
Log in to your Software Appliance and open the Security page.
-
In the Luna HSM Configuration section go to HA Groups Settings.
-
Check Enable HA log if HA logs are to be added to the system logs.

-
Probe Timeout (required) for Thales Luna HSM Client 10.9.0 and 10.7.2 only
By default, if the HA probing thread sends a request to the Luna Network HSM 7 and the HSM is blocked, the probing thread may also become blocked, and no failover will occur.
To account for this possibility, this setting—when set to a value greater than 0—triggers a timeout (in seconds).
Here the number of seconds that should elapse between attempts to recover a failed HA group member are specified.
-
Recovery retry interval (required)
Here the number of seconds that should elapse between attempts to recover a failed HA group member are specified.
-
Recovery mode
Here the method of HA automatic recovery is specified.
Use the drop down to chose.

-
Recovery attempts (required)
To set the number of attempts to restore a failed member use the arrow keys to:-
Enter the value -1 to set unlimited recovery attempts
-
Enter the value 0 to deactivate automatic recovery.

-
-
Click Save HSM Configuration in the Miscellaneous Configurations to save the settings.
Miscellaneous Configurations
Enter the following Miscellaneous Configurations:
Protected Authentication Path: Select the desired authentication protection using the drop down function:
-
No Challenge Request:
There will be no further authentication protection. -
Check for Crypto Officer Challenge Request (black PED key):
You need to insert the black PED (PIN Entry Device) key for authentication. -
Check for Crypto User Challenge Request (grey PED key):
You need to insert the grey PED (PIN Entry Device) key for authentication.
Moreover select the additional options:
-
Use HA Only mode:
This option is only selectable if a Luna HA group is configured. It hides the physical slots and leaves only the HA group slots visible to applications. -
Allow Login on FM enabled HSMs:
Allow login to a partition on an HSM that uses FM (Functionality Modules).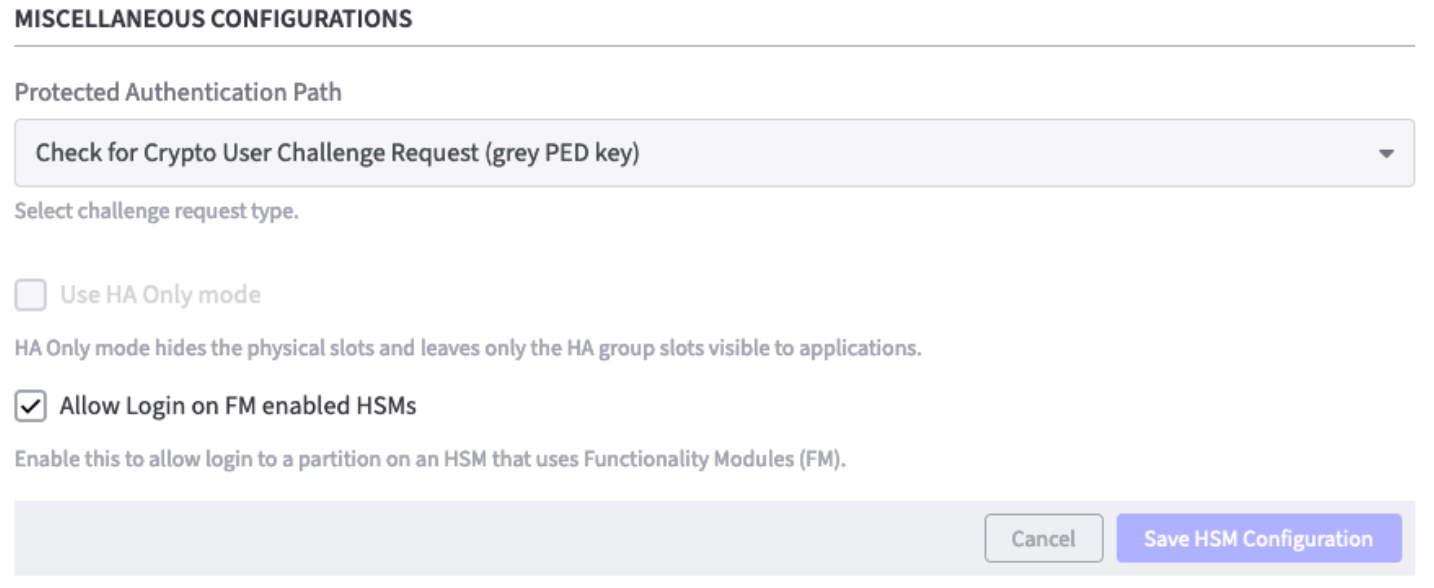
-
Finish with Save HSM Configuration.
Luna HA Key Synchronization
The Software Appliance will check every 40 seconds if at least one slot is available.
If no slot is found, the driver will shut down and EJBCA will no longer be available.
A Key Synchronization recovery of lost HA group members only works for Luna v1 partitions.
Usage Information
CryptoToken Configuration
The following note can be found in the info box:
In order to use this HSM in EJBCA, you need to select the following
PKCS#11 library in the P11NG CryptoToken configuration:
Reference: PKCS#11 Proxy - Thales Luna
The last line in Usage Information displays the options:
Remove HSM Configuration
To remove the HSM configuration you need to type REMOVE HSM CONFIGURATION into the Confirm Action field.
Click Remove to remove the configuration or Cancel to close the modal dialog.
If Remove is chosen the application will restart.
If changes have been made to the sections:
-
HSM Client Authentication Configuration
-
Secure Channel Client Configuration
-
Miscellaneous Configurations
these can be made with undone with Cancel or saved with Save HSM Configuration.
Abort
Click Abort to terminate the process of configuring a HSM.
This will reset your settings.
Save HSM Configuration
Click Save HSM Configuration to save changes made on the HSM configuration.
Once EJBCA is running again, you can proceed with adding a crypto token.
Add a Crypto Token in EJBCA Enterprise
To create a crypto token:
-
On the Overview page of the Software Appliance, click Admin Web for EJBCA in the Application Overview column.
-
The EJBCA Enterprise page opens.
The individual configuration of the Crypto Token depends on the configuration of the HSM!
For detailed Information please see Managing Crypto Tokens.
HSM Troubleshooting
In the section HSM Driver Controls the current HSM Driver Status is displayed.
In case of HSM problems, the HSM driver can be restarted via the Restart button.