A Hardware Security Module (HSM) can be configured to store and protect cryptographic keys in a centralized, high-assurance appliance, providing a root of trust for sensitive cryptographic data transactions.
Optionally, you can use the software-based SoftHSM implementation for demonstration or testing purposes.
The following describes how to configure an Entrust nShield HSM for the Software Appliance by registering the Software Appliance and connecting it to the HSM.
For more information on the Entrust nShield HSM, refer to the Entrust product documentation that you received with your purchase of the HSM.
-
Three versions of the Security World software package from Entrust are available:
12.80.4, 13.4.4. and 13.9.0. -
The Entrust nShield Connect HSM can be used with all three versions.
-
The nShield 5c HSM is supported with version 13.4.4 and 13.9.0.
To configure an Entrust nShield HSM for your Software Appliance, follow the steps below.
Supported Entrust HSM Features
The Software Appliance supports the following Entrust nShield features:
-
Preload of any Operator CardSets with a k/n quorum.
-
Preload with HA of any 1/n quorum Operator CardSet (n>= number of connected HSMs).
-
Connection of any 1/n Operator CardSet without preload functionality
-
Softcards
Post Quantum Cryptography (PQC)
In order to use PQC algorithms the HSM firmware needs to support it and you need to select nShield Security World 13.9.0.
If you run into issues after the configuration, you can get HSM specific log messages from a HSM Support Package. For further information please refer to Create an HSM Log.
Connect the Software Appliance with the Entrust nShield HSM
-
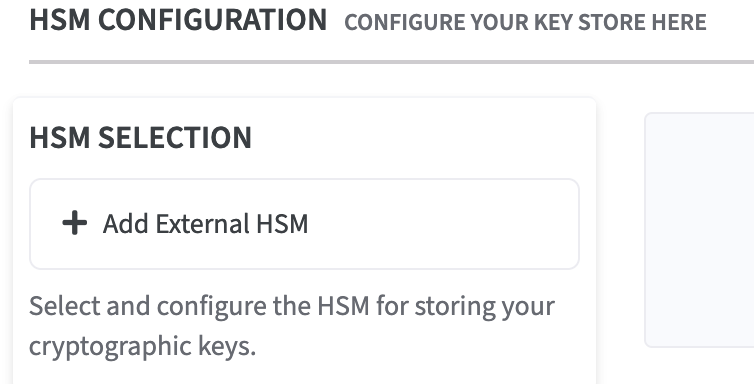
Log in to your Software Appliance and open the Security page or click Configure HSM in the Overview.
-
In the HSM Configuration section, click + Add External HSM in the HSM Selection field.
-
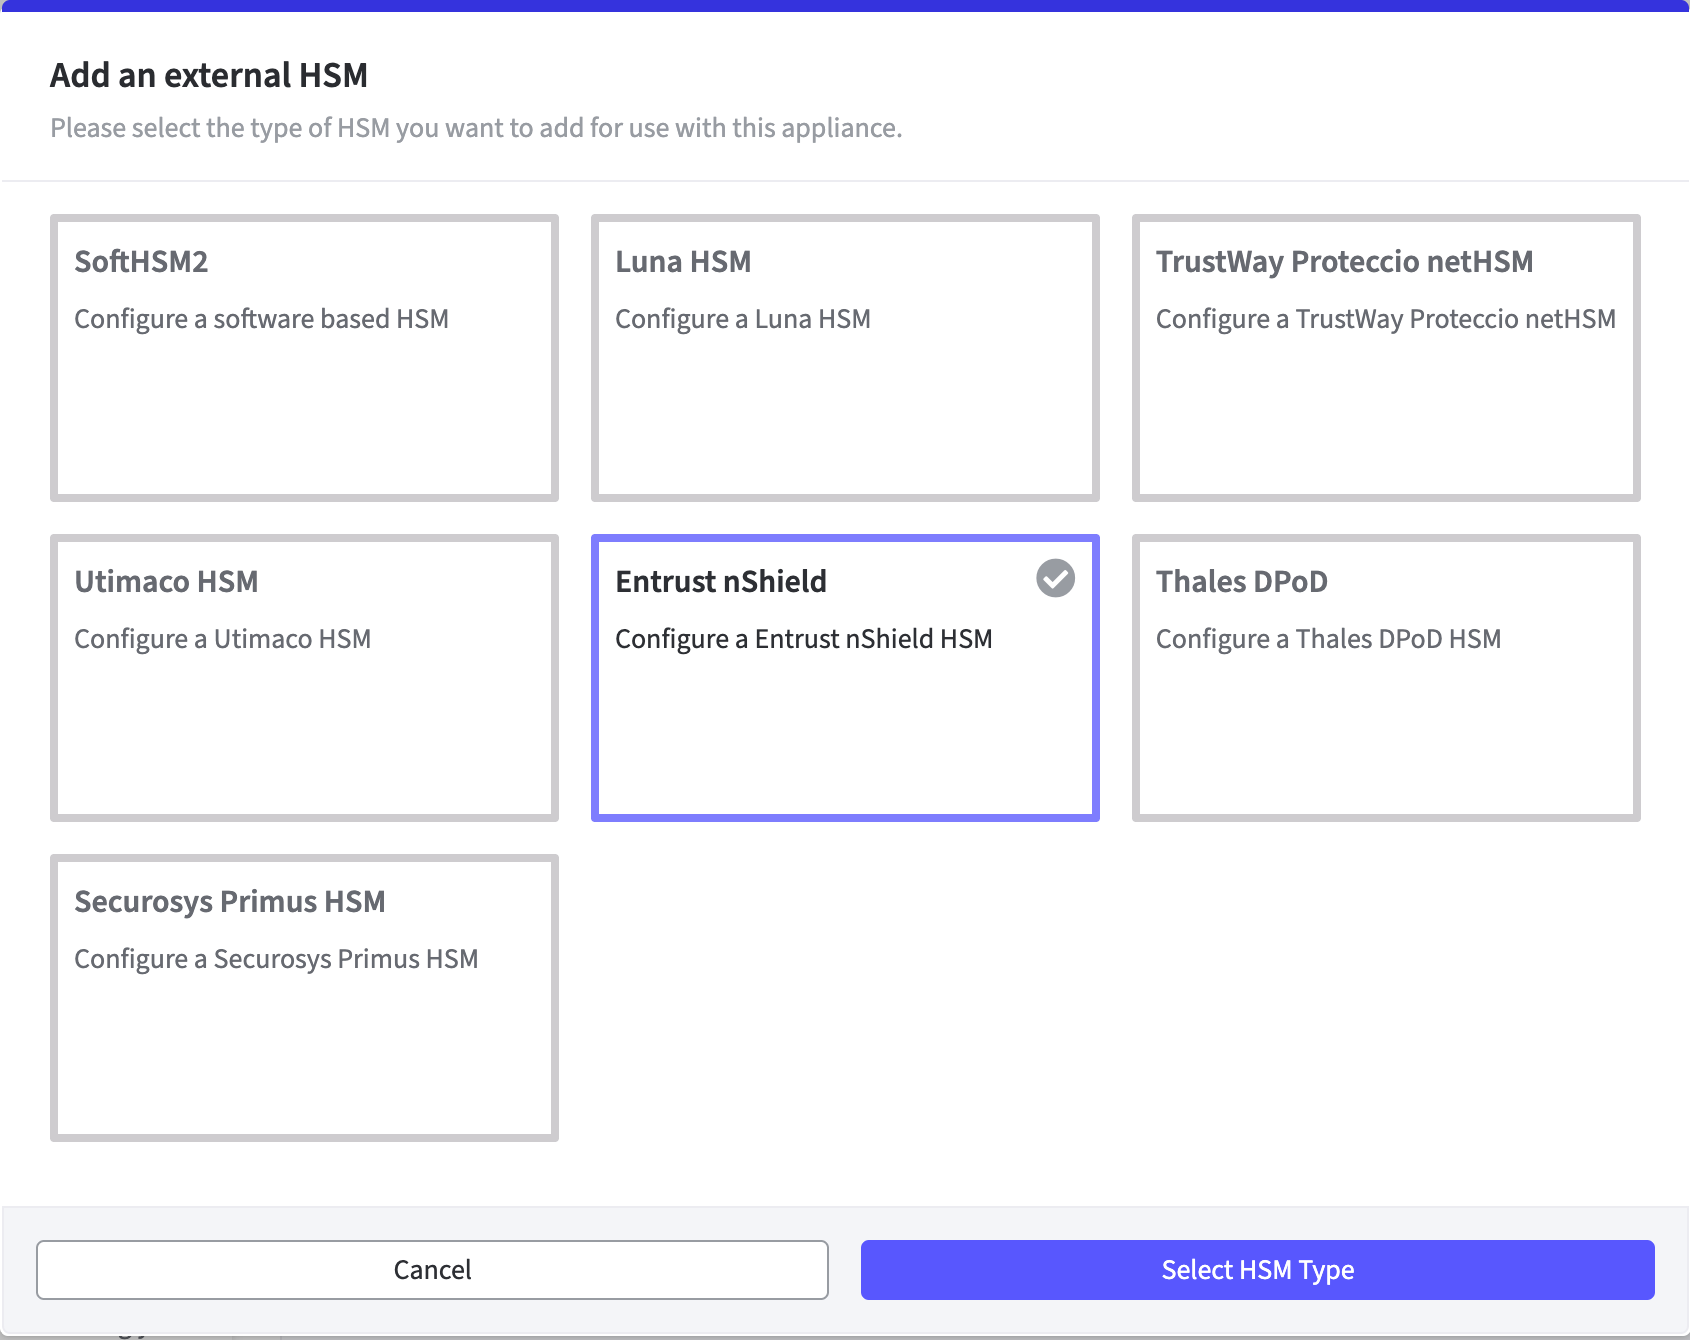
The Add an external HSM window opens.
Select Entrust nShield to access the Configuration fields. -
Click Select HSM Type to continue.
-
The HSM Client Version section is displayed on the Security page.
-
Click on the HSM client version to be used.

-
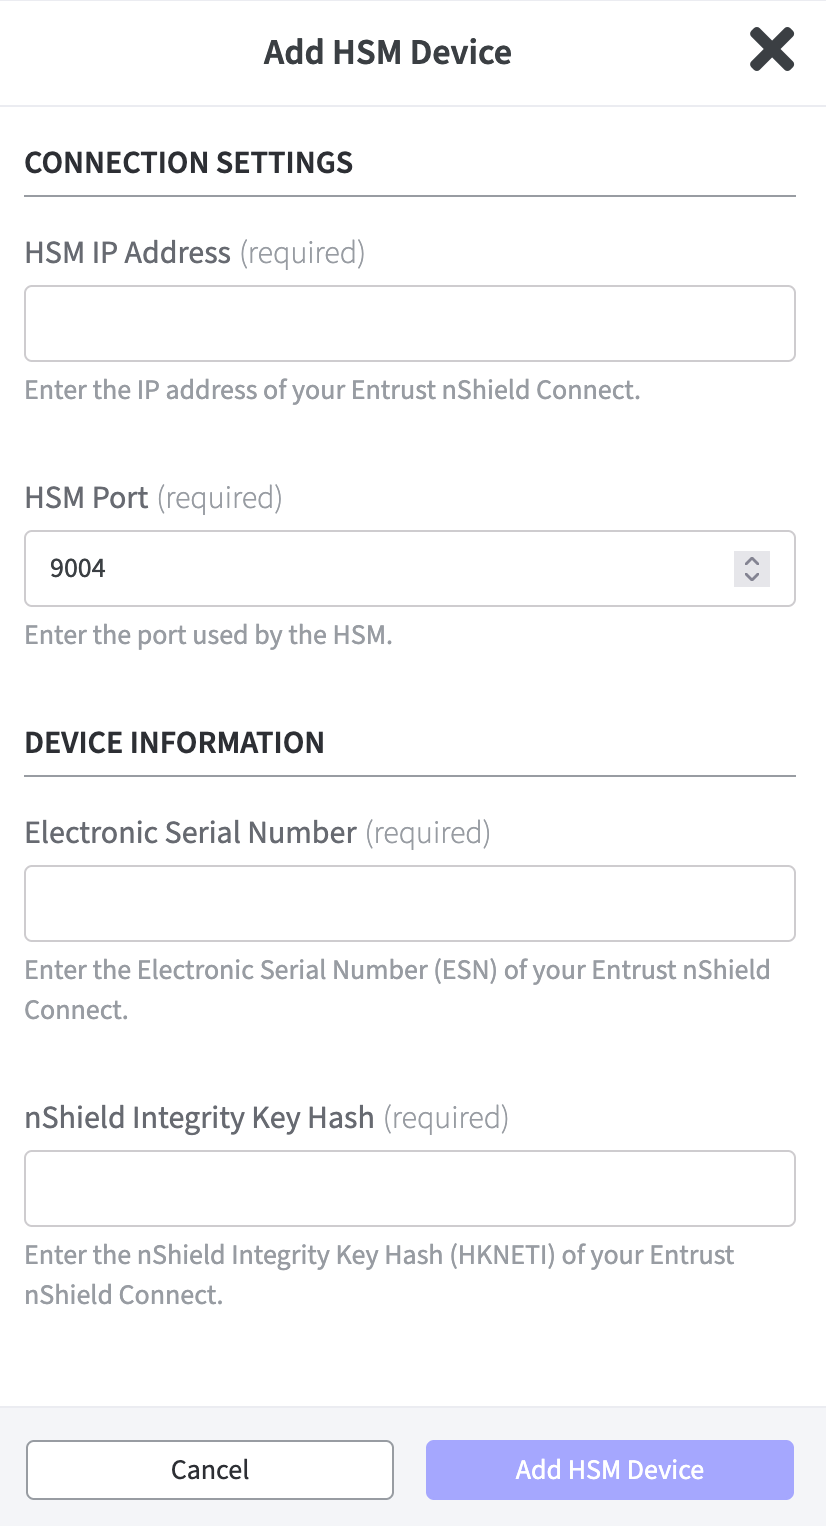
Click Add HSM Device.
The corresponding form for the certificate opens.-
HSM IP Address / FQDN:
Enter the IP address or the Fully Qualified Domain Name (FQDN) of the HSM.
Only IPv4 addresses are supported. -
The HSM Port is already set by default.
-
Device Information:
Enter the Electronic Serial Number (ESN).
Enter the nShield Integrity Key Hash of the Entrust nShield.
-
-
Confirm your entries with Add HSM Device.
-
A modal dialog requests Save HSM Configuration.
This will restart all applications on the appliance. -
Proceed with Activate or abort with Cancel.
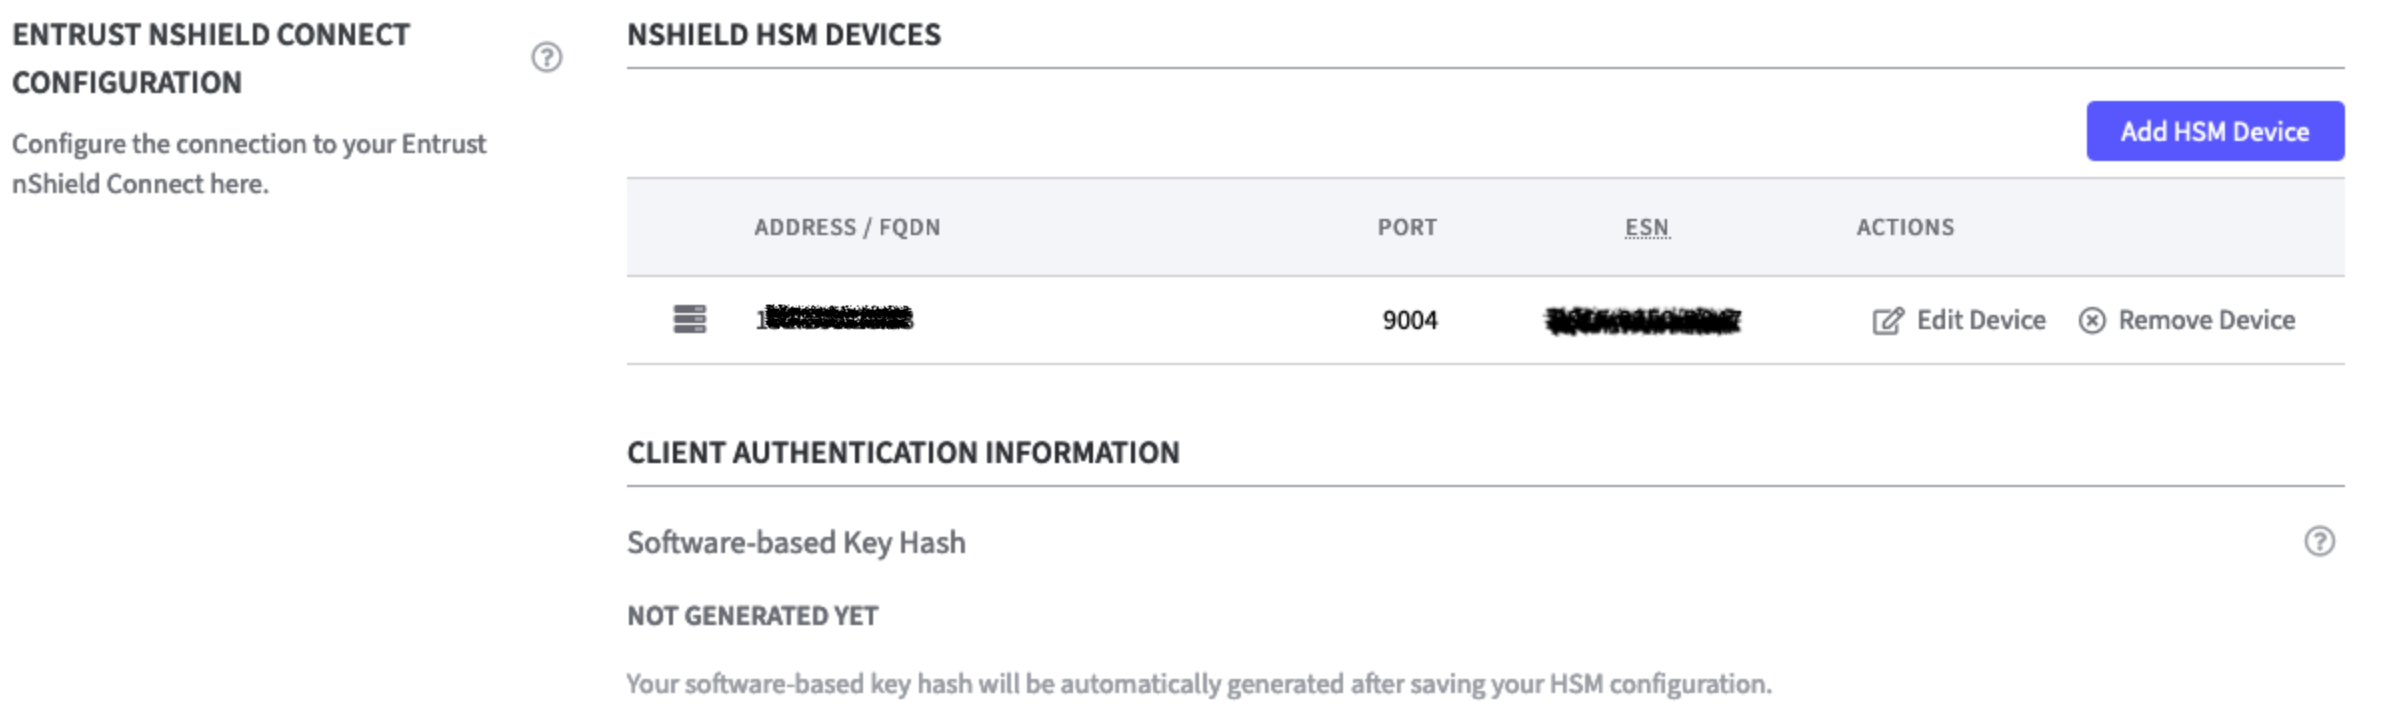
The HSM device is now configured and displayed in a table in the nShield HSM Devices section.
Here you can now preform actions such as Edit Device or Remove Device.
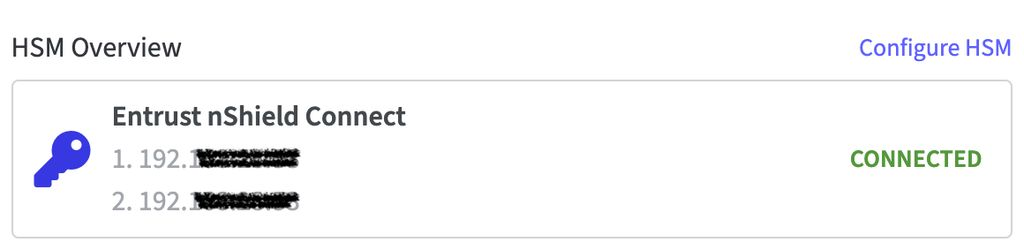
The status is also displayed on the Overview page in the section HSM Overview.
Click Configure HSM to go back to the HSM Configuration on the Security page.
Usage Information
CryptoToken Configuration
The following note can be found in the info box:
In order to use this HSM in EJBCA, you need to select the following
PKCS#11 library in the P11NG CryptoToken configuration:
Reference: PKCS#11 Proxy - Entrust nShield HSM
The last line in Usage Information displays the options:
Remove HSM Configuration
To remove the HSM configuration you need to type REMOVE HSM CONFIGURATION into the Confirm Action field.
Click Remove to remove the configuration or Cancel to close the modal dialog.
If Remove is chosen the application will restart.
If changes have been made to the sections:
-
HSM Client Authentication Configuration
-
Secure Channel Client Configuration
-
Miscellaneous Configurations
these can be made with undone with Cancel or saved with Save HSM Configuration.
Abort
Click Abort to terminate the process of configuring a HSM.
This will reset your settings.
Save HSM Configuration
Click Save HSM Configuration to save changes made on the HSM configuration.
On the Security page of the application, the status of the HSM Driver will change from Not Connected to Connected as soon as the configuration is completed.
On the Overview page of the application, the status in the HSM Overview also changes to Connected as soon as the configuration is completed. During configuration, the appliance is in the Restarting status. During this time, it is not available.