Security: Managing Transport Layer Security (TLS) Certificates
The following describes how to mange Transport Layer Security certificates.
It may be necessary to renew the TLS certificate in order to comply with your company's security regulations. For example, to remove the security warning in the address bar of the browser.
Managing TLS certificates includes the following steps.
Create and Download a New Certificate Signing Request (CSR)
Your first step for renewing a TLS certificate is to create a new CSR.
Log in to your Software Appliance and open the Security page.
In the TLS Certificates section, click Create New CSR to open the corresponding form.
Select the cryptographic Key Algorithm to be used for the CSR.
EC prime256v1 (default)
RSA 4096
RSA 3072
RSA 2048
Add Domains. You can enter any IPv4 or IPv6 address in the entry field. The field also supports any domain name as well as wildcard domains and punnycodes.
The default IP address is displayed below the input field.Click Add next to the new entry to specify the new domain. Several new domains can be added here.
Use the cross next to the entry on the right-hand side to remove an unwanted entry.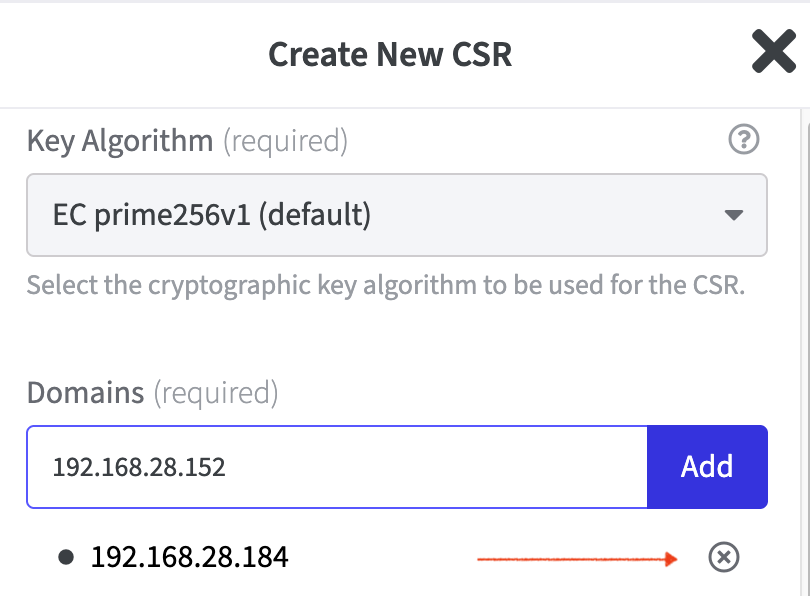
If you leave the entry field empty,, the default IP address displayed below will be used.
Optional Fields:Enter the Common Name (CN) to be included in the CSR.
Enter the State/Province (ST) and specify the Country (C). Use the drop down menu.
Enter the Locality (L).
Enter the Organization (O).
Click Create CSR to confirm your entries and create the CSR.
The TLS Certificates are listed now in a table.
A Status column for the certificates is displayed in the list. Awaiting Issuance should be stated here.Click Download CSR in the in the Actions column, to download and save the new CSR.
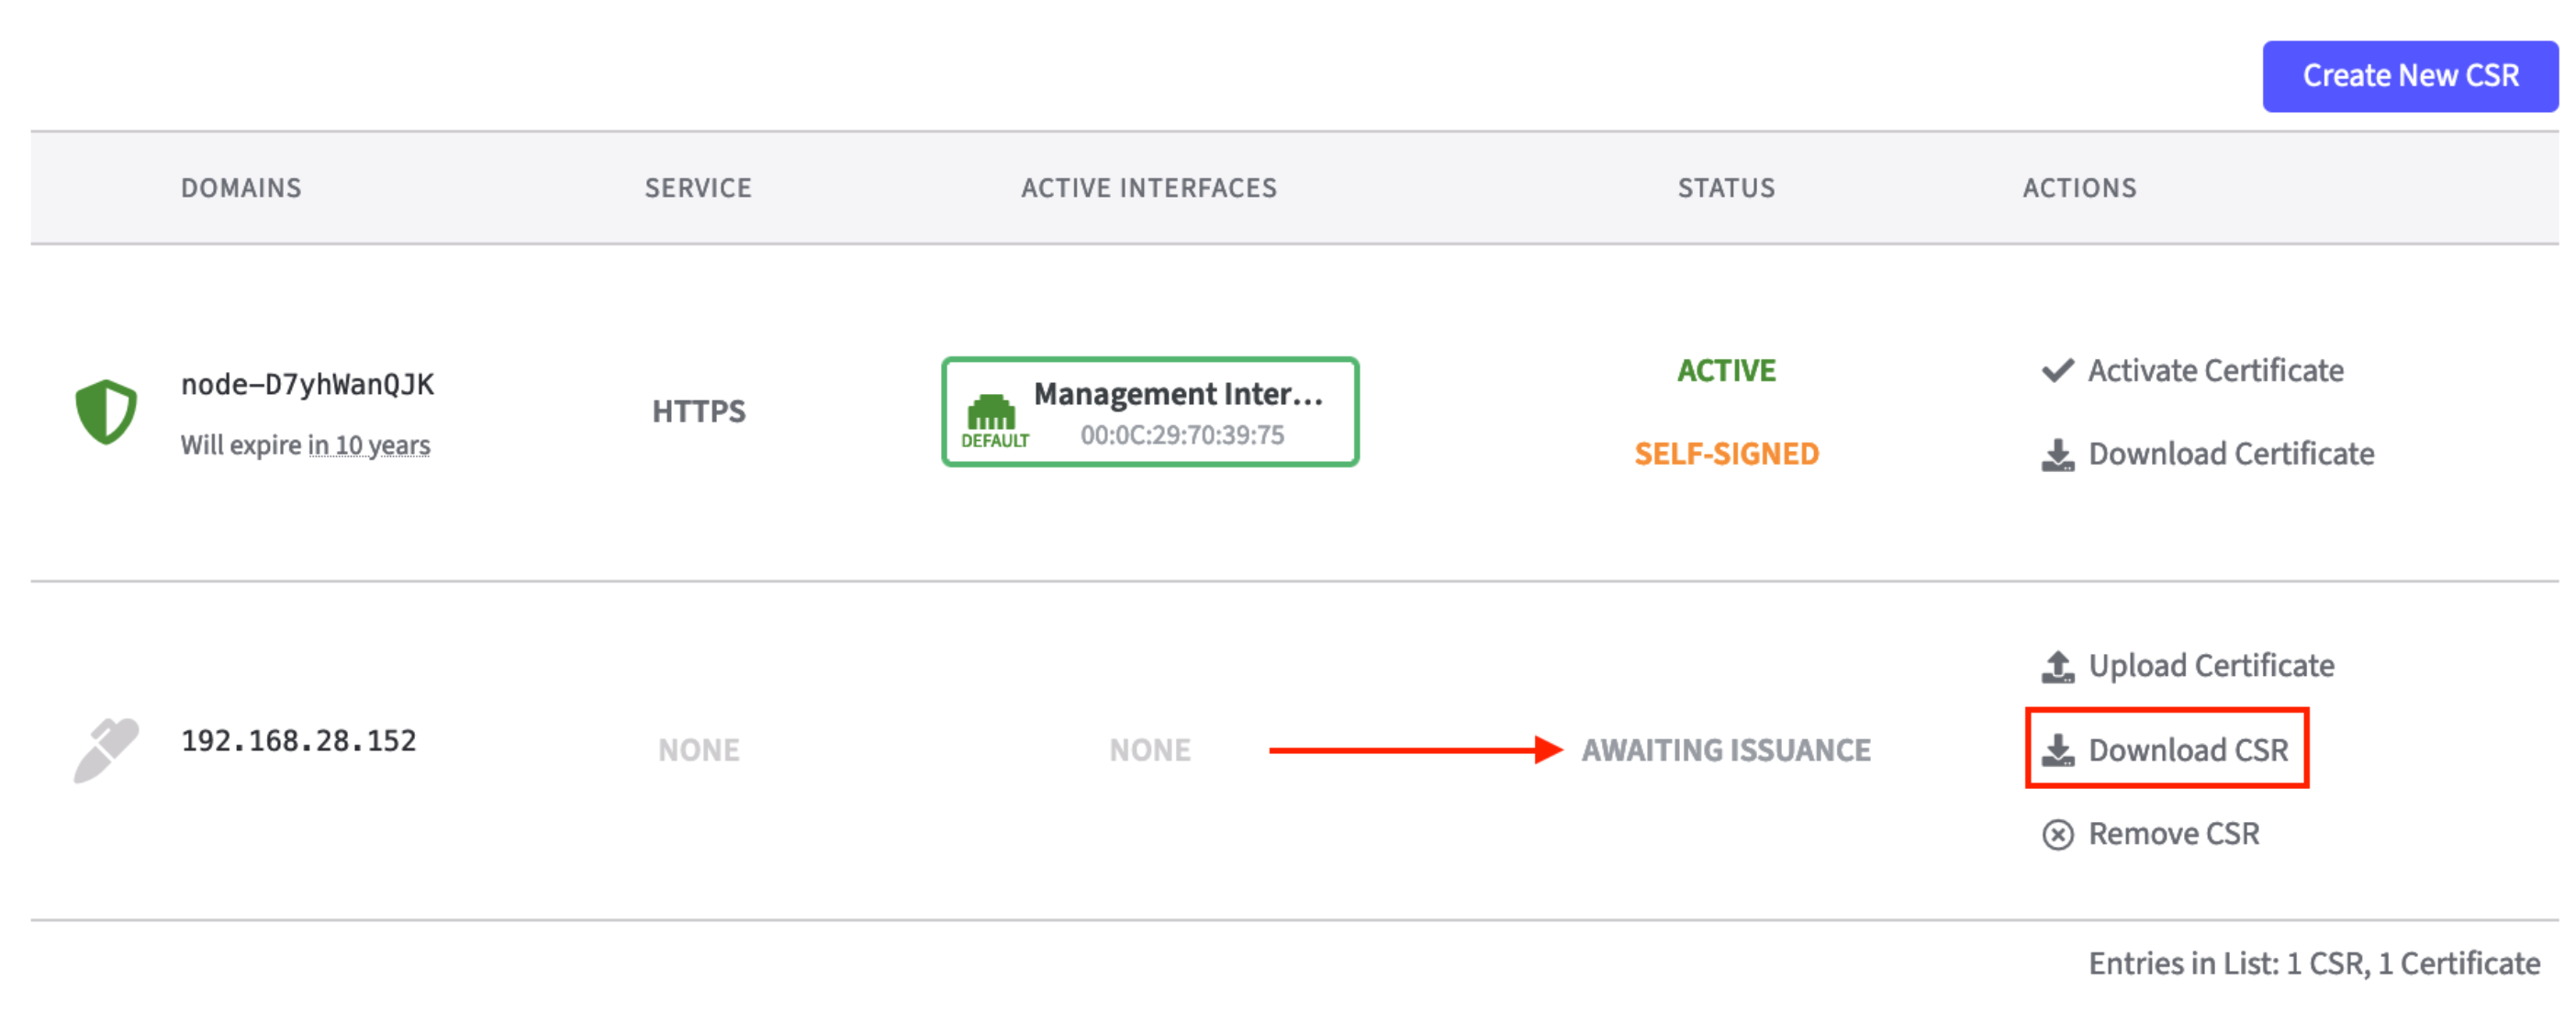
You can now proceed with creating a new certificate.
Create and Download the TLS Certificate
You can use your Certificate Authority (CA) in EJBCA to create a new certificate and download it.
The following describes the basic steps for making a certificate request and issue a certificate using the EJBCA RA user interface.
Note that the options available depend on your role, and when there is only one choice available and thus no selection to be made, the option is not displayed on the page. To view these predefined options, click Show details in the bottom-right of each section. For more information, refer to the EJBCA Documentation on Creating Certificates on the RA.
To create and download the TLS certificate in EJBCA, do the following:
Go to the Overview page in the Software Appliance.
In the Application Overview section, select Admin Web to go to EJBCA.
In EJBCA, select the RA Web menu option, in the top row of menu items on the far right.
In the EJBCA RA UI, click Make New Request.
In the Select Request Template Certificate subtype field, select Server.
Select the Key-pair generation option Provided by user to use the CSR to issue a new certificate using your trusted CA.
Click Browse under Upload CSR and select the PEM file downloaded in step Create and Download a New CSR.
Scroll down to Provide User Credentials and specify a Username.
Click Download PEM full chain to issue the certificate and click Save to store the file.
You can create a new certificate using the Certificate Authority (CA) of your organization's choice. The following example describes the basic steps for making a certificate request and issue a certificate using the EJBCA CA. For more information, see EJBCA Documentation.
To create and download the TLS certificate in EJBCA, do the following:
In EJBCA, select the RA Web menu option, in the top row of menu items on the far right.
In the EJBCA RA UI, click Make New Request.
In the Select Request Template Certificate subtype field, select Server.
Select the Key-pair generation option Provided by user to use the CSR to issue a new certificate using your trusted CA.
Click Browse under Upload CSR and select the PEM file downloaded in step Create and Download a New CSR.
Scroll down to Provide User Credentials and specify a Username.
Click Download PEM full chain to issue the certificate and click Save to store the file.
For more information, refer to the EJBCA Documentation on Creating Certificates on the RA.
Activate the new certificate, see Upload and Activate the TLS Certificate.
Certificate Rules
The Software Appliance will check the new certificate against the following rules:
All domains in the certificate must match the ones in the generated CSR.
The public key of the certificate must match with the public key of the CSR.
The certificate chain of the certificate must be correct.
The certificate must have the digitalSignature flag set for KeyUsage.
The Extended Key Usage of the certificate must include server authentication.
Upload and Activate the TLS Certificate
The following describes how to activate the new certificate in the user interface of the Software Appliance:
Certificate Bundle
It is also possible to upload certificate bundles.
Log in to your Software Appliance and open the Security page.
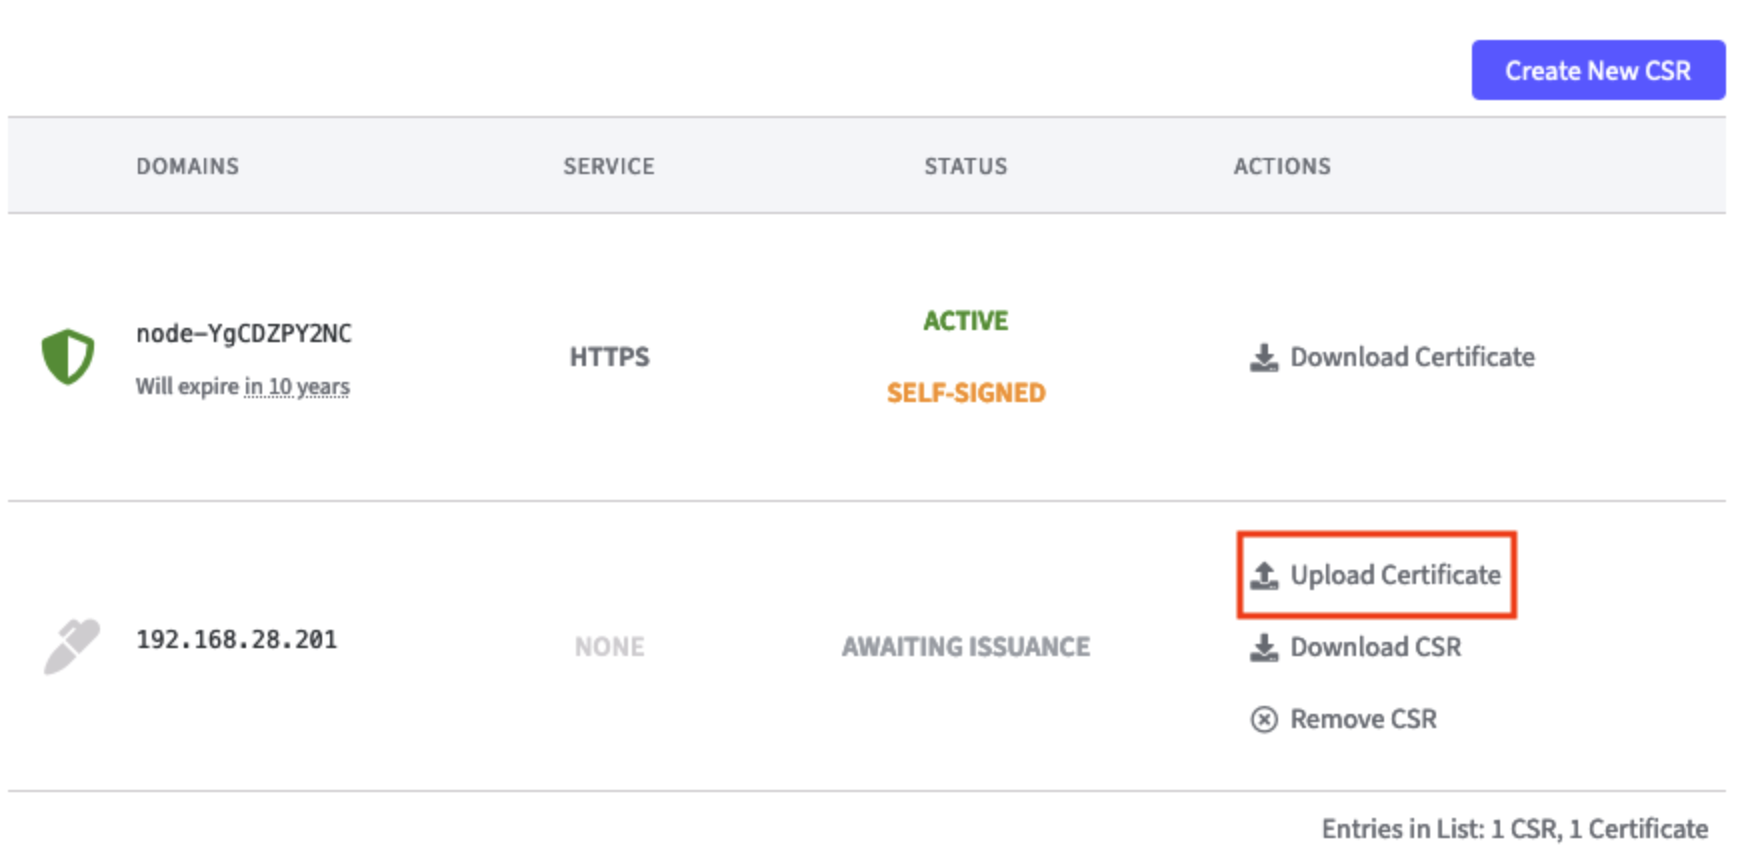
In the section TLS Certificates, click Upload Certificate for the certificate that is waiting for issuance.
Select and upload the newly created TLS certificate.
The option Activate Certificate appears. Click Activate Certificate to activate the new certificate. The former certificate becomes inactive:
Individual TLS Certificates per Network Interface Card (NIC)
The support of an individual TLS certificate for each network interface card is possible.
Select which NIC should use which TLS certificate.
Only one TLS certificate can be active per NIC.
It is possible to use the same TLS certificate for multiple NICs.
Log in to your Software Appliance and open the Security page.
In the section TLS Certificates, click on Activate Certificate.
A modal dialog for this TLS certificate will appear, showing all configured NIC.
In this example the TLS certificate can be set for the Management Interface or Application Interface.Click on the Network Interface to be used.
It is possible to select multiple network interfaces when activating a TLS certificate.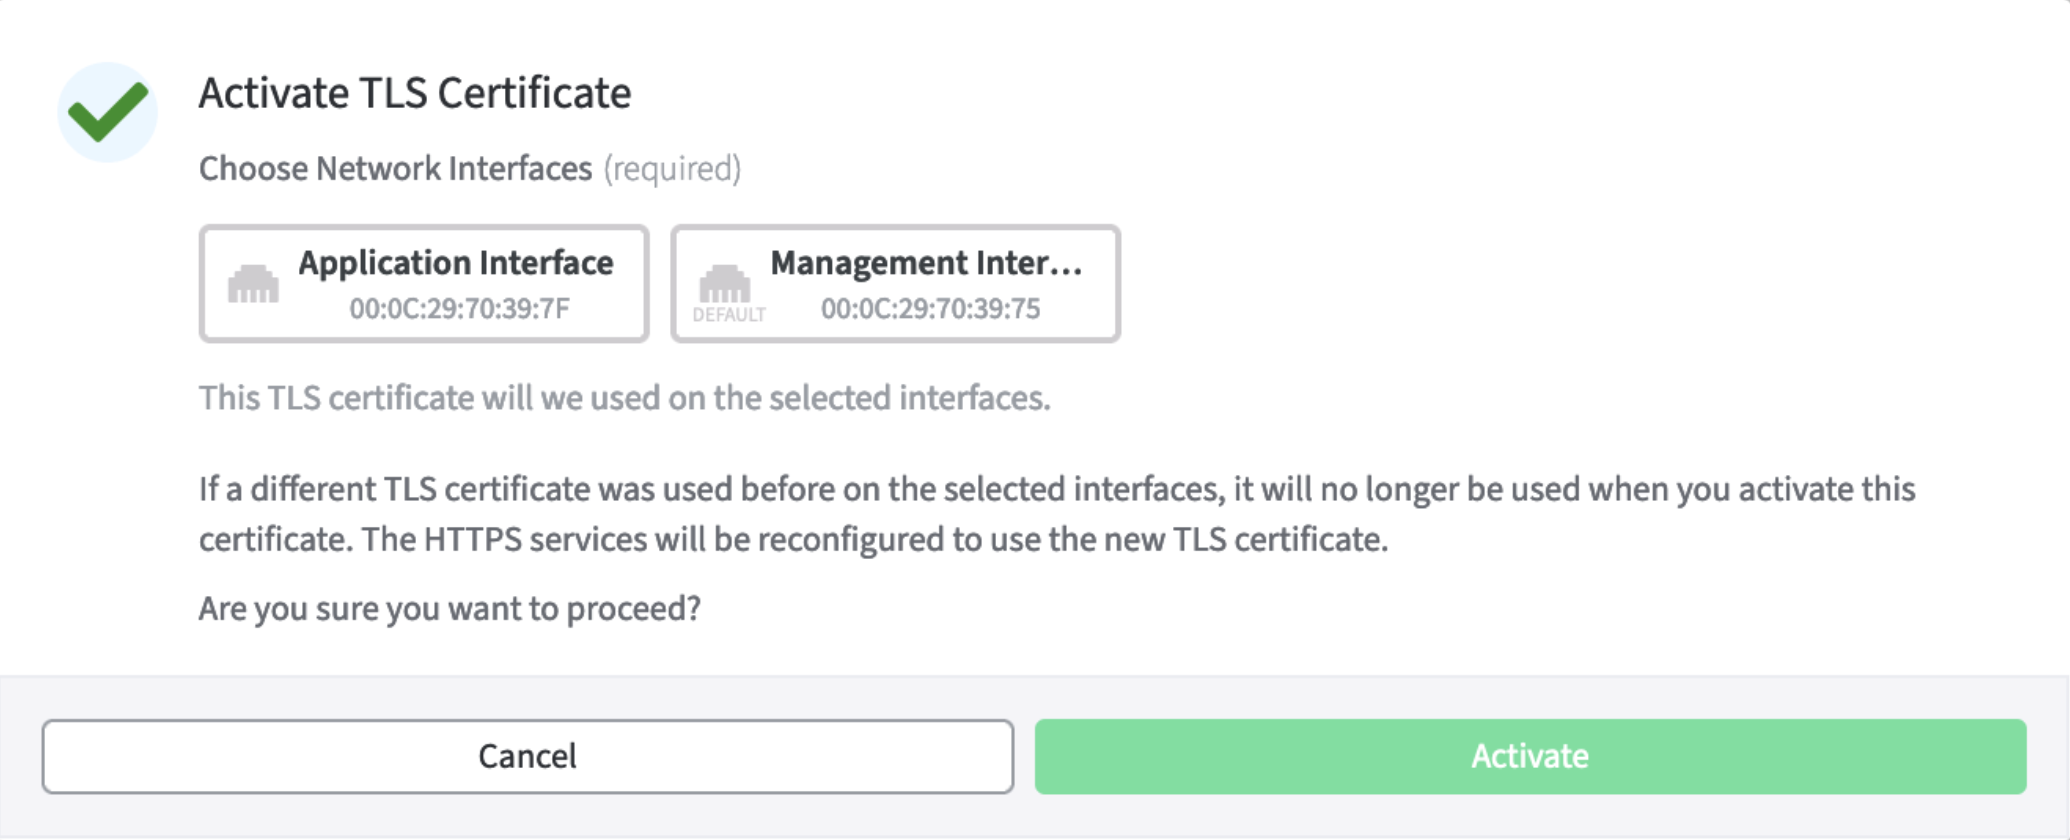
Click Activate to proceed.
The TLS certificate with the chosen Network Interface will now be shown in the list.
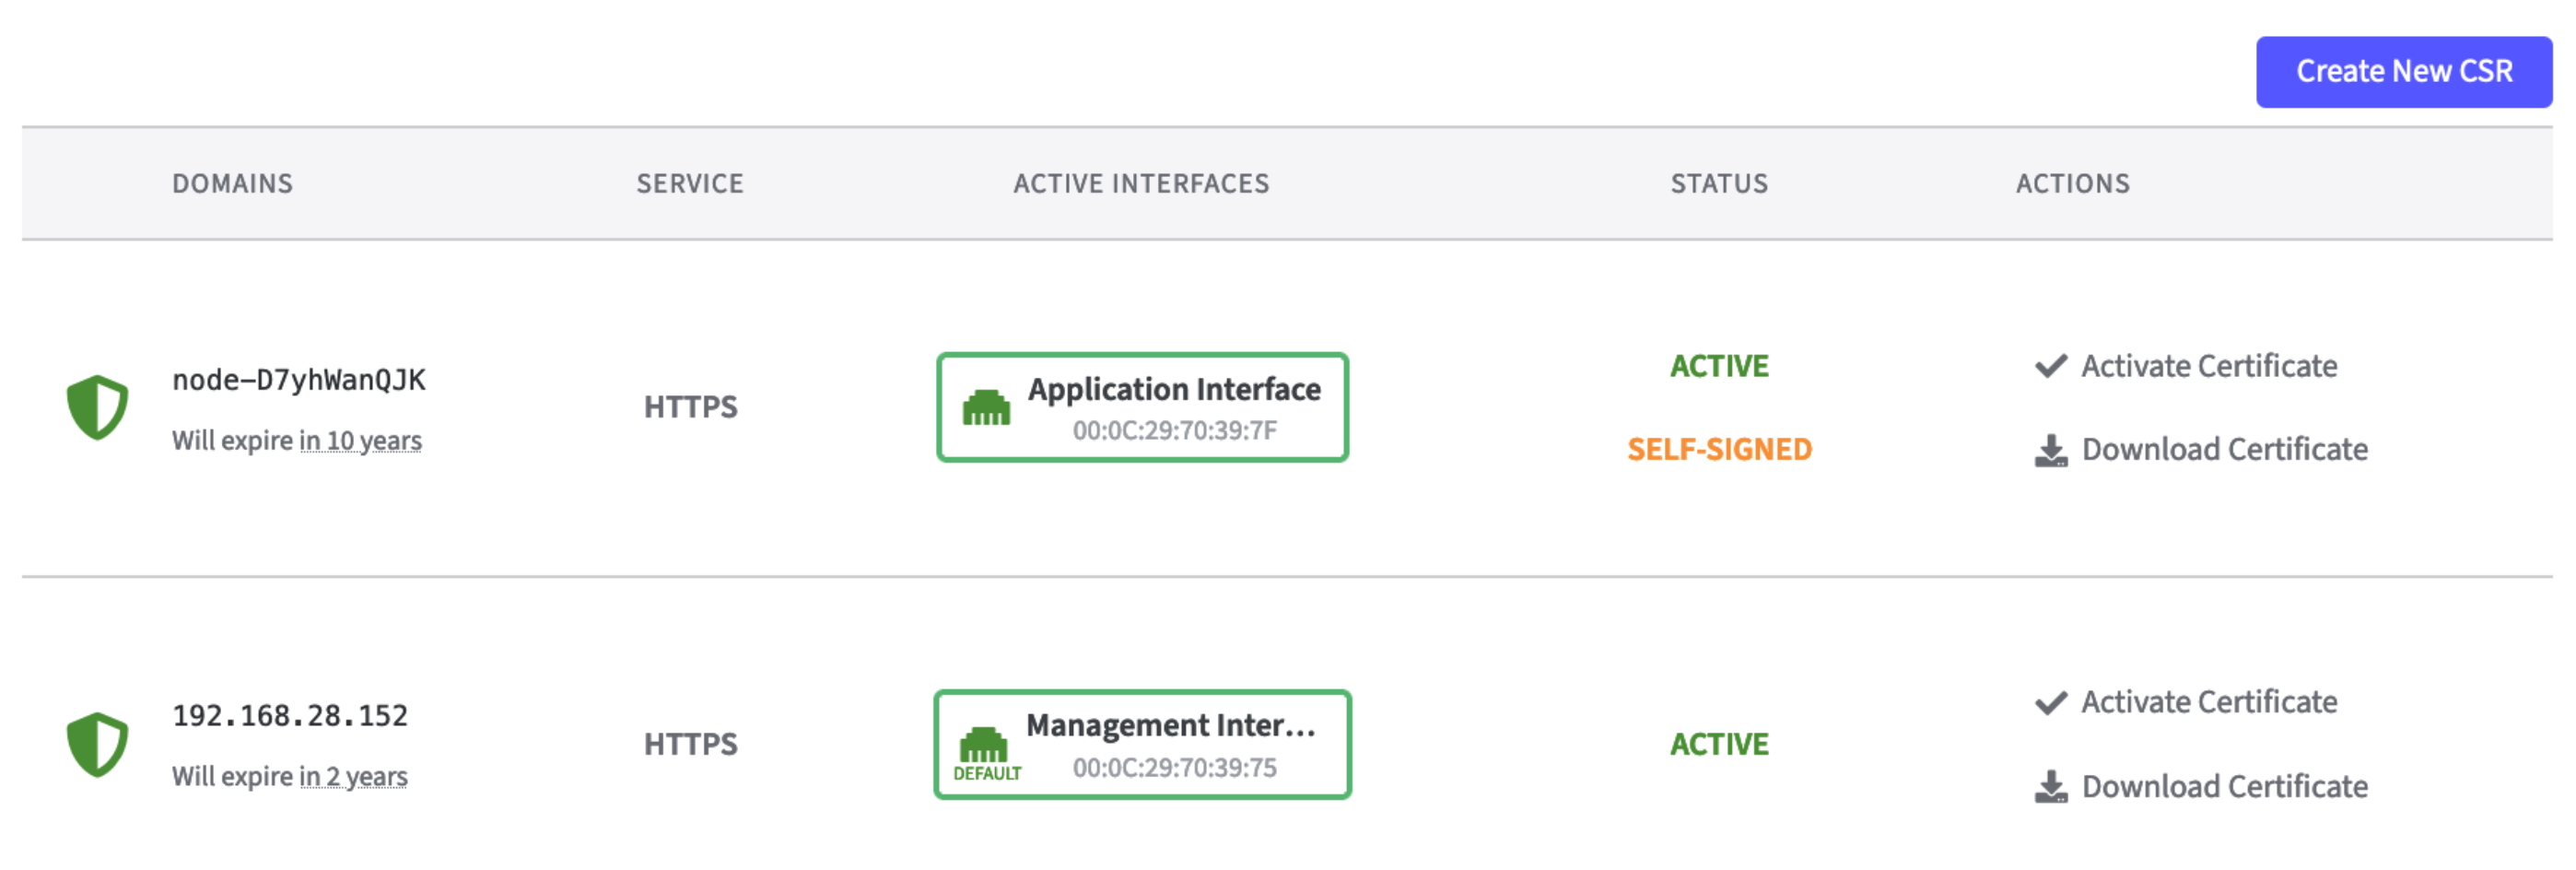
Click Activate Certificate again to go back to the modal dialog if you want to change the settings.
There can only be one TLS certificate for an interface.
Any certificate that was previously used for this NIC will no longer be used if you activate another TLS certificate for this NIC.Click on any interface in the Active Interfaces column to switch to the Network page in Webconf to see and/or configure the Network Interfaces.
TLS Cipher Settings
Legacy TLS Cipher
Enable or disable the use of legacy TLS cipher.
The ciphers listed below are legacy ciphers that are considered to be less secure and should no longer be used, unless legacy systems can only use these ciphers.
The four ciphers can only be enabled on the appliance if the Use legacy TLS cipher checkbox is selected.
Enabling this will add the following TLS 1.2 ciphers to the list of supported TLS ciphers.
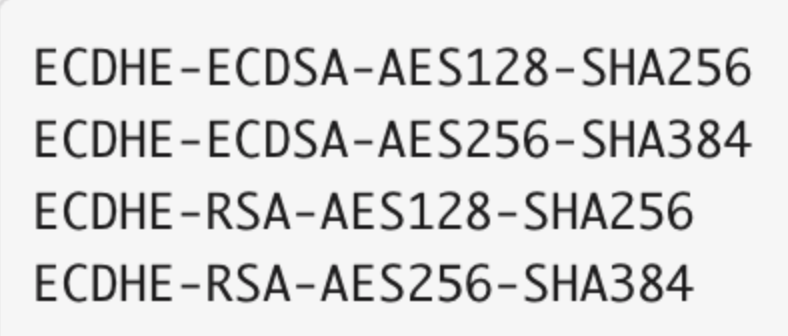
Check Use legacy TLS cipher to enable.

Default Cipher
The default ciphers are always enabled and require no further action!
TLS 1.2 and earlier
ECDHE-ECDSA-AES256-GCM-SHA384ECDHE-RSA-AES256-GCM-SHA384ECDHE-ECDSA-CHACHA20-POLY1305ECDHE-RSA-CHACHA20-POLY1305ECDHE-ECDSA-AES256-CCMECDHE-ECDSA-AES128-GCM-SHA256ECDHE-RSA-AES128-GCM-SHA256ECDHE-ECDSA-AES128-CCM
TLS 1.3
TLS_AES_256_GCM_SHA384TLS_CHACHA20_POLY1305_SHA256TLS_AES_128_GCM_SHA256TLS_AES_128_CCM_SHA256
.png)