Restore and Upgrade Procedure
In the following example, the source host is running EJBCA version 6.9.1 and the destination host is running EJBCA 6.10.0:
- The source host running EJBCA 6.9.1 has an elastic (public) IP of:
ec2-34-229-187-81.compute-1.amazonaws.com.
- The destination host running EJBCA 6.10.0 has an elastic (public) IP of:
ec2-52-23-217-245.compute-1.amazonaws.com.
When the upgrade is complete, all of the CAs and data on the source node running 6.9.1 are migrated over to the new 6.10.0 version.
Follow the instructions in this procedure to upgrade the version of EJBCA from 6.9.1 to 6.10.0. The same steps apply for restoring a backup. Note that this procedure needs to be performed on each node in the cluster.
Currently used EJBCA version
The version of EJBCA is visible in the top-right corner of the EJBCA Administration home screen.
Backup Existing Instance
Using the SSH key that you selected when procuring the instance, SSH into the EJBCA Enterprise Cloud instance using the username ec2-user.
CODEssh -i ssh-key.pem ec2-user@elastic-ip.compute-1.amazonaws.com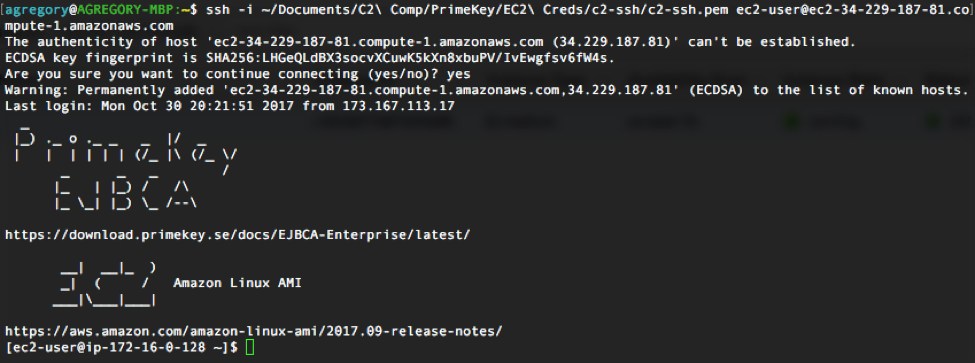
Run the command
sudo suto get elevated privileges:CODEsudo suChange to the
/opt/PrimeKey/supportdirectory.- Run the script
system_backup.shto create a backup of your system. - Press Y to proceed and enter a password to protect the backup once prompted:
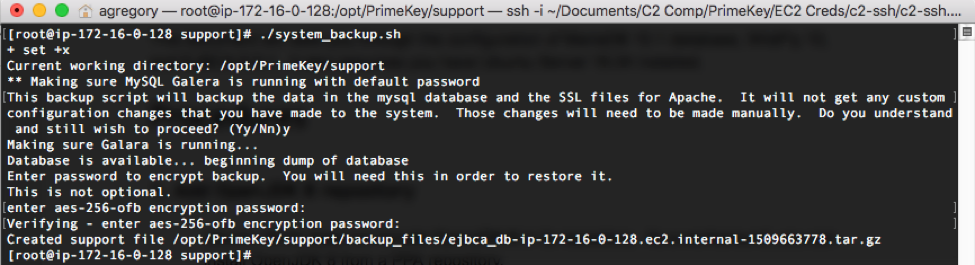
Make a note of the name of the backup file created. Copy the backup file to a directory that is accessible by the ec2-user, for example
/home/ec2-user/.
In this case, the file "/opt/PrimeKey/support/backup_files/ejbca_db-ip-172-16-0-128.ec2.internal-1509663778.tar.gz" is copied to/home/ec2-user/:CODEcp /opt/PrimeKey/support/backup_files/ejbca_db-ip-172-16-0-128.ec2.internal-1509663778.tar.gz /home/ec2-user/
Copy Backup to New Instance
Using either the command line interface (CLI) or a Secure Copy Protocol (SCP) utility, copy the file to your local system. You can copy the file directly from one instance to another if your VPC allows it. In this example, we will bring the file down locally and then SCP it to the new instance.
- Copy the file to your local system, using either CLI or a SCP utility:
Using the CLI:
CODEscp -i ~/Documents/C2\ Comp/PrimeKey/EC2\ Creds/c2-ssh/c2-ssh.pem ec2-user@ec2-34-229-187-81.compute-1.amazonaws.com:/home/ec2-user/ejbca_db-ip-172-16-0-128.ec2.internal-1509663778.tar.gz ~/Downloads/ejbca_db-ip-172-16-0-128.ec2.internal-1509663778.tar.gz
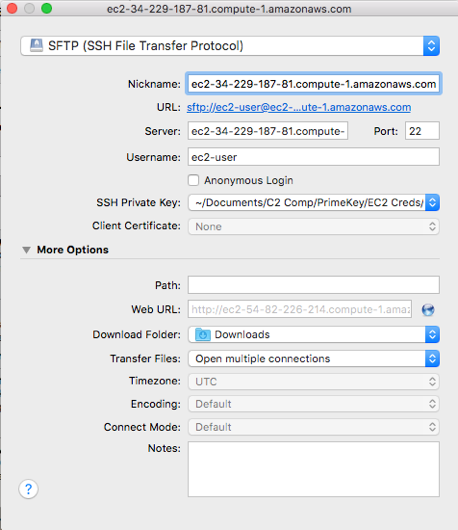
- Using a SCP utility (in this case Cyberduck)
- Specify details to connect to your instance, for example hostname, username, and SSH key):
- Connect to the instance and download the file to the local system:
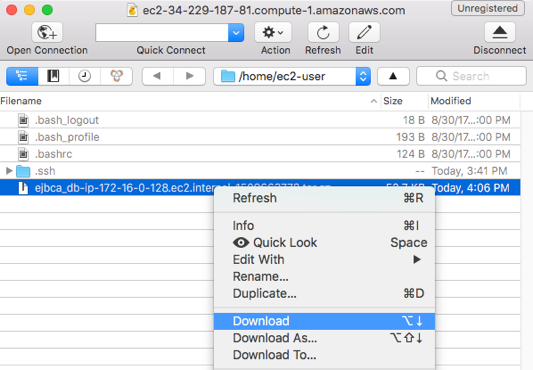
- Wait for the download to complete.

- Specify details to connect to your instance, for example hostname, username, and SSH key):
- Start a new instance from the Amazon AWS Marketplace. Ensure to select the correct version in the Version list menu (the most recent version is by default selected). For more information, refer to the EJBCA Cloud AWS Launch Guide.
- Wait for the new instance to start and retrieve the superadmin certificate for the new version. For more information, refer to the EJBCA Cloud AWS Launch Guide.
- Access the administration interface for the new instance and note the version of the new instance in the top-right corner of the EJBCA Administration home screen.
SCP the backup file created in section Backup Existing Instance and copied to the new instance using the instructions in step 1 above.
If using the CLI, the command will be a bit different since you are copying local to remote.CODEscp -i ~/Documents/C2\ Comp/PrimeKey/EC2\ Creds/c2-ssh/c2-ssh.pem ~/Downloads/ejbca_db-ip-172-16-0-128.ec2.internal-1509663778.tar.gz ec2-user@ec2-52-23-217-245.compute-1.amazonaws.com:/home/ec2-user/
- Once copied, SSH into the new host.
- Change to the
/opt/PrimeKey/supportdirectory.
Restore Backup on New Instance
Run the script
system_restore.shby pointing it to the backup file location after the script. In this example, the backup file is located in/home/ec2-user/and the file name isejbca_db-ip-172-16-0-128.ec2.internal-1509663778.tar.gz.CODE/opt/PrimeKey/support/system_restore.sh /home/ec2_user/ejbca_db-ip-172-16-0-128.ec2.internal-1509663778.tar.gzConfirm the script and then enter the password for your backup once prompted.
A backup of the existing database will be located at/opt/PrimeKey/support/backup_filesand SSL files will be backed up to/etc/httpd/ssl_backup.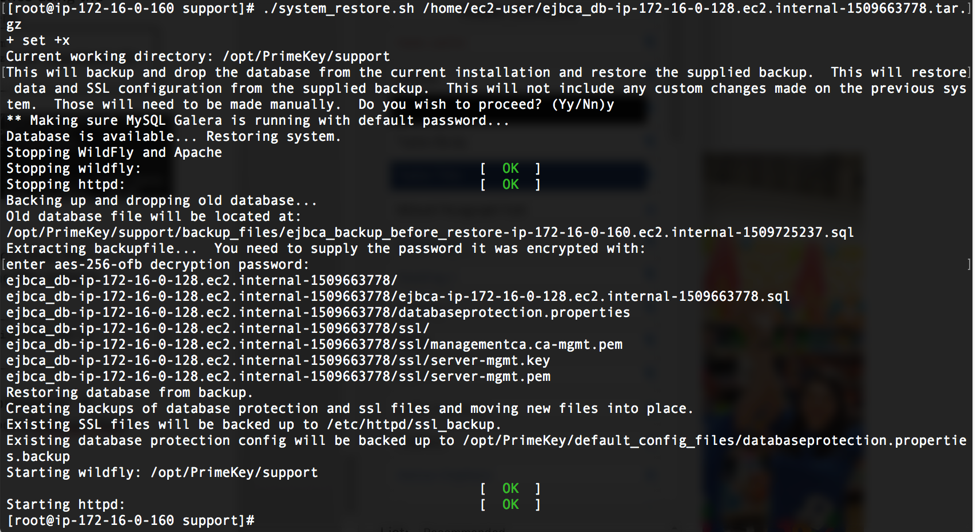
- Access your new instance and verify that your existing data appears in the new instance.
Generate new TLS certificates for your new instance. Since you likely have a new public and internal IP on this node, new certificates are needed to match the new instance. Run the following script to generate new certs. Refer to the EJBCA Cloud AWS TLS Certificate Generation Guide for more details if custom IP and DNS names are needed.
CODE/opt/PrimeKey/support/new_tls_cert.sh -p