Issue Composite Certificates
The following outlines how to configure EJBCA to issue certificates using composite keys, combining a classical cryptographic algorithm (RSA, ECDSA, or EdDSA) with a quantum-safe algorithm (ML-DSA).
For background on composite signatures and key structure, see Managing Crypto Tokens. For a general introduction to quantum-safe cryptography and composite signatures, see Post-Quantum Cryptography Keys and Signatures.
This guide covers how to:
Create a crypto token with composite key support
Create a Certification Authority (CA)
Create the necessary profiles
Request and inspect a composite certificate
Step 1 - Create a Crypto Token
Composite keys can be selected as key algorithms when generating keys in a crypto token.
Composite key aliases must end with the suffix -COMPOSITE. EJBCA uses this suffix to identify composite keys without querying the HSM for metadata on each operation.
To create a crypto token with composite key support, follow these steps.
In EJBCA, navigate to CA Functions>Crypto Tokens and create a new crypto token or edit an existing one.
When generating the key, select a supported composite algorithm, such as MLDSA87-RSA4096-PSS-SHA512.
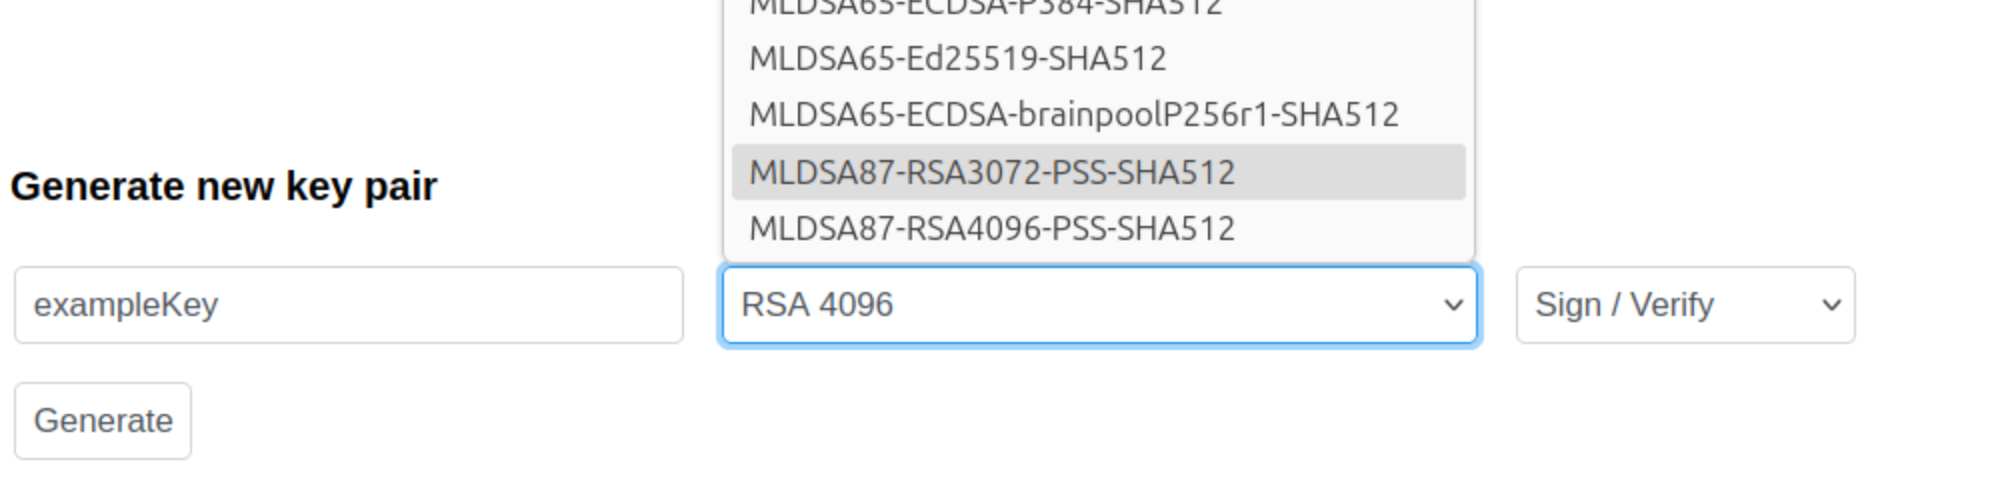
By default, the suffix
-COMPOSITEis added to the name you specify. Do not remove this suffix.
Click Generate to generate the key pair.
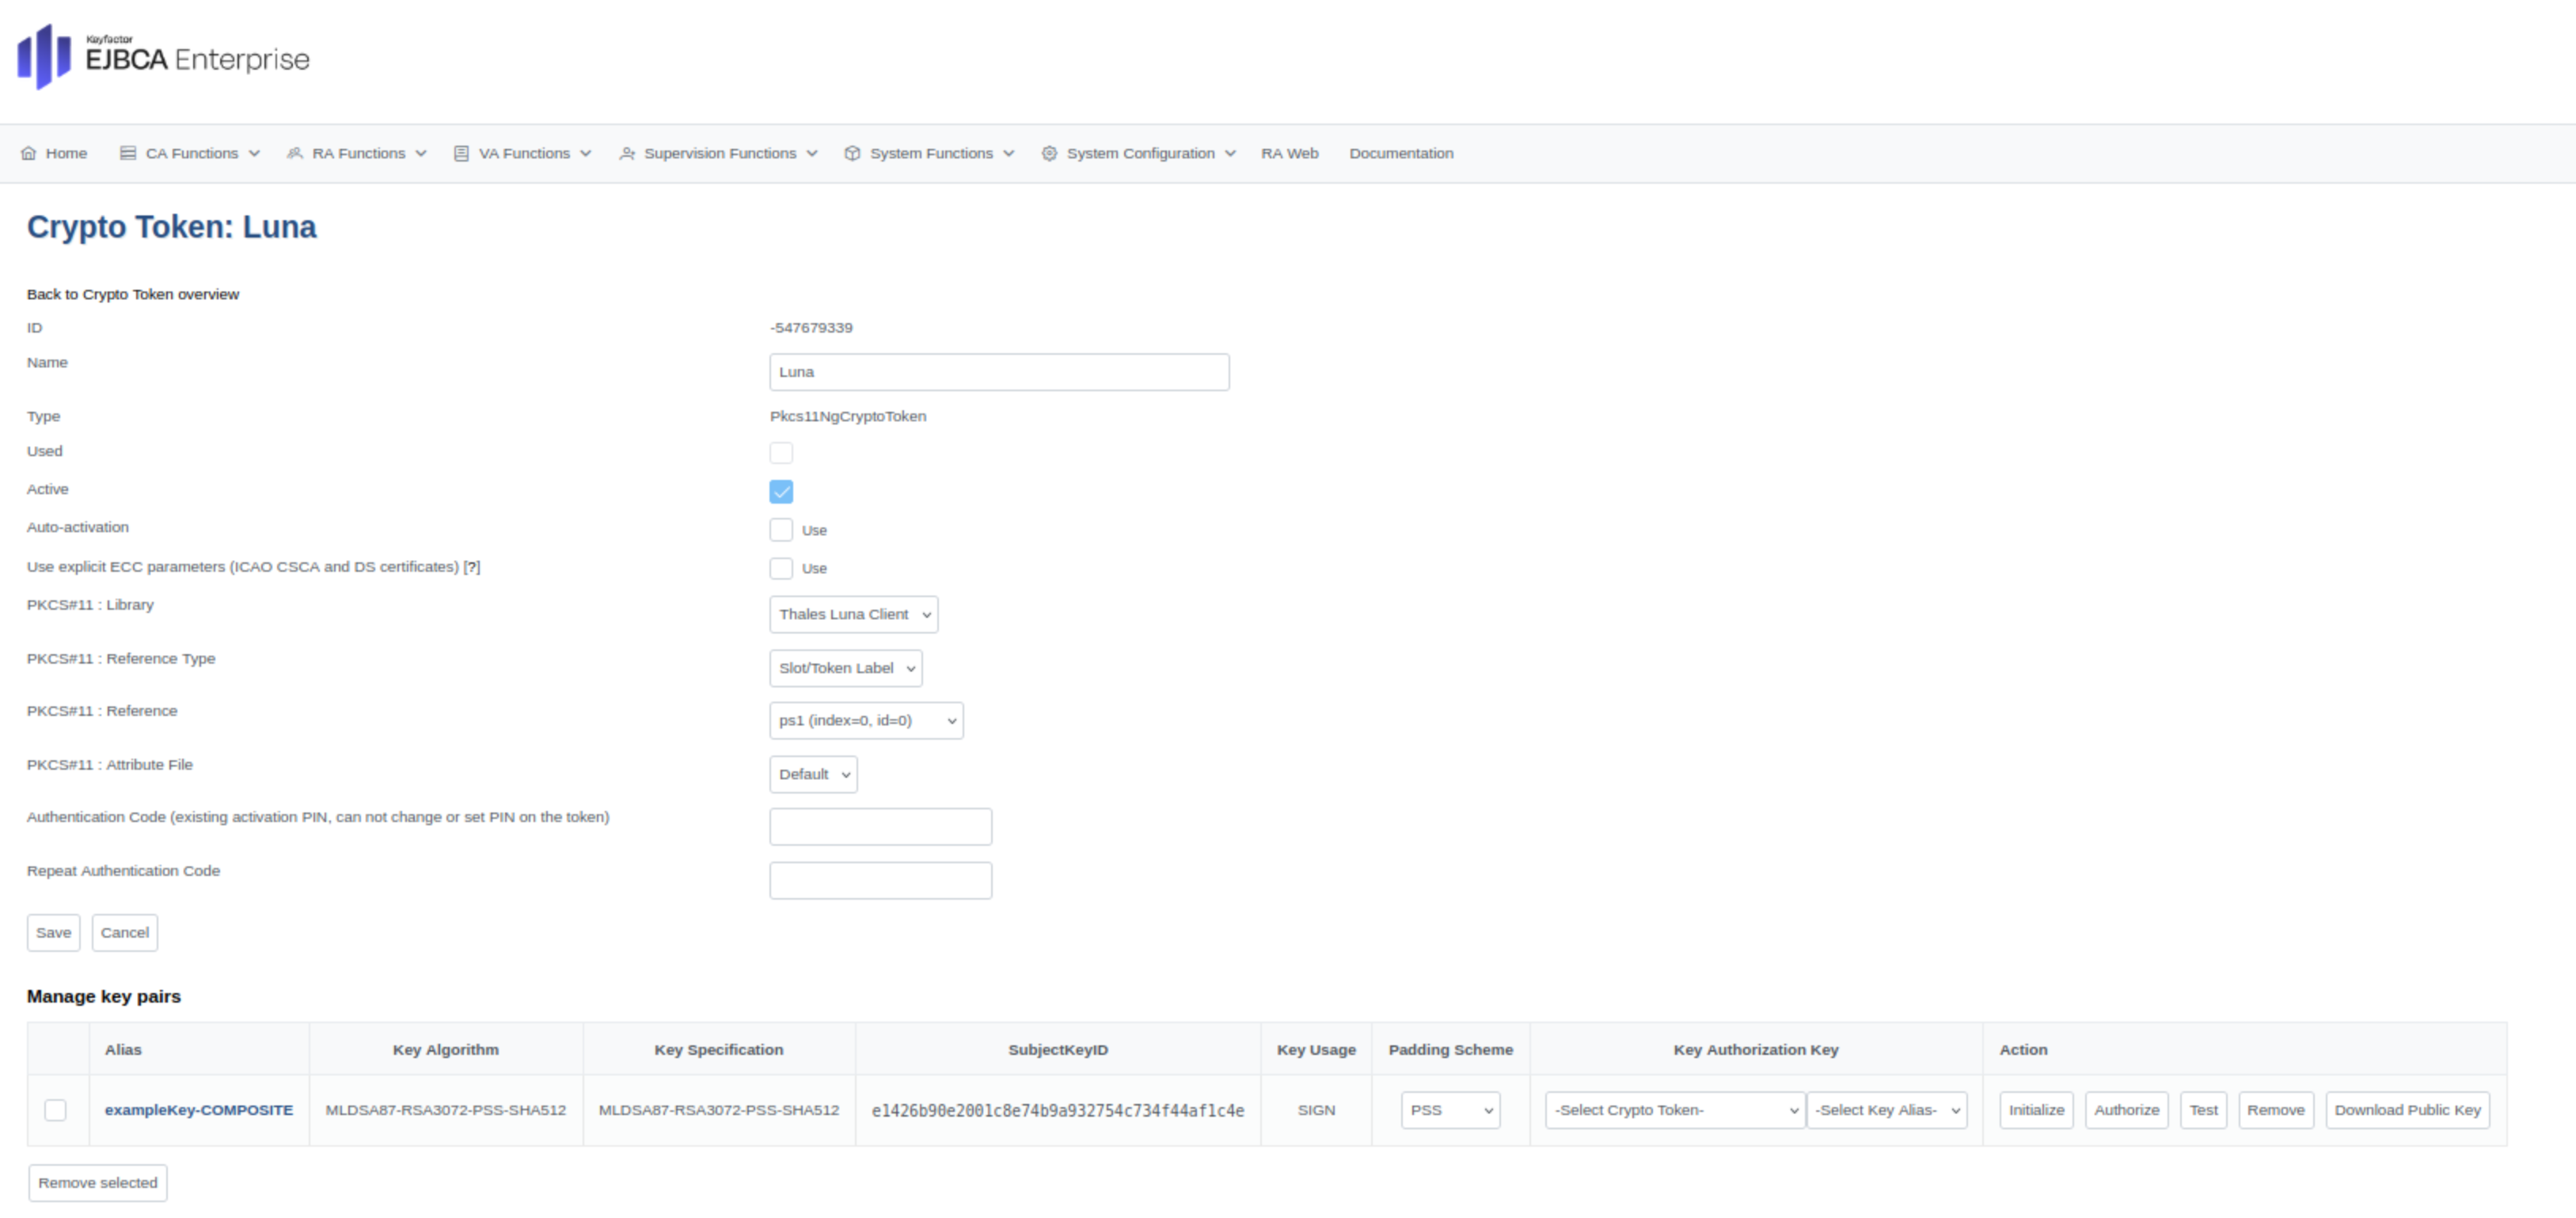
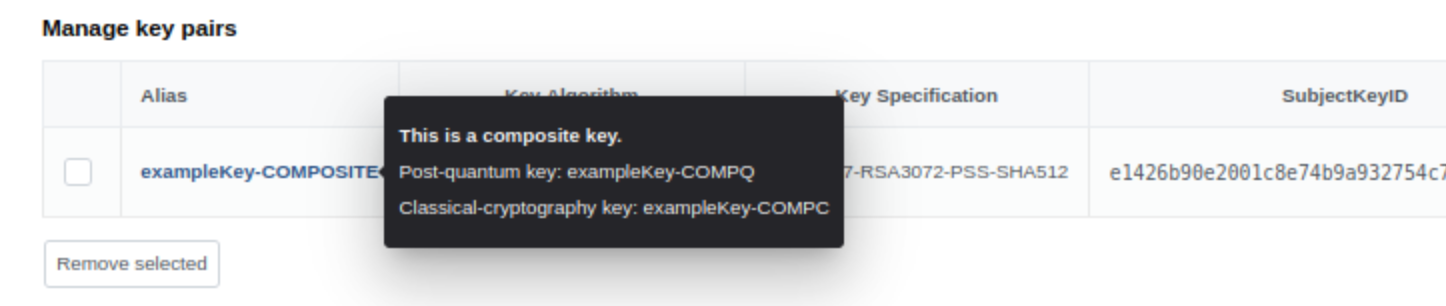
Composite keys are displayed in blue text in the user interface.
View additional key information by hovering over the key entry.
Alternative - Create composite keys outside of EJBCA
This section describes an alternative to creating composite keys in EJBCA.
Instead of generating composite keys inside EJBCA, you can create the component keys externally using tools provided by your HSM vendor.
In this case, create the two component keys separately using the following naming convention:
Classical component: append
-COMPC, for example signKey-COMPCPost-quantum component: append
-COMPQ, for example signKey-COMPQ
EJBCA will automatically detect these two keys and present them as a single key with the suffix: -COMPOSITE.
Note that the algorithm combination must be supported by EJBCA and that RSA-based composite keys always use RSA-PSS padding for signatures, see Interoperability and Certifications.
Step 2 - Create a CA
To create a CA with a crypto token that supports composite certificates, do the following.
In EJBCA, navigate to CA Functions>Certification Authorities>Add CA.
Click Add CA to create a new CA.
Select the Crypto Token containing the composite key.
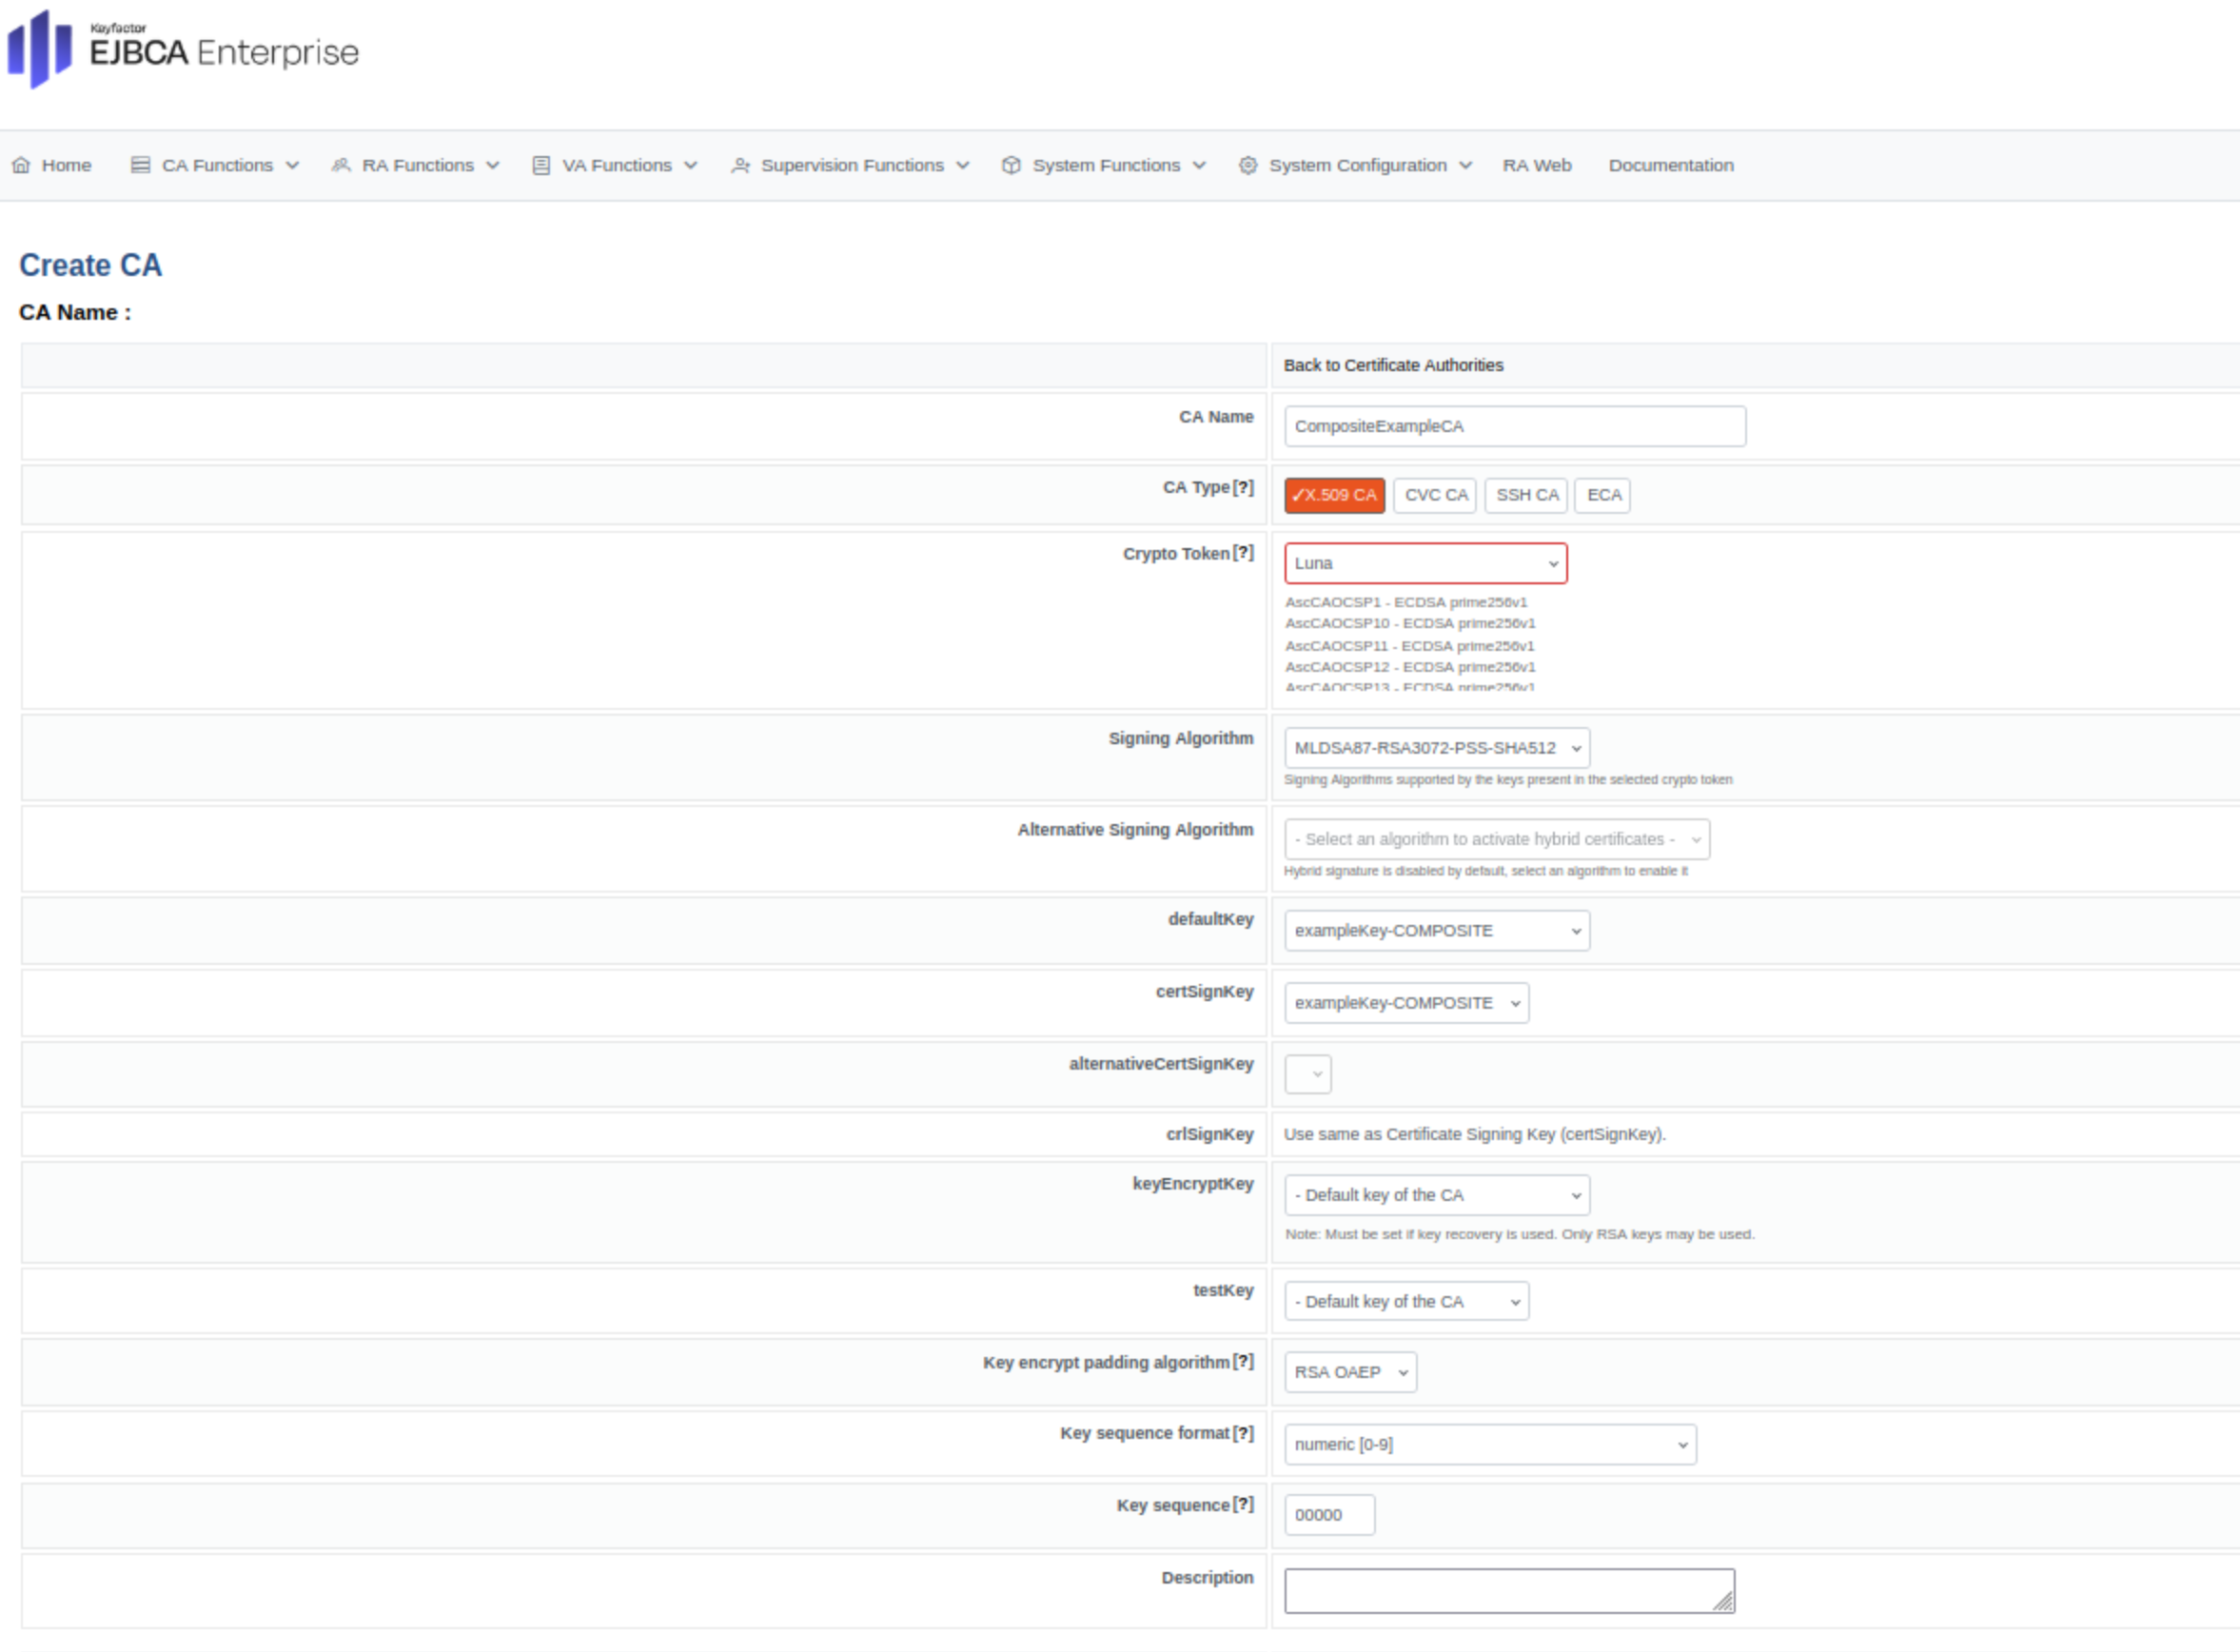
Select a signing algorithm from the Composite Algorithm List.
Complete the remaining CA configuration and click Create.
The CA is now configured to issue certificates using composite signatures.
Step 3 - Create a Certificate Profile
To create a certificate profile that supports composite algorithms, do the following.
In EJBCA, navigate to CA Functions>Certificate Profiles.
Click Add to create a new certificate profile.
For Available Key Algorithms, select the composite algorithms to use.
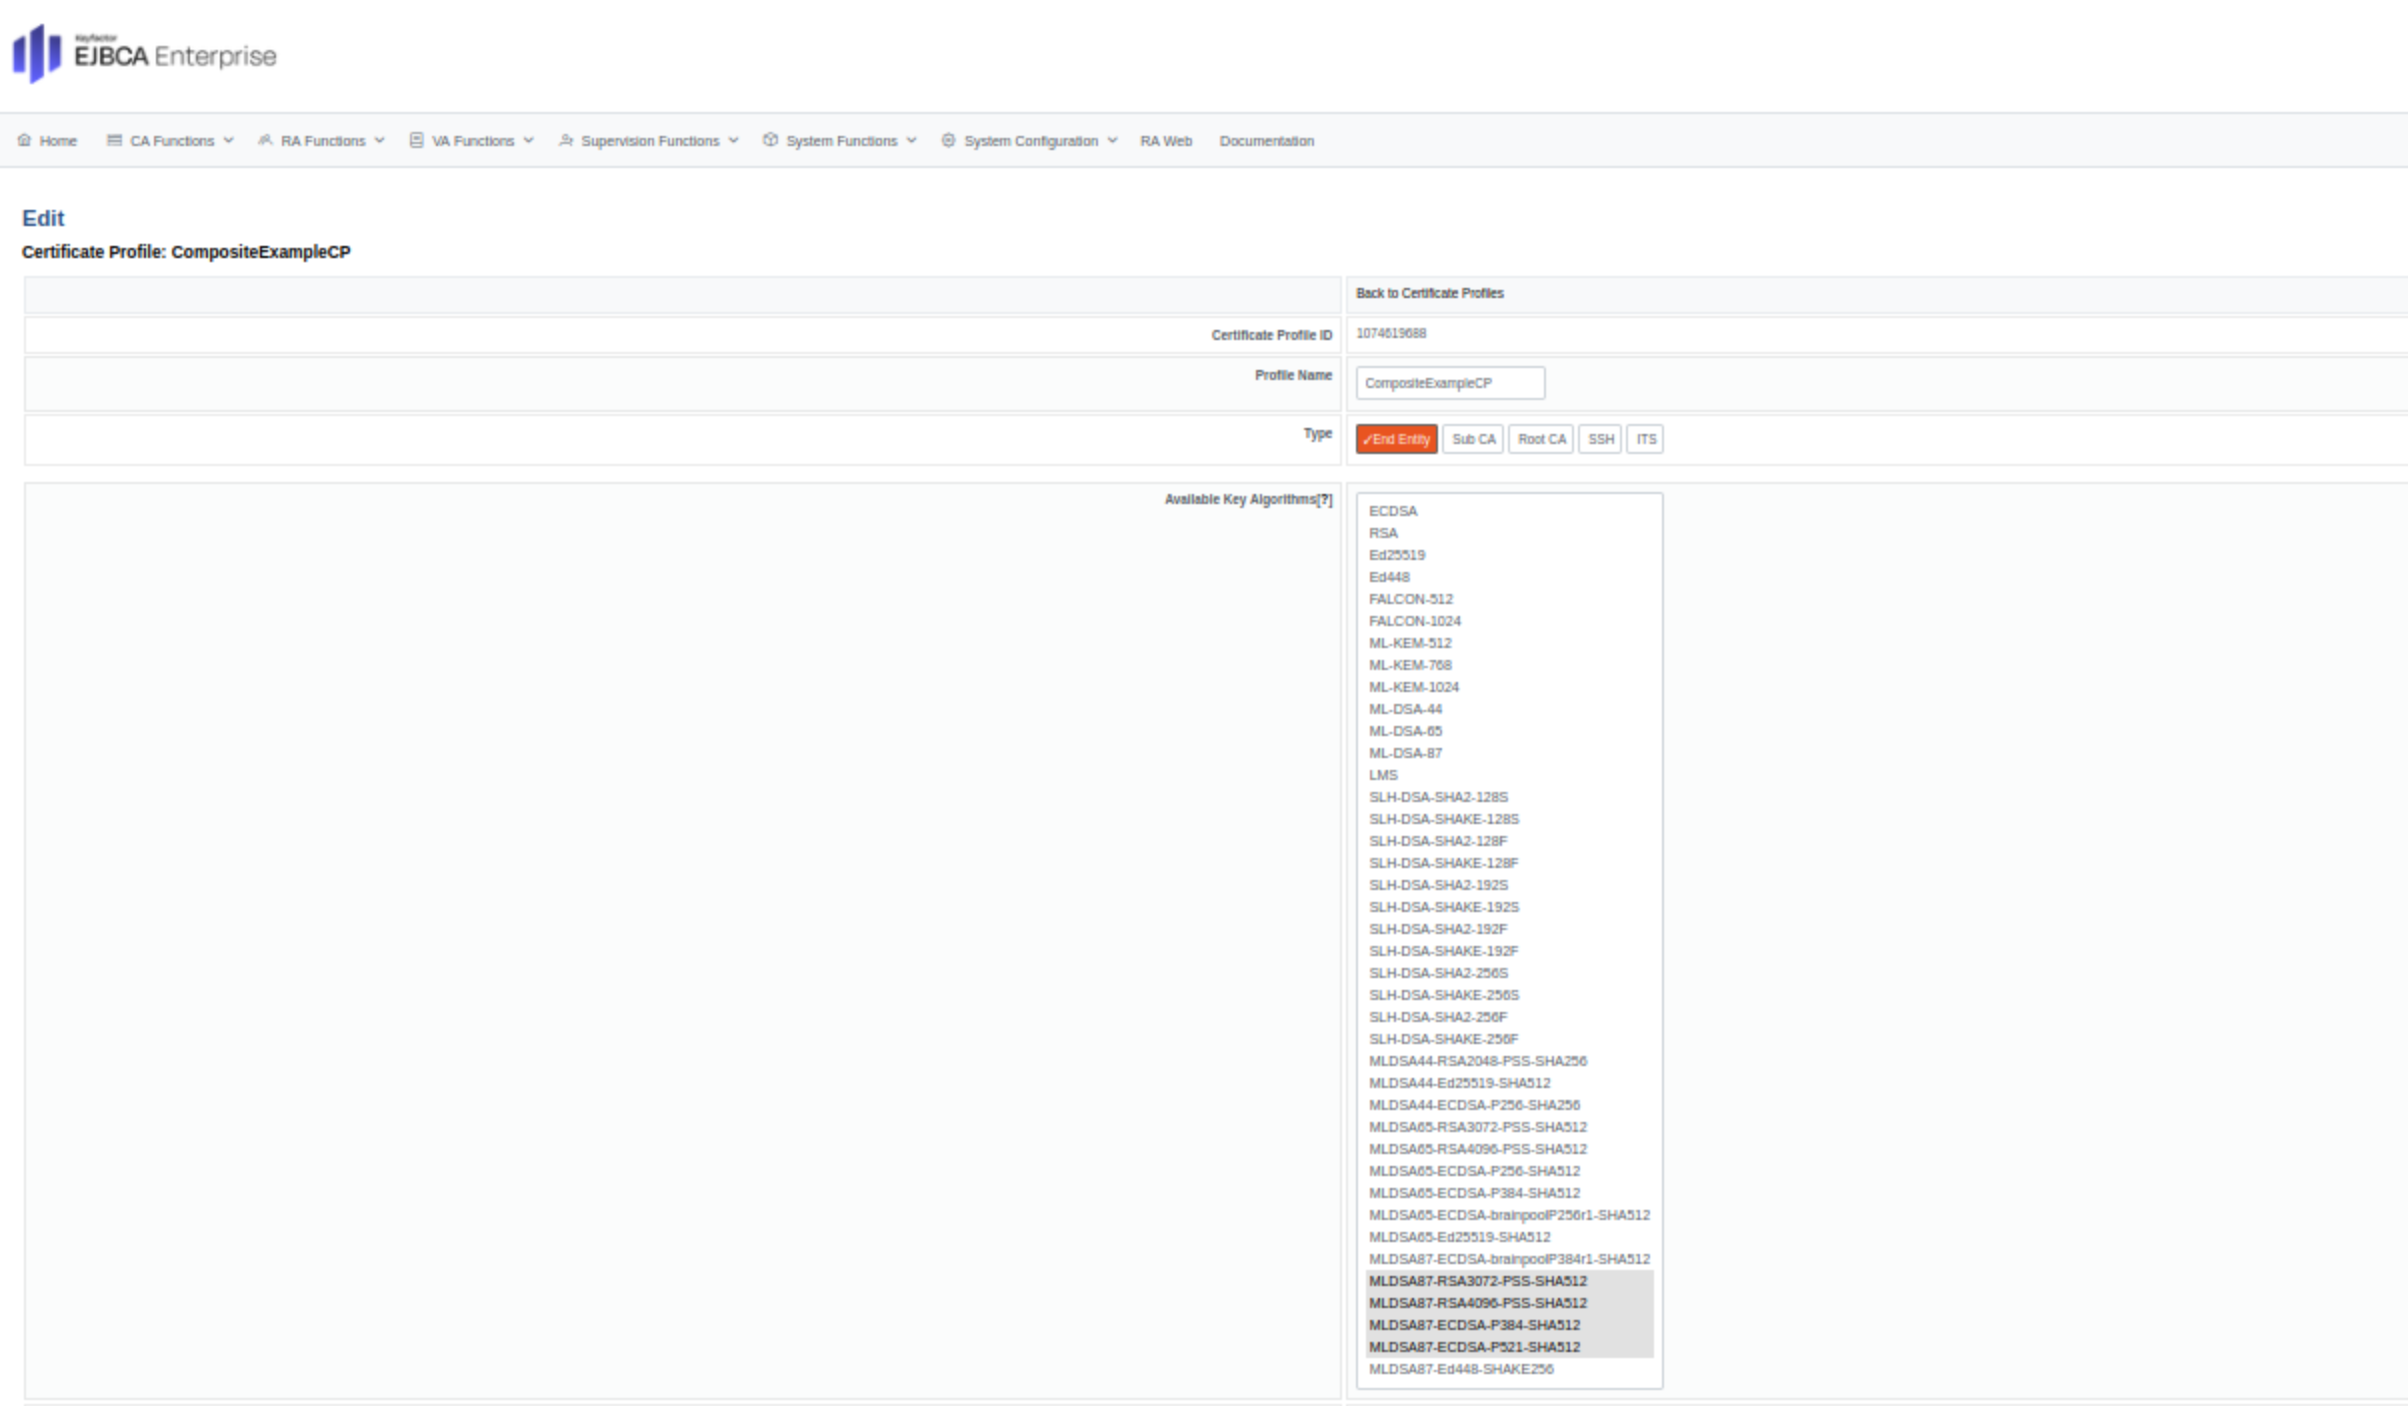
For Available CAs, select the composite supported CA created in Step 2.

Click Save to store the certificate profile.
Step 4 - Create an End Entity Profile
To create an end entity profile that supports composite algorithms, do the following.
In EJBCA, navigate to RA Functions>End Entity Profiles.
Click Add to create a new end entity profile.
Under Main Certificate Data, ensure that:
For Available Certificate Profiles, the newly created Composite Certificate Profile is selected.
For Default CA and Available CAs, the newly created Composite CA is selected.
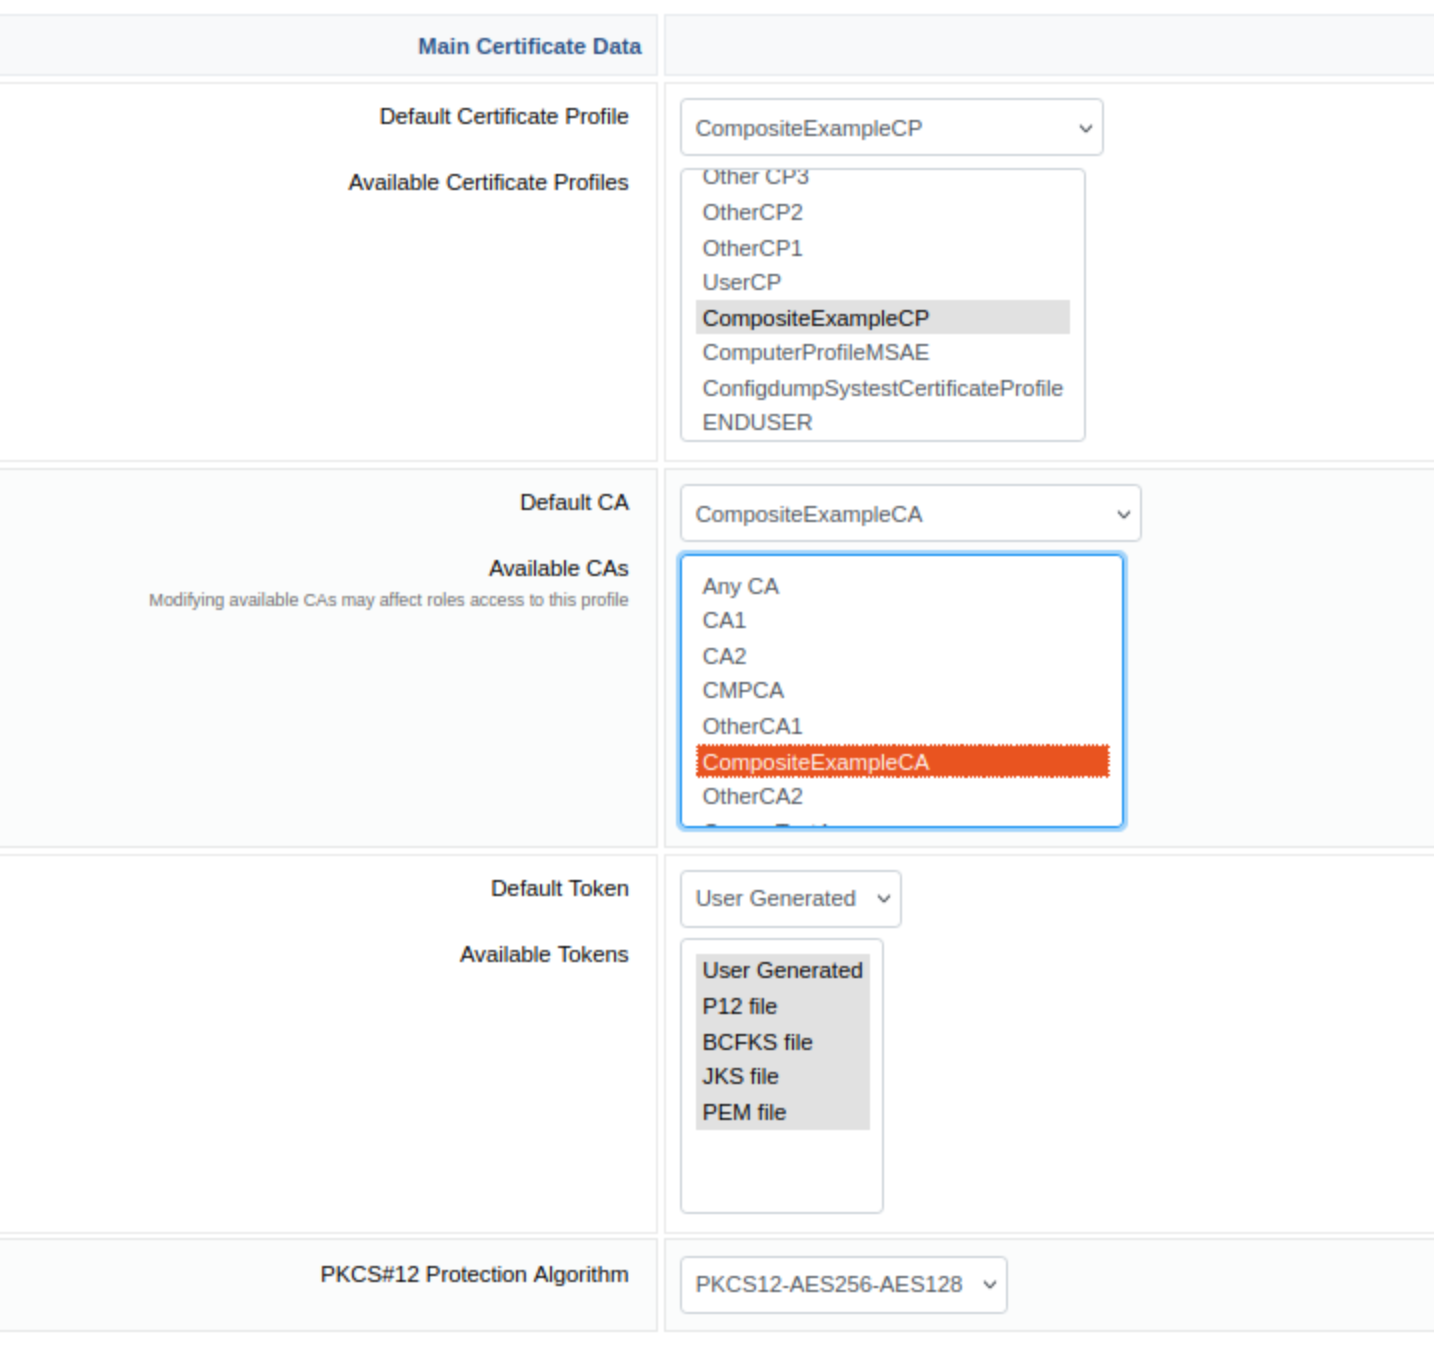
Click Save to store the end entity profile.
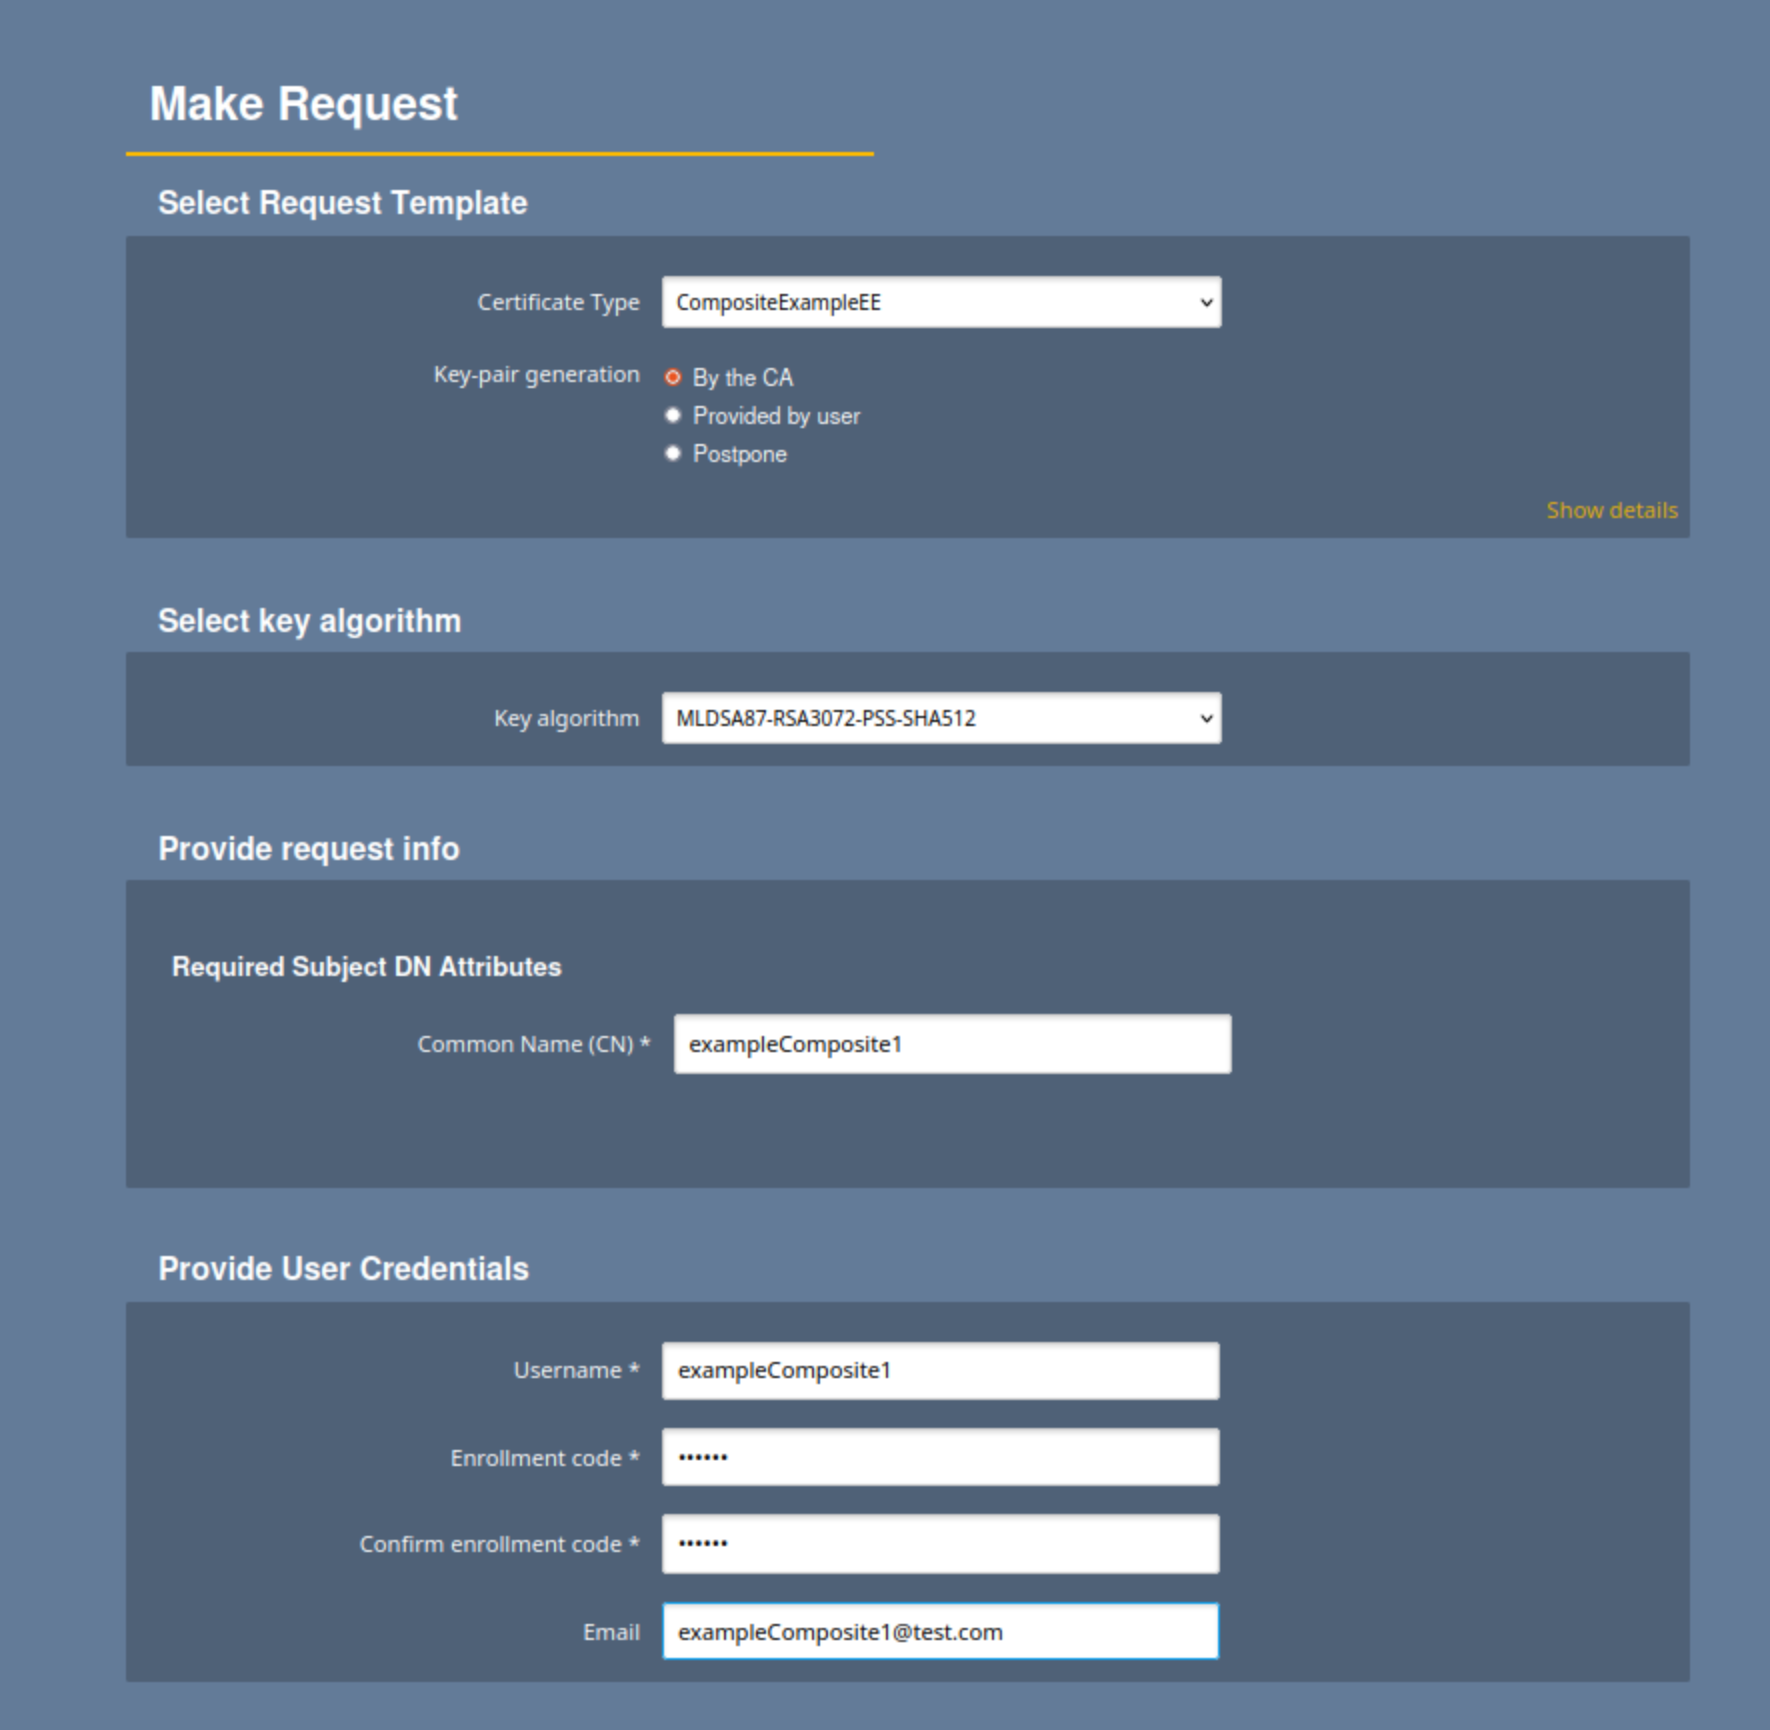
Step 5 - Issue a Composite Certificate using RA Web
To request a Composite certificate, do the following.
Continuing from the EJBCA Administration, click RA Web>Make New Request.
For Certificate Type, select the previously created end entity profile.
For Key-pair generation, select By the CA.
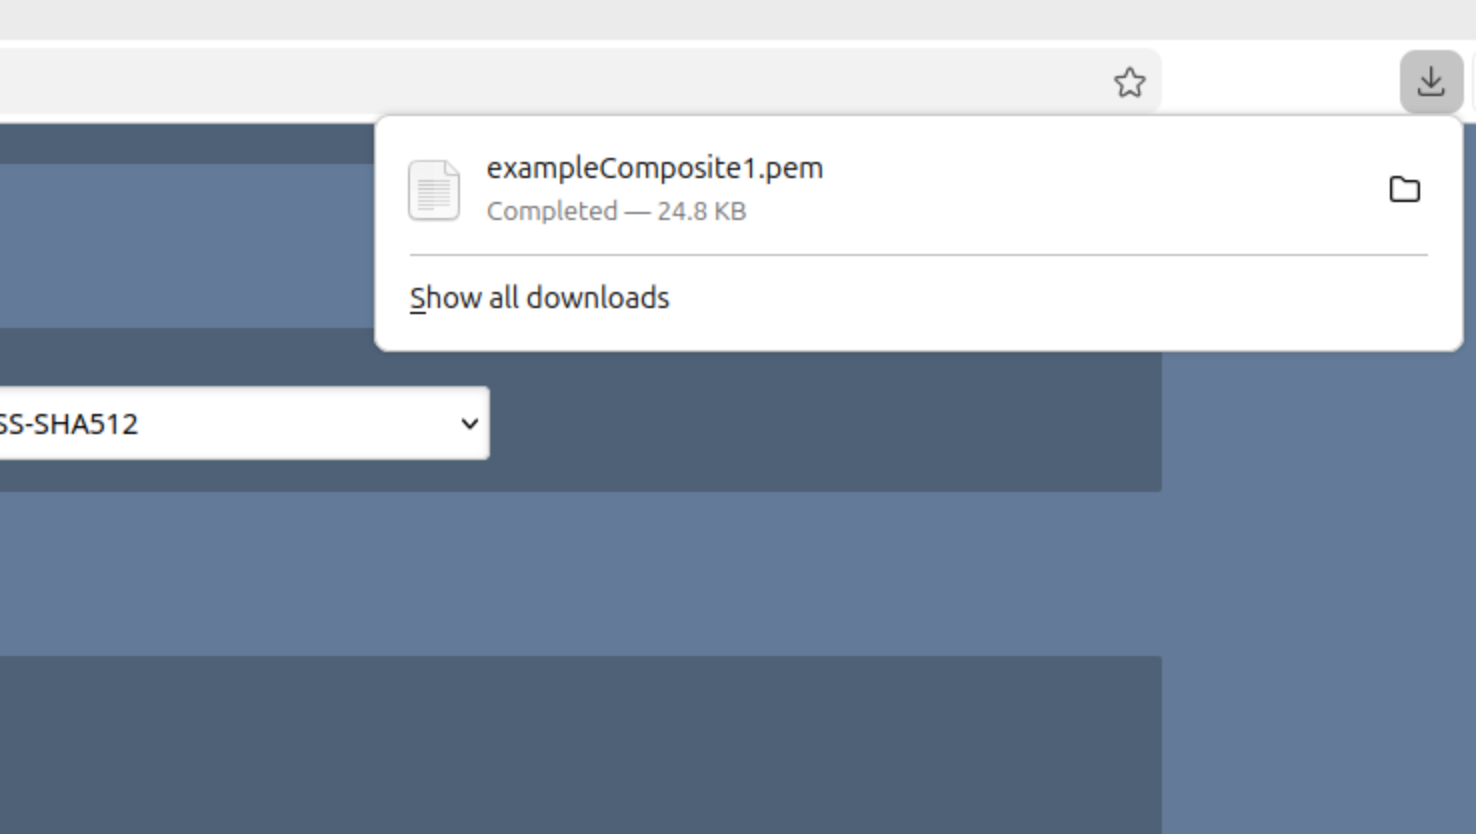
Review that the data is correct and click Download PEM the generate and download the certificate:
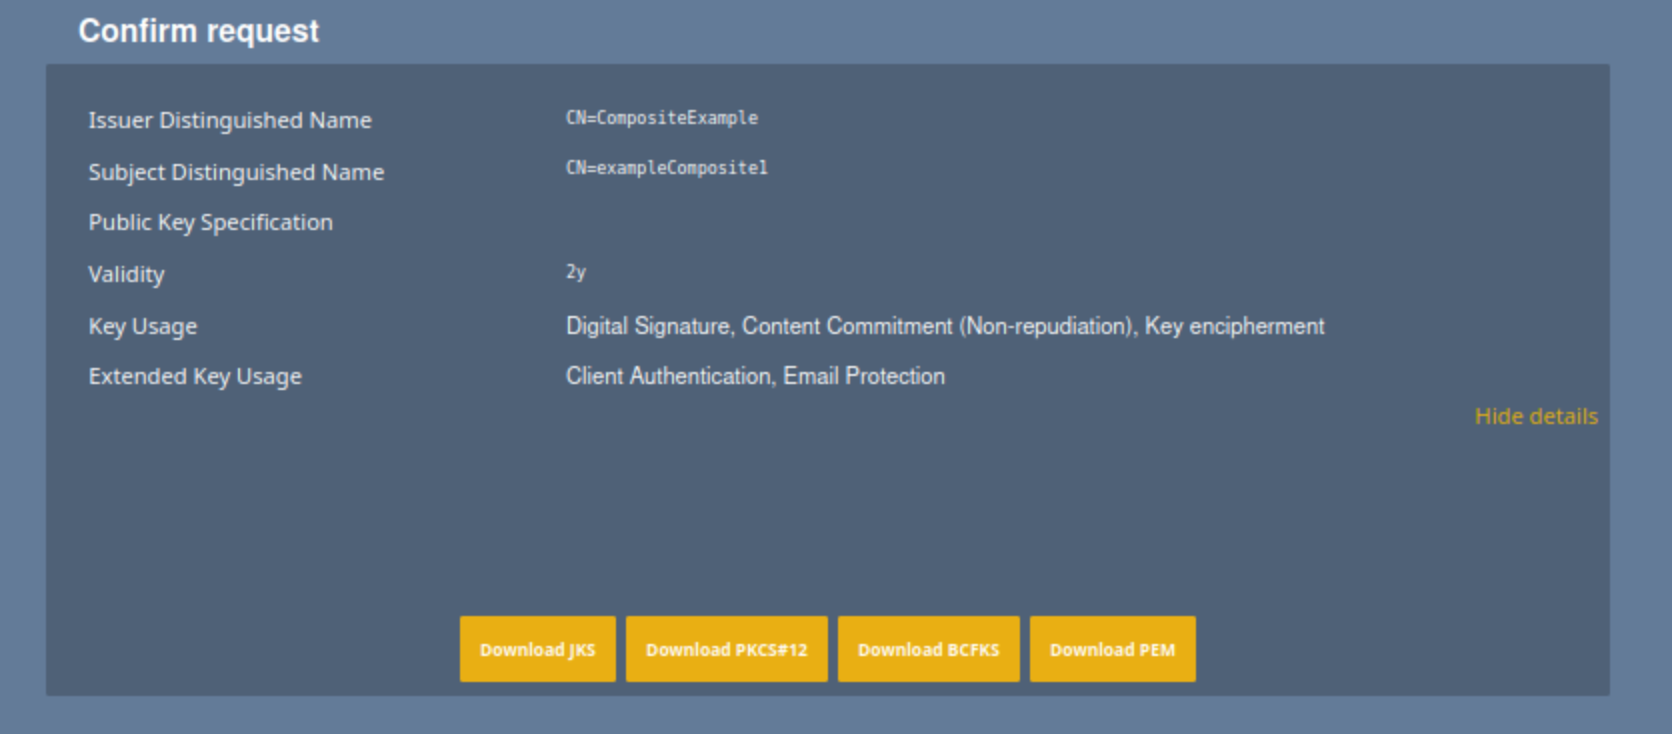
Verify that the PEM is successfully downloaded.
You have now created a Composite certificate. Continue to the next step to review the certificate.
Step 6 - Inspect the Composite Certificate
To inspect the generated composite certificate:
Navigate to RA Web>Tools >Inspect Certificate/CSR.
Upload the generated PEM file.
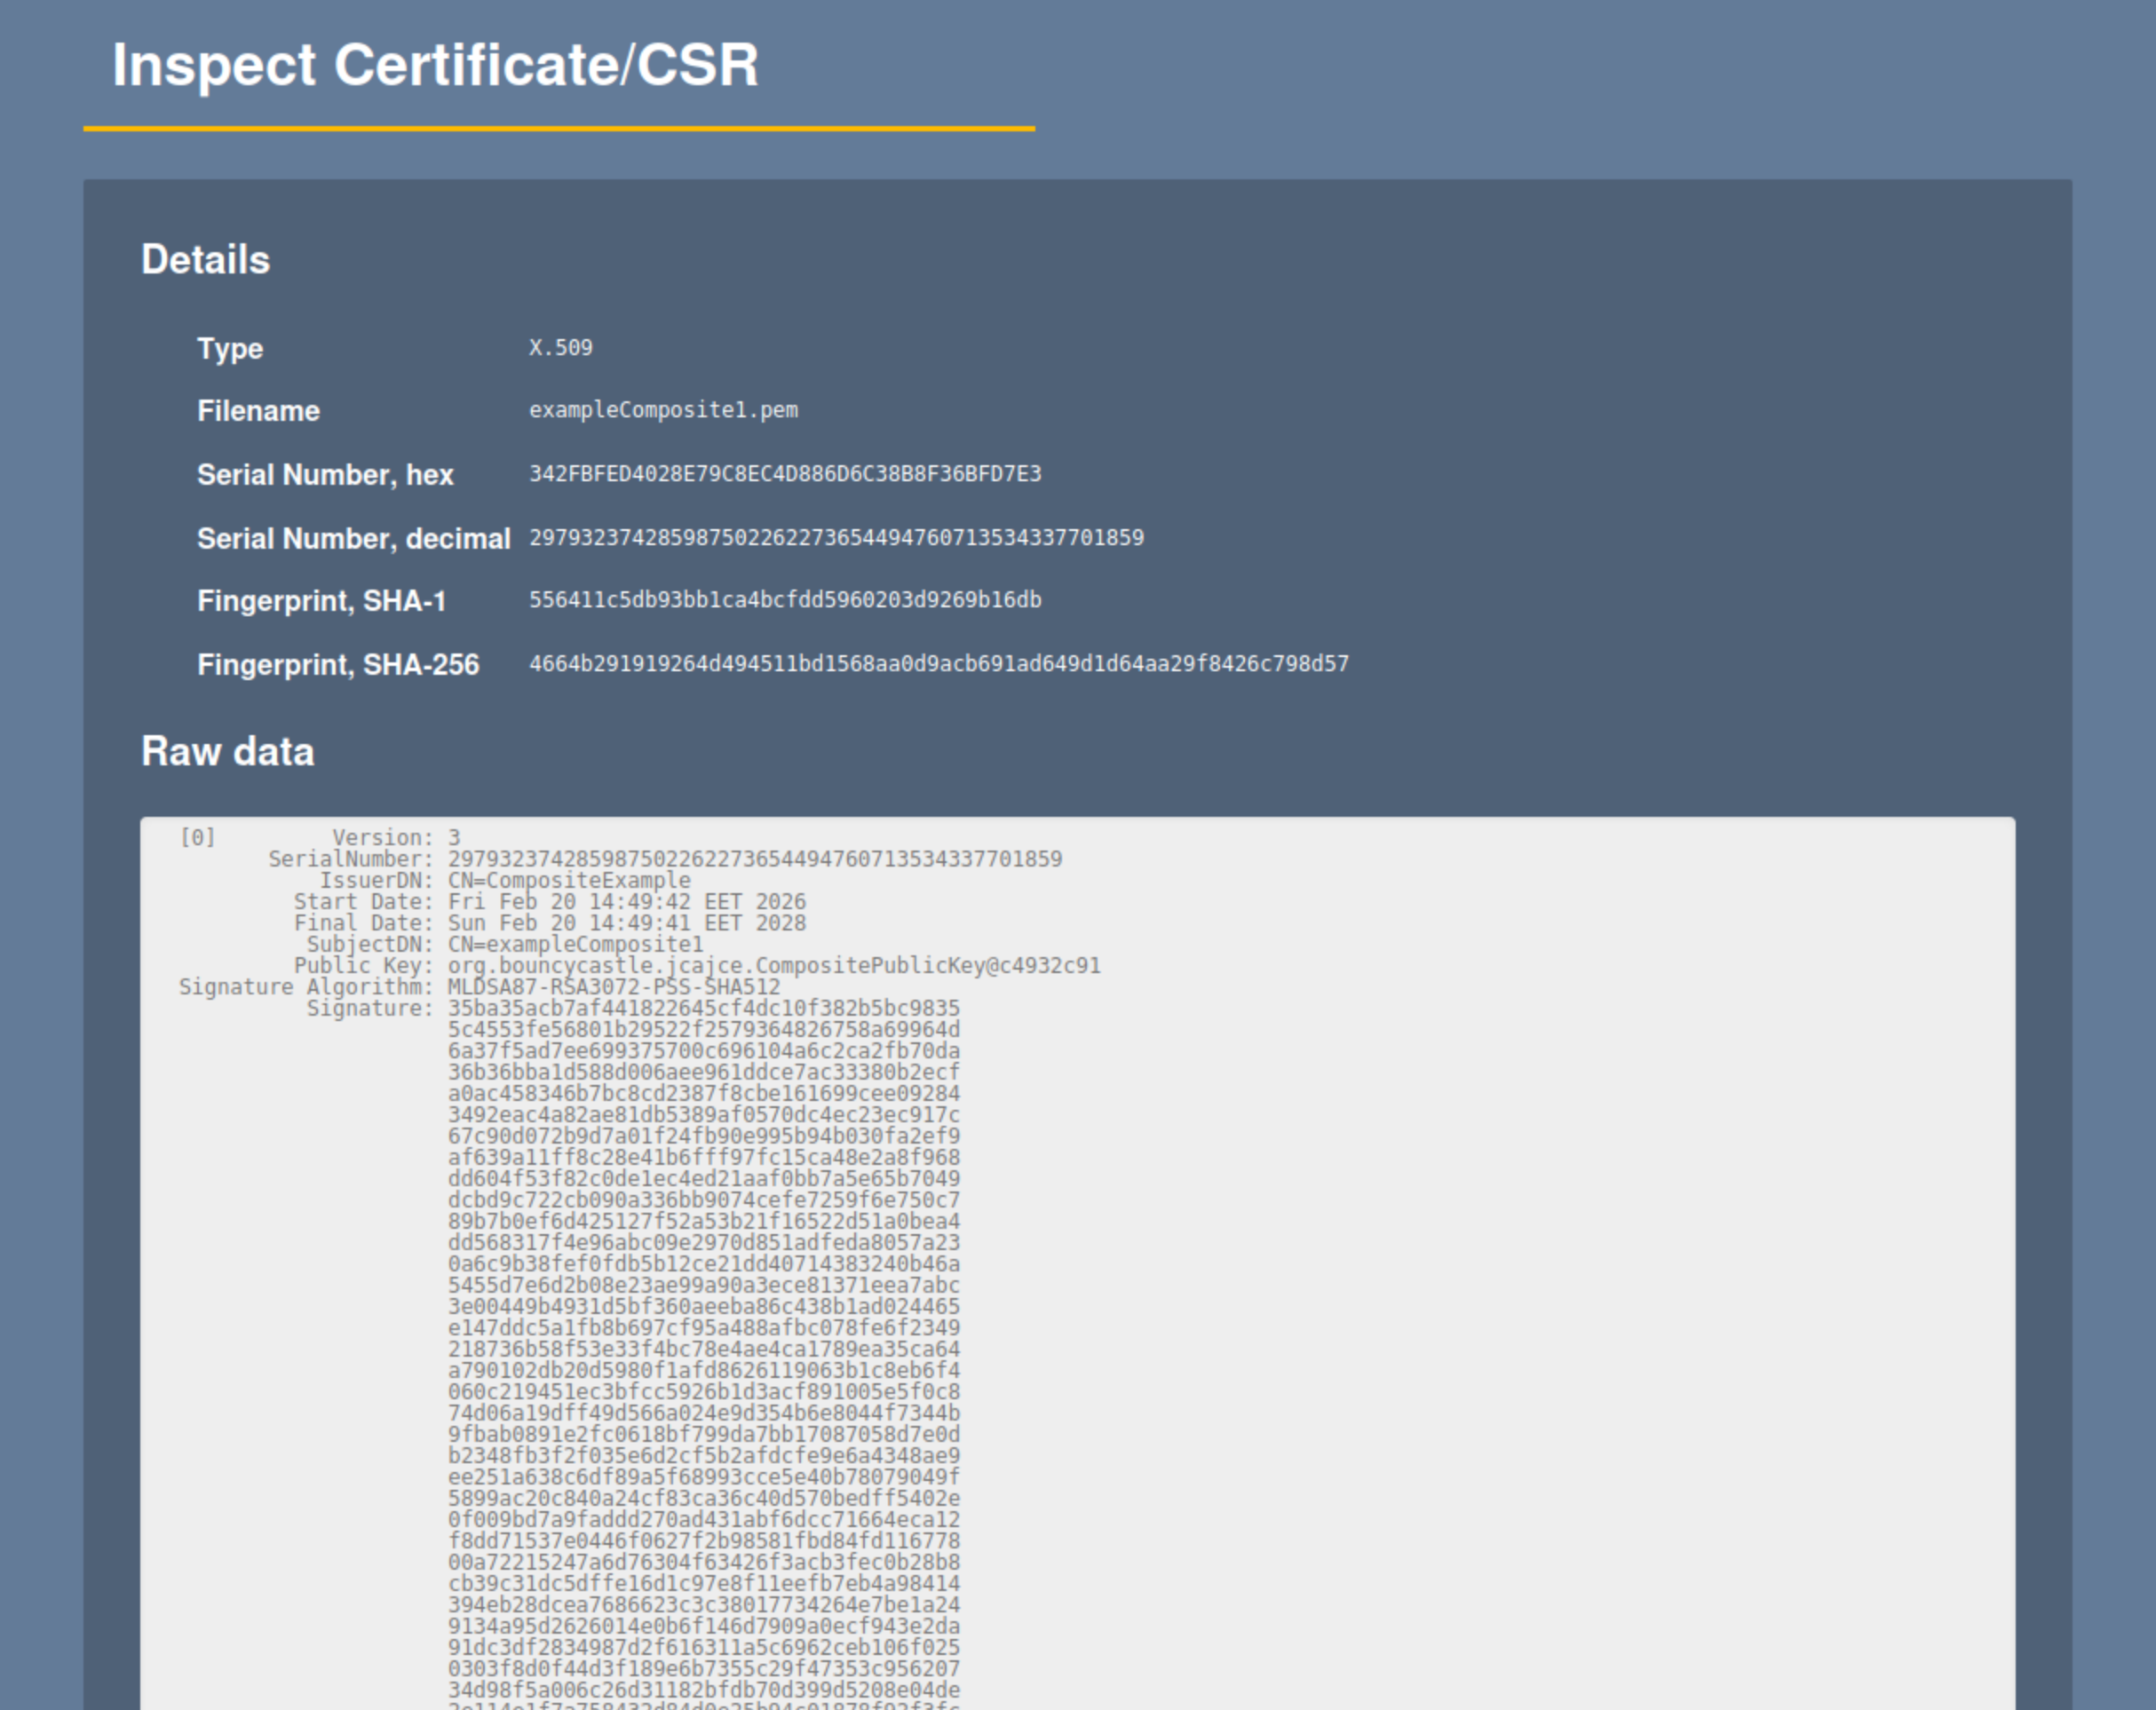
The certificate details display the composite signature structure and algorithms.
Optional - Create a Composite CSR
This step is required when the composite key pair is generated outside of EJBCA or when enrolling a certificate using the REST API.
Open a terminal window and use the EJBCA gencsr CLI command to generate a composite CSR according to the following example:
bin/ejbca.sh gencsr --subjectdn "CN=cncompkeys,O=org 2025,C=SE" --keyalg MLDSA87-RSA4096-PSS-SHA512 --sigalg MLDSA87-RSA4096-PSS-SHA512 The generated CSR can be used for enrollment through the REST API or other client-side enrollment workflows.
Optional - Issue Composite Certificate using the REST API
This section outlines how to enroll a composite certificate using the REST API with a previously generated Composite CSR.
Enable REST enrollment:
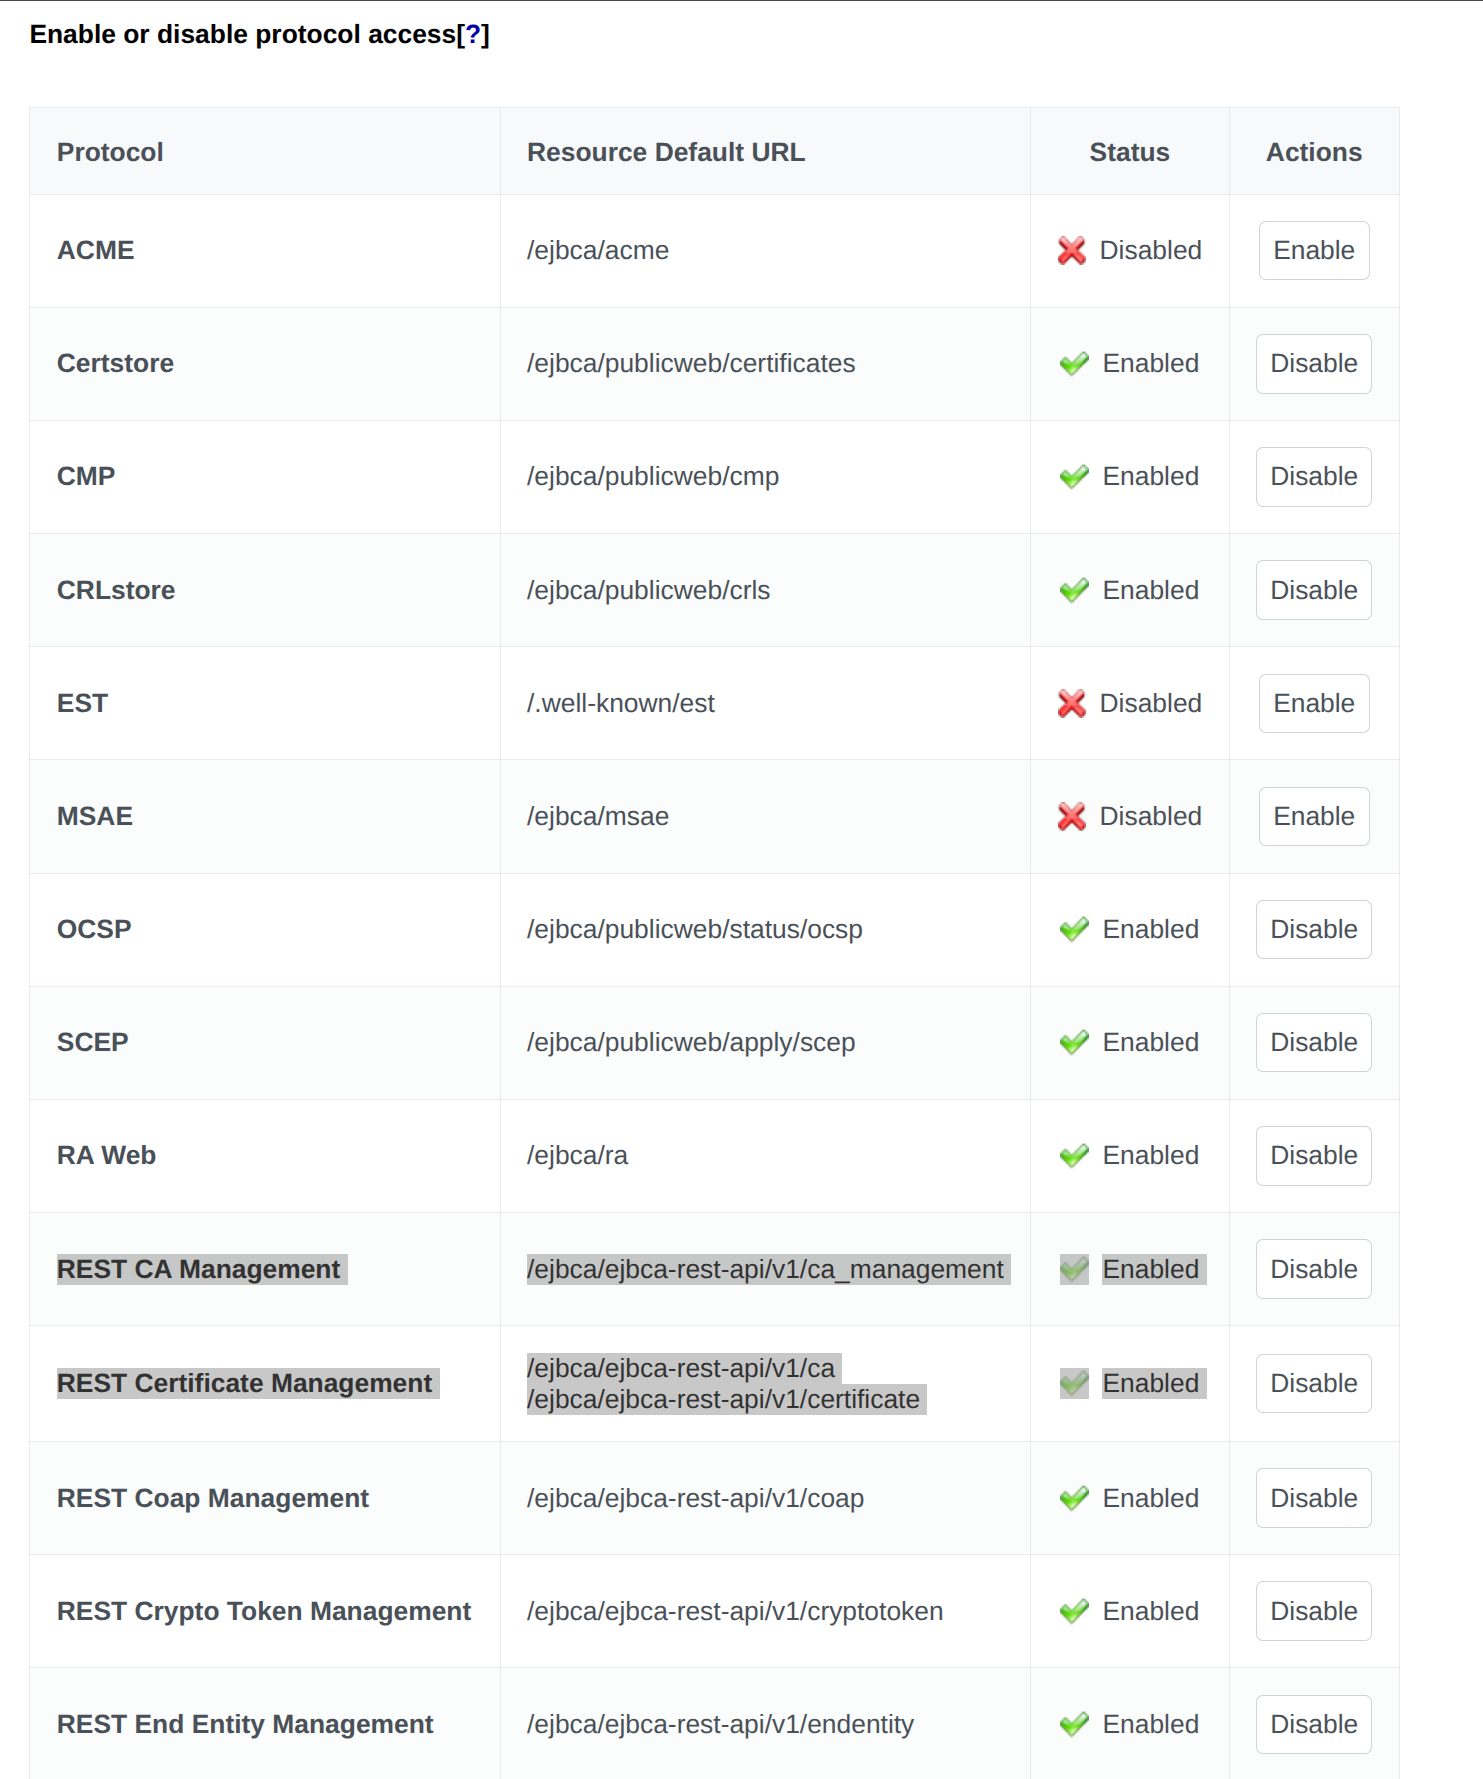
In EJBCA, navigate to System Configuration.
Select the Protocols tab and enable the REST protocols.
Use the created CSR, CA, Certificate Profile, and End Entity Profile to send an enrollment request, according to the following example:
curl -X 'POST' \ 'https://localhost:8443/ejbca/ejbca-rest-api/v1/certificate/enroll' \ -H 'accept: application/json' \ -H 'Content-Type: application/json' \ -d '{ "certificate_request": "<generated_csr>", "include_chain": false, "certificate_request_type": "PKCS10", "response_format": "DER", "end_entity": { "username": "<username>", "password": "<password>", "subject_dn": "<subject_dn>", "ca_name": "<composite_ca>", "certificate_profile_name": "<composite_certificate_profile>", "end_entity_profile_name": "<composite_end_entity_profile", "token": "USERGENERATED", "key_recoverable": false, "status": "NEW" } }' The output will look similar to the following:
{ "certificate": "<cert>", "serial_number": "<serial_number>", "response_format": "DER" } Related content
For more information on composite key structure and HSM considerations, see Managing Crypto Tokens.
For conceptual background on post-quantum cryptography and composite signatures, see Post-Quantum Cryptography Keys and Signatures, and for a list of supported composite algorithms, see Interoperability and Certifications.