Add a Cluster Node
Preconditions for Adding Cluster Nodes
-
Only newly created nodes that no one has logged into yet can be added.
-
If the node that initiates another node to join the cluster has a hostname, this hostname must be resolvable from the joining node.
If this cannot be guaranteed, the hostname should be temporarily removed until the new node has been added. -
During the reverse TLS check, the default interface IP is always sent to the other node.
To successfully set up a cluster, the node (Node2) being added must be able to reach Node1.
This is only possible if both nodes are on the same network, or if Node1 is on the default interface. If that is not the case, this can be done by specifying the This Node's Address dialog. -
If the joining node (Node2) is added via FQDN, make sure that it can resolve the name of Node1.
In general, the initializing node (Node1) sends a reverse DNS probe to the joining node. A reverse DNS probe is a method of looking up a domain name associated with an IP address. This ensures that Node2 can resolve the name of Node1. If the DNS check fails, the configuration of the name server is incorrect or missing. -
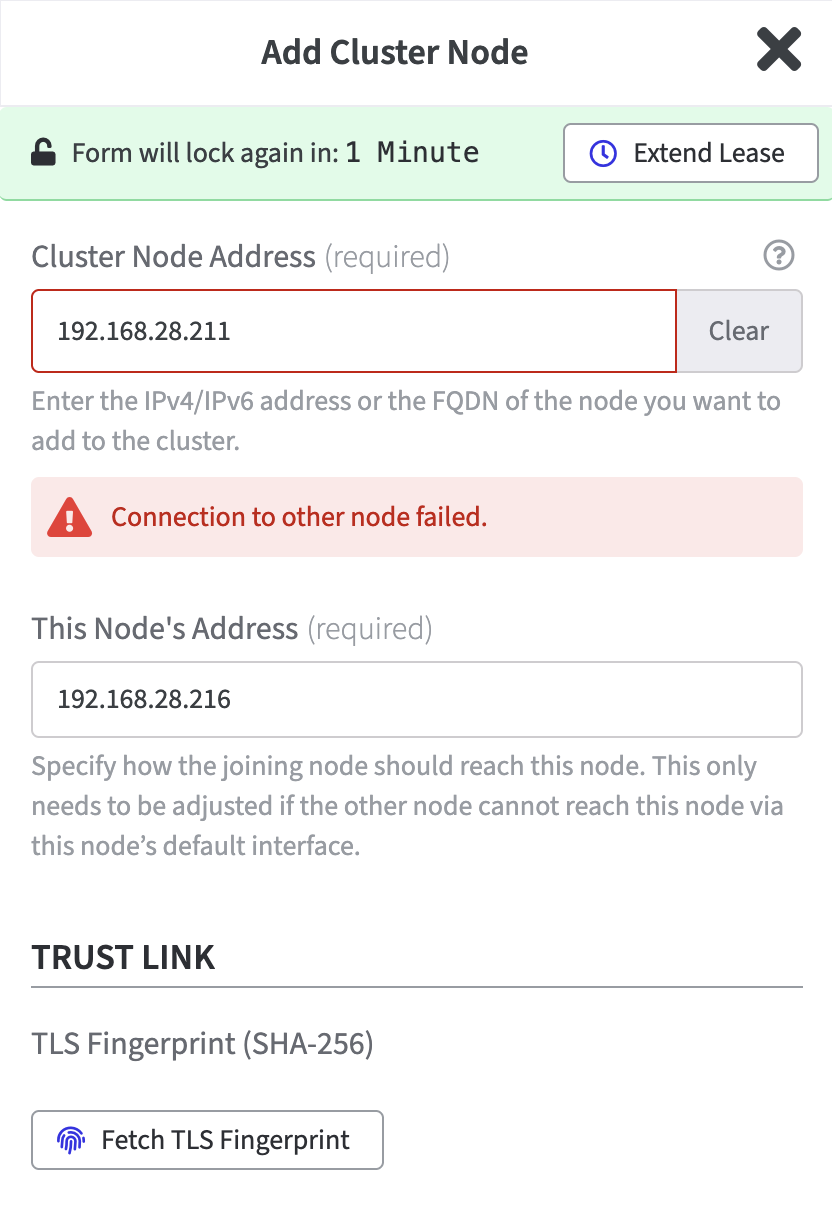
If you add a node that is not newly deployed, you will see the following error after clicking Fetch TLS Fingerprint:
-
If you want to add a new cluster node to an existing cluster, all existing nodes must be connected.
Create a 2-Node Cluster
Adding a node via FQDN
If the joining node (Node2) is added via FQDN, make sure that it can resolve the name of Node1.
In general, the initializing node (Node1) sends a reverse DNS probe to the joining node. A reverse DNS probe is a method of looking up a domain name associated with an IP address. This ensures that Node2 can resolve the name of Node1. If the DNS check fails, the configuration of the Nameserver is incorrect or missing.
Proceed as follows to create a 2-Node Cluster:
-
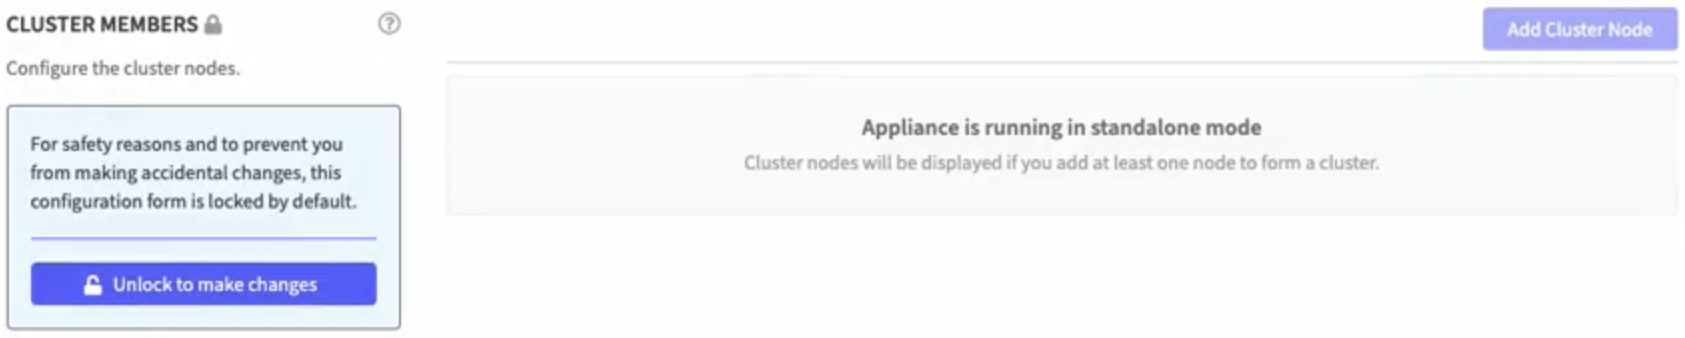
Log in to your Software Appliance and open the Cluster page.
The Cluster Status shows that the Appliance is running in standalone mode.
No Cluster Members are available yet.
-
In the section Cluster Members, click Unlock to make changes.
The configuration form Add Cluster Node is locked by default.
This is a security measure, to prevent accidental changes.
After activation, a 5-minute timer starts.
To monitor the status, the remaining time is displayed on the Webconf page as well as in the open form. Click Extent Lease to prolong the runtime if necessary.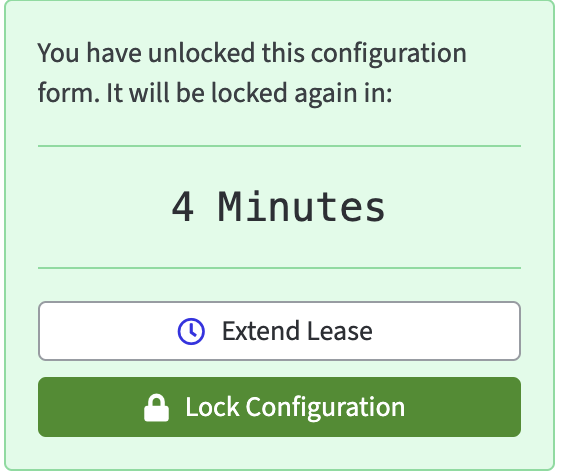
-
Click Add Cluster Node to open the form:
-
In the the Add Cluster Node dialog enter the Cluster Node Address of the new node as IPv4 or IPv6 address or as FQDN.
Make sure the appliance you address fulfills the preconditions. -
In the This Node's Address dialog specify how the joining node should reach the new node to be created. This field is already pre-filled and only needs to be adjusted if the other node cannot reach this node via its default interface.
-
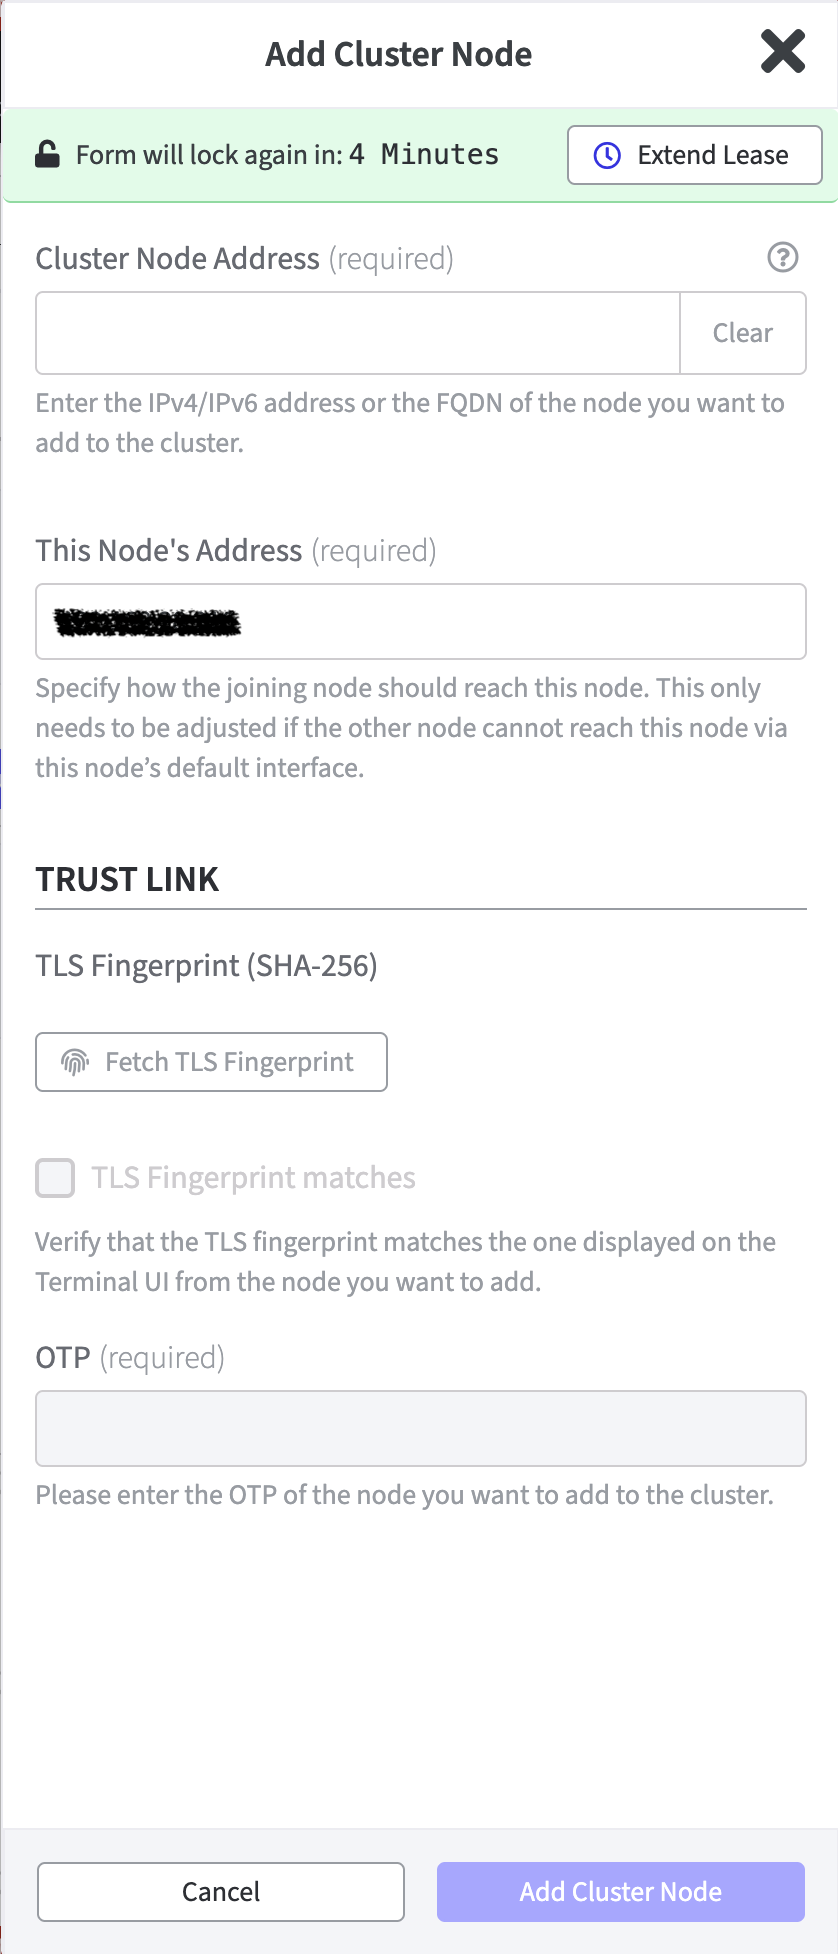
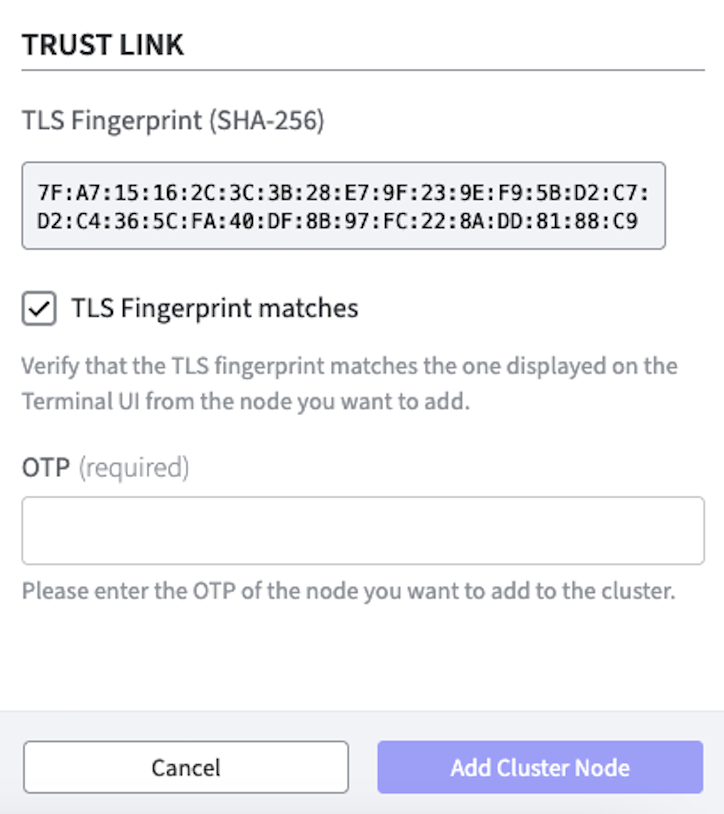
Trust Link
Click Fetch Fingerprint to get the TLS Fingerprint (SHA 256) of the new node.
The TLS Fingerprint will be displayed. -
Compare the indicated TLS fingerprint with the TLS fingerprint shown in the Terminal UI of the new node.
-
If the two fingerprints are identical, confirm this by activating the option TLS Fingerprint matches. The field OTP will become editable.
-
Enter the OTP for the new node.
-
Click Add Cluster Node to confirm your entries and create the new node.
A banner informs about the successfully added cluster.
-
The new Cluster Status is now displayed.
Node1 is created on the appliance on which the cluster was created.
Node2 is the cluster node to which the connection was established.
In the title bar Node1 is displayed.
Further information about the Cluster is now added in Webconf.
Please refer to Check the Cluster.
After the new node has been added, the VPN between the nodes will be created and the new node will receive information about the cluster configuration and the HSM type.
In the section Cluster Members, the new node appears with the connectivity status Initializing, which changes to Connecting and finally to Connected.
At the same time, the LTID (Last Transaction ID) of all nodes will converge.
When the new node appears as Connected, the cluster is operational:
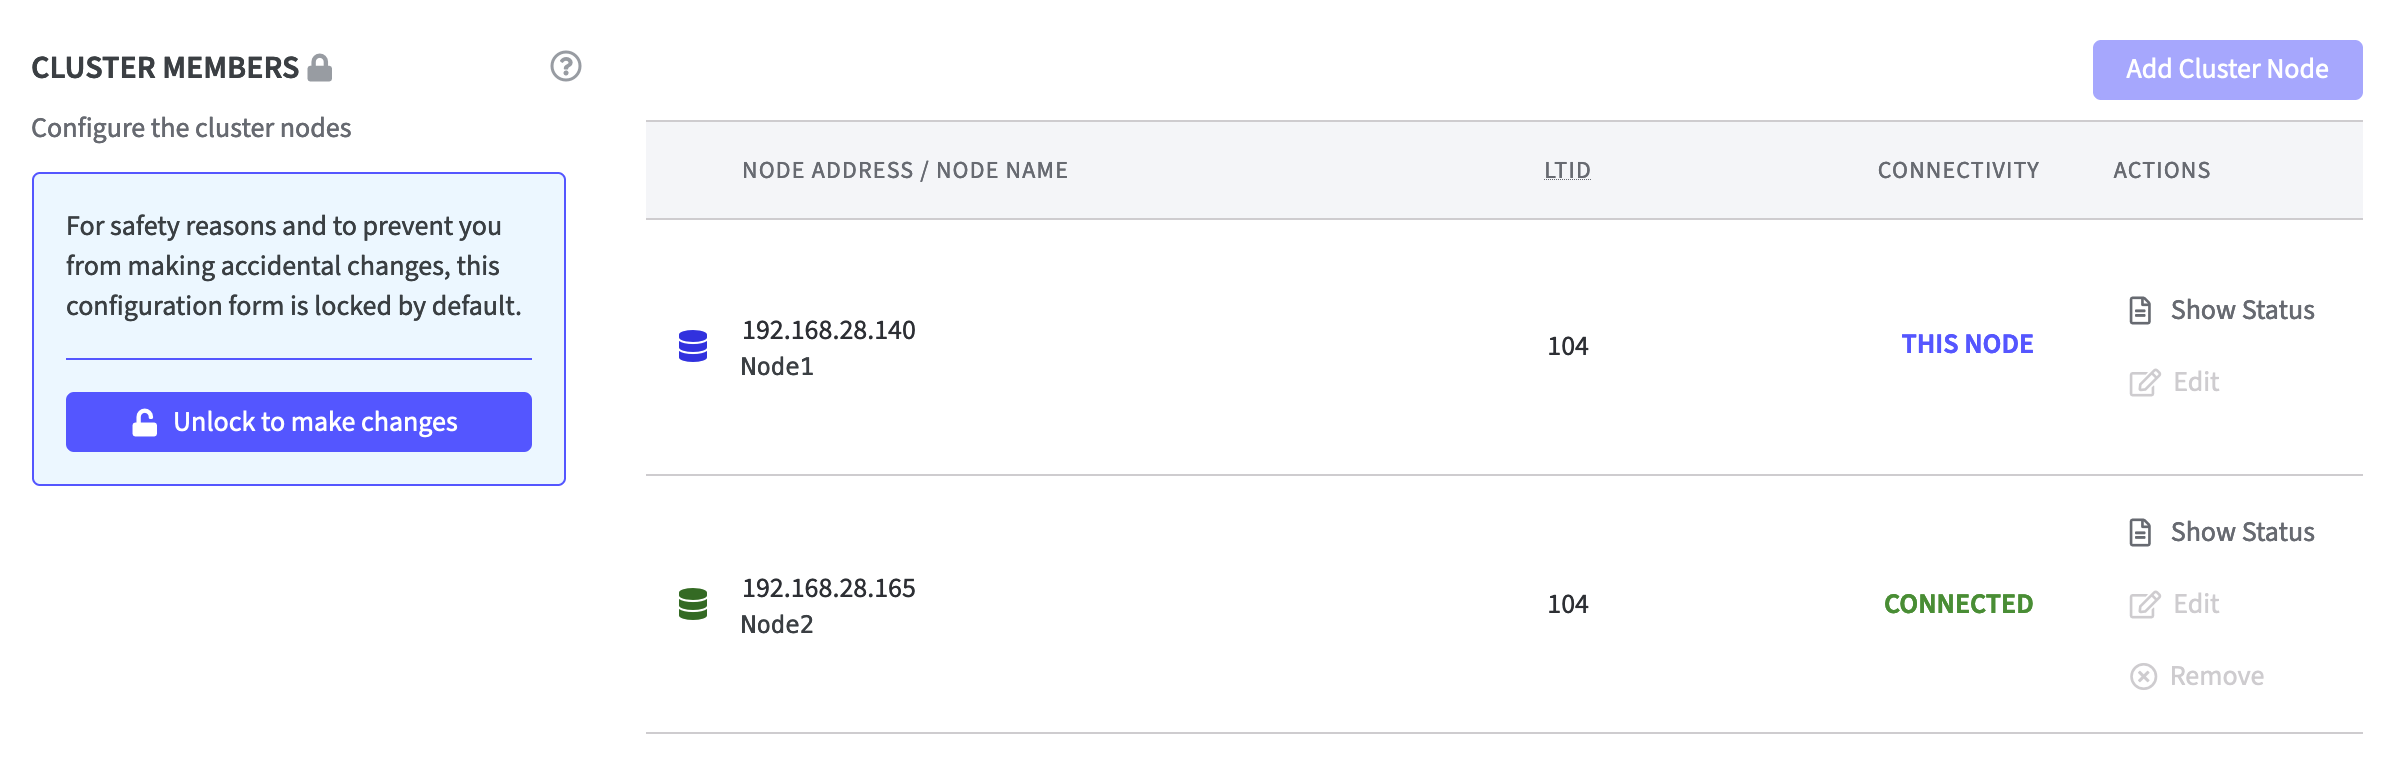
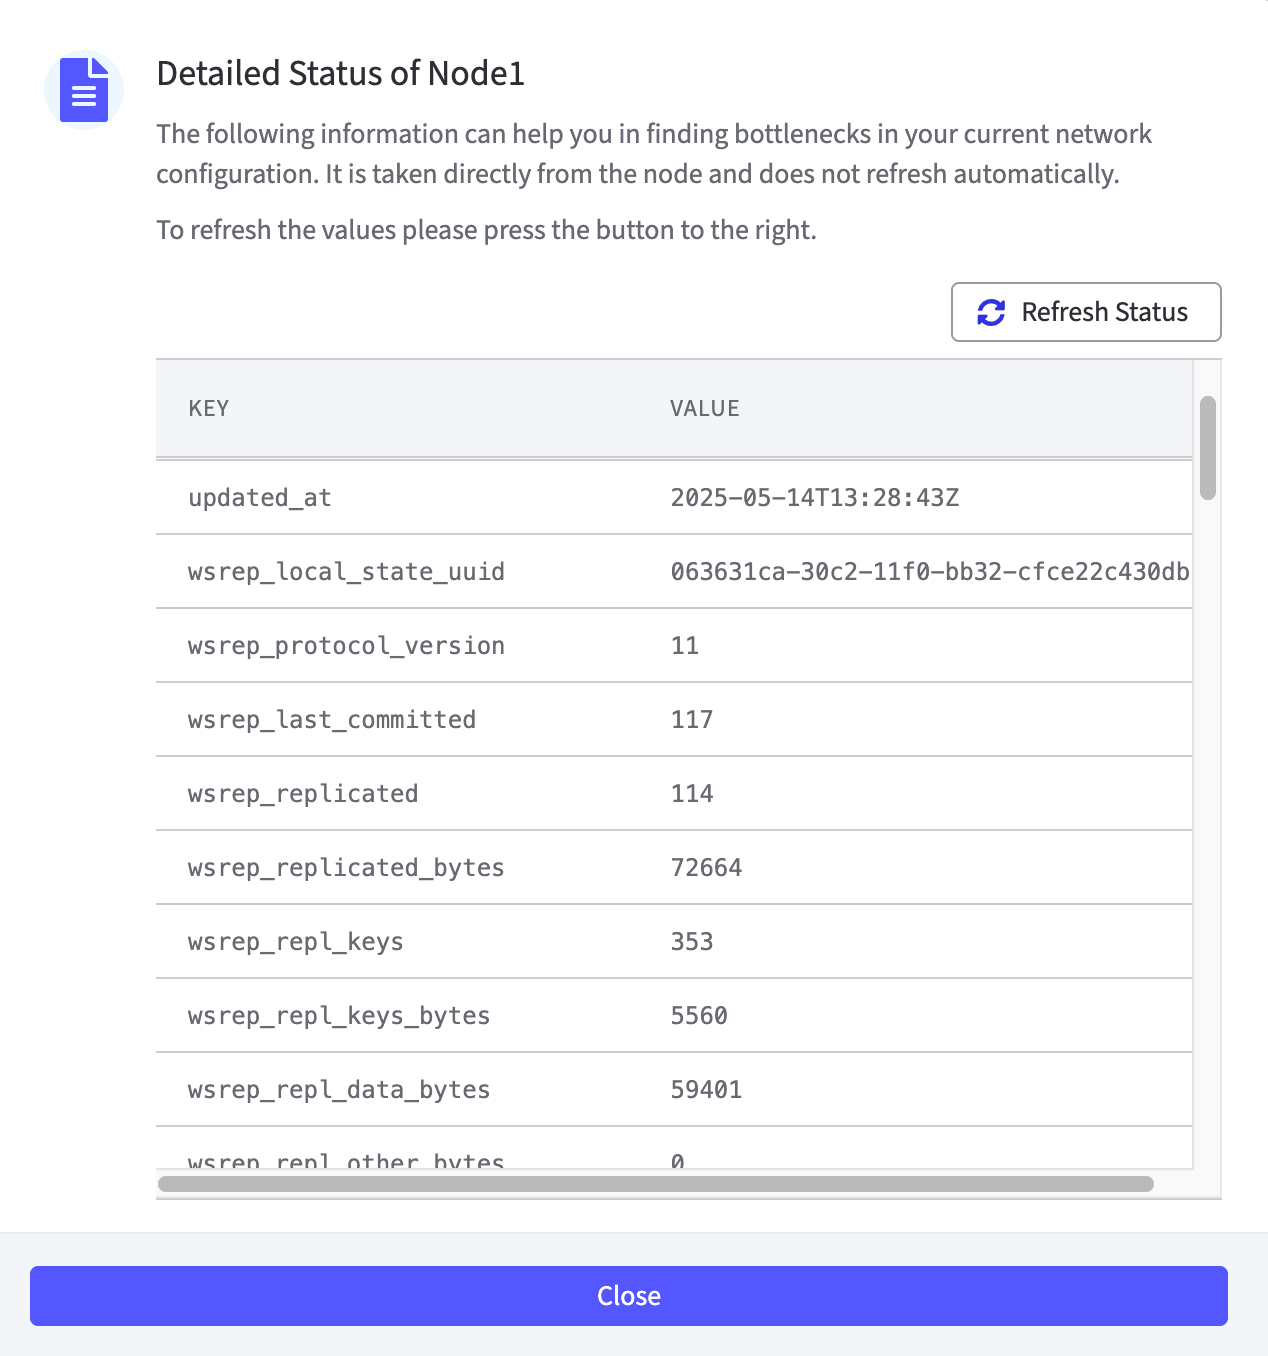
In the section Cluster Members click in the Actions column on Show Status to find detailed information about the node.
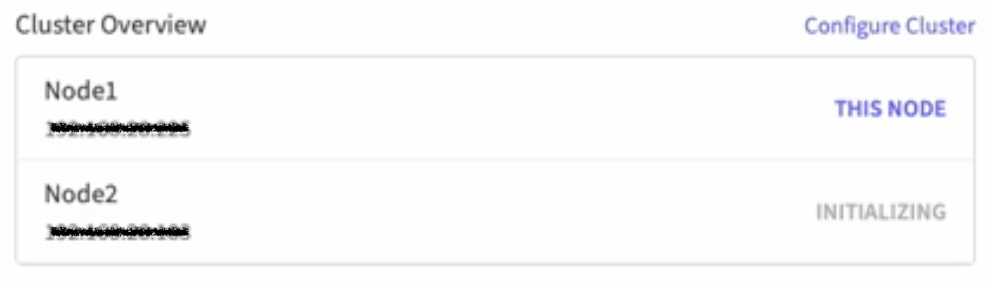
On the Overview page a new section Cluster Overview is displayed on the right-hand side above the Recent Activities. Click Configure Cluster to be redirected to the Cluster page.
Create a 3-Node Cluster
To create a 3-Node Cluster, follow exactly the same steps as for creating a 2-Node Cluster.
Preconditions are the same.
Resolving Cluster Node Addresses
When you add a node to a new cluster, we add two entries to the cluster configuration.
The address for the new node and the adjusted address for Node1. The entry for the address of the newly added node is exactly as you specify it. The current network configuration of Node1 is used to decide which of the available addresses of Node1 is selected for the cluster configuration.
The rules for the Node1 address in the cluster configuration are as follows:
-
You enter an IPv4 address for the new node → we pick the IPv4 address of Node1.
-
You enter an IPv6 address for the new node → we pick the IPv6 address of Node1.
-
You enter a hostname for the new node and
-
Node1 has a hostname → we pick the hostname of Node1.
-
Node1 does not have a hostname and
-
The hostname of the new node only resolves to IPv4 → we pick the IPv4 address of Node1.
-
The hostname of the new node only resolves to IPv6 → we pick the IPv6 address of Node1.
-
The hostname of the new node resolves to IPv4 and IPv6 → we pick the IPv6 address of Node1.
-
-
Switch between Cluster Nodes
As soon as a cluster is configured, you will find a drop-down selection list for nodes in the title bar.
Example of a 2-Node Cluster:

The list offers the following:
-
Node1: The name in the title bar is the name of the cluster node you are currently connected to.
-
Cluster nodes in list: The list contains all available cluster nodes, excluding the node to which you are currently connected. Click any node to switch to its Webconf.
-
Configure cluster: To switch to the Cluster page of the node you are currently connected to, click Configure cluster.