Enterprise
This page provides an overview of how to configure auto-enrollment in EJBCA.
For an example setup guide, see Microsoft Auto-enrollment Configuration Guide. For a conceptual overview, see Microsoft Auto-enrollment Overview.
Important Changes in Recent EJBCA Versions
Kerberos Extra SID Group Membership Support
As of EJBCA 9.3, support has been added for evaluating Extra SID group memberships in the Kerberos Token. This means that if an account belongs to a group in another domain, for example, its membership will now be evaluated. Additionally, this extra evaluation may occur when the Kerberos Key Distribution Center (KDC) adds extra SIDs under certain circumstances (for example, the NT Authority\Enterprise Domain Controllers (S-1-5-9) SID).
However, Resource Group SIDs are not directly evaluated due to a known issue in Kerb4J - the library EJBCA uses to parse and evaluate Kerberos ticket data. For more details, refer to the GitHub Kerb4J issue.
As a workaround, to enable the evaluation of Resource Group SIDs, you can disable Resource Group SID compression on the service account used by EJBCA. This causes the Resource Group SIDs to be moved and expanded into the ExtraSids attribute, allowing them to be evaluated in EJBCA 9.3. Keep in mind that disabling compression may increase the risk of token bloat, so this should be carefully considered.
Note that this change does not impact the existing SID evaluation in the MSAE code prior to EJBCA 9.3. Only data present in the Extra SID group membership section of the Kerberos ticket will also be evaluated.
Auto-enrollment Alias Configuration Moved to the CA
As of EJBCA 8.3, Microsoft auto-enrollment (MSAE) aliases must be created and configured on the CA instance.
-
Existing aliases configured in earlier versions remain visible on RA instances for backward compatibility.
-
New aliases must be created under System Configuration on the EJBCA CA instance.
If an alias configured on the CA is removed, RA instances may continue to use cached data until the cache is cleared manually. To manually clear the cache, select System Configuration > Basic Configurations > Clear All Caches.
Configure Auto-enrollment
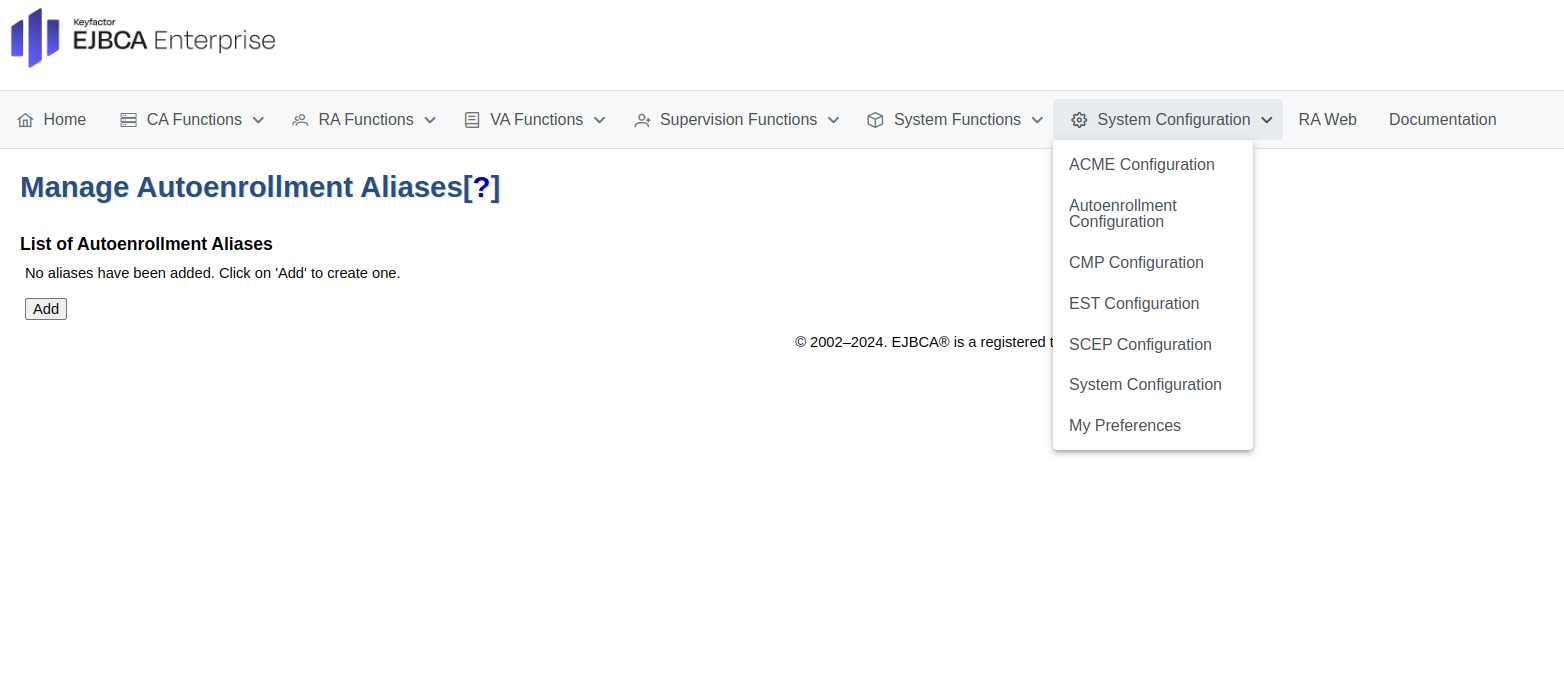
Auto-enrollment configuration is alias-based. Each alias is managed on the Manage Autoenrollment Aliases page.
To configure auto-enrollment:
-
In EJBCA, go to System Configuration > Autoenrollment Configuration.
-
To create a new alias, click Add.
Configure Domain and Connection Settings
The following sections cover the Domain and Connection configuration settings.
Domain Controller and Policy Settings
The following settings are configured on the auto-enrollment alias configuration page.
|
Field |
Description |
|---|---|
|
Forest Root Domain |
Domain name of the forest root (the location of the Certificate Templates). |
|
AD Domain Controller |
Fully qualified domain name (FQDN) of the domain controller (used for the LDAP connection). |
|
Policy Name |
Display name of the Certificate Enrollment Policy retrieved by clients (free text). |
|
Policy Update Interval |
Value of |
|
Service Principal Name (SPN) |
Service principal name (SPN) in the format |

The Service Principal Name (SPN) Fully Qualified Domain Name (FQDN) must resolve to an A record in DNS.
Kerberos authentication does not work correctly when the SPN resolves through a CNAME record.
Kerberos Settings
The following Kerberos settings are available on the auto-enrollment alias configuration page.
Import the Kerberos configuration files using the following fields.
|
Field |
Description |
|---|---|
|
Kerberos Key Tab |
Import a valid keytab file. |
|
Krb5 Conf File |
Import a valid |

Configure Active Directory Connection
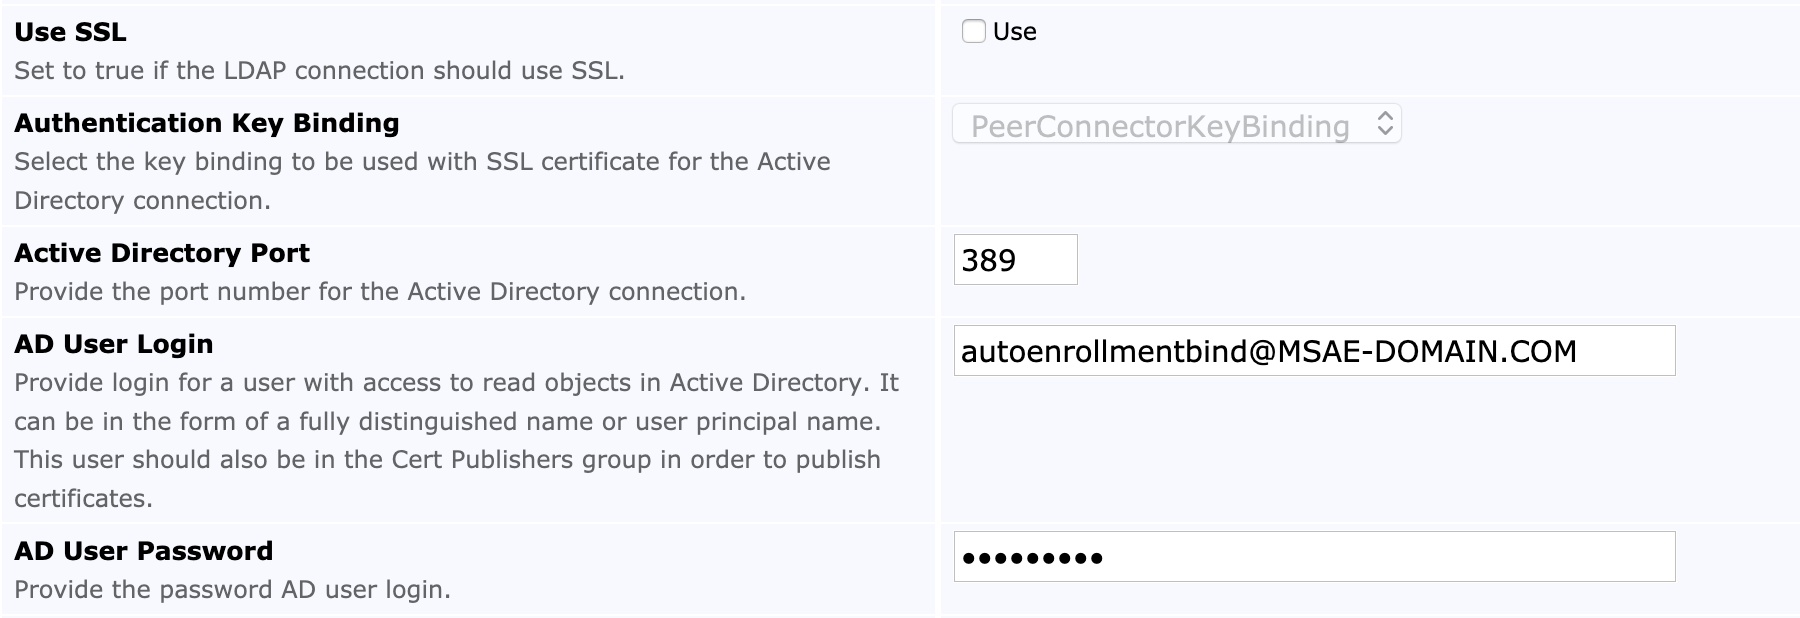
The following settings are configured for the Active Directory (AD) connection. Note that SSL can optionally be used for the EJBCA instance's connection to the LDAP server.
|
Field |
Settings Without SSL |
Settings Using SSL |
Notes |
|---|---|---|---|
|
Use SSL |
Cleared |
Selected |
|
|
Authentication Key Binding |
Disabled |
Select Relevant Key Binding |
Not available if enrollment requests are sent to RA instances and MSAE aliases are defined on the CA side of the peer connection. Then instead enable TLS for the Active Directory (AD) connection and set the SSL Trust Manager Type in the MSAE alias configuration to either Trust imported CA certificates or Local Trust Store (if the Legacy Hardware Appliance allows modification of the Java trust store). For details, see Enabling TLS for Active Directory Connection. |
|
Active Directory Port |
|
|
Use custom ports if required. |
|
AD User Login |
|
|
Valid AD bind account formats:
|
|
AD User Password |
Password |
Password |
Credentials for the AD bind account. |
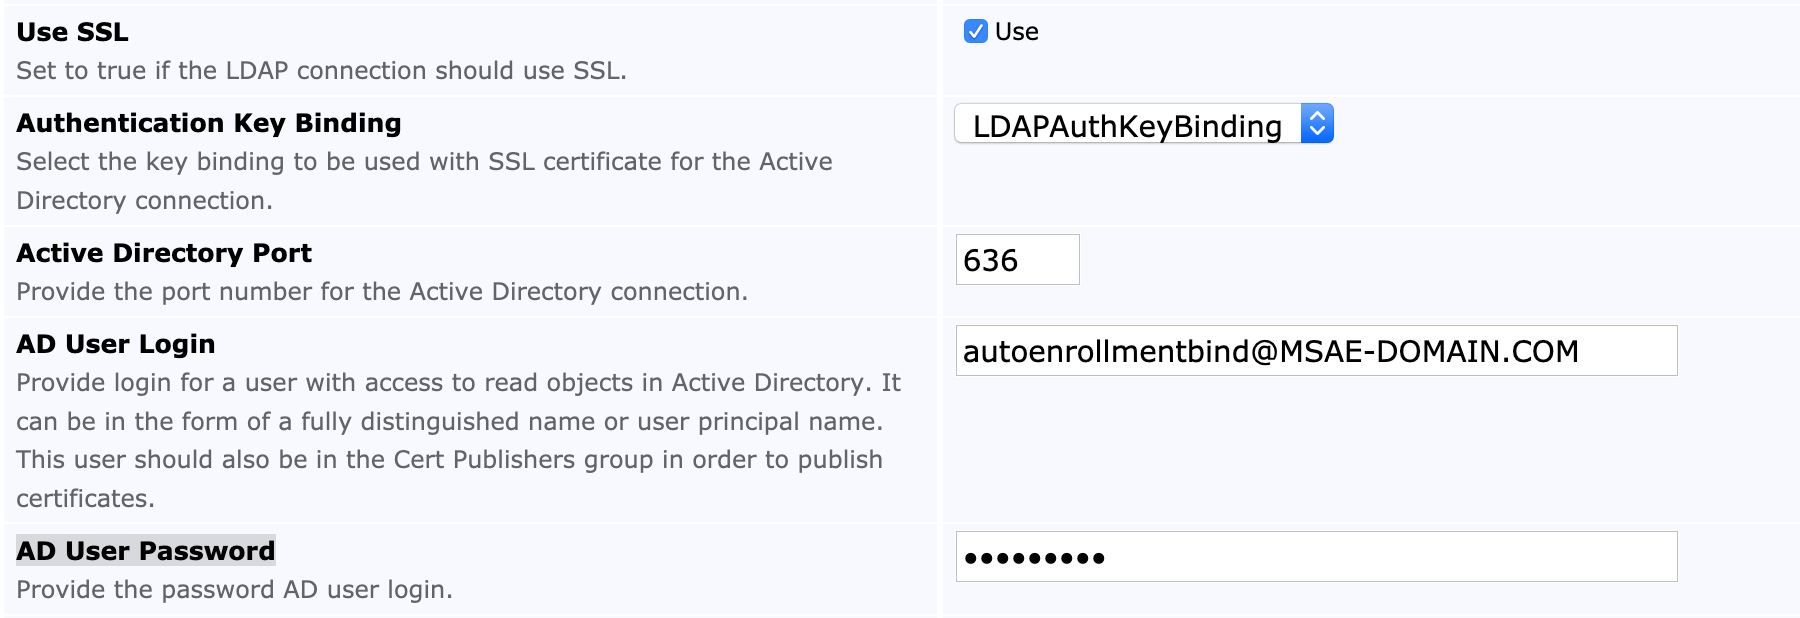
The EJBCA instance can connect to the LDAP server over SSL. Once the Use SSL option is selected, an Authentication Key Binding can be specified. The selected key binding is used as a trust entry for the LDAP SSL certificate. For details on creating the binding needed for the SSL connection, see Setting up a Remote Authenticator.
The following displays the settings for AD connection without SSL:
The following displays the settings for AD connection with SSL:
Configure Default CA
Select the default CA for auto-enrollment using the Default CA field.
Test Active Directory connection
After saving the configuration, click Test Connection to verify the AD connection.
A successful connection test displays a confirmation message: Active Directory connection test was successful.
Configure Microsoft Auto-enrollment Templates
To enroll through Microsoft Auto-enrollment, Microsoft Templates must be mapped to End Entity Profiles and Certificate Profiles.
Add Template Mappings
To add template mappings:
-
Under Available MS Templates, select:
-
a Microsoft template
-
an End Entity Profile
-
a Certificate Profile
-
-
Click Add.
Configured mappings appear under Mapped MSAE Templates.

Certificate Template Cache
EJBCA caches Certificate Templates retrieved from Active Directory for performance reasons.
To configure cache expiration, use the Certificate Template Cache Lifetime (seconds) field.
Optional Configure Key Archival
Key archival allows recovery of archived private keys.
To enable key archival, configure the following:
-
In the auto-enrollment alias, select a KEC Certificate profile for auto-enrollment with key archival.

-
In EJBCA System Configuration, activate Enable Key Recovery.

-
In the relevant End Entity Profiles, enable Key Recoverable.
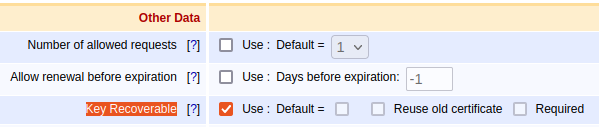
The targeted End Entity Profile must include P12 under Available Token Types. Without this setting, Microsoft key archival enrollment does not function correctly.
For more information, see Part 3a: EJBCA Configuration.
-
Open the Microsoft certificate template used in the auto-enrollment alias configuration. On the Request Handling tab, select Archive subject's encryption private key to enable key archival.
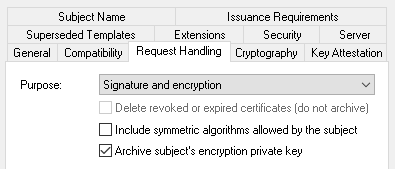
For more information, see Part 2: Group Policies and Certificate Templates.
FIPS and Cryptographic Compatibility Considerations
Future EJBCA versions may remove support for non-FIPS-compliant algorithms and HSM integrations.
Microsoft key archival can fail if Microsoft clients encrypt private keys using non-compliant algorithms such as the Triple DES (DES-EDE3-CBC). Review your Microsoft template and cryptographic provider configuration carefully before enabling key archival in FIPS environments.
Configure Key Archival for HSMs in FIPS Mode
For HSM deployments operating in FIPS mode, Microsoft clients must use a Cryptography Next Generation (CNG) Key Storage Provider (KSP).
To configure key archival for HSMs in FIPS mode:
-
In Microsoft Certificate Templates, open the relevant certificate template.
-
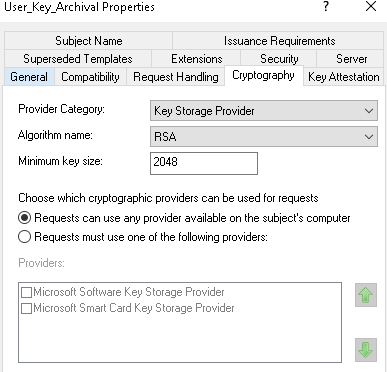
On the Cryptography tab, configure a Cryptography Next Generation (CNG) provider by setting Provider Category to Key Storage Provider. Select Requests can use any provider available on the subject’s computer as default, or adjust the type of the provider by selecting from the list of available KSP providers.
-
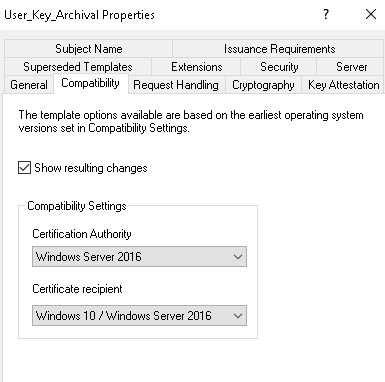
The required provider options are available when the template Compatibility level is configured for newer Windows versions, such as Windows Server 2016:
-
-
On the Request Handling tab, select Use advanced symmetric algorithm to send the key to the CA.
This ensures keys are encrypted using compatible algorithms before being sent to EJBCA.

-
In EJBCA, configure the CA responsible for key archival and recovery and set the CA field Key Encryption Padding Algorithm to RSA OAEP.
This setting is required to recover archived keys created using modern Microsoft cryptographic providers.
For additional information, see the Microsoft Auto-enrollment Overview and Microsoft Auto-enrollment Configuration Guide.