The following describes how to update a 2-Node and a 3-Node Cluster.
Prerequisites for the Update
The equivalent number of VMs must be available for the number of cluster members to be updated.
The VM must be shut down. To ensure a proper shutdown, use the Webconf instead of shutting down the VM via the hypervisor.
If a cluster is to be updated, it is recommended that you always start with the last node.
-
If it is a 2-node cluster:
start the update of Node2 and then repeat the same update process for Node1. -
If it is a 3-node cluster:
start the update of Node3, then repeat the same update process for Node2 and then for Node1.
Follow the update process that is linked for each of the nodes, depending on which hypervisor you are using.
In the Hardware Configuration overview the Hard disks are listed (e.g. Hard disk 1 and Hard disk 2). During the update processes, it is possible that the given names may change. In this case, it is helpful to know that the firmware disk is the disk which is usually about 60 GB in size.
Upload the latest Software Appliance Update to the Hypervisor
The VMs must be updated to the latest version of the Software Appliance first.
-
Log in to the hypervisor.
-
Copy the new firmware to the desired location to perform the update.
Select a storage folder.
Use or create a new directory to store the update.
Make sure that the new firmware is easily accessible during the update process and is not restricted by any permissions.
Make a note of the path to which the new firmware is copied.
The following documentation describes a firmware update process of the Software Appliance for a VM. Select the appropriate link for more information:
-
click here for Update Process with ESXi
-
click here for Update Process with Hyper-V
-
click here for Update Process with KVM based Hypervisors
Step-by-Step Guide for Upgrading a 2-Node Cluster
The following example is based on an ESXi hypervisor.
The step-by-step instructions may vary depending on which hypervisor is used.
Shutdown Node2
Make sure that the VM is turned Off via Webconf!
In this way, Node2 is shut down gracefully while Node1 remains switched on.
Although the web configuration is no longer accessible, the VM in the hypervisor takes some time to shut down properly.
-
Log in to your Software Appliance and open the Settings page.
-
On the Settings page go to the Maintenance section.
-
Click Shutdown Appliance.
-
A modal dialog opens. Check the box to confirm your decision.
-
Click Shutdown Appliance.
Shutting down the appliance may take a few seconds.
Update Node2
-
Log in to the hypervisor where Node2 is located.
-
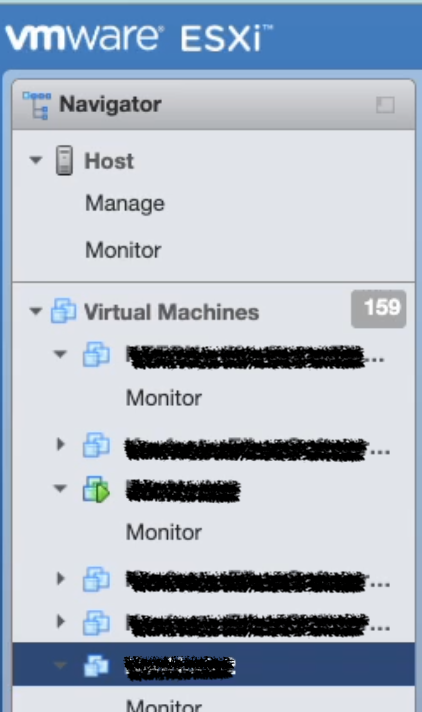
Open the Navigator.
-
In the navigator menu, search for the virtual machine that functions as Node2 in the cluster setup. Select it.
-
In the menu click Edit.

-
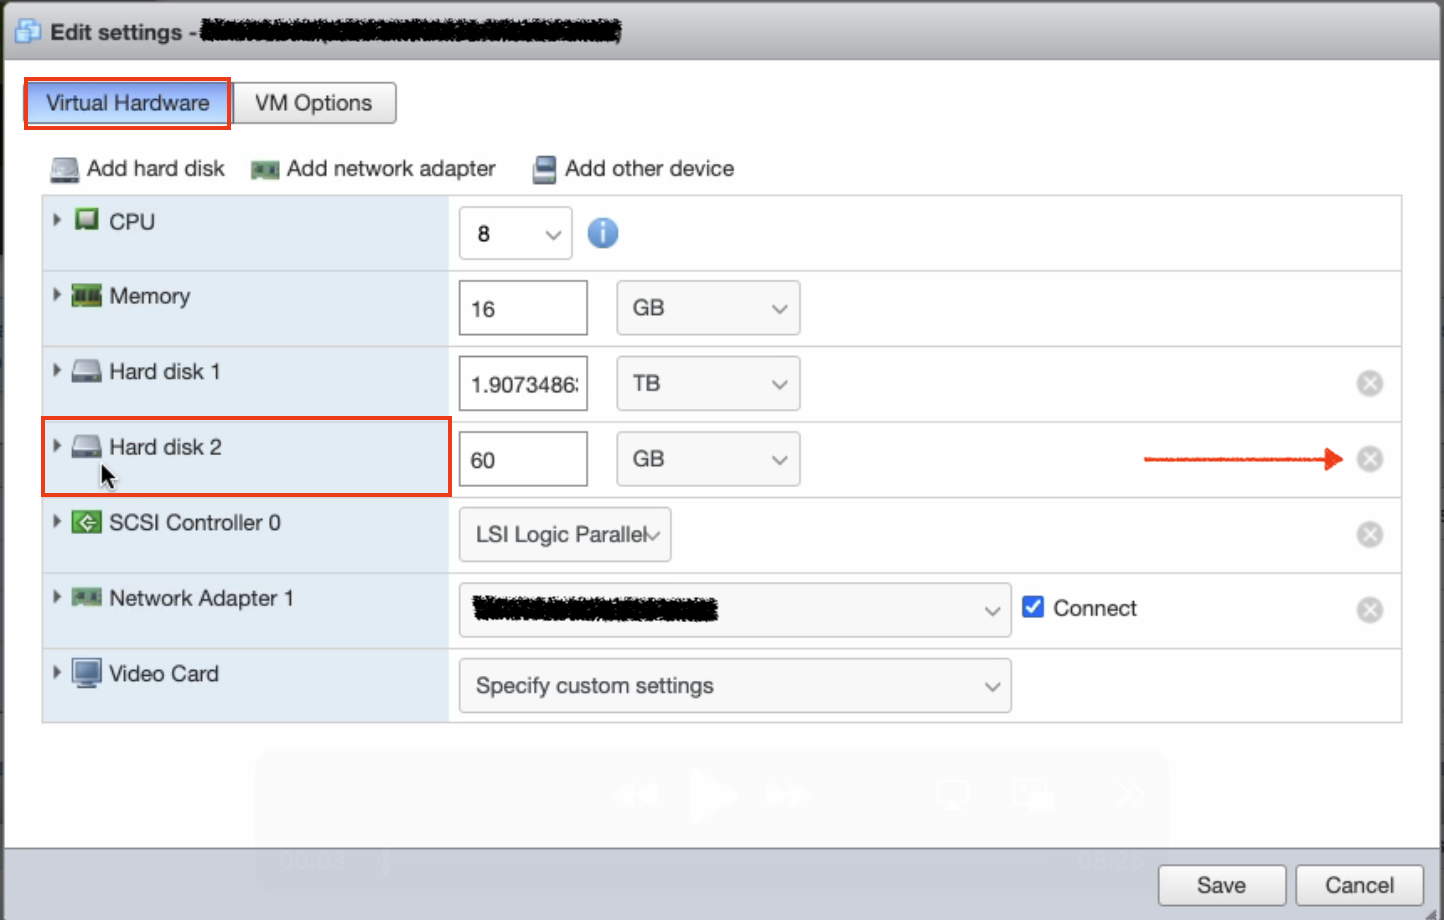
The Edit settings window opens.
-
Make sure the Virtual Hardware tab is active.
-
Search for the hard disk the firmware is on (disk size 60GB).
-
Select the hard disk. On the right hand side, click on the X to detach the disk.
-
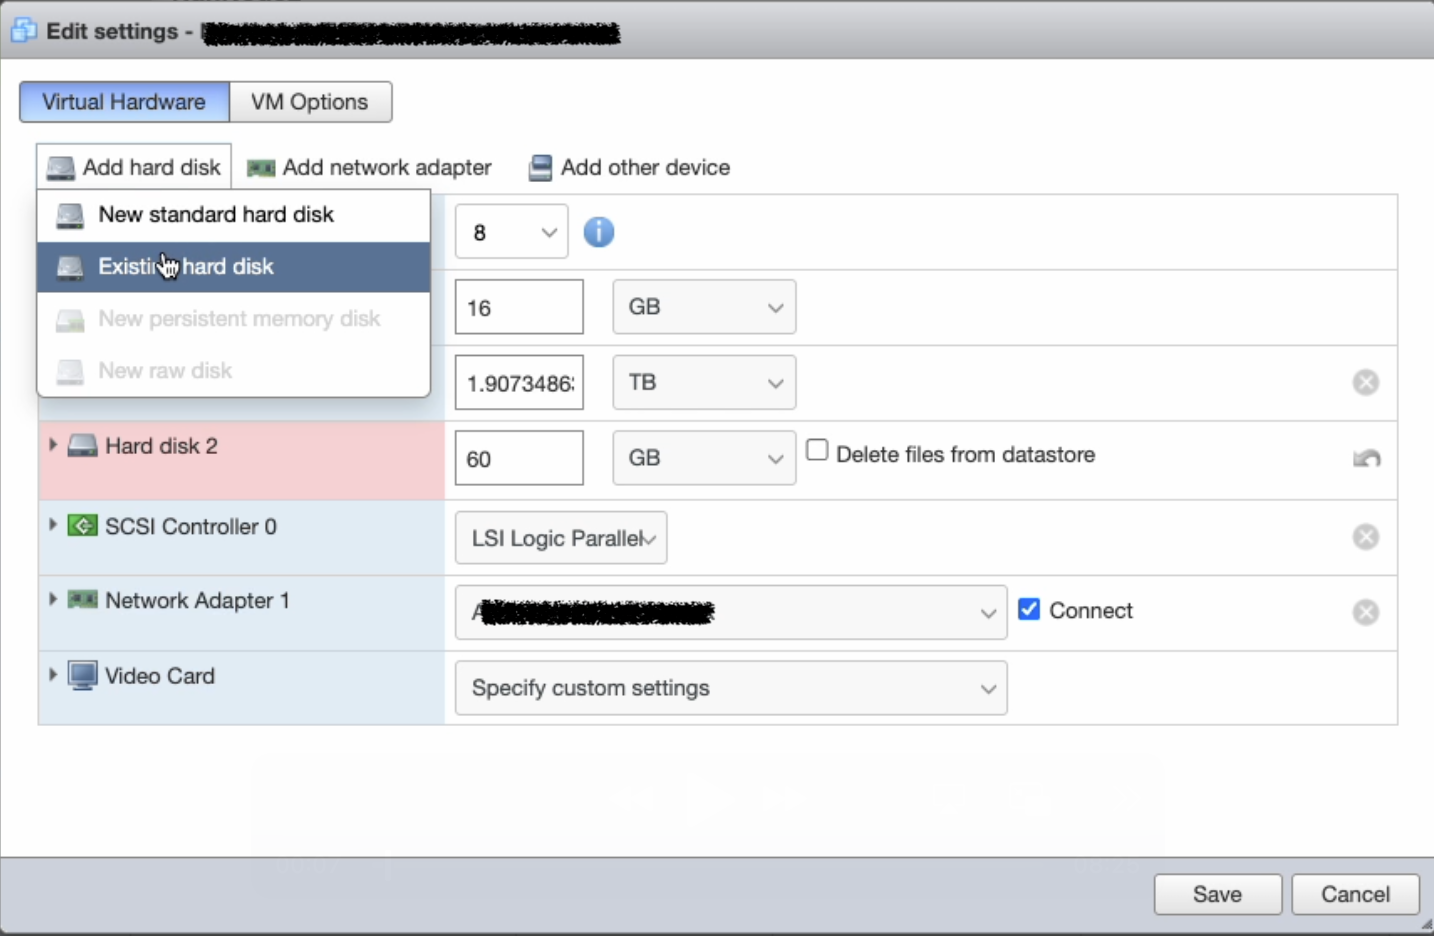
The chosen hard disk is now highlighted in red.
-
Click on Add hard disk at the top left and select Existing hard disk from the drop down menu.
-
The datastore browser opens.
-
Locate the storage folder the new firmware has been saved to.
-
Open the folder and select disk.vmdk from the sub folder.
-
Back on the Edit settings window click Save.
The new firmware disk has been successfully attached to the VM. -
Power on the VM.
Booting the appliance may take a few seconds. -
Log in to your Software Appliance and check the firmware version in the footer of Webconf.
Node2 has now been successfully updated.
Update Node1
-
Shut down the VM for Node1 gracefully via Webconf as described above, while Node2 remains switched on.
-
Log in to the hypervisor where Node1 is located.
-
Now follow exactly the steps 3 to 16 used for Node2.
Step-by-Step Guide for Updating a 3-Node Cluster
If a cluster is to be updated, it is recommended that you always start with the last node, i.e. in the case of a 3-Node Cluster, first Node3, next Node2 and then Node1.
All steps for the 3-Node Cluster are exactly the same as for the 2-Node Cluster.
Verification of Successful Update Completion
The following describes how to verify if an update for a cluster was successful.
After updating all cluster nodes as described above, make sure the cluster connection is established again.
-
Log in to your Software Appliance and open the Overview page.
-
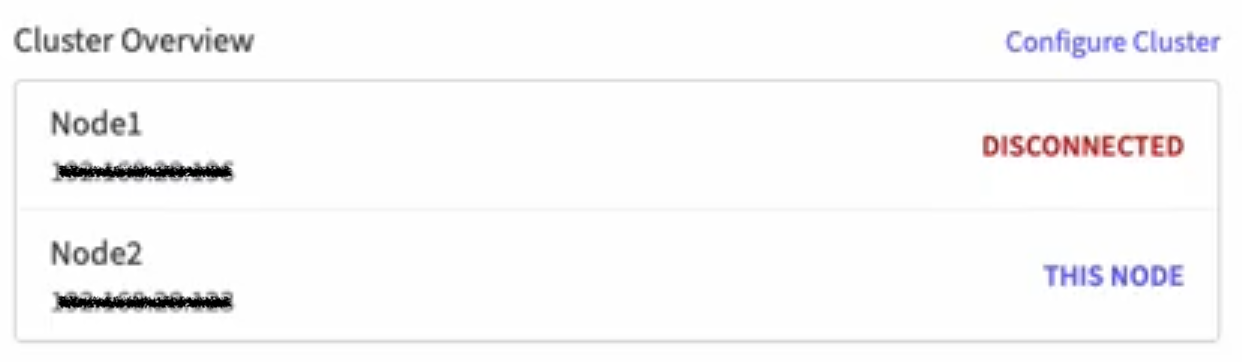
All nodes are listed on the right-hand side in the Cluster Overview section.
-
Check for any error messages e.g. a node has not yet been restored yet.
-
Ensure that all nodes are active and connected again.
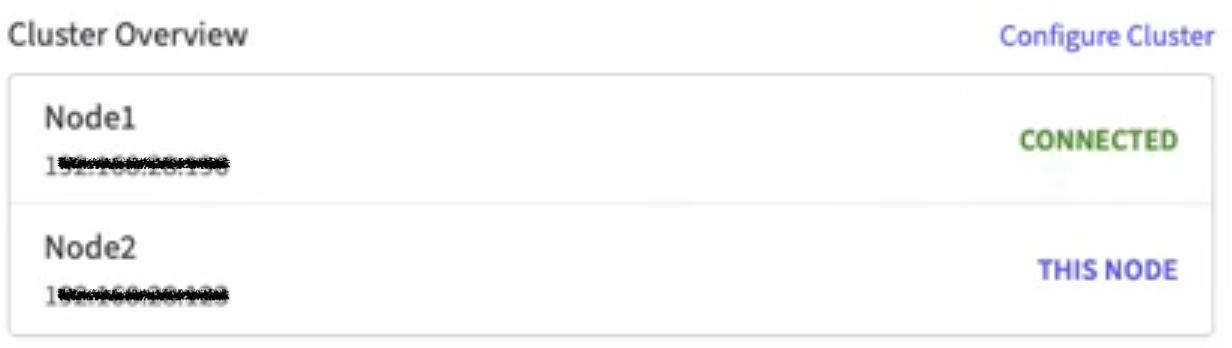
-
Next switch to the Cluster page. To do this, use the tab Cluster in the top menu bar or click on Configure Cluster in the Cluster Overview section.
-
Information about the cluster is also visible on the Cluster page in the Cluster Status section.
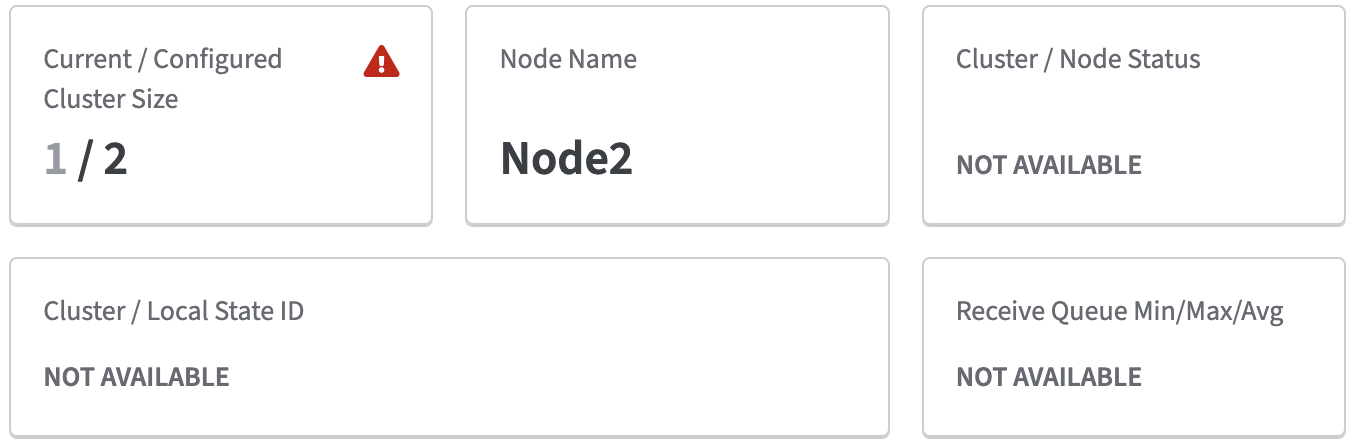
The warning sign indicates that a node is not functional.
Further more a red banner indicates that Cluster is not operational!
This happens, for example, if a node is still in initialization mode.
The warning sign disappears as soon as the node is connected. -
Use the drop down function in the title bar to switch between nodes.
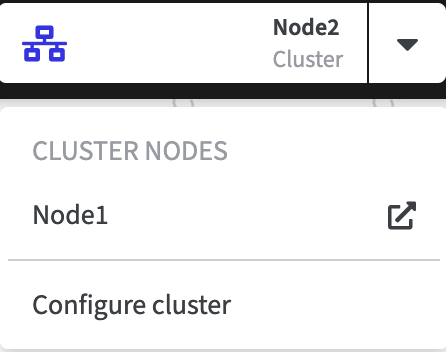
-
Start with any node and check for the Version of the current Software Appliance.
To do this, you can scroll down to the bottom of any page in Webconf.
The current version number is always visible here.All nodes must of course have been updated to the same version.