Restore a Backup
This function is the recommended alternative for the Restore process to be performed via the VM.
It is advised to perform the Restore using this function in Webconf on the Software Appliance.
To restore the Software Appliance from an existing backup, perform the following steps:
Known Limitation
If a backup with an internal database has been created on the Software Appliance, it cannot be used for restore on an appliance with an external database.
Do not restart or shut down the appliance while the Restore is running.
Network File System (NFS):
To restore, archives have to be uploaded to a Network File System (NFS) located in your network and reachable for the Next Generation Hardware Appliance.
On the Next Generation Hardware Appliance the following NFS versions are supported:
-
NFS Version 4
-
NFS Version 4.1
-
NFS Version 4.2
-
Log in to the Software Appliance.
-
Open the Restore page.
-
In the Restore Settings section, select the Storage Type for the backup you want to restore. Select Network File Setting (NFS) or the USB drive from the drop down menu.

-
After making the selection, another line appears to further define the path to the directory.
-
Enter the NFS or USB URL and click Browse Storage:
Using the Filter allows to narrow down search results.-
navigate to the path where the backup is located
-
click Directories to navigate one level down or
click One level up to return to the previous level
-
-
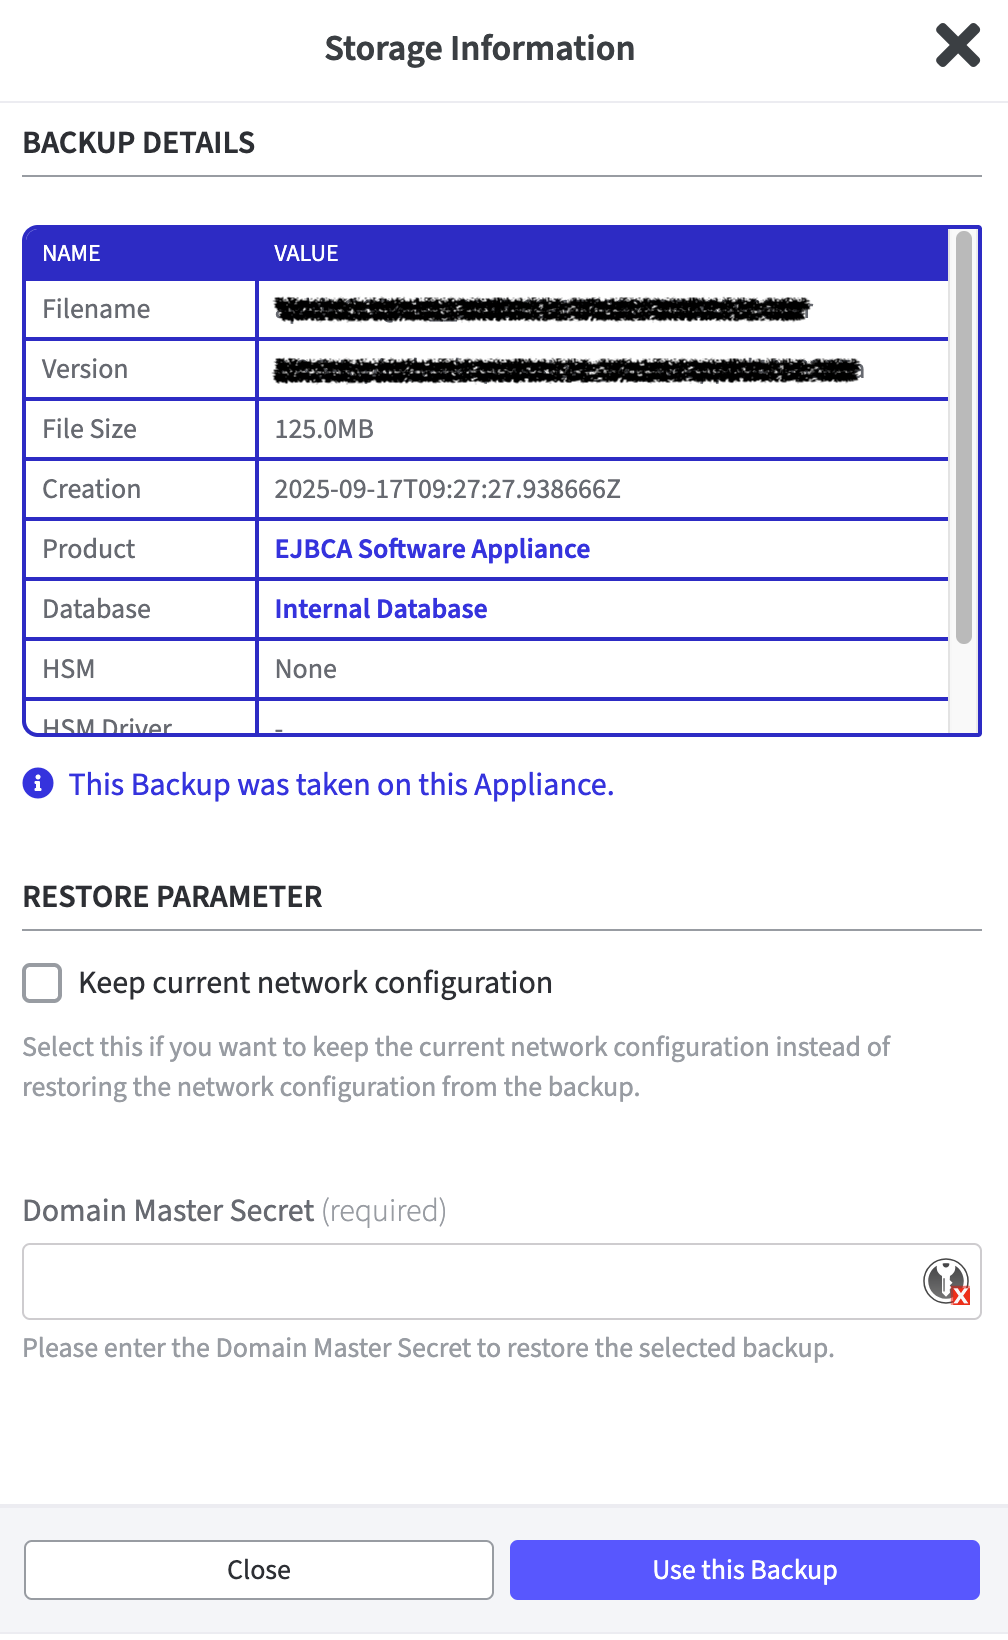
Select the Backup to be restored.
-
The Storage Information and Backup Details are displayed on the right side of the window.
-
Backup Details displayed in a table.
-
Restore Parameter
Select Keep current Network configuration if you want to preserve the current network configuration and not restore the network configuration from the backup. -
Domain Master Secret
Enter the Domain Master Secret (DMS). This entry is required.
-
-
Click Use this Backup.
-
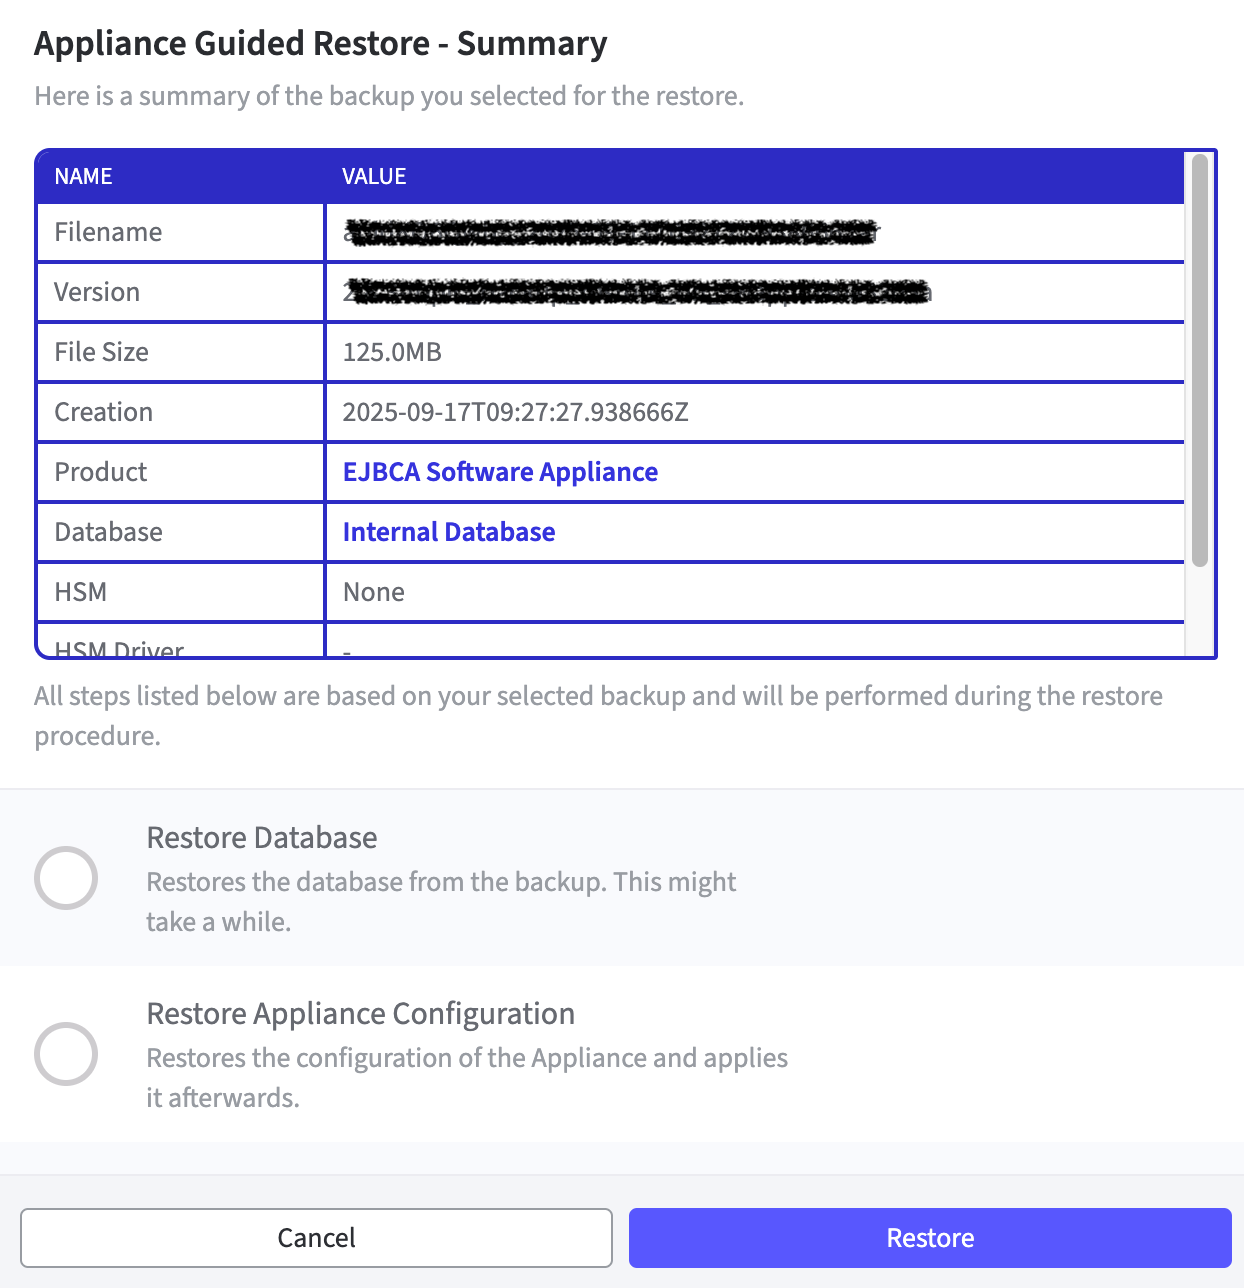
The Appliance Guided Restore - Summary window opens.
A summary of the backup information and the steps for the restore are displayed. -
Click Restore to start the process.
-
Follow the instructions in the Restore Guide.
The Restore Guide/Wizard appears in Webconf and guides through the next steps.
It shows the overall progress and indicates the part, that is currently restored. -
The Restore is successful.
-
Once the restore has been successfully completed, the Software Appliance Login appears in Webconf. Enter your credentials to log into the Software Appliance.
Please note that the IP addresses of the cluster nodes will likely need to be updated manually.
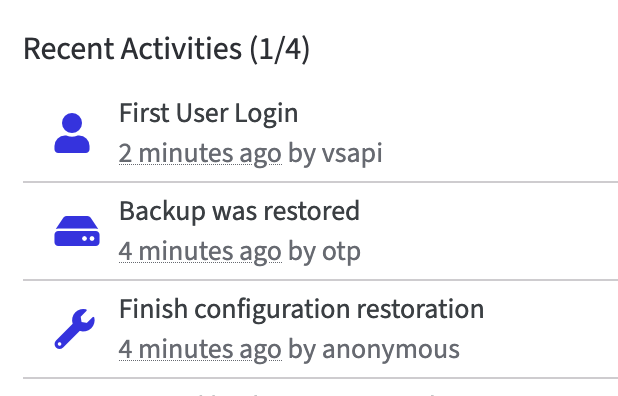
On the Overview page in Webconf in Recent Activities an entry shows Backup was restored.